在 Windows 上使用 WSL 进行 ZSH + Oh My ZSH!
1.安装WSL
关于如何安装 WSL有很多好的文章,所以我就不详细介绍这一步了。
简单的方法,从 Microsoft Store 安装 Ubuntu
2. Ubuntu
在开始菜单上搜索 Ubuntu 图标并打开终端(也可以使用Windows 终端)
使用此命令更新软件包源列表并更新当前安装的所有软件包。
sudo apt update && sudo apt upgrade
这可能需要一段时间,具体取决于需要更新的软件包数量。或许休息一下是个好主意。
3. ZSH
Bash 是 Ubuntu 的默认 shell,但 ZSH 凭借其强大的生产力提升,更胜一筹。因此,我们将在 Bash 上安装 ZSH。
安装
sudo apt install zsh
验证已安装的版本。
zsh --version
zsh 5.8.1 (x86_64-ubuntu-linux-gnu)
关闭并重新打开终端,以更新这些更改。
4. 哦,我的 zsh!
安装
运行此命令来zsh安装Oh my zsh!并添加超能力。
sh -c "$(curl -fsSL https://raw.githubusercontent.com/ohmyzsh/ohmyzsh/master/tools/install.sh)"
默认
回答y更改默认shell。
Time to change your default shell to zsh:
Do you want to change your default shell to zsh? [Y/n] y
字体
手动下载并安装Meslo Nerd 字体,以包含 Powerlevel10k 可能需要的所有字形和符号
复制文件夹.ttf中的文件~/.fonts。如果还没有,请创建一个。
并运行以下命令:
sudo apt install fontconfig
fc-cache -fv
主题
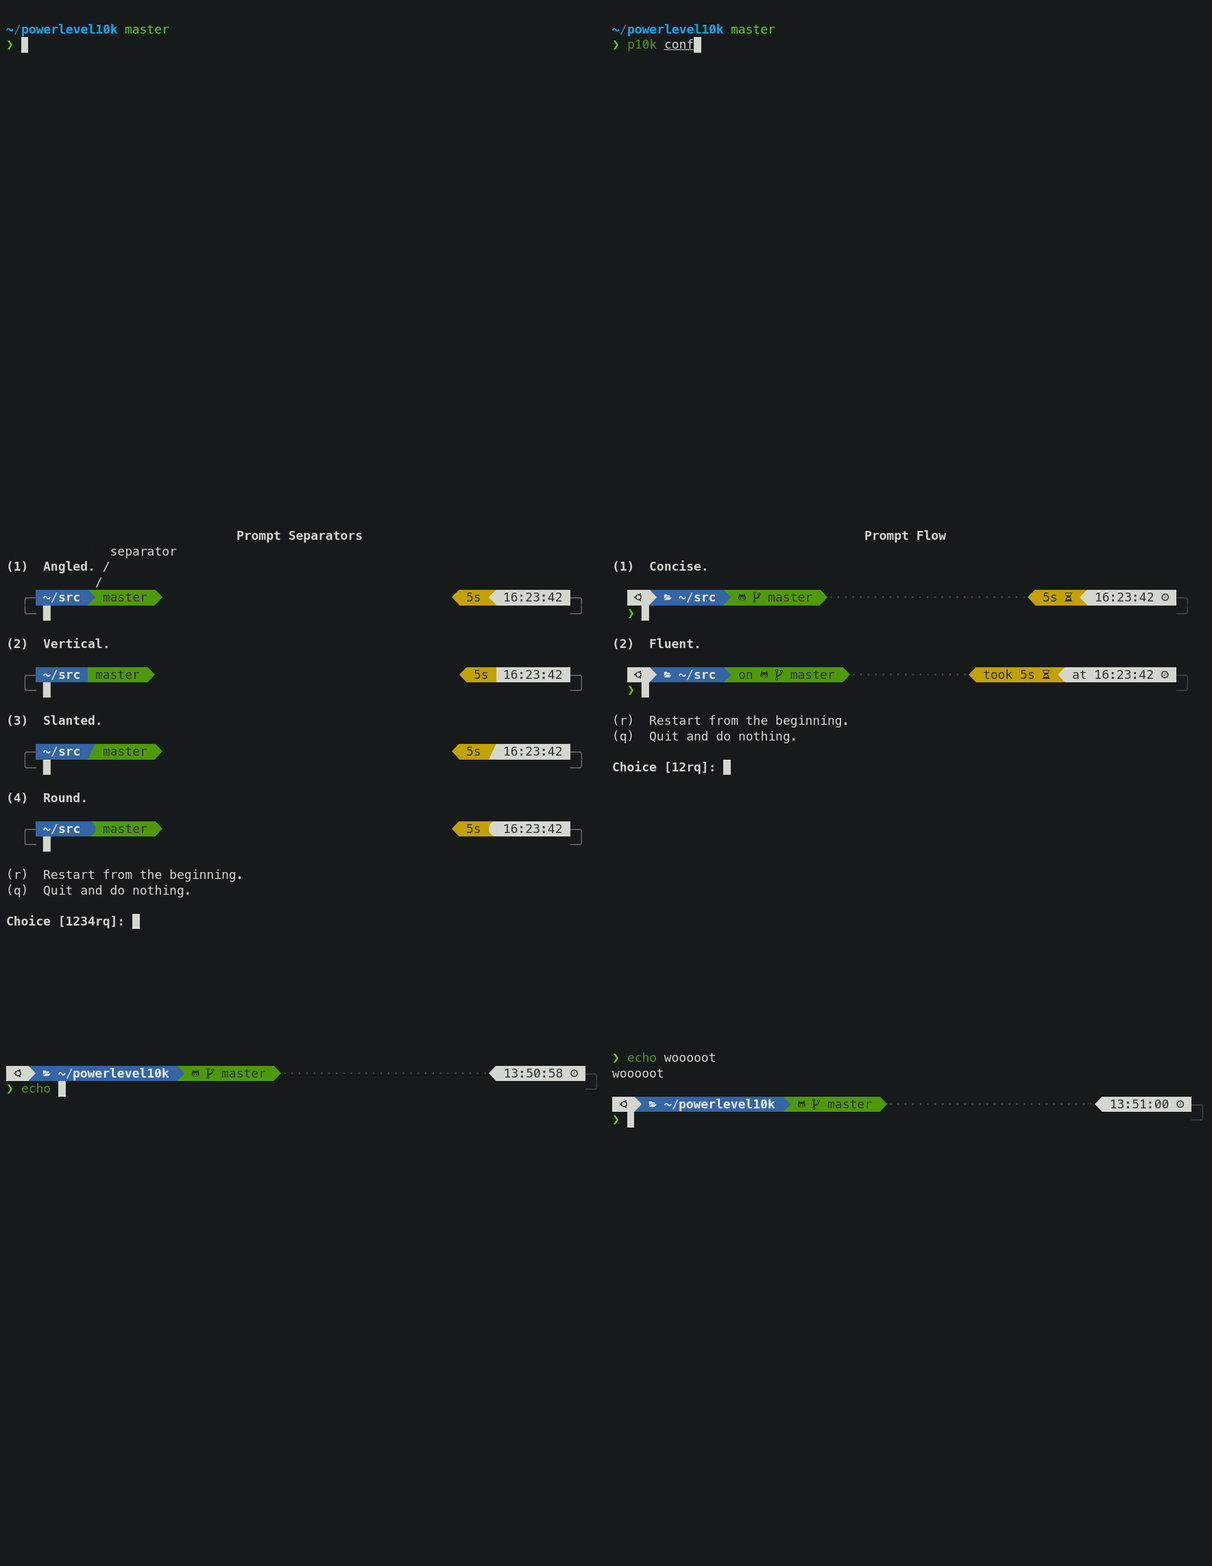
有很多主题,但我最喜欢的是Powerlevel10k,因为它易于设置和使用。
git clone https://github.com/romkatv/powerlevel10k.git ${ZSH_CUSTOM:-~/.oh-my-zsh/custom}/themes/powerlevel10k
在~/.zshrc文件上添加此附加配置
ZSH_THEME="powerlevel10k/powerlevel10k"
POWERLEVEL9K_RIGHT_PROMPT_ELEMENTS=(history)
POWERLEVEL9K_SHORTEN_DIR_LENGTH=1

export LS_COLORS="rs=0:no=00:mi=00:mh=00:ln=01;36:or=01;31:di=01;34:ow=04;01;34:st=34:tw=04;34:pi=01;33:so=01;33:do=01;33:bd=01;33:cd=01;33:su=01;35:sg=01;35:ca=01;35:ex=01;32:"
重新启动终端并输入p10k configure。
插件
我的天哪!zsh有很多插件可用。建议你仔细研究一下,选择最适合你需求的。
我已经安装了很多与软件开发相关的程序,以及其他一些用于添加更多功能的程序。运行以下命令:
git clone https://github.com/zsh-users/zsh-autosuggestions.git ${ZSH_CUSTOM:-~/.oh-my-zsh/custom}/plugins/zsh-autosuggestions
git clone https://github.com/zsh-users/zsh-syntax-highlighting.git ${ZSH_CUSTOM:-~/.oh-my-zsh/custom}/plugins/zsh-syntax-highlighting
git clone https://github.com/Pilaton/OhMyZsh-full-autoupdate.git ${ZSH_CUSTOM:-~/.oh-my-zsh/custom}/plugins/ohmyzsh-full-autoupdate
现在编辑~/.zshrc文件并将其添加到plugins属性中(不要使用逗号作为分隔符)
ZSH_HIGHLIGHT_HIGHLIGHTERS=(main brackets pattern cursor root line)
ZSH_HIGHLIGHT_PATTERNS=('rm -rf *' 'fg=white,bold,bg=red')

plugins=(
    adb
    command-not-found
    extract
    deno
    docker
    git
    github
    gitignore
    history-substring-search
    node
    npm
    nvm
    yarn
    volta
    vscode
    sudo
    web-search
    z
    zsh-autosuggestions
    zsh-syntax-highlighting
    ohmyzsh-full-autoupdate
)
如果您使用 NVM,请注意遵循此配置以避免减慢 zsh 启动速度,并遵循此配置以加快 compinit
⚠ 如果您在之前的 ZSH 安装中完成过包配置、别名定义或其他操作,~/.basrc则需要将它们手动移动到~/.zshrc。
4. 终端
要在 VSCode 和 Windows Terminal 中使用相同的终端,请遵循以下配置。
VS 代码
将这些属性添加到用户setttings.json
{
    ...
+   "terminal.integrated.fontFamily": "MesloLGS NF",
+   "terminal.integrated.fontSize": 12,
+   "terminal.integrated.shellIntegration.enabled": true,
+   "terminal.integrated.defaultProfile.windows": "Git Bash",
+   "terminal.integrated.defaultProfile.linux": "zsh",
    ...
}
微软终端
将这些配置添加到 Ubuntu 终端。
{
    "profiles": {
        "defaults": {},
        "list": [
                "colorScheme": "Ubuntu-ColorScheme",
                "cursorShape": "filledBox",
+               "font": {
+                   "face": "MesloLGS NF",
+                   "size": 10
+               },
                "guid": "{57ff1822-68a9-4a3f-90c5-a55c8557df50}",
                "hidden": false,
                "icon": "https://assets.ubuntu.com/v1/49a1a858-favicon-32x32.png",
                "name": "Ubuntu",
+               "commandline": "wsl",
+               "startingDirectory": "~/Developer"
            },
        ]
    }
}
好了,各位!祝您
编程愉快🖖
 后端开发教程 - Java、Spring Boot 实战 - msg200.com


