您的第一个 API(使用 Bun、Express 和 Prisma)
您是否见过这个全新、炫酷、快速的 JavaScript 运行时,并且正在思考如何开始开发 Web 应用?也许这篇文章会对您有所帮助。我喜欢看到各种创新的应用开发方式,为 JS 生态系统带来创新,而 Bun 则为此带来了更多惊喜。在这里,无需额外的库,您就可以创建 API、进行测试、打包,甚至使用它自带的 SQLite 集成,所有这些都可以在一个快速易用的运行时中实现。它甚至已经内置了一些框架,但这是为了未来而准备的。
安装和 Hello World
首先,按照 bun.sh 中的方法,使用 curl 下载并安装 bun
☁ ~ curl -fsSL 'https://bun.sh/install' | bash
######################################################################## 100,0%
bun was installed successfully to ~/.bun/bin/bun
Run 'bun --help' to get started
然后,创建一个用于存放项目的文件夹,cd进入该文件夹并执行bun init,这将创建一个新项目。您需要选择项目名称和入口点。默认情况下,cli 将使用您文件夹的名称并从 index.ts 启动。
☁  projects  mkdir bunApp
☁  projects  cd bunApp
☁  bunApp  bun init
bun init helps you get started with a minimal project and tries to guess sensible defaults. Press ^C anytime to quit

package name (bunapp):
entry point (index.ts):

Done! A package.json file was saved in the current directory.
 + index.ts
 + .gitignore
 + tsconfig.json (for editor auto-complete)
 + README.md

To get started, run:
  bun run index.ts
☁  bunApp
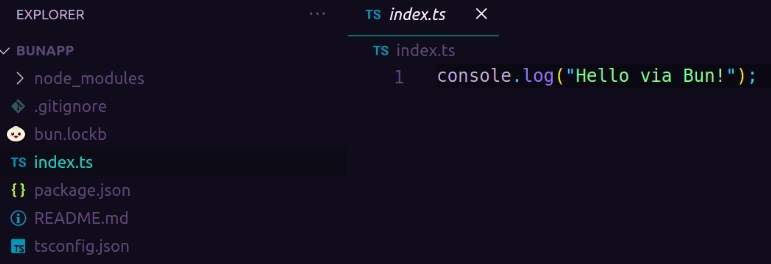
之后,打开你最喜欢的 IDE(这里我用的是 vscode),你会看到一个非常精简的内容,里面有一些配置文件和一个index.ts包含我们 Hello World 的文件! 几乎所有这些文件在每个仓库中都很常见,但有一个名为 的文件,它是一个自动生成的文件,与其他文件类似,目前不太重要,但你可以在 Bun 文档中了解它。 我们已经可以运行这个文件来启动我们的小项目了。
bun.lockb.lockindex.ts
☁  bunApp  bun index.ts
Hello via Bun!
☁  bunApp
在继续下一个主题之前,还有一件事要做。如果您熟悉 Node,您可能已经使用过 Nodemon 来监控项目,并在代码更改时重新加载。Bun 只需使用--watch标签即可在此模式下运行,因此您无需外部模块。
让我们在 package.json 中添加两个脚本,一个用于启动项目,另一个用于开发者模式,并包含--watch标签。
{
    "name": "bunapp",
    "module": "index.ts",
    "type": "module",
    "scripts": {
        "start": "bun run index.ts",
        "dev": "bun --watch run index.ts"
    },
    "devDependencies": {
        "bun-types": "latest"
    },
    "peerDependencies": {
        "typescript": "^5.0.0"
    },
}
路线
要启动我们的服务器,我们只需使用Bun.serve()。它可以接收一些参数,但目前我们只需要port来访问我们的应用程序和fetch()我们用来处理请求的处理程序。编写下面的代码并运行我们的脚本bun run dev
const server = Bun.serve({
    port: 8080,
    fetch(req) {
        return new Response("Bun!")
    }
})

console.log(`Listening on ${server.hostname}: ${server.port}...`)
这是我们的第一个 http 请求。由于我们没有指定方法,它将返回Bun!任何针对我们端点的请求的响应,响应内容应该是localhost:8080。我们将在下一个主题中讨论这个问题,现在我们只需按照文档示例添加一些代码来编写我们的路由即可。
const server = Bun.serve({
    port: 8080,
    fetch(req) {
        const url = new URL(req.url)
        if(url.pathname === "/") return new Response("Home Page!")
        if(url.pathname === "/blog") return new Response("Blog!")
        return new Response("404!")
    }
})

console.log(`Listening on ${server.hostname}: ${server.port}...`)
它从请求对象中获取 URL,并使用 Node 的 API 解析为 URL 对象。这是因为 Bun 致力于实现 Node 的完全兼容,因此 Node 上使用的大多数库和包都可以在 Bun 上开箱即用。
HTTP 请求
如果您愿意,可以使用console.log(req)来查看我们的请求对象,它看起来像这样:
Listening on localhost: 8080...
Request (0 KB) {
  method: "GET",
  url: "http://localhost:8080/",
  headers: Headers {
    "host": "localhost:8080",
    "connection": "keep-alive",
    "upgrade-insecure-requests": "1",
    "user-agent": "Mozilla/5.0 (X11; Linux x86_64) AppleWebKit/537.36 (KHTML, like Gecko) Chrome/117.0.0.0 Safari/537.36",
    "accept": "text/html,application/xhtml+xml,application/xml;q=0.9,image/avif,image/webp,image/apng,*/*;q=0.8",
    "accept-language": "en-US,en",
    "sec-fetch-mode": "navigate",
    "sec-fetch-dest": "document",
    "accept-encoding": "gzip, deflate, br",
    "if-none-match": "W/\"b-f4FzwVt2eK0ePdTZJcUnF/0T+Zw\"",
    "sec-ch-ua": "\"Brave\";v=\"117\", \"Not;A=Brand\";v=\"8\", \"Chromium\";v=\"117\"",
    "sec-ch-ua-mobile": "?0",
    "sec-ch-ua-platform": "\"Linux\"",
    "sec-gpc": "1",
    "sec-fetch-site": "none",
    "sec-fetch-user": "?1"
  }
}
现在问题是,我们可以使用大量的条件语句来检查方法和/或端点。这会变得非常混乱,而且看起来不太好看。
const server = Bun.serve({
    port: 8080,
    fetch(req) {
        const url = new URL(req.url)
        if(url.pathname === "/") return new Response("Home Page!")
        if(url.pathname === "/blog") {
        switch (req.method) {
            case "GET":
            // handle with GET
            case "POST":
            // handle with POST
            case "PUT":
            // handle with PUT
            case "DELETE":
            // handle with DELETE
            }
            // any other routes and methods...
        }
        return new Response("404!")
    }
})

console.log(`Listening on ${server.hostname}: ${server.port}...`)
还记得大多数 Node 软件包也能在 Bun 上运行吗?让我们使用 Express 来简化开发流程,详情请参阅 Bun 的文档。首先,使用以下命令停止应用程序CTRL + C并运行bun add express
Listening on localhost: 8080...
^C
☁  bunApp  bun add express
bun add v1.0.2 (37edd5a6)

 installed express@4.18.2


 58 packages installed [1200.00ms]
☁  bunApp
index.ts并使用 Express 模板重写我们的一些路线
import express, { Request, Response } from "express";

const app = express();
const port = 8080;
app.use(express.json());

app.post("/blog", (req: Request, res: Response) => {
//create new blog post
});

app.get("/", (req: Request, res: Response) => {
res.send("Api running");
});

app.get("/blog", (req: Request, res: Response) => {
//get all posts
});

app.get("/blog/:post", (req: Request, res: Response) => {
//get a specific post
});

app.delete("/blog/:post", (req: Request, res: Response) => {
//delete a post
});

app.listen(port, () => {
console.log(`Listening on port ${port}...`);
});
添加数据库
我们的 CRUD 最后一步是实现数据库连接。Bun 已经有自己的 SQLite3 驱动程序,但我们使用 Prisma,因为处理 ORM 更容易。让我们按照 Bun 文档中的指南,首先使用 添加 Prismabun add prisma并使用 初始化它bunx prisma init --datasource-provider sqlite。然后导航到我们的新schema.prisma文件并插入一个新模型。
☁  bunApp  bun add prisma
bun add v1.0.2 (37edd5a6)

 installed prisma@5.3.1 with binaries:
  - prisma


 2 packages installed [113.00ms]
☁  bunApp  bunx prisma init --datasource-provider sqlite

✔ Your Prisma schema was created at prisma/schema.prisma
  You can now open it in your favorite editor.

warn You already have a .gitignore file. Don't forget to add `.env` in it to not commit any private information.

Next steps:
1. Set the DATABASE_URL in the .env file to point to your existing database. If your database has no tables yet, read https://pris.ly/d/getting-started
2. Run prisma db pull to turn your database schema into a Prisma schema.
3. Run prisma generate to generate the Prisma Client. You can then start querying your database.

More information in our documentation:
https://pris.ly/d/getting-started

☁  bunApp
之后,运行 ,bunx prisma generate然后bunx prisma migrate dev --name init。现在我们已经获得了小型 API 所需的一切。返回我们的index.ts,导入并初始化 Prisma 客户端,然后我们就可以完成我们的路线了。
import { PrismaClient } from "@prisma/client";

/* Config database */
const prisma = new PrismaClient();
最终index.ts文件看起来应该是这样的:
import express, { Request, Response } from "express";
import { PrismaClient } from "@prisma/client";

/* Config database */
const prisma = new PrismaClient();

/* Config server */
const app = express();
const port = 8080;
app.use(express.json());

app.post("/blog", async (req: Request, res: Response) => {
    try {
        const { title, content } = req.body;

        await prisma.post.create({
            data: {
            title: title,
            content: content,
            },
        });
        res.status(201).json({ message: `Post created!` });
    } catch (error) {
        console.error(`Something went wrong while create a new post: `, error);
    }
});

app.get("/", (req: Request, res: Response) => {
    res.send("Api running");
});

app.get("/blog", async (req: Request, res: Response) => {
    try {
        const posts = await prisma.post.findMany();
        res.json(posts);
    } catch (error) {
        console.error(`Something went wrong while fetching all posts: `, error);
    }
});

app.get("/blog/:postId", async (req: Request, res: Response) => {
    try {
        const postId = parseInt(req.params.postId, 10);

        const post = await prisma.post.findUnique({
            where: {
                id: postId,
            },
        });
        if (!post) res.status(404).json({ message: "Post not found" });
        res.json(post);
    } catch (error) {
        console.error(`Something went wrong while fetching the post: `, error);
    }
});

app.delete("/blog/:postId", async (req: Request, res: Response) => {
    try {
        const postId = parseInt(req.params.postId, 10);
        await prisma.post.delete({
            where: {
            id: postId,
            },
        });
        res.send(`Post deleted!`);
    } catch (error) {
        return res.status(404).json({ message: "Post not found" });
    }
});

app.listen(port, () => {
    console.log(`Listening on port ${port}...`);
});
结论
我们的 API 终于完成了!接下来,你可以实现许多其他功能,例如:添加更多模型、创建前端,当然还有编写一些测试(接下来尝试一下)。你可以看到,Bun 在兼容大多数 Node 软件包的同时,还提升了开发质量,让我们的开发工作更加轻松。
鏂囩珷鏉ユ簮锛�https://dev.to/clerijr/your-first-api-with-bun-express-and-prisma-p90 后端开发教程 - Java、Spring Boot 实战 - msg200.com