GitHub:创建你自己的存储库环境⭐️
概述👋
你想创建一个中央仓库来展示所有高亮显示的仓库,并附上描述和星标吗?像这样: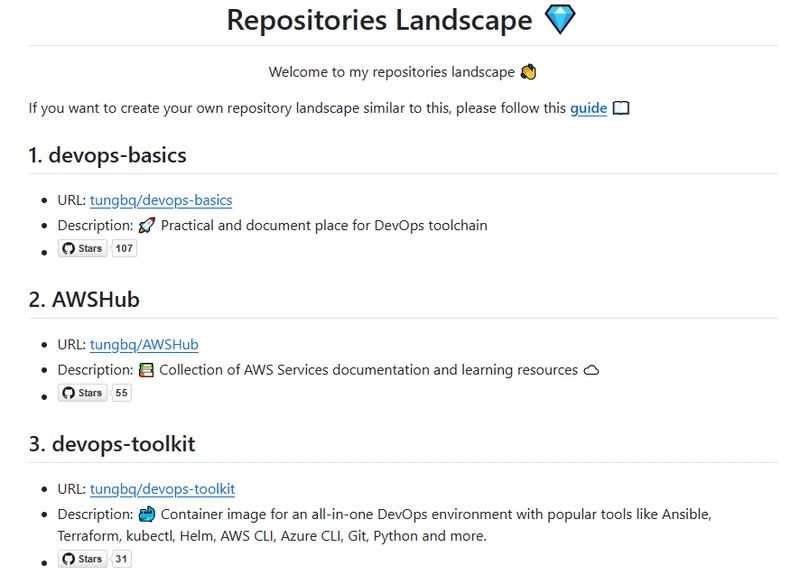
我创建了存储库格局模板tungbq/repos,它可以帮助您构建自己的存储库格局。
这篇博文将介绍其功能,并指导您如何使用此存储库模板创建自己的存储库格局。
主要特点🚀
tungbq/repos存储库模板提供了一些功能,可帮助您自动创建 repo 格局内容:
- 支持定义在景观、文件中显示的存储库列表
repository_list.txt。 - 自动脚本从中生成内容
repository_list.txt。 - 用于生成新存储库格局内容的 GitHub Action CI 管道:
- 触发自动生成脚本。
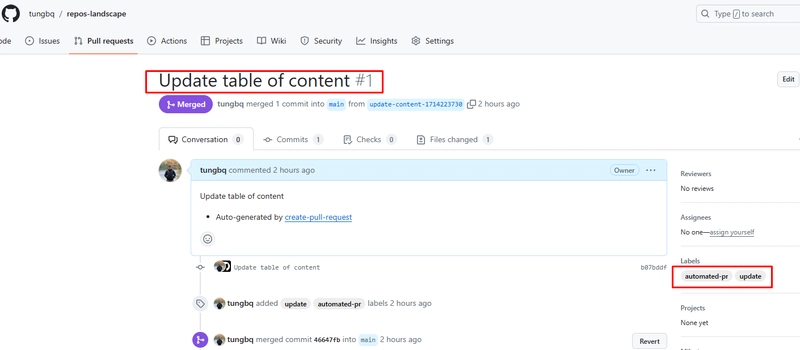
- 创建一个拉取请求来提出新内容。
- 存储库横向格式提供:
- 使用 repo 名称标题进行索引
- 仓库 URL
- Repo 描述(通过 GitHub API 调用存档)
- GitHub 星星徽章(利用此工具https://shields.io/)
快速入门📖
这是可选的;您可以跳过本节,直接Configure and use the template 📘创建您自己的仓库。
如果您想在本地生成内容,请更新repository_list.txt并运行此脚本:
git clone https://github.com/tungbq/repos.git
cd repos
./generate_content.sh repository_list.txt
结果将类似于:
➜  repos git:(main) ✗ ./generate_content.sh repository_list.txt
Working on repo: tungbq/devops-basics, with index: 1
Working on repo: tungbq/AWSHub, with index: 2
Working on repo: tungbq/devops-toolkit, with index: 3
Working on repo: tungbq/devops-project, with index: 4
Working on repo: tungbq/aws-lab-with-terraform, with index: 5
Working on repo: tungbq/awesome-workflow, with index: 6
Working on repo: tungbq/k8sHub, with index: 7
Working on repo: tungbq/Azure-DevOps-Pipeline, with index: 8
Working on repo: tungbq/find-github-issue, with index: 9
Working on repo: tungbq/challenges, with index: 10
Working on repo: tungbq/devops-dockerfiles, with index: 11
Working on repo: tungbq/terraform-sample-project, with index: 12
Working on repo: tungbq/repos, with index: 13
现在检查 README.md,你会发现你的存储库景观内容
配置并使用模板📘
以下是帮助您创建和配置自己的景观存储库的步骤。
简而言之,我们只需要执行 4 个主要步骤:Create new repo from template> Set up GITHUB_TOKEN> Update repository list> Merge the automated PR。
下面让我们深入了解细节:
1. 从模板创建一个新的 repo
- 访问模板存储库:https://github.com/tungbq/repos。
- 在右上角,选择
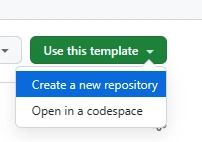
Use this template>Create a new repository:
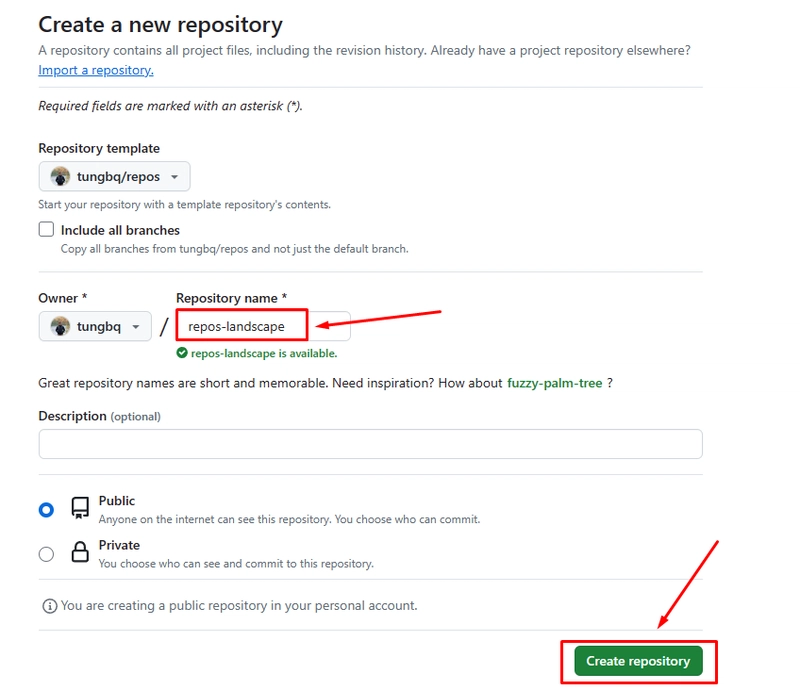
- 输入要创建的存储库名称并添加描述(如果需要),然后选择
Create repository。
- 等待几秒钟,您的存储库将被创建。
2. 配置GITHUB_TOKEN新的 repo
GITHUB_TOKEN有一个 CI 工作流程可以自动生成内容并为您的存储库环境发起新的拉取请求,因此需要设置权限。
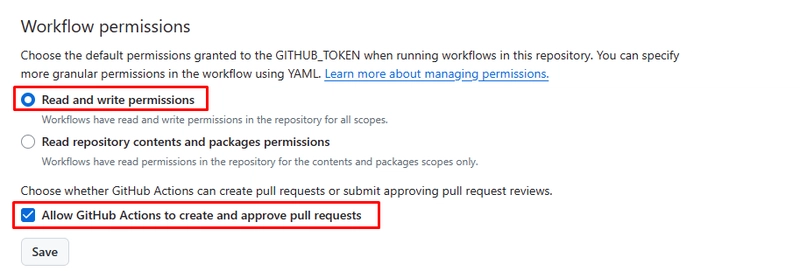
前往:https ://github.com/YOUR_USERNAME/YOUR_REPO/settings/actions (存储库 > 设置 > 操作 > 常规),在Workflow permission相应部分中启用以下选项:
- 读写权限
- 允许 GitHub Actions 创建和批准拉取请求
现在,我们已准备好触发 CI 工作流来更新 repo 格局。
现在,我们已准备好触发 CI 工作流来更新 repo 格局。
3. 更新你的仓库列表
- 将您的存储库列表添加到存储库中的文件
repository_list.txt并将其合并到main分支中,例如:
tungbq/devops-basics
tungbq/AWSHub
tungbq/devops-toolkit
tungbq/devops-project
tungbq/aws-lab-with-terraform
tungbq/awesome-workflow
4. 触发 CI 管道
合并事件自动触发到主
- 一旦
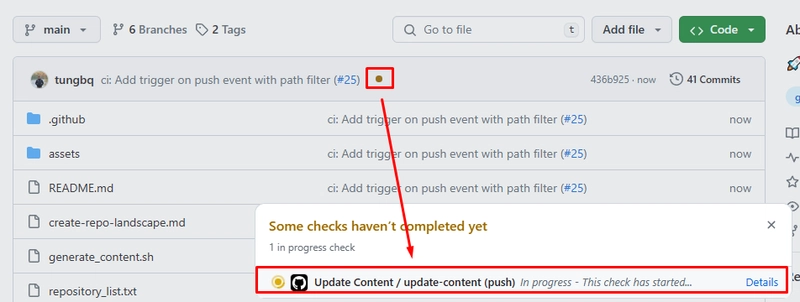
repository_list.txt合并到main分支中,CI 管道更新内容将自动触发。
- CI 管道将读取存储库列表并生成新
README.md内容。 - 然后,它将检查并创建一个 Pull Request 来提出新的存储库景观内容。
手动触发(可选)
- 您还可以在任何您想要的时刻触发该 CI。
- 转到操作并选择更新内容。
- 选择“运行工作流”来触发CI:
5. 审查并合并 PR
一旦 PR 自动生成,您只需审核并合并即可!您将在 README.md 中拥有自己的景观内容。
恭喜🎉,您已成功创建自己的 repo 架构!现在查看README.md最终结果。
高级 CI 配置(可选)
- 在上一节中,我们触发了 CI 流水线在合并到
main分支或手动事件时运行。您可以通过将触发事件更改为基于计时器运行来改进这一点。例如,每周一次或每月一次。这将有助于我们定期检查和更新环境,使其保持最新状态。 - 为此,将所需的 cron 触发器添加到
repos/.github/workflows/generate_content.yaml
on:
  schedule:
    - cron: '0 0 * * 6' # Run every Saturday at midnight
  workflow_dispatch:
  # other events as needed
- 检查https://crontab.guru/了解 CRON 语法
如果您觉得这个仓库模板有用,请随意使用,并请考虑点个星⭐️以表达您的感激之情。您的每颗星都会帮助我进一步完善它❤️
谢谢,祝您编码愉快!🔥
鏂囩珷鏉ユ簮锛�https://dev.to/tungbq/github-create-your-own-repository-landscape-16i5 后端开发教程 - Java、Spring Boot 实战 - msg200.com
