通过示例学习 Go:第 3 部分 - 使用 Go 创建 CLI 应用程序
在第一篇文章中,我们设置了环境,然后在第二篇文章中创建了一个 HTTP REST API 服务器,今天,我们将在 Go 中创建我们的第一个 CLI(命令行界面)应用程序。
初始化
我们在上一篇文章中创建了Git 存储库,因此现在我们只需要在本地检索它:
$ git clone https://github.com/scraly/learning-go-by-examples.git
$ cd learning-go-by-examples
我们将为go-gopher-cli我们的 CLI 应用程序创建一个文件夹并进入该文件夹:
$ mkdir go-gopher-cli
$ cd go-gopher-cli
现在,我们必须初始化 Go 模块(依赖管理):
$ go mod init github.com/scraly/learning-go-by-examples/go-gopher-cli
go: creating new go.mod: module github.com/scraly/learning-go-by-examples/go-gopher-cli
这将创建一个go.mod如下文件:
module github.com/scraly/learning-go-by-examples/go-gopher-cli

go 1.16
在启动我们的超级 CLI 应用程序之前,作为良好的做法,我们将创建一个简单的代码组织。
创建以下文件夹组织:
.
├── README.md
├── bin
├── go.mod
就这样?是的,我们剩下的代码组织很快就会创建完成 ;-)。
眼镜蛇
Cobra既是一个用于创建强大的现代 CLI 应用程序的库,也是一个用于生成应用程序和批处理文件的程序。
使用 Cobra 很简单。首先,你可以使用以下go get命令下载最新版本。此命令将安装 cobra 库及其依赖项:
$ go get -u github.com/spf13/cobra@latest
然后安装 Cobra CLI:
$ go install github.com/spf13/cobra-cli@latest
二进制文件cobra现在位于您的$GOPATHbin/目录中,该目录本身位于您的PATH中,因此您可以直接使用它。
我们将首先使用cobra init以下命令和包生成 CLI 应用程序。该命令将生成具有正确文件结构和导入的应用程序:
$ cobra-cli init
Your Cobra application is ready at
/workspace/learning-go-by-examples/go-gopher-cli
我们的应用程序已初始化,main.go文件和cmd/文件夹已创建,我们的代码组织现在是这样的:
.
├── LICENSE
├── bin
├── cmd
│   └── root.go
├── go.mod
├── go.sum
└── main.go
让我们创建我们的 CLI
我们想要什么?
就我个人而言,我喜欢的是,当我使用 CLI 时,我希望有人向我解释 CLI 的目标以及如何使用它。
因此,首先,在执行我们的 CLI 时,我们要显示:
- 简短描述
- 详细描述
- 使用我们的应用程序
为了做到这一点,我们必须修改cmd/root.go文件:
// rootCmd represents the base command when called without any subcommands
var rootCmd = &cobra.Command{
    Use:   "go-gopher-cli",
    Short: "Gopher CLI in Go",
    Long:  `Gopher CLI application written in Go.`,
    // Uncomment the following line if your bare application
    // has an action associated with it:
    // Run: func(cmd *cobra.Command, args []string) { },
}
文件中root.go有两个外部导入:
import (
    "fmt"
    "os"

    "github.com/spf13/cobra"

    "github.com/spf13/viper"
)
我们已经获得了眼镜蛇,所以你现在需要获得毒蛇依赖项:
$ go get github.com/spf13/viper@v1.8.1
我们的go.mod文件应该是这样的:
module github.com/scraly/learning-go-by-examples/go-gopher-cli

go 1.16

require (
    github.com/spf13/cobra v1.2.1 // indirect
    github.com/spf13/viper v1.8.1 // indirect
    golang.org/x/sys v0.0.0-20210630005230-0f9fa26af87c // indirect
    golang.org/x/text v0.3.6 // indirect
)
现在,我们想在 CLI 应用中添加一个get命令。为此,我们将使用cobra addcobra CLI 的命令:
$ cobra-cli add get
get created at /workspace/learning-go-by-examples/go-gopher-cli
此命令添加一个新get.go文件。现在我们的应用程序结构应该是这样的:
.
├── LICENSE
├── bin
├── cmd
│   ├── get.go
│   └── root.go
├── go.mod
├── go.sum
└── main.go
现在是时候执行我们的应用程序了:
$ go run main.go
Gopher CLI application written in Go.

Usage:
  go-gopher-cli [command]

Available Commands:
  completion  generate the autocompletion script for the specified shell
  get         A brief description of your command
  help        Help about any command

Flags:
      --config string   config file (default is $HOME/.go-gopher-cli.yaml)
  -h, --help            help for go-gopher-cli
  -t, --toggle          Help message for toggle

Use "go-gopher-cli [command] --help" for more information about a command.
默认情况下,会显示使用信息,完美!
$ go run main.go get
get called
好的,get命令也回答了。
让我们实现我们的 get 命令
我们想要什么?
是的,好问题,我们想要一个 gopher CLI,它可以通过名称检索我们最喜欢的 Gopher!
我们现在将cmd/get.go像这样修改文件:
var getCmd = &cobra.Command{
    Use:   "get",
    Short: "This command will get the desired Gopher",
    Long:  `This get command will call GitHub respository in order to return the desired Gopher.`,
    Run: func(cmd *cobra.Command, args []string) {
        var gopherName = "dr-who.png"

        if len(args) >= 1 && args[0] != "" {
            gopherName = args[0]
        }

        URL := "https://github.com/scraly/gophers/raw/main/" + gopherName + ".png"

        fmt.Println("Try to get '" + gopherName + "' Gopher...")

        // Get the data
        response, err := http.Get(URL)
        if err != nil {
            fmt.Println(err)
        }
        defer response.Body.Close()

        if response.StatusCode == 200 {
            // Create the file
            out, err := os.Create(gopherName + ".png")
            if err != nil {
                fmt.Println(err)
            }
            defer out.Close()

            // Writer the body to file
            _, err = io.Copy(out, response.Body)
            if err != nil {
                fmt.Println(err)
            }

            fmt.Println("Perfect! Just saved in " + out.Name() + "!")
        } else {
            fmt.Println("Error: " + gopherName + " not exists! :-(")
        }
    },
}
让我们一步一步解释一下这个块代码
当get调用命令时:
- 我们首先用默认的 Gopher 名称初始化一个变量gopherName
- 然后我们检索传递参数的 gopher 名称
- 我们初始化 gopher 的 URL
- 最后我们记录它
        var gopherName = "dr-who"

        if len(args) >= 1 && args[0] != "" {
            gopherName = args[0]
        }

        URL := "https://github.com/scraly/gophers/raw/main/" + gopherName + ".png"

        fmt.Println("Try to get '" + gopherName + "' Gopher...")
然后,我们:
- 尝试通过net/http包检索 gopher
- 如果检索到 gopher,我们就创建一个文件并将图像内容放入其中
- 否则,我们会记录一条错误消息
        // Get the data
        response, err := http.Get(URL)
        if err != nil {
            fmt.Println(err)
        }
        defer response.Body.Close()

        if response.StatusCode == 200 {
            // Create the file
            out, err := os.Create(gopherName + ".png")
            if err != nil {
                fmt.Println(err)
            }
            defer out.Close()

            // Writer the body to file
            _, err = io.Copy(out, response.Body)
            if err != nil {
                fmt.Println(err)
            }

            fmt.Println("Perfect! Just saved in " + out.Name() + "!")
        } else {
            fmt.Println("Error: " + gopherName + " not exists! :-(")
        }
推迟???
请等一下,那是什么?
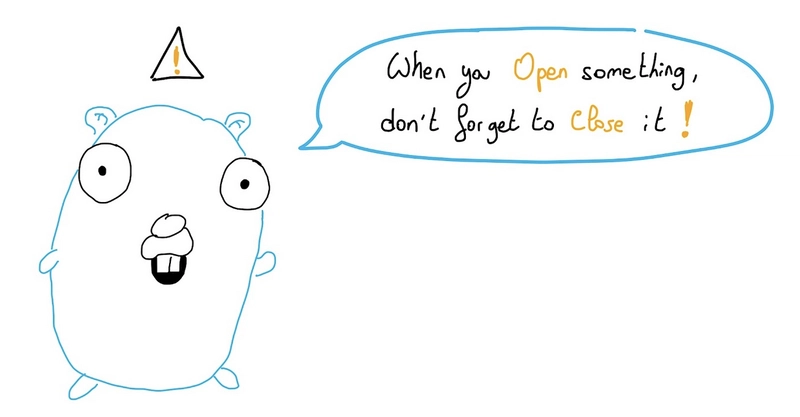
有一个简单但重要的规则,与语言无关:如果打开连接,则必须关闭它!:-)
忘记关闭连接/响应主体...可能会导致长时间运行的程序出现资源/内存泄漏。
这就是defer存在的原因。在我们的代码中,我们在创建文件时打开一个连接,然后推迟out.Close()的执行,该函数将在函数末尾执行:
// Create the file
out, err := os.Create(gopherName + ".png")
if err != nil {
    fmt.Println(err)
}
defer out.Close()
因此,最好的做法是在开场白之后立即添加一个带有延迟词的结束语,这样你就不会忘记它。
测试一下!
get现在让我们测试一下我们的命令的帮助:
$ go run main.go get -h
This get command will call GitHub respository in order to return the desired Gopher.

Usage:
  go-gopher-cli get [flags]

Flags:
  -h, --help   help for get

Global Flags:
      --config string   config file (default is $HOME/.go-gopher-cli.yaml)
现在是时候测试我们的 get 命令了:
$ go run main.go get friends
Try to get 'friends' Gopher...
Perfect! Just saved in friends.png!
我们还可以用未知的 Gopher 进行测试:
$ go run main.go get awesome
Try to get 'awesome' Gopher...
Error: awesome not exists! :-(
建造它!
您的应用程序现已准备就绪,只需构建它。
为此,与上一篇文章一样,我们将使用Taskfile来自动执行常见任务。
因此,对于这个应用程序,我也创建了一个Taskfile.yml包含以下内容的文件:
version: "3"

tasks:
    build:
        desc: Build the app
        cmds:
        - GOFLAGS=-mod=mod go build -o bin/gopher-cli main.go

    run:
        desc: Run the app
        cmds:
        - GOFLAGS=-mod=mod go run main.go

    clean:
        desc: Remove all retrieved *.png files
        cmds:
        - rm *.png
得益于此,我们可以轻松构建我们的应用程序:
$ task build
task: [build] GOFLAGS=-mod=mod go build -o bin/gopher-cli main.go

$ ll bin/gopher-cli
-rwxr-xr-x  1 aurelievache  staff   9,7M 16 jul 21:10 bin/gopher-cli
让我们用新的可执行二进制文件再次测试它:
$ ./bin/gopher-cli get 5th-element
Try to get '5th-element' Gopher...
Perfect! Just saved in 5th-element.png!

$ file 5th-element.png
5th-element.png: PNG image data, 1156 x 882, 8-bit/color RGBA, non-interlaced
凉爽的! :-)
...并清理它!
每次执行 CLI 应用程序时,都会在本地创建一个图像文件,因此如果您想在 Gophers 检索后清理文件夹,我创建了一个清理任务 :-)
$ task clean
task: [clean] rm *.png
再见,Gophers!
结论
正如我们在本文中看到的,借助cobra和viper这两个很棒的 Go 库,可以在几分钟内创建一个简单的 CLI 应用程序。
所有代码均可在以下位置找到: https: //github.com/scraly/learning-go-by-examples/tree/main/go-gopher-cli
在接下来的文章中,我们将使用 Go 创建其他类型的应用程序。
希望你会喜欢它。
文章来源:https://dev.to/aurelievache/learning-go-by-examples-part-3-create-a-cli-app-in-go-1h43 后端开发教程 - Java、Spring Boot 实战 - msg200.com


