如何使用 NextJS、Notion 和 Notion API 创建博客
在这篇文章中,我想尝试如何使用 Notion 作为数据库来创建一个博客管理系统。我之前写过一篇关于 如何使用 Airtable 创建博客的文章,我在那个项目中用到了 Airtable。现在我正在用 Notion 来做这件事。
我先把这篇文章写到我自己的博客上,也想在这里发布。
首先,我们可以找到有关概念的一切; https://developers.notion.com/ 地址
为我们的博客创建概念集成
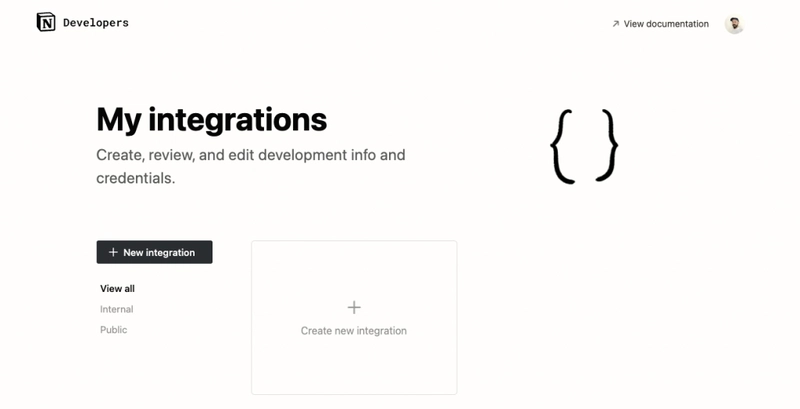
我已经看过文档了,我们开始吧。首先,我们应该创建一个集成 https://www.notion.so/my-integrations
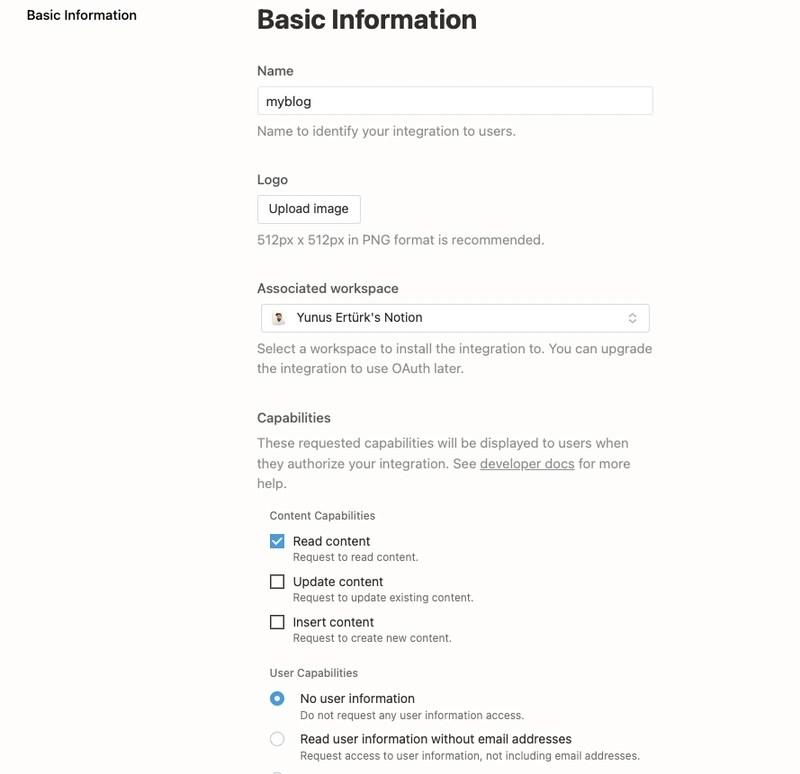
在此页面创建一个新的集成。我已创建一个名为“myblog”的集成,以下是我的设置:
完成这些步骤后,Notion 将为您提供一个 Notion 令牌,将此令牌复制到安全的地方,我们将使用它来连接我们的数据。
之后,我们需要创建一个页面并将其转换为数据库,以便用于我们的博客。我创建了一个概念页面——数据库完整页面。这是我得到的;
右上角有一个分享按钮,单击该 Share按钮并使用选择器通过名称找到您的集成,然后单击 Invite。
我们的集成现在可以访问我们的数据库了,最后一步我们需要数据库 ID。它是 URL 的一部分;
我的是; https://www.notion.so/yunuserturk/f9dfc334e89e4c2289b9bc98884b5e80
数据库 ID 是; f9dfc334e89e4c2289b9bc98884b5e80
现在我们必须创建我们的应用程序,并且我们可以使用这些概念访问。
创建 NextJS 应用
开始使用 Next.js 的最简单方法是使用 create-next-app 。
使用VS Code创建一个项目,打开终端并使用命令; npx create-next-app
安装 tailwindcss;
npm install -D tailwindcss postcss autoprefixer
npx tailwindcss init -p
创建一个粗略的 UI,我从 airtable 项目中复制了代码。
import Head from "next/head";

export default function Home() {
  return (
    <div>
      <Head>
        <title>Create Next App</title>
        <meta name="description" content="Generated by create next app" />
        <link rel="icon" href="/favicon.ico" />
      </Head>

      <main>
        <div className="container mx-auto w-full sm:w-10/12 md:w-8/12 lg:w-6/12 xl:w-6/12 p-4">
          <h1 className="font-bold text-2xl">Welcome to my blog</h1>
          <div className="flex flex-col p-5 rounded-lg border-2 border-gray-200 mt-10">
            <h2 className="text-xl font-bold">Post Title</h2>
            <div>Post Content will be here</div>
            <span className="text-sm mb-6">Post Date</span>
          </div>
        </div>
      </main>
    </div>
  );
}
如何使用 Notion API 并显示内容
我们的主页已经准备好了,现在我们需要获取数据并将其显示在页面上。让我们使用 来安装 Notion 客户端 SDK npm install @notionhq/client,并在终端上运行此命令。创建一个文件 lib>notion.js ,我们将在这里使用我们的数据库。在文档的帮助下,我创建了一个入门代码。
import { Client } from "@notionhq/client";

const notion = new Client({
  auth: process.env.NEXT_PUBLIC_NOTION_TOKEN,
});

export const getDatabase = async (databaseId) => {
  const response = await notion.databases.query({
    database_id: databaseId,
  });
  return response.results;
};

export const getPage = async (pageId) => {
  const response = await notion.pages.retrieve({ page_id: pageId });
  return response;
};

export const getBlocks = async (blockId) => {
  const blocks = [];
  let block;
  while (true) {
    const { results, next_block } = await notion.blocks.children.list({
      start_block: block,
      block_id: blockId,
    });
    blocks.push(...results);
    if (!next_block) {
      break;
    }
    block = next_block;
  }
  return blocks;
}
我们将把它导入到索引页,获取数据并在主页上显示帖子。使用 Notion API,getpage 函数仅获取页面的属性。我们无法检索页面块。我们必须创建另一个函数并使用 API 来检索页面内容。Notion 将它们称为块,并为此提供了另一个函数。
我的最终index.js页面是这样的;
import Head from "next/head";
import { getDatabase } from "../lib/notion";
import Link from "next/link";

export default function Home({ posts }) {

  return (
    <div>
      <Head>
        <title>Create Next App</title>
        <meta name="description" content="Generated by create next app" />
        <link rel="icon" href="/favicon.ico" />
      </Head>

      <main>
        <div className="container mx-auto w-full sm:w-10/12 md:w-8/12 lg:w-6/12 xl:w-6/12 p-4">
          <h1 className="font-bold text-2xl">Welcome to my blog</h1>
          {posts.map((post) => {
            const date=new Date(post.created_time).toLocaleString("en-Us",{
              month: "long",
              day: "numeric",
              year: "numeric",
              })
            return (
              <div className="flex flex-col p-5 rounded-lg border-2 border-gray-200 mt-10" key={post.id}>
                <h2 className="text-xl font-bold">{post.properties.Name.title[0].plain_text}</h2>
                <span className="text-sm">{date}</span>
                <Link href="/[post]" as={`/${post.id}`}>
                  <a className="text-sm">Read more</a>
                </Link>
              </div>
            );
          })}
        </div>
      </main>
    </div>
  );
}

export const getStaticProps = async () => {
  const database = await getDatabase("f9dfc334e89e4c2289b9bc98884b5e80");

  return {
    props: {
      posts: database,
    },
    revalidate: 1,
  };
};
Notion 为我们提供了带有丰富属性的 API 块。您可以根据需要使用其中的任意一个。但我只使用了文本块,以及段落和标题块。您可以根据项目的具体情况调整要使用的块。(我们将在单篇文章页面上使用它。)
这是单个帖子页面文件;
import { getDatabase, getPage, getBlocks } from "../lib/notion";
import Head from "next/head";

const renderBlock = (block) => {
  const { type } = block;
  const value = block[type];

  switch (type) {
    case "paragraph":
      return <p className="mb-4">{value.rich_text[0].plain_text}</p>;
    case "heading_1":
      return <h1 className="font-bold text-3xl  mb-2">{value.rich_text[0].plain_text}</h1>;
    case "heading_2":
      return <h2 className="font-bold text-2xl  mb-2">{value.rich_text[0].plain_text}</h2>;
    case "heading_3":
      return <h3 className=" font-bold text-xl mb-2">{value.rich_text[0].plain_text}</h3>;
  }
};

export default function Post({ post, content }) {
  const date = new Date(post.created_time).toLocaleString("en-Us", {
    month: "long",
    day: "numeric",
    year: "numeric",
  });
  return (
    <div>
      <Head>
        <title>{post.properties.Name.title[0].plain_text}</title>
        <link rel="icon" href="/favicon.ico" />
      </Head>

      <main>
        <div className="container mx-auto w-full sm:w-10/12 md:w-8/12 lg:w-6/12 xl:w-6/12 p-4">
          <h1 className="font-bold text-2xl">{post.properties.Name.title[0].plain_text}</h1>
          <span className="text-sm">{date}</span>
          <img src="<https://picsum.photos/800/200>" alt="random image" className=" max-w-full" />
          <div className="mt-10">
            {content.map((block) => {
              console.log(block);
              return <div key={block.id}>{block.type === "page_break" ? <hr /> : <div>{renderBlock(block)}</div>}</div>;
            })}
          </div>
        </div>
      </main>
    </div>
  );
}

export const getStaticPaths = async () => {
  const database = await getDatabase("f9dfc334e89e4c2289b9bc98884b5e80");
  const paths = database.map((post) => {
    return {
      params: {
        post: post.id,
      },
    };
  });
  return {
    paths,
    fallback: false,
  };
};

export const getStaticProps = async ({ params }) => {
  const postId = params.post;
  const post = await getPage(postId);
  const content = await getBlocks(postId);

  return {
    props: {
      post,
      content,
    },
    revalidate: 1,
  };
};
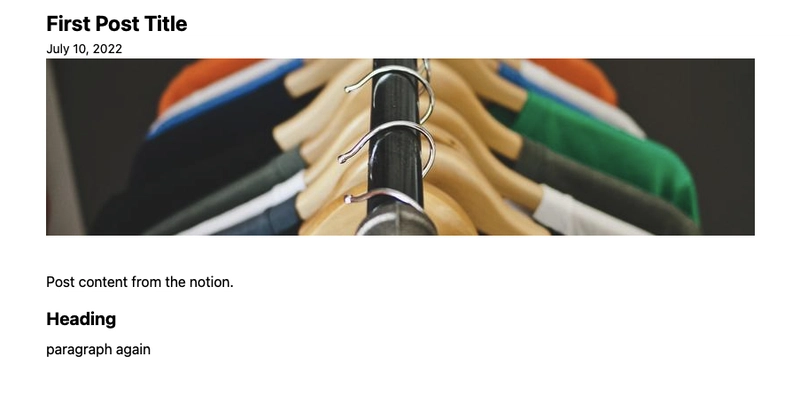
这是最终的帖子页面;
部署和结果
我终于把它部署到 Vercel 上了。这是 Nation API 的一个非常基本的用法,如果你创建了一些更特别的东西,也可以用这种方式。
您可以从 github repo 中看到所有代码: https://github.com/yunuserturk/notion-blog
以下是最终结果的演示: https://notion-blog-yunuserturk.vercel.app/
鏂囩珷鏉ユ簮锛�https://dev.to/yunuserturk/how-to-create-a-blog-with-nextjs-notion-and-notion-api-4fnm 后端开发教程 - Java、Spring Boot 实战 - msg200.com


