使用 HTML、CSS 和 JavaScript 从头构建完整的天气应用程序:分步指南
天气应用
创建一个综合天气应用weather app涉及多个步骤,包括从 获取数据weather API、设计用户界面以及处理用户交互。本文将提供分步指南,其中包含代码块,教您如何使用 构建一个简单的天气应用HTML, CSS, and JavaScript。
步骤 1:设置您的环境
在开始编码之前,请确保您的计算机上安装了代码编辑器(例如,Visual Studio Code)和 Web 浏览器。
第 2 步:设计 HTML 结构
创建一个 HTML 文件(例如 index.html)并定义天气应用的基本结构。您可以使用以下 HTML 代码作为起点:
<!DOCTYPE html>
<html lang="en">
<head>
    <meta charset="UTF-8">
    <meta name="viewport" content="width=device-width, initial-scale=1.0">
    <title>Weather App</title>
    <link rel="stylesheet" href="styles.css">
</head>
<body>
    <div class="container">
        <h1>Weather App</h1>
        <input type="text" id="locationInput" placeholder="Enter a city">
        <button id="searchButton">Search</button>
        <div class="weather-info">
            <h2 id="location"></h2>
            <p id="temperature"></p>
            <p id="description"></p>
        </div>
    </div>
    <script src="script.js"></script>
</body>
</html>
步骤 3:设计你的应用
创建一个 CSS 文件(例如,styles.css)来设置你的天气应用的样式。以下是一个简单的 CSS 代码示例:
body {
    font-family: Arial, sans-serif;
    background-color: #f0f0f0;
}

.container {
    max-width: 400px;
    margin: 0 auto;
    text-align: center;
    padding: 20px;
    background-color: rgba(255, 255, 255, 0.5); /* Set the background color to be transparent */
    border-radius: 10px;
    box-shadow: 0 0 10px rgba(0, 0, 0, 0.3); /* Adjust the alpha value here for the box shadow transparency */
    margin-top: 105px;
}

h1 {
    font-size: 24px;
}

input[type="text"] {
    width: 100%;
    padding: 10px;
    margin: 10px 0;
    border: 1px solid #ccc;
    border-radius: 5px;
}

button {
    background-color: #007BFF;
    color: #fff;
    border: none;
    padding: 10px 20px;
    border-radius: 5px;
    cursor: pointer;
}

.weather-info {
    margin-top: 20px;
}

/* Add more styles as needed */
步骤 4:使用 JavaScript 获取天气数据
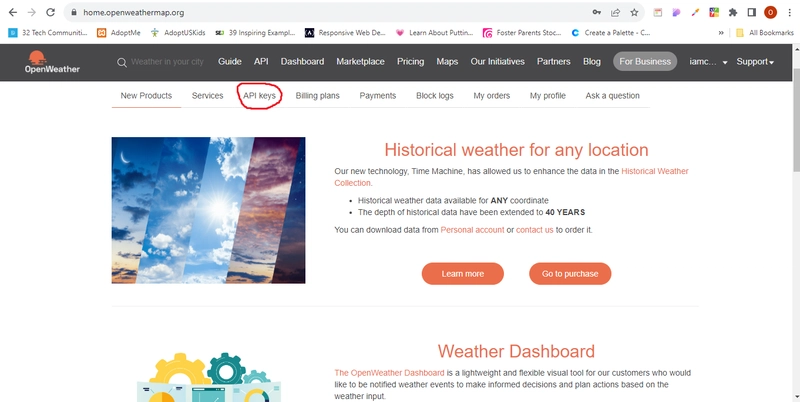
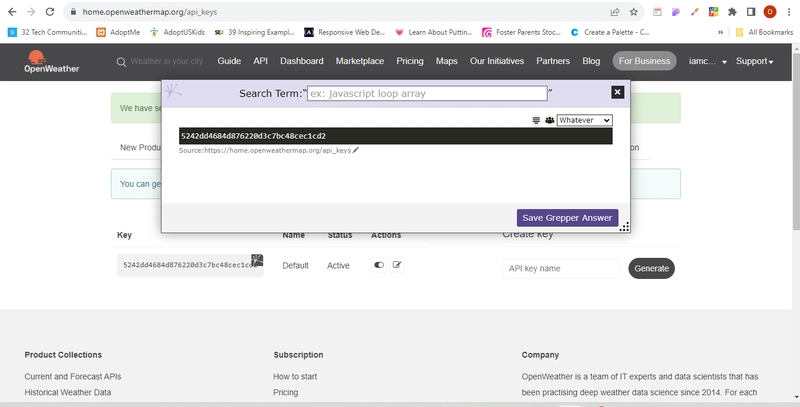
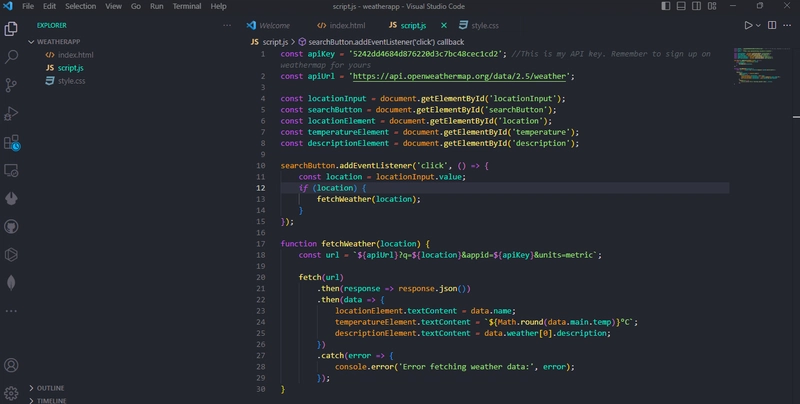
创建一个 JavaScript 文件(例如 script.js)来从公共天气 API 获取天气数据。我们将以该OpenWeatherMapAPI 为例。您需要从 .io 注册一个免费的 API 密钥OpenWeatherMap。
const apiKey = 'YOUR_API_KEY';
const apiUrl = 'https://api.openweathermap.org/data/2.5/weather';

const locationInput = document.getElementById('locationInput');
const searchButton = document.getElementById('searchButton');
const locationElement = document.getElementById('location');
const temperatureElement = document.getElementById('temperature');
const descriptionElement = document.getElementById('description');

searchButton.addEventListener('click', () => {
    const location = locationInput.value;
    if (location) {
        fetchWeather(location);
    }
});

function fetchWeather(location) {
    const url = `${apiUrl}?q=${location}&appid=${apiKey}&units=metric`;

    fetch(url)
        .then(response => response.json())
        .then(data => {
            locationElement.textContent = data.name;
            temperatureElement.textContent = `${Math.round(data.main.temp)}°C`;
            descriptionElement.textContent = data.weather[0].description;
        })
        .catch(error => {
            console.error('Error fetching weather data:', error);
        });
}
步骤 5:获取您的 API 密钥
OpenWeatherMap从(或您选择的其他天气 API 提供商)注册一个免费的 API 密钥。将'YOUR_API_KEY'JavaScript 代码替换为您的实际 API 密钥。
步骤6:测试您的天气应用程序
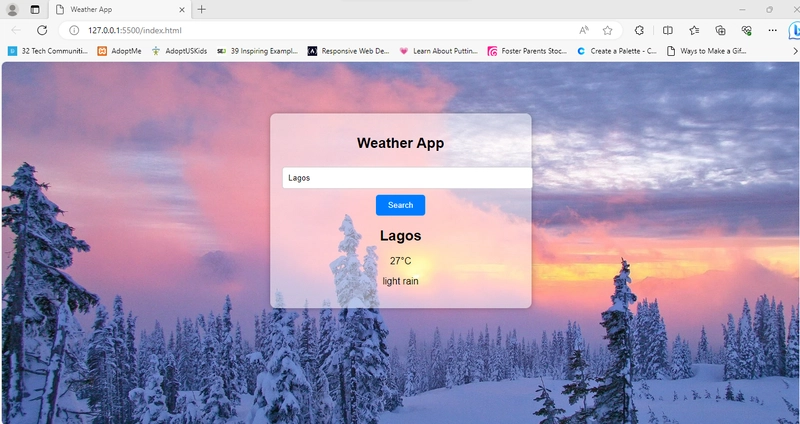
在网页浏览器中打开 HTML 文件(index.html),输入城市名称,然后点击“搜索”按钮。页面上应该会显示天气信息。
我在 CSS 样式中将背景图片添加到 body 元素中,以美化页面weather app。以下是包含背景图片的更新后的代码片段:
body {
  font-family: Arial, sans-serif;
    /* background-color: #f0f0f0; */

  background-image: url('weather1.webp');
  background-size: cover;
  background-position: center;
  background-repeat: no-repeat;
  height: 100vh; /* Set the height to fill the viewport */
  margin: 0; /* Remove default margin */
  padding: 0;
}
步骤 7:部署您的天气应用程序
要与他人分享您的天气应用程序,您可以将其部署在网络托管平台上或使用 GitHub Pages 等服务。
这是一个天气应用的基本示例。您可以进一步增强它的功能,例如添加图标、更详细的天气信息以及五天天气预报。您还可以改进样式,使其更具视觉吸引力。
LinkedIn Account:LinkedInTwitter Account:TwitterCredit:图片来源于Hackr.io
 后端开发教程 - Java、Spring Boot 实战 - msg200.com


