iTerm2 + Oh My Zsh! + Powerlevel10K 是极客的最佳终端组合!
把这几个字母放在一起听,前后都有对应的音节:ZSH。你可能会想:我以前怎么没听说过这个?哎呀!
Oh My Zsh - 一个令人愉悦的 Z-Shell 开源框架
ZSH (Z Shell) 是一次真正的革新,它用简单的解决方案实现了终端的现代化。它可以在 GNU Linux 和 macOS 上使用,但我将教你如何在 MacOS 上安装和配置它。
先决条件
自制
Brew 有自己的分类。在 brew 里面可以找到命令行应用程序和实用程序。在 cask 里面可以找到所有带有图形界面的应用程序。
/bin/bash -c "$(curl -fsSL https://raw.githubusercontent.com/Homebrew/install/HEAD/install.sh)"
将以下行添加到~/.bash_profile和/或~/.zshrc文件:
# Brew
export BREW_HOME="/opt/homebrew/bin"
export PATH="$BREW_HOME:$PATH"
eval "$($BREW_HOME/brew shellenv)"
在终端上运行以下命令:
eval "$(/opt/homebrew/bin/brew shellenv)"
source ~/.zshrc
source ~/.bash_profile
重新启动终端,然后更新并升级 brew 源:
brew tap homebrew/cask-fonts
brew update --force --quiet
brew upgrade
brew cleanup
运行此命令,并遵循医生的建议:
brew doctor
《美丽城三胞胎》
警告:我不想妄下结论,但iTerm2 + Oh My Zsh! + Powerlevel10K 的组合太致命了。以后你肯定不想再用其他终端了。
brew install --cask iterm2

sh -c "$(curl -fsSL https://raw.githubusercontent.com/ohmyzsh/ohmyzsh/master/tools/install.sh)"

git clone --depth=1 https://github.com/romkatv/powerlevel10k.git ${ZSH_CUSTOM:-$HOME/.oh-my-zsh/custom}/themes/powerlevel10k

git clone https://github.com/nobeans/zsh-sdkman.git ${ZSH_CUSTOM:-~/.oh-my-zsh/custom}/plugins/sdkman
git clone https://github.com/zsh-users/zsh-autosuggestions.git ${ZSH_CUSTOM:-~/.oh-my-zsh/custom}/plugins/zsh-autosuggestions
git clone https://github.com/zsh-users/zsh-syntax-highlighting.git ${ZSH_CUSTOM:-~/.oh-my-zsh/custom}/plugins/zsh-syntax-highlighting
git clone https://github.com/Pilaton/OhMyZsh-full-autoupdate.git ${ZSH_CUSTOM:-~/.oh-my-zsh/custom}/plugins/ohmyzsh-full-autoupdate

chsh -s /bin/zsh
关闭默认终端并打开 iTerm2。
配置
ZSH 配置文件位于~/.zshrc。使用你喜欢的编辑器打开并设置:
DEFAULT_USER="$USER"

ZSH_THEME="powerlevel10k/powerlevel10k"
POWERLEVEL9K_RIGHT_PROMPT_ELEMENTS=(history)
POWERLEVEL9K_SHORTEN_DIR_LENGTH=1

export LS_COLORS="rs=0:no=00:mi=00:mh=00:ln=01;36:or=01;31:di=01;34:ow=04;01;34:st=34:tw=04;34:pi=01;33:so=01;33:do=01;33:bd=01;33:cd=01;33:su=01;35:sg=01;35:ca=01;35:ex=01;32:"

ZSH_HIGHLIGHT_HIGHLIGHTERS=(main brackets pattern cursor root line)
ZSH_HIGHLIGHT_PATTERNS=('rm -rf *' 'fg=white,bold,bg=red')

plugins=(
  brew
    command-not-found
    extract
    macos
    git
    github
    gitignore
    sdkman
    history-substring-search
    node
    npm
    volta
    vscode
    sudo
    web-search
    z
    zsh-autosuggestions
    zsh-syntax-highlighting
    ohmyzsh-full-autoupdate
)

# Z Plugin
if command -v brew >/dev/null 2>&1; then
  # Load rupa's z if installed
  [ -f $(brew --prefix)/etc/profile.d/z.sh ] && source $(brew --prefix)/etc/profile.d/z.sh
fi
source /opt/homebrew/etc/profile.d/z.sh

# Plugins
source /opt/homebrew/share/zsh-history-substring-search/zsh-history-substring-search.zsh
source /opt/homebrew/share/zsh-syntax-highlighting/zsh-syntax-highlighting.zsh
将您想要或需要的所有插件plugins=()添加到列表中,每个插件占一行。
打开 iTerm2,更改值后确保~/.zshrc运行完整命令更新文件:
source ~/.zshrc
字体
下载并安装 Meslo 和 Nerd 字体
brew install --cask font-meslo-lg-nerd-font
brew install --cask font-hack-nerd-font
将其更改为开启iTerm > Settings > Profiles > Text > Change Font并选择MesloLGS NF。
Visual Studio 代码
如果要在 Visual Studio Code 中使用 ZSH 作为默认终端,请添加以下设置(⌘ + ,):
"terminal.external.osxExec": "iTerm.app",
"terminal.integrated.fontFamily": "Meslo LG M for Powerline",
"terminal.integrated.defaultProfile.osx": "zsh",
巫师
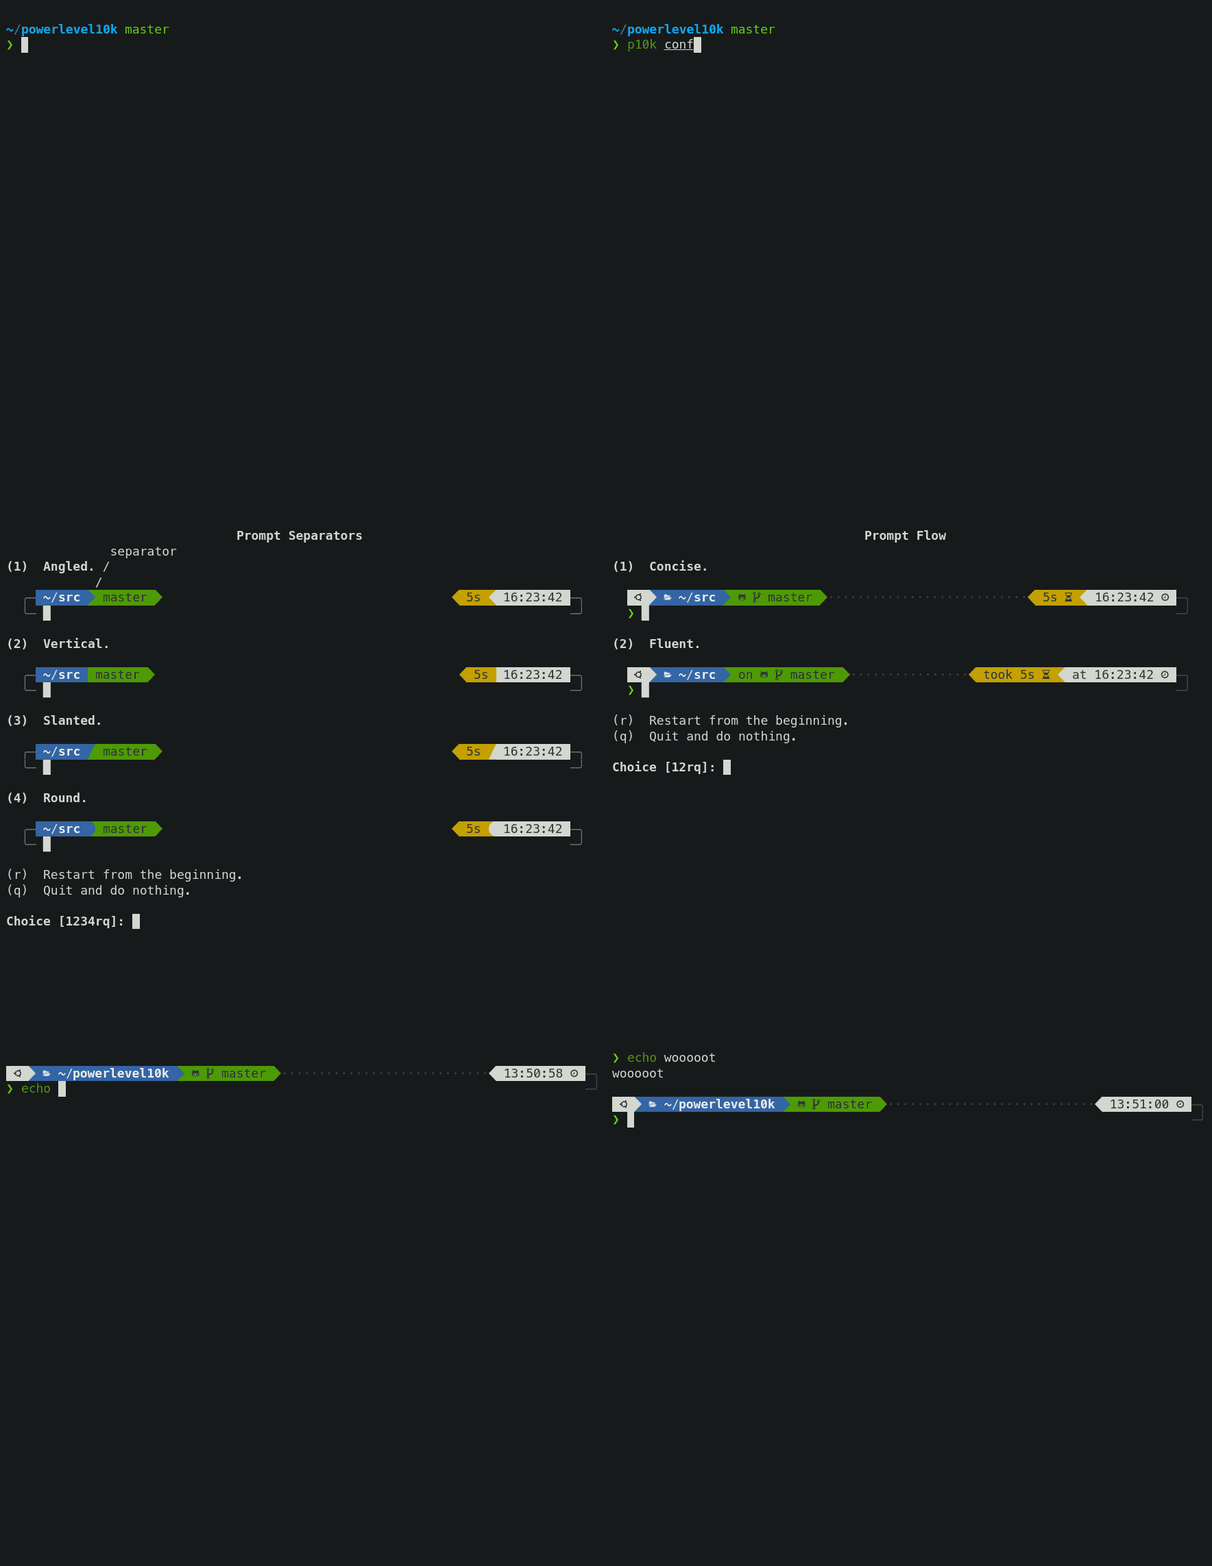
第一次运行时,Powerlevel10k 配置向导会询问您几个问题并配置您的提示。
如果它没有自动触发,请输入p10k configure。
配置向导会根据您的偏好设置创建 ~/.p10k.zsh。您可以通过编辑此文件来自定义其他提示符。该文件包含大量注释,可帮助您浏览配置选项。
终端(Bash)
macOS 默认终端自带 3.0 版本,并且不会更新,因为新版本改变了其许可证。Apple 不提供任何 GPLv3 许可下的软件。
打开默认终端并运行此命令以使用更新版本:
brew install bash bash-completion
将这一行添加到~/.bash_profile文件:
[ -f /usr/local/etc/bash_completion ] && . /usr/local/etc/bash_completion
打开终端并更改Terminal > Settings > General选择Shell open with:和Command (complete path)设置/bin/bash值。
通过此配置,您现在可以在 iTerm2 上使用 ZSH,在默认终端上使用 Bash。
删除“上次登录:”
对我来说,macOS 终端中默认的“上次登录:”信息既没必要,又很烦人。还好,这很简单:
touch ~/.hushlogin
成为一名 ZSH 忍者!
强烈推荐参加@WesBoss制作的免费课程:
奖励曲目
好了,各位!祝您
编程愉快🖖
 后端开发教程 - Java、Spring Boot 实战 - msg200.com


