如何使用 JavaScript 创建 PWA
如果您不知道什么是 PWA 或服务工作者,请查看我的文章。
级别:初学者
要求: Javascript、HTML、CSS 和良好的态度。
现在,让我们从 SCRATCH 开始创建 PWA!
现场演示
https://my-first-pwa-744ee.firebaseapp.com/
创建我们的 PWA
2)转到您的index.html文件并粘贴以下代码:
<!DOCTYPE html>
<html lang="en">
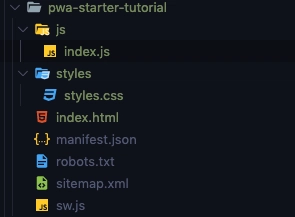
  <head>
    <link rel="manifest" href="manifest.json">
    <meta charset="utf-8" />
    <meta http-equiv="X-UA-Compatible" content="IE=edge" />
    <meta name="viewport" content="width=device-width, initial-scale=1" />
    <meta name="theme-color" content="#222" />
    <meta name="description" content="My First PWA">
    <meta name="apple-mobile-web-app-capable" content="yes">
    <meta name="apple-mobile-web-app-status-bar-style" content="black">
    <meta name="apple-mobile-web-app-title" content="My First PWA">
    <link rel="apple-touch-icon" href="/icons/icon-152x152.png">
    <title>My First PWA</title>
    <link rel="stylesheet" href="https://cdnjs.cloudflare.com/ajax/libs/font-awesome/4.7.0/css/font-awesome.min.css">
    <link rel="stylesheet" type="text/css" href="./styles/styles.css" />
  </head>
  <body>
    <!-- More before code here -->
    <script src="./js/index.js"></script>
  </body>
</ lang="en">
我觉得元标签的含义一目了然。如果你想深入了解,请访问 google.com :)
如果你看一下代码,就会发现我导入了manifest.json、style.css和index.js,所以你不用管这些,尤其是manifest.json。你可能之前没见过这个文件,它非常重要。
3)在包含正文的 index.html 中,我们将创建响应式导航栏。
仅供参考:此导航栏取自此处。本教程的目的并非向您展示如何编写 CSS。
<div class="navbar" id="navbar">
  <a href="#home" class="active">Home</a>
  <a href="#news">News</a>
  <a href="#contact">Contact</a>
  <a href="#about">About</a>
   <a href="javascript:void(0);" alt="button to toggle menu" aria-label="button to toggle menu" class="icon" onclick="toggleMenu()">
    <i class="fa fa-bars"></i>
  </a>
</div>
4)是时候在styles.css中添加一些颜色了
body {
  margin: 0;
  font-family: Arial, Helvetica, sans-serif;
}

.navbar {
  overflow: hidden;
  background-color: #333;
}

.navbar a {
  float: left;
  display: block;
  color: #f2f2f2;
  text-align: center;
  padding: 14px 16px;
  text-decoration: none;
  font-size: 17px;
}

.navbar a:hover {
  background-color: #ddd;
  color: black;
}

.navbar a.active {
  background-color: #c3042f;
  color: #fff;
}

.navbar .icon {
  display: none;
}

@media screen and (max-width: 600px) {
  .navbar a:not(:first-child) {
    display: none;
  }
  .navbar a.icon {
    float: right;
    display: block;
  }
}

@media screen and (max-width: 600px) {
  .navbar.responsive {
    position: relative;
  }
  .navbar.responsive .icon {
    position: absolute;
    right: 0;
    top: 0;
  }
  .navbar.responsive a {
    float: none;
    display: block;
    text-align: left;
  }
}
5)index.js文件粘贴以下代码,该代码将执行响应式菜单的打开和关闭。
function toggleMenu() {
  const navbar = document.getElementById("navbar");
  if (navbar.className === "navbar") {
    navbar.className += " responsive";
  } else {
    navbar.className = "navbar";
  }
}
Service Worker 生命周期
登记
6)在您的index.js中,您将按如下方式注册您的服务工作者:
if ("serviceWorker" in navigator) {
  navigator.serviceWorker.register("sw.js").then(() => {
    console.log("[ServiceWorker**] - Registered");
  });
}
安装
7) 在你的 Service Worker (sw.js) 文件中,添加以下代码来安装 Service Worker。然后,我们将缓存一些资源。缓存将在 Service Worker 安装期间进行。
注意:除了缓存之外,您还可以在安装过程中做更多的事情。
// Service Worker
const cacheName = "my-first-pwa";
const filesToCache = [
  "/",
  "index.html",
  "./js/index.js",
  "./styles/styles.css"
];

self.addEventListener("install", e => {
  console.log("[ServiceWorker**] Install");
  e.waitUntil(
    caches.open(cacheName).then(cache => {
      console.log("[ServiceWorker**] Caching app shell");
      return cache.addAll(filesToCache);
    })
  );
});
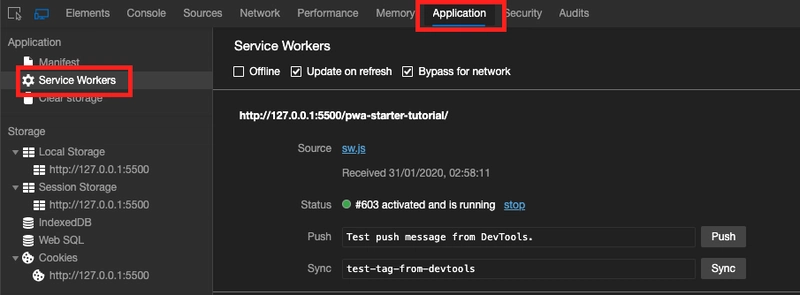
如果你想检查浏览器以确保你的 Service Worker 已注册,请转到 Google Dev Tool -> Application -> Service Worker
激活
8) 在您的 Service Worker (sw.js) 文件中添加以下代码。在此代码片段中,我们等待 activate 事件,然后运行 waitUntil() 代码块,该代码块会在新的 Service Worker 激活之前清除所有旧的/未使用的缓存。这里我们有一个白名单,其中包含我们要保留的缓存的名称。我们使用 keys() 返回 CacheStorage 对象中缓存的键,然后检查每个键是否在白名单中。如果不在,我们使用 CacheStorage.delete 将其删除。
self.addEventListener("activate", event => {
  caches.keys().then(keyList => {
    return Promise.all(
      keyList.map(key => {
        if (key !== cacheName) {
          console.log("[ServiceWorker] - Removing old cache", key);
          return caches.delete(key);
        }
      })
    );
  });
});
缓存回退到网络
9) 如果您的应用采用离线优先模式,则大多数请求将采用此模式处理。其他模式将根据传入请求的情况进行例外处理。
self.addEventListener("fetch", event => {
  event.respondWith(
    caches.match(event.request, { ignoreSearch: true }).then(response => {
      return response || fetch(event.request);
    })
  );
});
要了解适合您场景的不同回退方法,请访问此Google 文档
验证我们的缓存文件
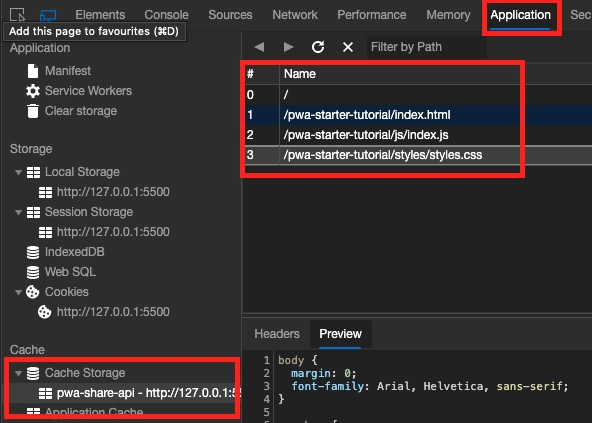
如果你想查看你的文件是否已被缓存,你只需转到 Google Dev tools->Application->Cache Storage
Manifest.json
该文件告诉浏览器有关您的 PWA 的一些基本信息以及您的应用在用户设备上安装后的行为方式。
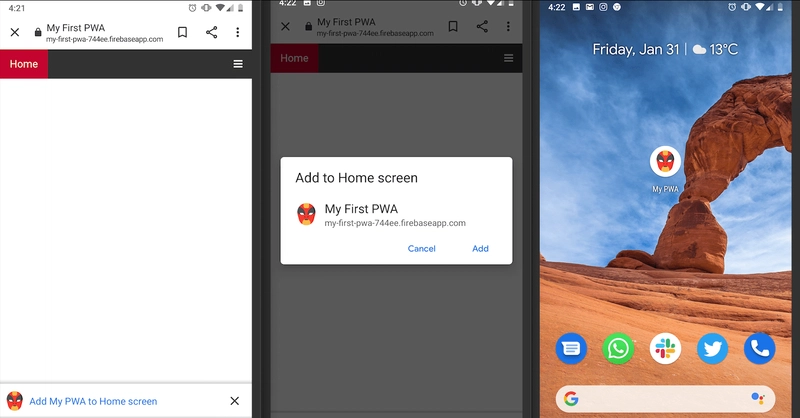
您是否曾经访问过某个网站,它要求您“添加到主屏幕”?这要归功于manifest.json。
10)在manifest.json中粘贴以下代码:
{
  "short_name": "My PWA",
  "name": "My First PWA",
  "icons": [
    {
      "src": "./icons/icon.png",
      "type": "image/png",
      "sizes": "192x192"
    },
    {
      "src": "./icons/icon.png",
      "type": "image/png",
      "sizes": "512x512"
    }
  ],
  "start_url": "/index.html",
  "background_color": "#222",
  "display": "standalone",
  "scope": "/",
  "theme_color": "#c3042f"
}
要了解有关manifest.json 的更多信息,请访问此文档。
不要忘记我们在 html 中添加了清单;)
11) 在项目根目录下创建一个名为“icons”的文件夹。然后添加你想要的图标,并将其命名为icon.png。如果图标有其他名称,则需要更新manifest.json文件。
注意:您可以从 FlatIcons https://www.flaticon.com/获取一些图标。
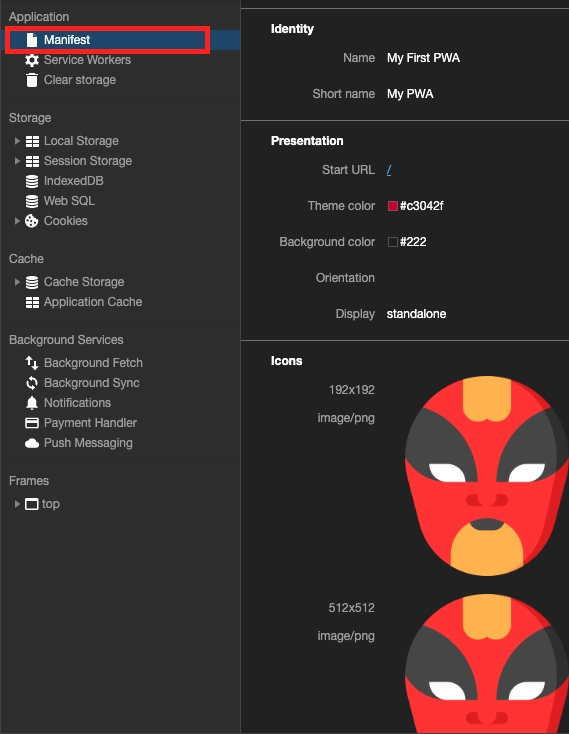
12) 验证manifest.json是否被检测到。再次前往 Google Dev Tools -> Application -> Manifest
一旦您在浏览器中运行此应用程序,它就会询问您是否要将 PWA 添加到主屏幕。
Robots.txt 文件
13) 您可以在此 Robots.txt 文件中输入以下代码,也可以访问此网站来生成您的代码。
# robots.txt generated by smallseotools.com
User-agent: Googlebot
Disallow:
User-agent: *
Disallow:
Disallow: /cgi-bin/
该文件对机器人和 SEO 非常有用。如果您想了解更多信息,请查看这篇文章:
https://www.cloudflare.com/learning/bots/what-is-robots.txt/
网站地图
在sitemap.xml中添加站点地图代码。您可以在这里生成一个:https://www.xml-sitemaps.com/,或者使用我的代码并更改 URL。
<?xml version="1.0" encoding="UTF-8"?>
<urlset xmlns="http://www.sitemaps.org/schemas/sitemap/0.9" xmlns:xsi="http://www.w3.org/2001/XMLSchema-instance" xsi:schemaLocation="http://www.sitemaps.org/schemas/sitemap/0.9 http://www.sitemaps.org/schemas/sitemap/0.9/sitemap.xsd">
<!-- Generated by Web-Site-Map.com -->
<url><loc>https://my-first-pwa-744ee.firebaseapp.com/</loc><lastmod>2020-01-20T23:50:35+00:00</lastmod><changefreq>always</changefreq><priority>1.00</priority></url>
</urlset>
部署您的 PWA。
我不会再讨论这个问题,但是您可以在任何您想要的地方部署 PWA,也可以按照我的其他教程通过 Firebase 进行部署。
灯塔报告
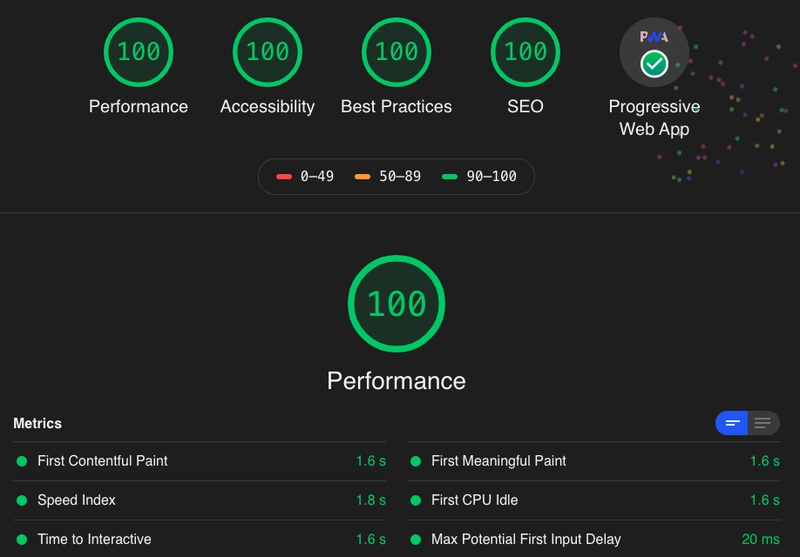
Lighthouse 是一款可以帮助我们获取应用指标的工具。您可以通过添加 Google Chrome 扩展程序来生成 Lighthouse 报告。Lighthouse 会生成一份报告,用于测试您的应用的性能、可访问性、最佳实践、SEO 以及它是否是 PWA。
要运行报告,请访问你的 PWA 网站,点击 Lighthouse Chrome 扩展程序,然后等待奇迹发生。你应该会看到类似这样的内容:
注意: Robots.txt 文件和 sitemap.xml 并不是将您的应用变成 PWA 所必需的,但拥有它们还是很有用的,并且会使您的 Lighthouse 学校的排名更高。
文章来源:https://dev.to/devpato/how-to-create-a-pwa-with-javascript-4jlh 后端开发教程 - Java、Spring Boot 实战 - msg200.com
