如何使用 README 创建精美的 Github 个人资料?
在本文中,我们将向您展示如何以您从未想过的方式使用 GitHub。您将学习如何将您的 GitHub 个人资料用作简历 (CV),甚至将其用作您自己或公司的展示网站。您还将学习如何以非常美观的方式自定义用户进入您的 GitHub 个人资料时看到的第一个页面。我们将向您展示如何展示您最引以为豪的仓库、如何列出您撰写的文章、如何展示您的 YouTube 频道等等。
首先,如果您还没有 GitHub 帐户,请创建一个。点击此链接创建帐户。为了充分理解本文内容,您需要对 Markdown 和 HTML 语言有基本的了解。因此,为了方便您理解,我们附上了两份Markdown和HTML
速查表的 PDF 文件。
现在我们开始吧!😄
目录:
1. 入门指南
2. 我的简历示例内容
3. Github 个人资料的额外内容
1. 入门
为了向人们展示您的信息,您可以将 README.md 添加到您的 GitHub 个人资料中。这是您向 GitHub 社区展示您的技能和项目的秘密途径。操作非常简单;您只需创建一个公开的仓库,以您的 GitHub 帐户用户名命名,并创建一个 README.md 文件,其中包含您希望在个人资料中显示的所有内容。例如,如果您的用户名是my-username,则需要创建一个名为my-username 的公开仓库,并将该文件放入其中README.md。此文件的内容将在您的个人资料中显示在所有仓库之前。
2. 我的简历示例内容
下面我们将向您展示如何与访问您 Github 个人资料的人分享您的简历。我们尽力构建内容,以尽可能多地包含简历中所需的元素,无论经验水平或工作领域如何。
我们在这里创建了一个带有简历示例的复杂模板。
在自述文件中插入横幅
此部分是您个人资料的第一部分。您可以在此处添加图片,例如横幅、GIF、动态 SVG 或任何您喜欢的形式。
您也可以选择添加您网站的链接。
带有链接的横幅图像
示例预览:
代码片段:

[](https://www.creative-tim.com/)
在自述文件中插入带有 gif 的标题
示例预览:
你好✋!
代码片段:
Hi there ✋!
GitHub 个人资料中的“关于我”部分
在本部分,您可以写下一些最能描述您的词语。为此,您可以使用自定义字体、图标或表情符号。字体可以在线找到,或者您也可以使用其他工具生成文本,然后直接粘贴到这里。
示例预览:
完整编码的 UI 工具,助您创建 Web 和移动应用。UI 工具包、模板和仪表盘基于 Bootstrap、Vue.js、React、Angular、Node.js 和 Laravel 构建。加入超过160 万创意人士,使用我们所有的产品!
代码片段:
Fully Coded UI Tools to create web and mobile apps. UI Kits, Templates, and Dashboards built on top of Bootstrap, Vue.js, React, Angular, Node.js, and Laravel. Join over **1,6M** creatives to access all our products!
除了精美的字体,你还可以使用表情符号来提升简历的风格。
对于 Mac 用户,只需按下Command + Control + Space键即可轻松访问表情符号面板。
Github 个人资料中的兴趣爱好部分
和大多数人一样,你也可以有一些爱好,也应该提及它们,以便雇主更好地了解你。
添加爱好的方法有很多,但最常见的是使用列表。
列表
无序列表:
对于无序列表,您必须在前面添加 - 或 * 来添加项目。
示例预览:
- 爱好 1
- 嵌套爱好 1
- 子嵌套爱好 1
- 爱好 2
- 爱好 3
代码片段:
* Hobby 1
  * Nested Hobby 1
    * Sub-nested Hobby 1
* Hobby 2
* Hobby 3
有序列表:
对于有序列表,您必须在项目前添加数字。
示例预览:
- 爱好 1
- 嵌套爱好 1
- 嵌套爱好 2
- 爱好 2
- 爱好 3
代码片段:
1. Hobby 1
    1. Nested Hobby 1
    2. Nested Hobby 2
2. Hobby 2
3. Hobby 3
表情符号列表:
对于这种列表,您必须在每个项目前添加一个表情符号。
示例预览:
1️⃣。爱好1
2️⃣。爱好2
3️⃣。爱好3或者
🏔. 爱好 1(徒步旅行)
📚. 爱好 2(阅读)
💻. 爱好 3(编程)代码片段:
 1️⃣. Hobby 1
 2️⃣. Hobby 2
 3️⃣. Hobby 3

or

 🏔. Hobby 1 (Hiking)
 📚. Hobby 2 (Reading)
 💻. Hobby 3 (Programming)
注意:对于此列表,您需要在每个项目的末尾添加两个空格。这两个空格会使每个项目另起一行。
图片列表:
您可以在标题中添加 gif 图像作为横幅,也可以添加静态图像作为列表项。
示例预览:
徒步旅行
阅读
编程
或者


代码片段:


<img src="https://cdn.pixabay.com/photo/2021/09/03/15/37/mountain-6596074_1280.jpg" width="100px"> Hiking
<img src="https://cdn.pixabay.com/photo/2014/09/05/18/32/old-books-436498_1280.jpg" width="100px"> Reading
<img src="https://cdn.pixabay.com/photo/2015/04/20/13/17/work-731198_1280.jpg" width="100px"> Programming

or

<img src="https://cdn.pixabay.com/photo/2021/09/03/15/37/mountain-6596074_1280.jpg" width="100px"> <img src="https://cdn.pixabay.com/photo/2014/09/05/18/32/old-books-436498_1280.jpg" width="100px"> <img src="https://cdn.pixabay.com/photo/2015/04/20/13/17/work-731198_1280.jpg" width="100px">
在 GitHub 个人资料中插入“我的经验”部分
每份简历都必须包含这一部分,以便雇主了解你是否适合该职位。
在这一部分,你可以尽可能地发挥创意。例如,你可以添加你使用图标进行编程的经验。
编程语言:
示例预览:


代码片段:

<p>
  <img src="https://img.shields.io/badge/Python-3776AB?style=for-the-badge&logo=python&logoColor=white" />
  <img src="https://img.shields.io/badge/HTML5-E34F26?style=for-the-badge&logo=html5&logoColor=white" />
  <img src="https://img.shields.io/badge/CSS3-1572B6?style=for-the-badge&logo=css3&logoColor=white" />
  <img src="https://img.shields.io/badge/JavaScript-323330?style=for-the-badge&logo=javascript&logoColor=F7DF1E" />
  <img src="https://img.shields.io/badge/TypeScript-007ACC?style=for-the-badge&logo=typescript&logoColor=white" />
  <img src="https://img.shields.io/badge/C-00599C?style=for-the-badge&logo=c&logoColor=white" />
  <img src="https://img.shields.io/badge/C%2B%2B-00599C?style=for-the-badge&logo=c%2B%2B&logoColor=white" />
  <img src="https://img.shields.io/badge/C%23-239120?style=for-the-badge&logo=c-sharp&logoColor=white" />
  <img src="https://img.shields.io/badge/Java-ED8B00?style=for-the-badge&logo=java&logoColor=white" />
  <img src="https://img.shields.io/badge/PHP-777BB4?style=for-the-badge&logo=php&logoColor=white" />
  <img src="https://img.shields.io/badge/Swift-FA7343?style=for-the-badge&logo=swift&logoColor=white" />
  <img src="https://img.shields.io/badge/Go-00ADD8?style=for-the-badge&logo=go&logoColor=white" />
  <img src="https://img.shields.io/badge/Ruby-CC342D?style=for-the-badge&logo=ruby&logoColor=white" />
  <img src="https://img.shields.io/badge/json-5E5C5C?style=for-the-badge&logo=json&logoColor=white" />
</p>
框架和库
示例预览:


代码片段:

<p>
  <img src="https://img.shields.io/badge/React_Native-20232A?style=for-the-badge&logo=react&logoColor=61DAFB" />
  <img src="https://img.shields.io/badge/Node.js-339933?style=for-the-badge&logo=nodedotjs&logoColor=white" />
  <img src="https://img.shields.io/badge/.NET-512BD4?style=for-the-badge&logo=dotnet&logoColor=white" />
  <img src="https://img.shields.io/badge/React-20232A?style=for-the-badge&logo=react&logoColor=61DAFB" />
  <img src="https://img.shields.io/badge/Svelte-4A4A55?style=for-the-badge&logo=svelte&logoColor=FF3E00" />
  <img src="https://img.shields.io/badge/Vue.js-35495E?style=for-the-badge&logo=vuedotjs&logoColor=4FC08D" />
  <img src="https://img.shields.io/badge/Angular-DD0031?style=for-the-badge&logo=angular&logoColor=white" />
  <img src="https://img.shields.io/badge/AngularJS-E23237?style=for-the-badge&logo=angularjs&logoColor=white" />
  <img src="https://img.shields.io/badge/Bootstrap-563D7C?style=for-the-badge&logo=bootstrap&logoColor=white" />
  <img src="https://img.shields.io/badge/Tailwind_CSS-38B2AC?style=for-the-badge&logo=tailwind-css&logoColor=white" />
  <img src="https://img.shields.io/badge/jQuery-0769AD?style=for-the-badge&logo=jquery&logoColor=white" />
  <img src="https://img.shields.io/badge/Django-092E20?style=for-the-badge&logo=django&logoColor=white" />
  <img src="https://img.shields.io/badge/Ruby_on_Rails-CC0000?style=for-the-badge&logo=ruby-on-rails&logoColor=white" />
  <img src="https://img.shields.io/badge/Laravel-FF2D20?style=for-the-badge&logo=laravel&logoColor=white" />
  <img src="https://img.shields.io/badge/Flask-000000?style=for-the-badge&logo=flask&logoColor=white" />
  <img src="https://img.shields.io/badge/nuxt.js-00C58E?style=for-the-badge&logo=nuxtdotjs&logoColor=white" />
  <img src="https://img.shields.io/badge/next.js-000000?style=for-the-badge&logo=nextdotjs&logoColor=white" />
</p>
工具
示例预览:


代码片段:

<p>
  <img src="https://img.shields.io/badge/Xcode-007ACC?style=flat-square&logo=Xcode&logoColor=white" />
  <img src="https://img.shields.io/badge/Visual_Studio_Code-0078D4?style=for-the-badge&logo=visual%20studio%20code&logoColor=white" />
  <img src="https://img.shields.io/badge/Visual_Studio-5C2D91?style=for-the-badge&logo=visual%20studio&logoColor=white" />
  <img src="https://img.shields.io/badge/Atom-66595C?style=for-the-badge&logo=Atom&logoColor=white" />
  <img src="https://img.shields.io/badge/Eclipse-2C2255?style=for-the-badge&logo=eclipse&logoColor=white" />
  <img src="https://img.shields.io/badge/sublime_text-%23575757.svg?&style=for-the-badge&logo=sublime-text&logoColor=important" />
</p>
数据库
示例预览:


代码片段:

<p>
  <img src="https://img.shields.io/badge/MySQL-00000F?style=for-the-badge&logo=mysql&logoColor=white" />
  <img src="https://img.shields.io/badge/PostgreSQL-316192?style=for-the-badge&logo=postgresql&logoColor=white" />
  <img src="https://img.shields.io/badge/MongoDB-4EA94B?style=for-the-badge&logo=mongodb&logoColor=white" />
  <img src="https://img.shields.io/badge/SQLite-07405E?style=for-the-badge&logo=sqlite&logoColor=white" />
</p>
您还可以在此部分添加以前的工作。您可以像下面这样以表格形式添加。
我的工作经历
示例预览:
公司 1 工作时间(mm/yyyy - mm/yyyy) 位置 1 位置 1 的描述
公司 2 工作时间(mm/yyyy - mm/yyyy) 位置 2 位置 2 的描述
公司 3 工作时间(mm/yyyy - mm/yyyy) 位置 3 位置 3 的描述 代码片段:
| Company 1 | Period of work (mm/yyyy - mm/yyyy) |
|:---------:|:----------------------------------:|
| Position 1 | Description about position 1 |

| Company 2 | Period of work (mm/yyyy - mm/yyyy) |
|:---------:|:----------------------------------:|
| Position 2 | Description about position 2 |

| Company 3 | Period of work (mm/yyyy - mm/yyyy) |
|:---------:|:----------------------------------:|
| Position 3 | Description about position 3 |
除上述内容外,本部分还专门介绍您已完成、开始或感兴趣的课程/教程。您可以包含任何您认为与您的发展相关的内容。
课程/教程
示例预览:
Creative Tim 课程/教程
代码片段:
**Creative Tim Courses/Tutorials**

- [How to quickstart and launch your website using Jekyll?](https://www.creative-tim.com/blog/webdesign/quickstart-launch-website-using-jekyll)
- [How to create Scrolling Transformations for your React App?](https://www.creative-tim.com/blog/webdesign/create-scrolling-transformations-react-app)
- [How to create a single-page application using React?](https://www.creative-tim.com/blog/react/create-single-page-application-using-react)
示例预览:
YouTube 课程/教程
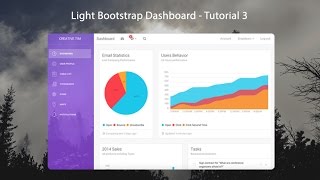
如何将 React 与 Firebase 和 Redux 结合使用:简介 ReactJS 和 Redux 教程及实际案例 使用 Light Bootstrap Dashboard 的响应式管理模板 代码片段:


YouTube courses/tutorials
[](https://www.creative-tim.com/courses "How to use React with Firebase and Redux: Introduction")
示例预览:
Udemy 课程
如何将 React 与 Firebase 和 Redux 结合使用,
通过 Webpack 4、Babel 7 和 Material Design 学习 ReactJS代码片段:
Udemy courses

[How to use React with Firebase and Redux](https://www.udemy.com/course/how-to-use-react-with-firebase-and-redux/)
[Learn ReactJS with Webpack 4, Babel 7, and Material Design](https://www.udemy.com/course/learn-reactjs-with-webpack-4-babel-7-and-material-design/)
我的项目
这是您可以展示项目的部分。您可以在这里概述您在 Github 上完成的最重要的项目。这样,访问您个人资料的人就能立即看到您掌握了哪些技能以及如何操作。
我的 Github 仓库
您可以在此处列出最好的存储库。
示例预览:


代码片段:

<img width="282" src="https://denvercoder1-github-readme-stats.vercel.app/api/pin/?username=YOUR_GITHUB_USERNAME&repo=REPO_NAME&theme=react&bg_color=273849&title_color=F85D7F&icon_color=F8D866&hide_border=true&show_icons=false" alt="github-readme-streak-stats">
我的贡献
以下是您在 Github 上的贡献。
示例预览:
代码片段:


<img align="center" src="https://github-readme-streak-stats.herokuapp.com?user=timcreative&theme=vue-dark&hide_border=true&date_format=M%20j%5B%2C%20Y%5D" alt="My github stats" />

<img align="center" src="https://github-readme-stats.vercel.app/api?username=timcreative&show_icons=true&include_all_commits=true&theme=cobalt&hide_border=true" alt="My github stats" />

<img align="center" src="https://github-readme-stats.vercel.app/api/top-langs/?username=timcreative&layout=compact&theme=cobalt&hide_border=true" />
我的最新帖子
在本部分,您可以列出博客中的最新帖子。您可以列出所有想要的内容。您可以使用链接、表情符号、强调等等。
示例预览:
- 🔥 Creative Tim Courses 为网页设计师和开发者打造的全新学习平台
- 😎 Git 教程: 如何修复 18 个常见错误
- 🙏 Docker 和 Django 如何快速启动
- ⭐️ 技术 用户体验专家在每个公司中的重要性
- 💣 Shopify 模板 10+ 最佳电子商务 Shopify 模板
代码片段:
1. **[🔥 Creative Tim Courses](https://www.creative-tim.com/blog/creative-tim/new-learning-resources-web-designers/)** <br> *New Learning Platform for Web Designers & Devs*
2. **[😎 Git Tutorial](https://www.creative-tim.com/blog/educational-tech/git-tutorial-fix-common-mistakes/)** <br> *How to Fix 18 Common Mistakes*
联系我
您可以在此处填写您的联系信息。您个人资料的访问者可以使用此处填写的详细信息与您联系。
示例预览:


代码片段:

[<img alt="Github" src="https://img.shields.io/badge/GitHub-%2312100E.svg?&style=for-the-badge&logo=Github&logoColor=white" />](https://github.com/creativetimofficial) [<img alt="Github" src="https://img.shields.io/badge/twitter-%231DA1F2.svg?&style=for-the-badge&logo=twitter&logoColor=white" />](https://twitter.com/CreativeTim)
页脚
在页脚部分,您可以添加额外信息,如版权、捐赠 URL 或订阅链接。
示例预览:
© 2021 Creative Tim,保留所有权利。用心打造更美好的网络。
https://www.creative-tim.com
代码片段:
---
<p align="center"> © 2021 Creative Tim, all rights reserved. Made with ❤️ for a better web. </p>
<p align="center">
https://www.creative-tim.com
</p>
3. Github 个人资料的额外内容
在这里,我们将向您介绍可以包含在您的自述文件中的其他元素,以使您和进入您的 Github 个人资料的人尽可能愉快。
待办事项列表
示例预览:
- 任务 1
- 任务 2
代码片段:
  - [ ] task 1
  - [x] task 2
创建简单表
如果您想在 MD 文件中创建表格,您可以非常轻松地做到这一点。您可以将所需的所有内容放入表格的单元格中,从文本和表情符号到图像和 GIF。
示例预览:
第一个标题 第二个标题 第三个标题 👉 内容单元格 1 ✅ 内容单元格 2 ⭕️ 内容单元格 3 👉 内容列 1 ✅ 内容列 2 ⭕️内容列3 👉 内容列 1 ✅ 内容列 2 ⭕️内容列3 代码片段:
First Header | Second Header | Third Header
------------ | ------------- | -------------
👉 Content cell 1 | ✅ Content cell 2 | ⭕️ Content cell 3
👉 Content column 1 | ✅ Content column 2 | ⭕️ Content column 3
👉 Content column 1 | ✅ Content column 2 | ⭕️ Content column 3
例子:


插入“支持我”部分(给我买杯咖啡)
如果您希望自己的劳动获得回报,可以访问https://www.buymeacoffee.com/并创建一个帐户,或者您可以通过自己的方式获得支持。
示例预览:
代码片段:

<a href="your-own-link-from-the-website" target="_blank"><img src="https://cdn.buymeacoffee.com/buttons/v2/default-red.png" alt="Buy Me A Coffee" width="150" ></a>
在 GitHub readme 中分享您的 Spotify 个人资料
要将 Spotify 添加到您的个人资料,我们已创建了一个免费使用的应用程序。您只需从 Spotify 帐户授予该应用程序的权限即可:https://spotify-github-profile.vercel.app/api/login
代码片段:

最后的想法
感谢您的阅读!希望我们的文章能启发您创建自己精美的 GitHub 个人资料(README)。在 GitHub 上撰写简历非常独特且细分;如果您想拥有一份精美易读、能够展现您的技能和个性的简历,我们建议您遵循以下结构。简洁的简历可以提升您脱颖而出的机会,并为您带来巨大的优势。除了结构之外,您还必须确保您的信息准确且真实。请多次检查您的代码以发现任何错误,并遵循我们的建议保持简历简洁。请记住,您的简历是您的私人物品,所以请毫不犹豫地在上面留下您的印记!此外,如果您需要一些创建开发人员简历的技巧和窍门,请查看这篇文章教程。
下载完整的简历模板。
特别感谢:
文章来源:https://dev.to/creativetim_official/how-to-create-a-fancy-github-profile-with-readme-4b1i