2025 年 React.js 微前端完整指南
计数器应用程序
容器应用
什么是微前端?
微前端风格的架构设计对于应用程序的前端的作用就像微服务对于后端的作用一样,将单片结构分解为更小的组件,然后可以在单个页面上组装。
微前端的优缺点:
优点:
- 微前端更加模块化和可重用。
- 微前端更具可扩展性。
- 微前端更易于维护。
- 独立且更快的发展。
- 测试单独的应用程序很容易。
- 不同的项目可以使用不同的前端技术(如 React、Angular、Vue.js 等)。
缺点:
- 测试整个应用程序并不容易。
- 共享代码、状态(数据)等并不容易。
模块联合(模块联合 | webpack)
模块联合允许 JavaScript 应用程序动态加载其他应用程序的代码,并在此过程中共享依赖项。如果使用联合模块的应用程序缺少联合代码所需的依赖项,Webpack 将从该联合构建源下载缺少的依赖项。
先决条件:
- 确保你已经安装了最新的 Node.js
- React.js 和 Webpack 5+ 的基本知识。
- 代码编辑器
我将在本文中创建 2 个应用程序:
- 首先:容器应用程序将用作微前端的基础。
- 第二:将在容器应用程序内呈现的计数器应用程序。
让我们从设置环境开始。我使用create-mf-app来创建一个 React 应用。
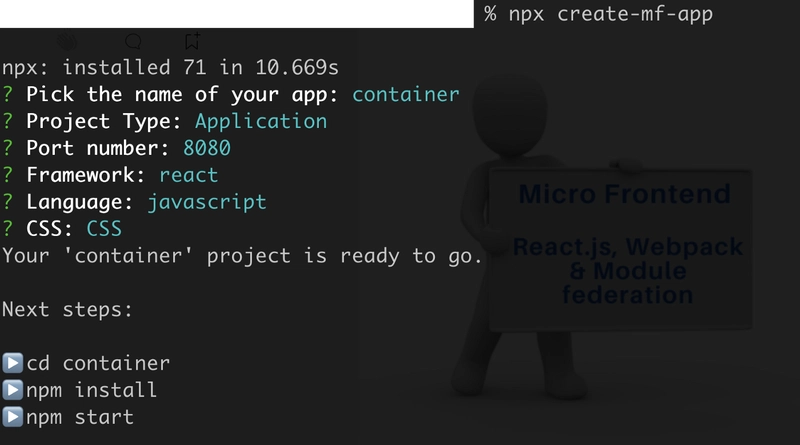
容器应用
安装
在终端上运行以下 npx 命令,使用“create-mf-app”安装并启动应用程序。我们将该应用程序称为“容器”。
npx create-mf-app
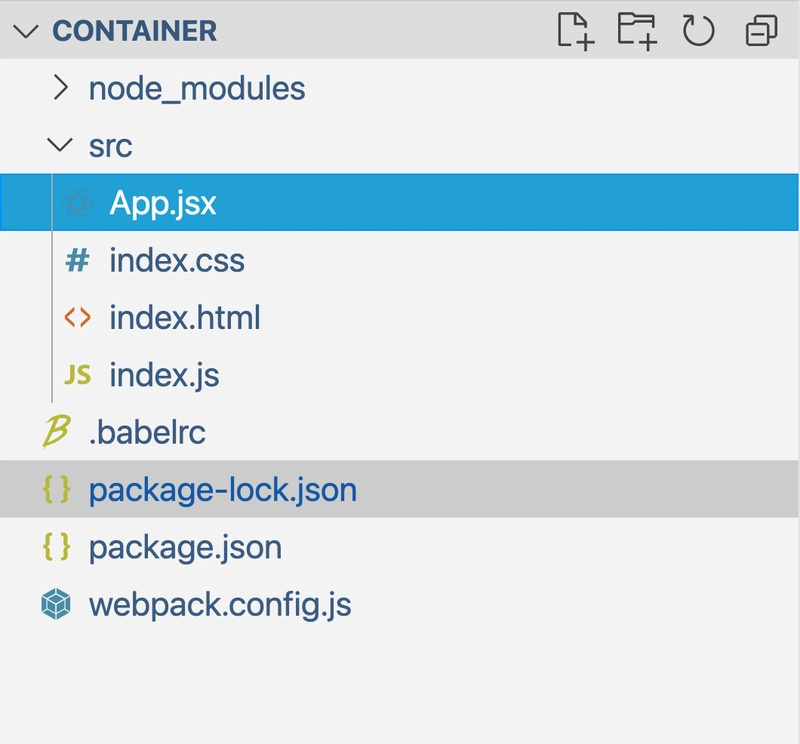
我不会深入研究文件夹结构,它类似于 create-react-app 文件夹结构。
注意:这里唯一的区别是 index.js 文件,它会动态加载应用程序。
import('./App');
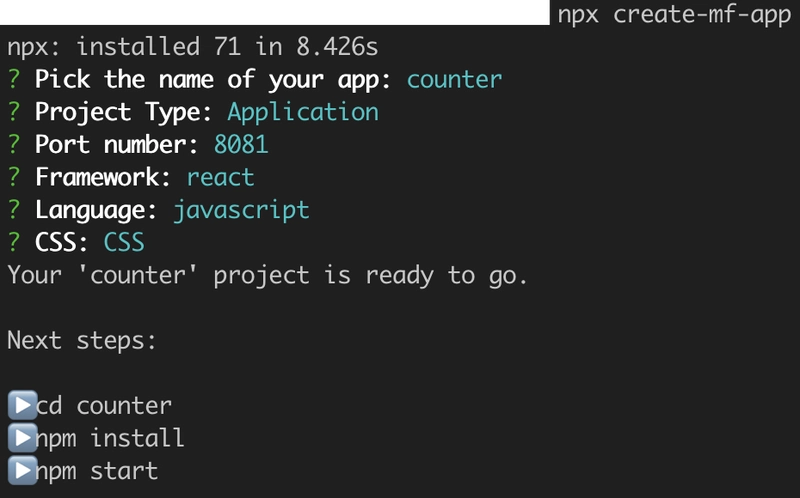
让我们使用与上述相同的步骤快速创建另一个名为 Counter 的应用程序。
计数器应用程序
npx create-mf-app
在计数器应用程序内部,我在组件文件夹中创建了一个计数器组件。
src/组件/Counter.jsx
import React, { useState } from "react";
export const Counter = () => {
    const [count, setCount] = useState(0);
    const onIncrement = () => setCount(count + 1);
    const onDecrement = () => setCount(count - 1);
    return (
      <div>
        <h1>Counter App</h1>
        <p>Current count: <strong>{count}</strong></p>
        <button onClick={onIncrement}>+</button>
        <button onClick={onDecrement}>-</button>
      </div>
    );
}
让我们更新Counter 应用内的webpack.config.js文件。将 ModuleFederationPlugin 添加到 plugins 数组中,配置如下:
webpack.config.js
const HtmlWebPackPlugin = require("html-webpack-plugin");
const ModuleFederationPlugin = require("webpack/lib/container/ModuleFederationPlugin");
const deps = require("./package.json").dependencies;
module.exports = {
  output: {
    publicPath: "http://localhost:8081/",
  },
  resolve: {
    extensions: [".tsx", ".ts", ".jsx", ".js", ".json"],
  },
  devServer: {
    port: 8081,
    historyApiFallback: true,
  },
  module: {
    rules: [
      {
        test: /\.m?js/,
        type: "javascript/auto",
        resolve: {
          fullySpecified: false,
        },
      },
      {
        test: /\.(css|s[ac]ss)$/i,
        use: ["style-loader", "css-loader", "postcss-loader"],
      },
      {
        test: /\.(ts|tsx|js|jsx)$/,
        exclude: /node_modules/,
        use: {
          loader: "babel-loader",
        },
      },
    ],
  },
  plugins: [ // This is important part
    new ModuleFederationPlugin({
      name: "counter",
      filename: "remoteEntry.js",
      remotes: {},
      exposes: {
        "./Counter": "./src/components/Counter",
      },
      shared: {
        ...deps,
        react: {
          singleton: true,
          requiredVersion: deps.react,
        },
        "react-dom": {
          singleton: true,
          requiredVersion: deps["react-dom"],
        },
      },
    }),
    new HtmlWebPackPlugin({
      template: "./src/index.html",
    }),
  ],
};
让我们了解一下每个选项的含义:
- name:远程应用程序的名称
- 文件名:计数器应用程序的入口点(remoteEntry.js)。
- 远程:在此处添加远程条目(与容器相关)
- 公开:您想要向容器应用程序公开的所有组件名称。
- 共享:容器包含您想要在容器和计数器应用程序之间共享的所有依赖项。
让我们更新容器应用程序内的webpack.config.js文件。
webpack.config.js
const HtmlWebPackPlugin = require("html-webpack-plugin");
const ModuleFederationPlugin = require("webpack/lib/container/ModuleFederationPlugin");
const deps = require("./package.json").dependencies;
module.exports = {
  output: {
    publicPath: "http://localhost:8080/",
  },
  resolve: {
    extensions: [".tsx", ".ts", ".jsx", ".js", ".json"],
  },
  devServer: {
    port: 8080,
    historyApiFallback: true,
  },
  module: {
    rules: [
      {
        test: /\.m?js/,
        type: "javascript/auto",
        resolve: {
          fullySpecified: false,
        },
      },
      {
        test: /\.(css|s[ac]ss)$/i,
        use: ["style-loader", "css-loader", "postcss-loader"],
      },
      {
        test: /\.(ts|tsx|js|jsx)$/,
        exclude: /node_modules/,
        use: {
          loader: "babel-loader",
        },
      },
    ],
  },
  plugins: [ // This is important part
    new ModuleFederationPlugin({
      name: "container",
      filename: "remoteEntry.js",
      remotes: {
        counter: "counter@http://localhost:8081/remoteEntry.js",
      },
      exposes: {},
      shared: {
        ...deps,
        react: {
          singleton: true,
          requiredVersion: deps.react,
        },
        "react-dom": {
          singleton: true,
          requiredVersion: deps["react-dom"],
        },
      },
    }),
    new HtmlWebPackPlugin({
      template: "./src/index.html",
    }),
  ],
};
注意:远程对象必须定义从远程应用程序公开的所有入口点,远程入口具有以下结构:
{ "app-name": "name@<remote-host>/remoteEntry.js" }
src/App.jsx
import React from "react";
import ReactDOM from "react-dom";
import { Counter } from 'counter/Counter';
import "./index.css";
const App = () => (
  <div className="container">
    <h1>Container App</h1>
    <Counter /> // Micro frontend app
  </div>
);
ReactDOM.render(<App />, document.getElementById("app"));
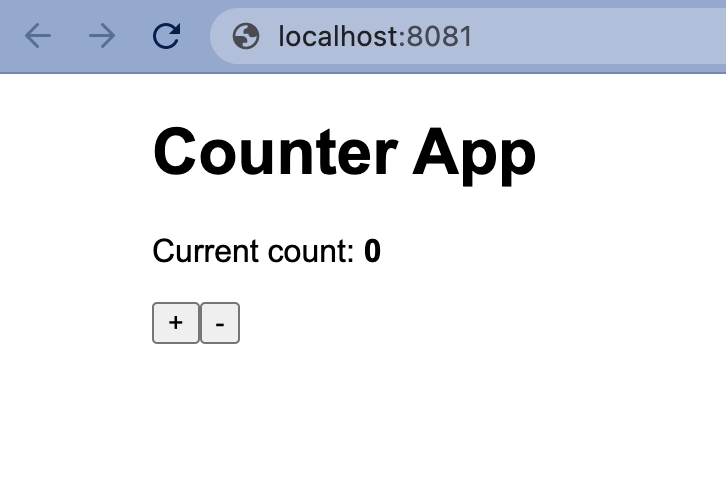
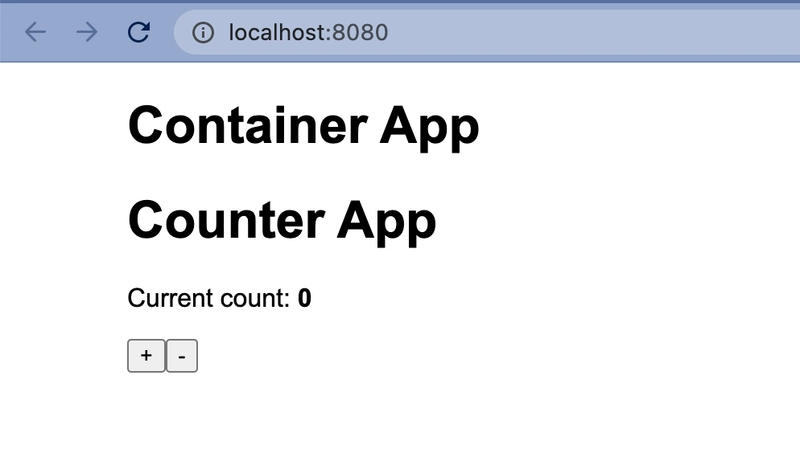
是时候运行这两个应用程序了
计数器应用程序
容器应用
Github仓库:
https://github.com/devsmitra/micro
参考:
https ://github.com/jherr/create-mf-app
有任何问题或其他信息吗?请留言。
感谢您的阅读😊
如果你还没有读过

如何使用 AbortController 取消 Javascript API 请求
Rahul Sharma ・ 2022年4月9日
关注我
Youtube Github LinkedIn Medium Stackblitz Hashnode HackerNoon
文章来源:https://dev.to/devsmitra/the-complete-guide-to-micro-frontend-with-reactjs-for-2022-36b2 后端开发教程 - Java、Spring Boot 实战 - msg200.com


