使用 React Transition Group 为你的 React 应用添加动画
在你的应用中添加功能性动画是提升用户体验的绝佳方式。如果使用得当,动画可以引导用户的注意力到应用的特定部分,强化界面内的关系,并防止用户对变化视盲。
一个可以提升用户体验的动画示例是,将某个项目添加到列表时淡入淡出。此动画的步骤可能如下所示:
- 渲染新项目。
- 准备动画所需的项目。在本例中,将其不透明度设置为
0。 - 在一段时间内将元素的不透明度从 转变为
0。1
删除该项目:
- 将该项目标记为需要删除。
- 在一段时间内将元素的不透明度从 转变为
1。0 - 转换完成后删除该元素。
管理所有这些状态可能会很麻烦,所以让我们尝试找到一个可以帮我们处理它的库。进入React Transition Group。
React Transition Group 包含一组组件,用于管理组件随时间推移的挂载和卸载状态。它不会规定组件在挂载或卸载时的行为——这部分由我们自己决定。这种极简主义让我们可以灵活地定义动画。
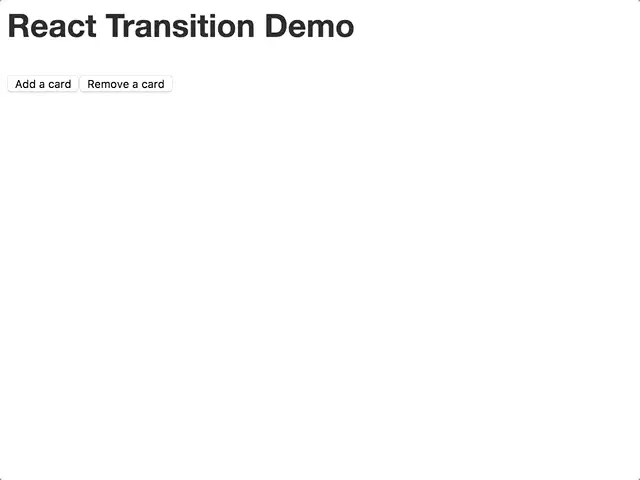
在本文中,我们将为卡片板添加过渡动画,在卡片添加到卡片板和从卡片板中删除卡片时为其添加动画。
最终结果如下:
您可以在此处观看动画的现场演示。
先决条件
使用的软件包
开始设置
在我们向应用程序添加动画之前,我们需要一个可以制作动画的应用程序!
我们要创建的应用程序相当简单,因为它只包含 3 个组件:
<Card />- 以动画方式出现和消失的组件。
<Board />- 呈现项目列表
<Card/>。
- 呈现项目列表
<Application />- 我们应用程序的根。管理要渲染的卡片的状态
<Board />,并包含用于添加和删除卡片的按钮。
- 我们应用程序的根。管理要渲染的卡片的状态
以下是这些组件的源代码:
<Card/>
function Card ({children, onRemove}) {
  return (
    <div className="card">
      {children}
      <button onClick={onRemove}>Remove</button>
    </div>
  )
}
<Board />
function Board ({children}) {
  return (
    <ul className="board">
      {children}
    </ul>
  )
}
<Application/>
class Application extends React.Component {
  constructor (props) {
    super(props)

    this.state = {
      cards: []
    }

    this.addCard = this.addCard.bind(this)
    this.removeCard = this.removeCard.bind(this)
    this.removeLastCard = this.removeLastCard.bind(this)
  }

  render () {
    const {cards} = this.state

    return (
      <main className="container">
        <h1>React Transition Demo</h1>
        <button onClick={this.addCard}>Add a card</button>
        <button onClick={this.removeLastCard}>Remove a card</button>
        <Board>
          {
            cards.map(card => {
              return (
                <li className="board__item" key={card.id}>
                  <Card onRemove={() => {
                    this.removeCard(card.id)
                  }}>{card.content}</Card>
                </li>
              )
            })
          }
        </Board>
      </main>
    )
  }

  addCard () {
    const {cards} = this.state
    const id = cards.length + 1
    const newCard = {
      id,
      content: `Card ${id}`
    }
    this.setState({
      cards: cards.concat([newCard])
    })
  }

  removeCard (id) {
    const {cards} = this.state
    this.setState({
      cards: cards.filter(card => card.id !== id)
    })
  }

  removeLastCard () {
    const {cards} = this.state
    this.setState({
      cards: cards.slice(0, -1)
    })
  }
}
您可以从 GitHub获取这些组件的样式。
如果您按原样运行此应用,您将能够添加和删除卡片(这真是太棒了!)。但是卡片弹出和消失的方式在视觉上不太美观。让我们通过添加过渡动画来解决这个问题。
添加动画
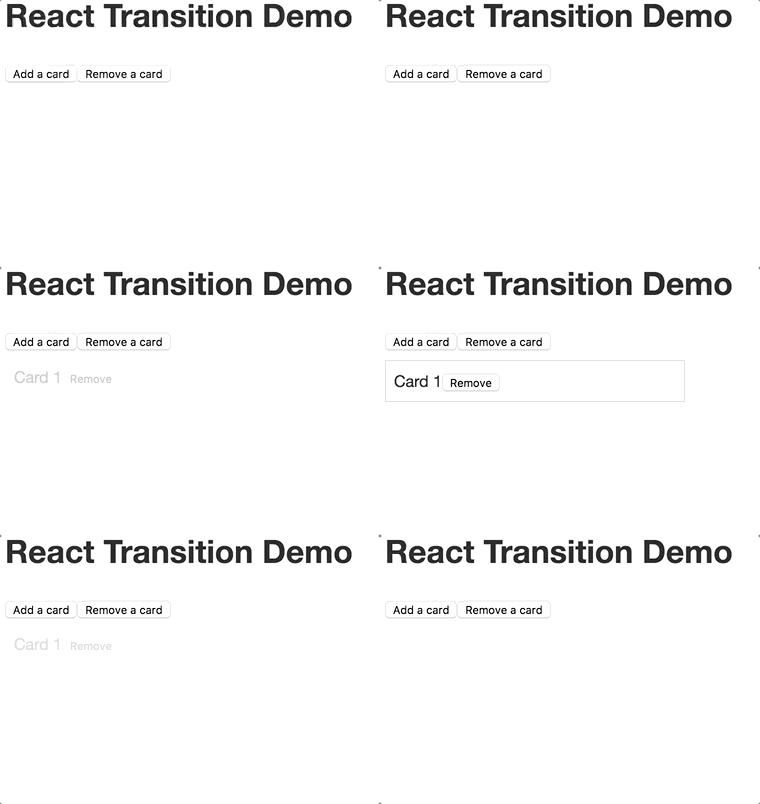
我们希望卡片的添加和移除操作能够流畅流畅。我们可以通过在卡片的添加和移除过程中淡入淡出和滑动来实现,如下所示:
但在我们可以为卡片转换制作动画之前,我们需要一种方法来跟踪卡片在添加和移除时的状态<Board />,并在卡片进入和退出时运行适当的动画。
卡片进入动画应在卡片添加到列表后立即运行。卡片退出动画应在卡片从列表中移除时运行,但卡片应保留在 DOM 中,直到动画结束。动画完成后,卡片应从 DOM 中移除。
这听起来工作量很大。与其自己实现这个功能,不如使用<TransitionGroup />React Transition Group 提供的组件。
使用<TransitionGroup />
<TransitionGroup />应该包裹要进行动画处理的元素列表。因此,让我们将<Board />的 render 方法中的组件替换为。<Application /><TransitionGroup />
默认情况下<TransitionGroup />会将其子元素列表包装在 a 中<span />,但我们可以<Board />通过设置componentprop 让它将我们的卡片包装在 a 中:
import TransitionGroup from 'react-transition-group/TransitionGroup'

// ...

<TransitionGroup component={Board}>
  {
    cards.map(card => {
      return (
    <li className="board__item" key={card.id}>
      <Card onRemove={() => {
        this.removeCard(card.id)
          }}>{card.content}</Card>
    </li>
      )
    })
  }
</TransitionGroup>

// ...
但是,如果你运行应用并开始添加卡片,你会发现卡片仍然像以前一样弹出和移除。这是因为我们还没有定义卡片在添加和移除时的行为。为了实现这一点,我们需要将每张卡片包装在一个<Transition />组件中。
使用<Transition />
React Transition Group 中的组件<Transition />允许我们定义组件在渲染或即将从 DOM 中删除时的行为。
组件的添加或移除状态通过inprop 来处理。该 prop 的boolean值用于指示组件是否显示。值为true表示组件显示,false值为 表示组件隐藏。
的值in由 提供,当添加组件时<TransitionGroup />会将此 prop 设置为,当删除组件时会设置为 。truefalse
prop值的变化in会在一段时间内触发一系列状态变化。这些状态变化使我们能够通过在过渡状态变化时对组件应用不同的样式来为其添加动画效果。
我们将创建一个<FadeAndSlideTransition />组件,可用于在组件安装和卸载时应用过渡动画。
以下是该组件的代码:
import Transition from 'react-transition-group/Transition'

// <FadeAndSlideTransition /> is a component that wraps children in
// a <Transition /> component.
// 'children' is the element to be animated.
// 'duration' is the duration of the animation in milliseconds.
// The `in` prop will be provided by <TransitionGroup />.
function FadeAndSlideTransition ({children, duration, in: inProp}) {
  // Styles to set on children which are necessary in order
  // for the animation to work.
  const defaultStyle = {
    // Transition "opacity" and "transform" CSS properties.
    // Set duration of the transition to the duration of the animation.
    transition: `${duration}ms ease-in`,
    transitionProperty: 'opacity, transform'
  }

  // Styles that will be applied to children as the status
  // of the transition changes. Each key of the
  // 'transitionStyles' object matches the name of a
  // 'status' provided by <Transition />.
  const transitionStyles = {
    // Start with component invisible and shifted up by 10%
    entering: {
      opacity: 0,
      transform: 'translateY(-10%)'
    },
    // Transition to component being visible and having its position reset.
    entered: {
      opacity: 1,
      transform: 'translateY(0)'
    },
    // Fade element out and slide it back up on exit.
    exiting: {
      opacity: 0,
      transform: 'translateY(-10%)'
    }
  }

  // Wrap child node in <Transition />.
  return (
    <Transition in={inProp} timeout={{
      // Set 'enter' timeout to '0' so that enter animation
      // will start immediately.
      enter: 0,

      // Set 'exit' timeout to 'duration' so that the 'exited'
      // status won't be applied until animation completes.
      exit: duration
    }}>
      {
        // Children is a function that receives the current
        // status of the animation.
        (status) => {
          // Don't render anything if component has 'exited'.
          if (status === 'exited') {
            return null
          }

          // Apply different styles to children based
          // on the current value of 'status'.
          const currentStyles = transitionStyles[status]
          return React.cloneElement(children, {
            style: Object.assign({}, defaultStyle, currentStyles)
          })
        }
      }
    </Transition>
  )
}
<Card />我们可以通过将每个卡片包装在一个组件中来将淡入淡出和滑动过渡应用到卡片上<FadeAndSlideTransition />:
// render method of <Application />
<TransitionGroup component={Board}>
  {
    cards.map(card => {
      return (
        <FadeAndSlideTransition duration={150} key={card.id}>
          <li className="board__item">
            <Card onRemove={() => {
              this.removeCard(card.id)
            }}>{card.content}</Card>
          </li>
        </FadeAndSlideTransition>
      )
    })
  }
</TransitionGroup>
如果您现在重新运行该应用程序,您将看到在卡片被添加和从板上删除时将应用漂亮的动画。
以下是整个工作原理的详细说明。
每当添加一张卡时:
-
<TransitionGroup />将渲染一个新<FadeAndSlideTransition />组件,该组件渲染<Card />包含在 中的<Transition />。 -
每个都
<Card />立即transition设置了其样式,这将导致opacity和transform样式在每次更改时都以动画形式呈现。 -
in的 prop设置<FadeAndSlideTransition />为true,这将导致组件children的函数<Transition />以 的状态被调用entering。 中的样式transitionStyles.entering随后被应用到<Card />。 -
由于进入动画的超时设置为
0,children因此将立即再次调用,状态为entered。这将更新<Card />的opacity和transform样式,从而触发 CSS 过渡。
每当一张牌被移除时:
<TransitionGroup />将卡片在其中呈现的组件in的 prop设置为。<FadeAndSlideTransition />falsechildren组件的函数将以<Transition />的状态被调用exiting。exiting样式被应用到,<Card />这会导致它淡出并向上滑动。duration动画的 结束后,children将被调用,状态为exited。我们 returnnull以便<Card />从 DOM 中移除 。
应用内联样式只是创建动画的一种方法。你还可以使用函数status中的变量<Transition /> children来应用 CSS 类:
<Transition in={inProp} timeout={{
  enter: 0,
  exit: duration
  }}>
    {
      (status) => {
        // Don't render anything if component has "exited".
        if (status === 'exited') {
          return null
        }

        return <Card className={`fade fade-${status}`} />
      }
   }
</Transition>
然后,您将为每个状态创建一个 CSS 类:
.fade {
  transition: ease-in 0.15s;
  transition-property: opacity, transform;
}

.fade-entering {
  opacity: 0
  transform: translateY(-10%);
}
因为<Transition />只管理动画的状态,所以我们可以自由地以我们认为合适的方式实现动画。希望这两个示例足以帮助您开始制作自己的动画。
如果您想查看带有一些代码的工作示例,您可以在 GitHub 上查看此示例的源代码。
如果您想了解有关 React Transition Group 的更多信息,请查看GitHub 存储库和文档。
鏂囩珷鏉ユ簮锛�https://dev.to/underdogio/adding-animations-to-your-react-app-with-react-transition-group 后端开发教程 - Java、Spring Boot 实战 - msg200.com

