使用无服务器在 AWS Lambda 上部署 Django 项目(第 1 部分)
BLUF
现在你位于 container001 的 bash shell 中
BLUF
作为上一篇探讨了关于云中 Django 最常见问题的文章的后续,现在,我想帮助您在 Amazon Web Services 上部署您的 Django 应用,并让您更加独立于其他开发人员(例如 DevOps 和 CloudOps 工程师)。实现这一点有很多方法,但我想展示其中一种,并希望您最终能够使用无服务器架构在 AWS Lambda 上部署您的 Django 应用。
我受到Daniil Bratchenko 的文章《不要让软件供应商决定您的业务流程》的启发,开始撰写这篇博客文章。
由于每个公司都有其独特性,找到适合所有业务流程的软件非常困难。因此,许多公司决定成立专门的团队,根据其特定的业务流程和需求构建软件。就我个人而言,在 AWS Lambda 上使用无服务器技术开发 Django 应用是这类情况的理想解决方案。
此外,您还可以使用此方法在项目早期阶段对项目进行原型设计。
使用这种方法有一些优点和缺点。
使用AWS Lambdas的优势:
- 成本(与 AWS EC2 相比,AWS Lambda 更便宜);
- 运行和维护简单;
- 可扩展性;
- 快速部署。
缺点:
- AWS Lambda 需要一些额外的时间来运行您的应用程序;
- 部署包的大小限制;
- API 网关限制(30 秒超时,6 Mb 响应主体大小);
- 如果请求太多,其成本可能会比 AWS EC2 更高。
准备 AWS 基础设施
您可能已经了解 Web 应用程序所需的各种 AWS 服务。为了在 AWS Lambdas 上部署 Django 项目,您需要准备好 AWS 基础设施。
以下是我在 Django 项目中使用的 AWS 服务列表:
- Lambdas 运行我们的 wsgi 应用程序
- API 网关处理 HTTP 请求并将其发送到 Lambdas
- 用于 Lambda 部署和存储静态文件的 S3 存储桶
- CloudFront 分发,用于从 S3 存储桶提供静态文件
- RDS 数据库(我使用 Postgres)
- 带有子网的 VPC
- EC2 安全组
- 角色和策略的 IAM
- 用于日志的 CloudWatch
AWS Lambdas 和 API 网关将由 Serverless 自动创建。我将在后续博客文章中尝试引导您完成创建所有必要 AWS 资源的过程。
创建 Django 项目
Djangostartproject命令允许我们创建一个简单的 Django 项目,除此之外,还有一些很棒的 Cookiecutter 项目可以帮助你轻松启动项目(例如Cookiecutter Django)。在此示例中,我使用默认的django-admin startprojectcli 命令。
pip install django
django-admin startproject django_aws_lambda
配置要求
有很多选项可以存储你的项目需求,例如requirements.txt,,Pipfile。pyproject.toml你可以选择其中一个选项。我requirements.txt在这里使用。
requirements.txt在项目的根目录中创建文件- 将以下库添加到
requirements.txt文件:
boto3==1.17.17
Collectfast==2.2.0
Django==3.1.7
django-environ==0.4.5
psycopg2-binary==2.8.6
Werkzeug==1.0.1
- 创建并激活虚拟环境
选择您喜欢的工具来管理虚拟环境(如 conda、pyenv、virtualenv 等)
- 安装要求
pip install -r requirements.txt
创建helloDjango 应用
startapp使用Django 命令创建应用程序
python manage.py startapp hello
- 创建
templates文件夹
mkdir templates
- 使用以下行在文件夹中创建
index.html文件:templates
{% load static %}

<!DOCTYPE html>
<html lang="en">
<head>
    <meta charset="UTF-8">
    <title>Greeting</title>
</head>
<body>
<div>
  <h1>Hello {{ name }}</h1>
<img src="{% static 'django.jpeg' %}" alt="Django" style="width: 20%">
</div>
</body>
</html>
static在项目根目录中创建文件夹
mkdir static
-
static例如将图像文件添加到文件夹django.jpeg -
更新
hello/views.py
from django.shortcuts import render


# Create your views here.
def hello(request, resource=None):

    return render(request, "index.html", {"name": resource or 'World'})
配置环境变量:
.env在项目根目录中创建文件- 配置以下变量:
STAGE='production'
DB_HOST=<your database host>
DB_USER=<your database user name>
DB_PASSWORD=<your database password>
DB_NAME=<your database name>
DJANGO_SECRET_KEY=<some django secret key>
AWS_S3_CDN_DOMAIN=<your Cloud Front distribution, like: `<distribution id>.cloudfront.net`>
AWS_S3_REGION_NAME=<your AWS region>
AWS_STORAGE_BUCKET_NAME=<AWS s3 bucket for static files with punlic policies>
DEPLOYMENT_BUCKET=<AWS s3 bucket for deployment>
AWS_KEY_ID=<your AWS Key Id>
AWS_SECRET=<your AWS Secret>
DJANGO_ADMIN_URL=<Django admin url>
DJANGO_ALLOWED_HOSTS=<list of allowed hosts separated by coma>
为本地开发和生产创建配置
- 使用以下行在文件夹
settings.py中更新:django_aws_lambda
"""
Django settings for django_aws_lambda project.

Generated by 'django-admin startproject' using Django 1.11.29.

For more information on this file, see
https://docs.djangoproject.com/en/1.11/topics/settings/

For the full list of settings and their values, see
https://docs.djangoproject.com/en/1.11/ref/settings/
"""

from pathlib import Path

import environ

ROOT_DIR = Path(__file__).resolve(strict=True).parent.parent
env = environ.Env()
READ_DOT_ENV_FILE = env.bool('DJANGO_READ_DOT_ENV_FILE', default=True)
if READ_DOT_ENV_FILE:
    env.read_env(str(ROOT_DIR / '.env'))

# Quick-start development settings - unsuitable for production
# See https://docs.djangoproject.com/en/1.11/howto/deployment/checklist/

# SECURITY WARNING: keep the secret key used in production secret!
SECRET_KEY = env('DJANGO_SECRET_KEY', default='<some-secured-key>')
# SECURITY WARNING: don't run with debug turned on in production!
DEBUG = False

ALLOWED_HOSTS = env.list('DJANGO_ALLOWED_HOSTS', default=['127.0.0.1', 'localhost'])
INSTALLED_APPS = [
    'django.contrib.admin',
    'django.contrib.auth',
    'django.contrib.contenttypes',
    'django.contrib.sessions',
    'django.contrib.messages',
    'django.contrib.staticfiles',
    'hello',
]

MIDDLEWARE = [
    'django.middleware.security.SecurityMiddleware',
    'django.contrib.sessions.middleware.SessionMiddleware',
    'django.middleware.common.CommonMiddleware',
    'django.middleware.csrf.CsrfViewMiddleware',
    'django.contrib.auth.middleware.AuthenticationMiddleware',
    'django.contrib.messages.middleware.MessageMiddleware',
    'django.middleware.clickjacking.XFrameOptionsMiddleware',
]

ROOT_URLCONF = 'django_aws_lambda.urls'

TEMPLATES = [
    {
        'BACKEND': 'django.template.backends.django.DjangoTemplates',
        'DIRS': [
            str(ROOT_DIR / 'templates'),
            str(ROOT_DIR / 'staticfiles'),
        ],
        'OPTIONS': {
            'loaders': [
                'django.template.loaders.filesystem.Loader',
                'django.template.loaders.app_directories.Loader',
            ],
            'context_processors': [
                'django.template.context_processors.debug',
                'django.template.context_processors.request',
                'django.contrib.auth.context_processors.auth',
                'django.template.context_processors.i18n',
                'django.template.context_processors.media',
                'django.template.context_processors.static',
                'django.template.context_processors.tz',
                'django.contrib.messages.context_processors.messages',
            ],
        },
    },
]

WSGI_APPLICATION = 'django_aws_lambda.wsgi.application'


# Database
# https://docs.djangoproject.com/en/3.0/ref/settings/#databases

DATABASES = {
    'default': {
        'ENGINE': 'django.db.backends.sqlite3',
        'NAME': ROOT_DIR / "db.sqlite3",
    }
}


# Password validation
# https://docs.djangoproject.com/en/3.0/ref/settings/#auth-password-validators
AUTH_PASSWORD_VALIDATORS = [
    {
        'NAME': 'django.contrib.auth.password_validation.UserAttributeSimilarityValidator',
    },
    {
        'NAME': 'django.contrib.auth.password_validation.MinimumLengthValidator',
    },
    {
        'NAME': 'django.contrib.auth.password_validation.CommonPasswordValidator',
    },
    {
        'NAME': 'django.contrib.auth.password_validation.NumericPasswordValidator',
    },
]


# Internationalization
# https://docs.djangoproject.com/en/1.11/topics/i18n/

LANGUAGE_CODE = 'en-us'

TIME_ZONE = 'UTC'

USE_I18N = True

USE_L10N = True

USE_TZ = True


# Static files (CSS, JavaScript, Images)
# https://docs.djangoproject.com/en/1.11/howto/static-files/

STATIC_ROOT = str(ROOT_DIR / 'staticfiles')
STATIC_URL = '/static/'

STATICFILES_DIRS = [str(ROOT_DIR / 'static')]
STATICFILES_FINDERS = [
    'django.contrib.staticfiles.finders.FileSystemFinder',
    'django.contrib.staticfiles.finders.AppDirectoriesFinder',
]
MEDIA_ROOT = str(ROOT_DIR / 'media')
MEDIA_URL = '/media/'
ADMIN_URL = env('DJANGO_ADMIN_URL')
- 在与以下文件夹同级的文件夹中创建
local.py和production.py文件django_aws_lambdasettings.py - 添加以下几行到
local.py:
from .settings import *  # noqa


DEBUG = True
- 添加以下几行到
production.py:
from .settings import *  # noqa

DEBUG = False
DATABASES["default"] = {
    'ENGINE': 'django.db.backends.postgresql',
    'NAME': env("DB_NAME"),
    'USER': env("DB_USER"),
    'PASSWORD': env("DB_PASSWORD"),
    'HOST': env("DB_HOST"),
    'PORT': '5432',
}
DATABASES["default"]["ATOMIC_REQUESTS"] = True  # noqa F405
DATABASES["default"]["CONN_MAX_AGE"] = env.int("CONN_MAX_AGE", default=60)  # noqa F405
SECURE_PROXY_SSL_HEADER = ("HTTP_X_FORWARDED_PROTO", "https")
SECURE_SSL_REDIRECT = env.bool("DJANGO_SECURE_SSL_REDIRECT", default=False)
SESSION_COOKIE_SECURE = True
CSRF_COOKIE_SECURE = True
SECURE_HSTS_SECONDS = 60
SECURE_HSTS_INCLUDE_SUBDOMAINS = env.bool("DJANGO_SECURE_HSTS_INCLUDE_SUBDOMAINS", default=True)
SECURE_HSTS_PRELOAD = env.bool("DJANGO_SECURE_HSTS_PRELOAD", default=True)
SECURE_CONTENT_TYPE_NOSNIFF = env.bool("DJANGO_SECURE_CONTENT_TYPE_NOSNIFF", default=True)
INSTALLED_APPS += ["storages"]  # noqa F405
AWS_KEY = env("AWS_KEY_ID")
AWS_SECRET = env("AWS_SECRET")
AWS_STORAGE_BUCKET_NAME = env("AWS_STORAGE_BUCKET_NAME")
AWS_QUERYSTRING_AUTH = False
_AWS_EXPIRY = 60 * 60 * 24 * 7
AWS_S3_OBJECT_PARAMETERS = {"CacheControl": f"max-age={_AWS_EXPIRY}, s-maxage={_AWS_EXPIRY}, must-revalidate"}
AWS_S3_REGION_NAME = env("AWS_S3_REGION_NAME", default=None)
AWS_S3_CUSTOM_DOMAIN = env("DJANGO_AWS_S3_CUSTOM_DOMAIN", default=None)
aws_s3_domain = AWS_S3_CUSTOM_DOMAIN or f"{AWS_STORAGE_BUCKET_NAME}.s3.amazonaws.com"
STATICFILES_STORAGE = "django_aws_lambda.utils.StaticRootS3Boto3Storage"
COLLECTFAST_STRATEGY = "collectfast.strategies.boto3.Boto3Strategy"
STATIC_URL = f"https://{aws_s3_domain}/static/"
DEFAULT_FILE_STORAGE = "django_aws_lambda.utils.MediaRootS3Boto3Storage"
MEDIA_URL = f"https://{aws_s3_domain}/media/"
MEDIAFILES_LOCATION = "/media"

STATICFILES_LOCATION = "/static"
TEMPLATES[-1]["OPTIONS"]["loaders"] = [  # type: ignore[index] # noqa F405
    (
        "django.template.loaders.cached.Loader",
        [
            "django.template.loaders.filesystem.Loader",
            "django.template.loaders.app_directories.Loader",
        ],
    )
]
- 使用以下行更新文件夹
wsgi.py中的文件:django_aws_lambda
"""
WSGI config for django_aws_lambda project.

It exposes the WSGI callable as a module-level variable named ``application``.

For more information on this file, see
https://docs.djangoproject.com/en/1.11/howto/deployment/wsgi/
"""

"""
WSGI config for django_aws_lambda project.

It exposes the WSGI callable as a module-level variable named ``application``.

For more information on this file, see
https://docs.djangoproject.com/en/3.0/howto/deployment/wsgi/
"""

import os

from django.core.wsgi import get_wsgi_application

os.environ.setdefault('DJANGO_SETTINGS_MODULE', 'django_aws_lambda.production')

application = get_wsgi_application()
- 使用以下行更新文件夹
urls.py中的文件:django_aws_lambda
"""django_aws_lambda URL Configuration

The `urlpatterns` list routes URLs to views. For more information please see:
    https://docs.djangoproject.com/en/3.0/topics/http/urls/
Examples:
Function views
    1. Add an import:  from my_app import views
    2. Add a URL to urlpatterns:  path('', views.home, name='home')
Class-based views
    1. Add an import:  from other_app.views import Home
    2. Add a URL to urlpatterns:  path('', Home.as_view(), name='home')
Including another URLconf
    1. Import the include() function: from django.urls import include, path
    2. Add a URL to urlpatterns:  path('blog/', include('blog.urls'))
"""
from django.contrib import admin
from django.urls import path

from hello.views import hello

urlpatterns = [
    path('admin/', admin.site.urls),
    path('', hello),
    path('<path:resource>', hello),
]
manage.py使用以下几行进行更新:
#!/usr/bin/env python
"""Django's command-line utility for administrative tasks."""
import os
import sys


def main():
    os.environ.setdefault('DJANGO_SETTINGS_MODULE', 'django_aws_lambda.production')
    try:
        from django.core.management import execute_from_command_line
    except ImportError as exc:
        raise ImportError(
            "Couldn't import Django. Are you sure it's installed and "
            "available on your PYTHONPATH environment variable? Did you "
            "forget to activate a virtual environment?"
        ) from exc
    execute_from_command_line(sys.argv)


if __name__ == '__main__':
    main()
utils在里面创建一个文件夹django_aws_lambda- 使用以下行在文件夹内创建
storages.py文件:utils
from storages.backends.s3boto3 import S3Boto3Storage


class StaticRootS3Boto3Storage(S3Boto3Storage):
    location = "static"
    default_acl = "public-read"


class MediaRootS3Boto3Storage(S3Boto3Storage):
    location = "media"
    file_overwrite = False
在本地运行 Django 项目
- 使用 Django 本地配置文件的路径设置环境变量
export DJANGO_SETTINGS_MODULE=django_aws_lambda.local
- 迁移数据库更改
python manage.py migrate
- 在数据库中创建超级用户
python manage.py createsuperuser
然后提供用户名、用户电子邮件、密码并确认密码
- 收集静态文件
python manage.py collectstatic
- 本地运行服务器
python manage.py runserver
-
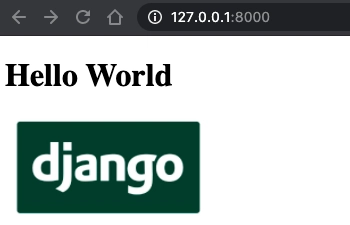
转到http://127.0.0.1:8000/你会看到:
-
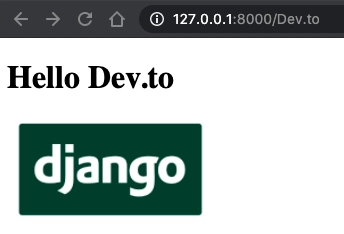
转到http://127.0.0.1:8000/Dev.to你会看到以下内容:


创建无服务器配置
- 初始化 npm:
npm init
- 安装无服务器
npm install -g serverless
- 安装无服务器插件
npm install -P serverless-dotenv-plugin
npm install -P serverless-prune-plugin
npm install -P serverless-python-requirements
npm install -P serverless-wsgi
- 使用以下配置创建 serverless.yaml 文件:
service: django-aws-lambda

plugins:
  - serverless-dotenv-plugin
  - serverless-prune-plugin
  - serverless-python-requirements
  - serverless-wsgi
useDotenv: true

custom:
  dotenv:
    logging: false
  pythonRequirements:
    dockerizePip: non-linux
    zip: true
    fileName: requirements.txt
  stage: ${env:STAGE}
  wsgi:
    app: django_aws_lambda.wsgi.application
    packRequirements: false
  prune:
    automatic: true
    number: 3

functions:
  - app:
      handler: wsgi_handler.handler
      events:
        - http: ANY /
        - http: ANY /{proxy+}
      timeout: 30

provider:
  name: aws
  role: arn:aws:iam::<role_id>:role/<role_name>
  profile: <your-profile-name>  # make sure that you configured aws profile using `aws configure --profile <your-profile-name>`
  region: us-east-1
  runtime: python3.8
  versionFunctions: false
  stage: ${env:STAGE}
  timeout: 60
  vpc:
    securityGroupIds:
      - <your-security-group-id>
      - <your-security-group-id>
    subnetIds:
      - <your-subnet-id>
      - <your-subnet-id>
  deploymentBucket:
    name: ${env:DEPLOYMENT_BUCKET}
  apiGateway:
    shouldStartNameWithService: true
  lambdaHashingVersion: 20201221

package:
  individually:
    true
  exclude:
    - .env
    - .git/**
    - .github/**
    - .serverless/**
    - static/**
    - .cache/**
    - .pytest_cache/**
    - node_modules/**
使用 Docker 通过无服务器将您的 Django 项目部署到 AWS Lambda
- 运行 Amazon Linux 2 docker 镜像:
docker run -it -v $(pwd):/root/src/ -v /Users/<your_user>/.aws:/root/.aws amazonlinux:latest bash
- 安装必要的 Unix 依赖项:
yum install sudo -y
sudo yum install -y gcc openssl-devel bzip2-devel libffi-devel wget tar sqlite-devel gcc-c++ make
- 安装 node.js 版本 14:
curl -sL https://rpm.nodesource.com/setup_14.x | sudo -E bash -
sudo yum install -y nodejs
- 安装 Python 3.8.7:
cd /opt
sudo wget https://www.python.org/ftp/python/3.8.7/Python-3.8.7.tgz
sudo tar xzf Python-3.8.7.tgz
cd Python-3.8.7
sudo ./configure --enable-optimizations
sudo make altinstall
sudo rm -f /opt/Python-3.8.7.tgz
- 创建 python 和 pip 别名:
alias python='python3.8'
alias pip='pip3.8'
- 更新 pip 和 setuptools:
pip install --upgrade pip setuptools
- 安装无服务器:
npm install -g serverless
- 移动到项目目录
cd /root/src/
- 在 Docker 容器内安装要求:
pip install -r requirements.txt
- 使用 django 生产配置文件的路径设置环境变量
export DJANGO_SETTINGS_MODULE=django_aws_lambda.production
- 迁移数据库更改
python manage.py migrate
- 在数据库中创建超级用户
python manage.py createsuperuser
然后提供用户名、用户电子邮件、密码并确认密码
- 将静态文件收集到 AWS S3 存储桶
python manage.py collectstatic
如果你
NoCredentialsError从中获取botocore,则应添加到环境变量中AWS_PROFILE:
export AWS_PROFILE=<your-aws-profile-name>
- 从 package.json 安装无服务器包
npm install
- 使用无服务器将您的 Django 项目部署到 AWS Lambda
serverless deploy -s production
您的回复将如下所示:
Serverless: Adding Python requirements helper to ....
Serverless: Generated requirements from /root/src/requirements.txt in /root/src/.serverless/requirements.txt...
Serverless: Installing requirements from /root/.cache/serverless-python-requirements/ ...
Serverless: Using download cache directory /root/.cache/serverless-python-requirements/downloadCacheslspyc
Serverless: Running ...
Serverless: Zipping required Python packages for ....
Serverless: Using Python specified in "runtime": python3.8
Serverless: Packaging Python WSGI handler...
Serverless: Packaging service...
Serverless: Excluding development dependencies...
Serverless: Removing Python requirements helper from ....
Serverless: Injecting required Python packages to package...
Serverless: Uploading CloudFormation file to S3...
Serverless: Uploading artifacts...
Serverless: Uploading service app.zip file to S3 (60.48 MB)...
Serverless: Validating template...
Serverless: Updating Stack...
Serverless: Checking Stack update progress...
..........
Serverless: Stack update finished...
Service Information
service: <your-serverless-service-name>
stage: production
region: <your-aws-region>
stack: <your-serverless-service-name>-pronduction
resources: 8
api keys:
  None
endpoints:
  ANY - https://<some-id>.execute-api.<your-aws-region>.amazonaws.com/production
  ANY - https://<some-id>.execute-api.<your-aws-region>.amazonaws.com/production/{proxy+}
functions:
  app: <your-serverless-service-name>-production-app
layers:
  None
Serverless: Prune: Running post-deployment pruning
Serverless: Prune: Querying for deployed function versions
Serverless: Prune: <your-serverless-service-name>-production-app has 3 additional versions published and 0 aliases, 0 versions selected for deletion
Serverless: Prune: Pruning complete.
Serverless: Removing old service artifacts from S3...

**************************************************************************************************************************************
Serverless: Announcing Metrics, CI/CD, Secrets and more built into Serverless Framework. Run "serverless login" to activate for free..
**************************************************************************************************************************************
现在,您的 Django 项目将通过以下 URL 访问:https://<some-id>.execute-api.<your-aws-region>.amazonaws.com/production
恭喜!
这是包含本博文中显示的代码的GitHub 存储库的链接。
如果您想了解有关 AWS Lambdas 上的 Django 项目的更多信息,请在 Twitter 上关注我(@vadim_khodak),我计划撰写一篇文章,展示如何为这个 Django 项目创建所有必要的 AWS 资源,如何将 React.js 客户端添加到 Django 项目等等。
鏂囩珷鏉ユ簮锛�https://dev.to/vaddimart/deploy-django-app-on-aws-lambda-using-serverless-part-1-1i90