使用 Puppeteer 和 React 构建交互式屏幕共享应用程序🤯
这篇文章是关于什么的?
您希望让用户能够通过您的系统浏览网页并感觉就像一个真正的浏览器一样。
我为什么要写这篇文章?
长期以来,我一直尝试创建一种让会员通过网页填写详细信息的注册方式。我搜索了很多可以实现的开源库,但一无所获。所以我决定自己实现它。
我们该怎么做呢?
在本文中,我将使用 Puppeteer 和 ReactJS。Puppeteer
是 一个 Node.js 库,可以自动执行多项浏览器操作,例如表单提交、抓取单页应用程序、UI 测试,以及生成网页的屏幕截图和 PDF 版本。
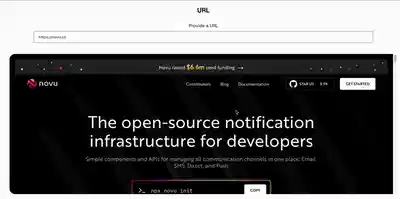
我们将使用 Puppeteer 打开一个网页,将每一帧的截图发送到客户端(React),并通过点击图片将操作反映到 Puppeteer 中。首先,让我们设置项目环境。
Novu——第一个开源通知基础设施
简单介绍一下我们。Novu 是第一个开源通知基础设施。我们主要负责管理所有产品通知。通知可以是应用内通知(类似于开发者社区的Websockets中的铃铛图标)、电子邮件、短信等等。
如果你能给我们一颗星,我会非常高兴!这会帮助我每周写更多文章🚀
https://github.com/novuhq/novu
如何使用 Socket.io 和 React.js 创建实时连接
在这里,我们将为屏幕共享应用设置项目环境。您还将学习如何将 Socket.io 添加到 React 和 Node.js 应用程序中,以及如何通过 Socket.io 连接两个开发服务器以实现实时通信。
创建包含两个名为客户端和服务器的子文件夹的项目文件夹。
mkdir screen-sharing-app
cd screen-sharing-app
mkdir client server
通过终端导航到客户端文件夹并创建一个新的 React.js 项目。
cd client
npx create-react-app ./
安装 Socket.io 客户端 API 和 React Router。React Router 是一个 JavaScript 库,它使我们能够在 React 应用程序中的页面之间导航。
npm install socket.io-client react-router-dom
从 React 应用中删除多余的文件(例如徽标和测试文件),并更新App.js文件以显示如下所示的 Hello World。
function App() {
    return (
        <div>
            <p>Hello World!</p>
        </div>
    );
}
export default App;
导航到服务器文件夹并创建一个package.json文件。
cd server & npm init -y
安装 Express.js、CORS、Nodemon 和 Socket.io 服务器 API。
Express.js 是一个快速、简约的框架,它提供了多种用于在 Node.js 中构建 Web 应用程序的功能。CORS 是一个 Node.js包 ,允许不同域之间进行通信。
Nodemon 是一个 Node.js 工具,它在检测到文件更改后会自动重启服务器,而 Socket.io 允许我们在服务器上配置实时连接。
npm install express cors nodemon socket.io
创建一个index.js文件——Web 服务器的入口点。
touch index.js
使用 Express.js 设置一个简单的 Node.js 服务器。下面的代码片段会在浏览器中访问时返回一个 JSON 对象http://localhost:4000/api。
//index.js
const express = require("express");
const app = express();
const PORT = 4000;

app.use(express.urlencoded({ extended: true }));
app.use(express.json());

app.get("/api", (req, res) => {
    res.json({
        message: "Hello world",
    });
});

app.listen(PORT, () => {
    console.log(`Server listening on ${PORT}`);
});
导入 HTTP 和 CORS 库以允许客户端和服务器域之间进行数据传输。
const express = require("express");
const app = express();
const PORT = 4000;

app.use(express.urlencoded({ extended: true }));
app.use(express.json());

//New imports
const http = require("http").Server(app);
const cors = require("cors");

app.use(cors());

app.get("/api", (req, res) => {
    res.json({
        message: "Hello world",
    });
});

http.listen(PORT, () => {
    console.log(`Server listening on ${PORT}`);
});
接下来,将 Socket.io 添加到项目中,以创建实时连接。在app.get()代码块之前,复制以下代码。接下来,将 Socket.io 添加到项目中,以创建实时连接。在app.get()代码块之前,复制以下代码。
//New imports
.....
const socketIO = require('socket.io')(http, {
    cors: {
        origin: "http://localhost:3000"
    }
});

//Add this before the app.get() block
socketIO.on('connection', (socket) => {
    console.log(`⚡: ${socket.id} user just connected!`);
    socket.on('disconnect', () => {
      console.log('🔥: A user disconnected');
    });
});
从上面的代码片段中,该socket.io("connection")函数与 React 应用程序建立连接,然后为每个套接字创建一个唯一的 ID,并在用户访问网页时将该 ID 记录到控制台。
当您刷新或关闭网页时,套接字会触发断开事件,表明用户已与套接字断开连接。
通过将启动命令添加到package.json文件中的脚本列表中来配置 Nodemon。下面的代码片段使用 Nodemon 启动服务器。
//In server/package.json

"scripts": {
    "test": "echo \"Error: no test specified\" && exit 1",
    "start": "nodemon index.js"
  },
您现在可以使用以下命令通过 Nodemon 运行服务器。
npm start
构建用户界面
在这里,我们将创建一个简单的用户界面来演示交互式屏幕共享功能。
导航到client/src并创建一个包含Home.js和名为的子组件的组件文件夹Modal.js。
cd client/src
mkdir components
touch Home.js Modal.js
更新App.js文件以呈现新创建的 Home 组件。
import React from "react";
import { BrowserRouter, Route, Routes } from "react-router-dom";
import Home from "./components/Home";

const App = () => {
    return (
        <BrowserRouter>
            <Routes>
                <Route path='/' element={<Home />} />
            </Routes>
        </BrowserRouter>
    );
};

export default App;
导航到src/index.css文件并复制以下代码。它包含设计此项目所需的所有 CSS。
@import url("https://fonts.googleapis.com/css2?family=Space+Grotesk:wght@300;400;500;600;700&display=swap");

body {
    margin: 0;
    padding: 0;
    font-family: -apple-system, BlinkMacSystemFont, "Segoe UI", "Roboto",
        "Oxygen", "Ubuntu", "Cantarell", "Fira Sans", "Droid Sans",
        "Helvetica Neue", sans-serif;
    -webkit-font-smoothing: antialiased;
    -moz-osx-font-smoothing: grayscale;
}
* {
    font-family: "Space Grotesk", sans-serif;
    box-sizing: border-box;
}
.home__container {
    display: flex;
    min-height: 55vh;
    width: 100%;
    flex-direction: column;
    align-items: center;
    justify-content: center;
}
.home__container h2 {
    margin-bottom: 30px;
}
.createChannelBtn {
    padding: 15px;
    width: 200px;
    cursor: pointer;
    font-size: 16px;
    background-color: #277bc0;
    color: #fff;
    border: none;
    outline: none;
    margin-right: 15px;
    margin-top: 30px;
}
.createChannelBtn:hover {
    background-color: #fff;
    border: 1px solid #277bc0;
    color: #277bc0;
}
.form {
    width: 100%;
    display: flex;
    align-items: center;
    justify-content: center;
    flex-direction: column;
    margin-bottom: 30px;
}
.form__input {
    width: 70%;
    padding: 10px 15px;
    margin: 10px 0;
}
.popup {
    width: 80%;
    height: 500px;
    background: black;
    border-radius: 20px;
    padding: 20px;
    overflow: auto;
}
.popup-ref {
    background: white;
    width: 100%;
    height: 100%;
    position: relative;
}
.popup-ref img {
    top: 0;
    position: sticky;
    width: 100%;
}
@media screen and (max-width: 768px) {
    .login__form {
        width: 100%;
    }
}
将以下代码复制到 中Home.js。它将为 URL 呈现一个表单输入框、一个提交按钮和一个 Modal 组件。
import React, { useCallback, useState } from "react";
import Modal from "./Modal";

const Home = () => {
    const [url, setURL] = useState("");
    const [show, setShow] = useState(false);
    const handleCreateChannel = useCallback(() => {
        setShow(true);
    }, []);

    return (
        <div>
            <div className='home__container'>
                <h2>URL</h2>
                <form className='form'>
                    <label>Provide a URL</label>
                    <input
                        type='url'
                        name='url'
                        id='url'
                        className='form__input'
                        required
                        value={url}
                        onChange={(e) => setURL(e.target.value)}
                    />
                </form>
                {show && <Modal url={url} />}
                <button className='createChannelBtn' onClick={handleCreateChannel}>
                    BROWSE
                </button>
            </div>
        </div>
    );
};

export default Home;
将代表屏幕录像的图像添加到Modal.js文件并导入 Socket.io 库。
import { useState } from "react";
import socketIO from "socket.io-client";
const socket = socketIO.connect("http://localhost:4000");

const Modal = ({ url }) => {
    const [image, setImage] = useState("");
    return (
        <div className='popup'>
            <div className='popup-ref'>{image && <img src={image} alt='' />}</div>
        </div>
    );
};

export default Modal;
启动 React.js 服务器。
npm start
检查服务器运行的终端;React.js 客户端的 ID 应该出现在终端上。
恭喜🥂,我们现在可以从应用程序 UI 开始与 Socket.io 服务器通信。
使用 Puppeteer 和 Chrome DevTools 协议截取屏幕截图
在本节中,您将学习如何使用 Puppeteer 和Chrome DevTools 协议自动截取网页截图 。与 Puppeteer 提供的常规截图功能不同,Chrome 的 API 可以创建非常快速的截图,并且由于它是异步的,因此不会降低 Puppeteer 和您的运行时速度。
导航到服务器文件夹并安装 Puppeteer。
cd server
npm install puppeteer
更新Modal.js文件以将用户提供的网页 URL 发送到 Node.js 服务器。
import { useState, useEffect } from "react";
import socketIO from "socket.io-client";
const socket = socketIO.connect("http://localhost:4000");

const Modal = ({ url }) => {
    const [image, setImage] = useState("");

    useEffect(() => {
        socket.emit("browse", {
            url,
        });
    }, [url]);

    return (
        <div className='popup'>
            <div className='popup-ref'>{image && <img src={image} alt='' />}</div>
        </div>
    );
};

export default Modal;
browse在后端服务器上创建该事件的监听器。
socketIO.on("connection", (socket) => {
    console.log(`⚡: ${socket.id} user just connected!`);

    socket.on("browse", async ({ url }) => {
        console.log("Here is the URL >>>> ", url);
    });

    socket.on("disconnect", () => {
        socket.disconnect();
        console.log("🔥: A user disconnected");
    });
});
由于我们已经能够从 React 应用程序收集 URL,因此让我们使用 Puppeteer 和 Chrome DevTools 协议创建屏幕截图。
创建一个screen.shooter.js文件并复制以下代码:
const { join } = require("path");

const fs = require("fs").promises;
const emptyFunction = async () => {};
const defaultAfterWritingNewFile = async (filename) =>
    console.log(`${filename} was written`);

class PuppeteerMassScreenshots {
    /*
    page - represents the web page
    socket - Socket.io
    options - Chrome DevTools configurations
    */
    async init(page, socket, options = {}) {
        const runOptions = {
            //👇🏻 Their values must be asynchronous codes
            beforeWritingImageFile: emptyFunction,
            afterWritingImageFile: defaultAfterWritingNewFile,
            beforeAck: emptyFunction,
            afterAck: emptyFunction,
            ...options,
        };
        this.socket = socket;
        this.page = page;

        //👇🏻 CDPSession instance is used to talk raw Chrome Devtools Protocol
        this.client = await this.page.target().createCDPSession();
        this.canScreenshot = true;

        //👇🏻 The frameObject parameter contains the compressed image data
    //   requested by the Page.startScreencast.
        this.client.on("Page.screencastFrame", async (frameObject) => {
            if (this.canScreenshot) {
                await runOptions.beforeWritingImageFile();
                const filename = await this.writeImageFilename(frameObject.data);
                await runOptions.afterWritingImageFile(filename);

                try {
                    await runOptions.beforeAck();
                    /*👇🏻 acknowledges that a screencast frame  (image) has been received by the frontend.
                    The sessionId - represents the frame number
                    */
                    await this.client.send("Page.screencastFrameAck", {
                        sessionId: frameObject.sessionId,
                    });
                    await runOptions.afterAck();
                } catch (e) {
                    this.canScreenshot = false;
                }
            }
        });
    }

    async writeImageFilename(data) {
        const fullHeight = await this.page.evaluate(() => {
            return Math.max(
                document.body.scrollHeight,
                document.documentElement.scrollHeight,
                document.body.offsetHeight,
                document.documentElement.offsetHeight,
                document.body.clientHeight,
                document.documentElement.clientHeight
            );
        });
        //Sends an event containing the image and its full height
        return this.socket.emit("image", { img: data, fullHeight });
    }
    /*
    The startOptions specify the properties of the screencast
    👉🏻 format - the file type (Allowed fomats: 'jpeg' or 'png')
    👉🏻 quality - sets the image quality (default is 100)
    👉🏻 everyNthFrame - specifies the number of frames to ignore before taking the next screenshots. (The more frames we ignore, the less screenshots we will have)
    */
    async start(options = {}) {
        const startOptions = {
            format: "jpeg",
            quality: 10,
            everyNthFrame: 1,
            ...options,
        };
        try {
            await this.client?.send("Page.startScreencast", startOptions);
        } catch (err) {}
    }

    /*
    Learn more here 👇🏻:
    https://github.com/shaynet10/puppeteer-mass-screenshots/blob/main/index.js
    */
    async stop() {
        try {
            await this.client?.send("Page.stopScreencast");
        } catch (err) {}
    }
}

module.exports = PuppeteerMassScreenshots;
- 从上面的代码片段来看:
- 该
runOptions对象包含四个值,beforeWritingImageFile并且afterWritingImageFile必须包含在将图像发送到客户端之前和之后运行的异步函数。 beforeAck并将afterAck确认发送给浏览器作为异步代码,表明已收到图像。- 该
writeImageFilename函数计算屏幕录像的完整高度并将其与屏幕录像图像一起发送到 React 应用程序。
- 该
创建一个实例PuppeteerMassScreenshots并更新server/index.js文件以截取屏幕截图。
//👇🏻 Add the following imports
const puppeteer = require("puppeteer");
const PuppeteerMassScreenshots = require("./screen.shooter");

socketIO.on("connection", (socket) => {
    console.log(`⚡: ${socket.id} user just connected!`);

    socket.on("browse", async ({ url }) => {
        const browser = await puppeteer.launch({
            headless: true,
        });
        //👇🏻 creates an incognito browser context
        const context = await browser.createIncognitoBrowserContext();
        //👇🏻 creates a new page in a pristine context.
        const page = await context.newPage();
        await page.setViewport({
            width: 1255,
            height: 800,
        });
        //👇🏻 Fetches the web page
        await page.goto(url);
        //👇🏻 Instance of PuppeteerMassScreenshots takes the screenshots
        const screenshots = new PuppeteerMassScreenshots();
        await screenshots.init(page, socket);
        await screenshots.start();
    });

    socket.on("disconnect", () => {
        socket.disconnect();
        console.log("🔥: A user disconnected");
    });
});
更新Modal.js文件以监听来自服务器的屏幕录像图像。
import { useState, useEffect } from "react";
import socketIO from "socket.io-client";
const socket = socketIO.connect("http://localhost:4000");

const Modal = ({ url }) => {
    const [image, setImage] = useState("");
    const [fullHeight, setFullHeight] = useState("");

    useEffect(() => {
        socket.emit("browse", {
            url,
        });

        /*
        👇🏻 Listens for the images and full height
             from the PuppeteerMassScreenshots.
           The image is also converted to a readable file.
        */
        socket.on("image", ({ img, fullHeight }) => {
            setImage("data:image/jpeg;base64," + img);
            setFullHeight(fullHeight);
        });
    }, [url]);

    return (
        <div className='popup'>
            <div className='popup-ref' style={{ height: fullHeight }}>
                {image && <img src={image} alt='' />}
            </div>
        </div>
    );
};

export default Modal;
恭喜!💃🏻 我们已经能够在 React 应用中显示屏幕截图了。在接下来的部分中,我将指导您如何使截屏图像具有交互性。
使屏幕截图具有交互性
在这里,您将学习如何使屏幕录像完全交互,使其像浏览器窗口一样运行并响应鼠标滚动和移动事件。
对光标的点击和移动事件做出反应。
将下面的代码复制到 Modal 组件中。
const mouseMove = useCallback((event) => {
    const position = event.currentTarget.getBoundingClientRect();
    const widthChange = 1255 / position.width;
    const heightChange = 800 / position.height;

    socket.emit("mouseMove", {
        x: widthChange * (event.pageX - position.left),
        y:
            heightChange *
            (event.pageY - position.top - document.documentElement.scrollTop),
    });
}, []);

const mouseClick = useCallback((event) => {
    const position = event.currentTarget.getBoundingClientRect();
    const widthChange = 1255 / position.width;
    const heightChange = 800 / position.height;
    socket.emit("mouseClick", {
        x: widthChange * (event.pageX - position.left),
        y:
            heightChange *
            (event.pageY - position.top - document.documentElement.scrollTop),
    });
}, []);
- 从上面的代码片段来看:
[event.currentTarget.getBoundingClient()](https://developer.mozilla.org/en-US/docs/Web/API/Element/getBoundingClientRect)返回一个对象,其中包含有关屏幕录像相对于视口的大小和位置的信息。- event.pageX - 返回鼠标指针的位置;相对于文档的左边缘。
mouseClick然后,计算光标的位置并通过和事件将其发送到后端mouseMove。
在后端创建这两个事件的监听器。
socket.on("browse", async ({ url }) => {
    const browser = await puppeteer.launch({
        headless: true,
    });
    const context = await browser.createIncognitoBrowserContext();
    const page = await context.newPage();
    await page.setViewport({
        width: 1255,
        height: 800,
    });
    await page.goto(url);
    const screenshots = new PuppeteerMassScreenshots();
    await screenshots.init(page, socket);
    await screenshots.start();

    socket.on("mouseMove", async ({ x, y }) => {
        try {
            //sets the cursor the position with Puppeteer
            await page.mouse.move(x, y);
            /*
            👇🏻 This function runs within the page's context,
               calculates the element position from the view point
               and returns the CSS style for the element.
            */
            const cur = await page.evaluate(
                (p) => {
                    const elementFromPoint = document.elementFromPoint(p.x, p.y);
                    return window
                        .getComputedStyle(elementFromPoint, null)
                        .getPropertyValue("cursor");
                },
                { x, y }
            );

            //👇🏻 sends the CSS styling to the frontend
            socket.emit("cursor", cur);
        } catch (err) {}
    });

    //👇🏻 Listens for the exact position the user clicked
    //   and set the move to that position.
    socket.on("mouseClick", async ({ x, y }) => {
        try {
            await page.mouse.click(x, y);
        } catch (err) {}
    });
});
监听cursor事件并将 CSS 样式添加到屏幕截图容器。
import { useCallback, useEffect, useRef, useState } from "react";
import socketIO from "socket.io-client";
const socket = socketIO.connect("http://localhost:4000");

const Modal = ({ url }) => {
    const ref = useRef(null);
    const [image, setImage] = useState("");
    const [cursor, setCursor] = useState("");
    const [fullHeight, setFullHeight] = useState("");

    useEffect(() => {
        //...other functions

        //👇🏻 Listens to the cursor event
        socket.on("cursor", (cur) => {
            setCursor(cur);
        });
    }, [url]);

    //...other event emitters

    return (
        <div className='popup'>
            <div
                ref={ref}
                className='popup-ref'
                style={{ cursor, height: fullHeight }} //👈🏼 cursor is added
            >
                {image && (
                    <img
                        src={image}
                        onMouseMove={mouseMove}
                        onClick={mouseClick}
                        alt=''
                    />
                )}
            </div>
        </div>
    );
};

export default Modal;
响应滚动事件
在这里,我将指导您使屏幕录像可滚动以查看所有网页内容。
创建一个onScroll函数,测量从视口顶部到屏幕录制容器的距离并将其发送到后端。
const Modal = ({ url }) => {
    //...other functions

    const mouseScroll = useCallback((event) => {
        const position = event.currentTarget.scrollTop;
        socket.emit("scroll", {
            position,
        });
    }, []);

    return (
        <div className='popup' onScroll={mouseScroll}>
            <div
                ref={ref}
                className='popup-ref'
                style={{ cursor, height: fullHeight }}
            >
                {image && (
                    <img
                        src={image}
                        onMouseMove={mouseMove}
                        onClick={mouseClick}
                        alt=''
                    />
                )}
            </div>
        </div>
    );
};
创建一个事件监听器,以便根据文档的坐标滚动页面。
socket.on("browse", async ({ url }) => {
    //....other functions

    socket.on("scroll", ({ position }) => {
        //scrolls the page
        page.evaluate((top) => {
            window.scrollTo({ top });
        }, position);
    });
});
恭喜!💃🏻我们现在可以滚动浏览截屏视频并与网页内容进行交互。
结论
到目前为止,您已经学习了如何使用 React.js 和Socket.io建立实时连接 ,如何使用 Puppeteer 和Chrome DevTools Protocol截取网页截图 ,并使其具有交互性。
本文演示了如何使用 Puppeteer 构建各种功能。您还可以生成页面 PDF、自动化表单提交、进行 UI 测试、测试 Chrome 扩展程序等等。欢迎随时浏览 文档。
本教程的源代码可以在这里找到: https://github.com/novuhq/blog/tree/main/screen-sharing-with-puppeteer。
附言:如果你能给我们一颗星,我会非常高兴!这会帮助我每周写更多文章🚀
https://github.com/novuhq/novu
感谢您的阅读!
文章来源:https://dev.to/novu/building-an-interactive-screen-sharing-app-with-puppeteer-and-react-12h7 后端开发教程 - Java、Spring Boot 实战 - msg200.com


