React + TypeScript:使用 Tensorflow 进行人脸检测
大家好,
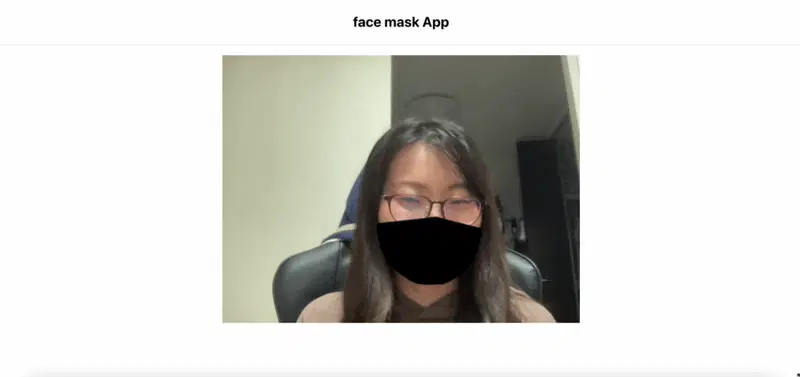
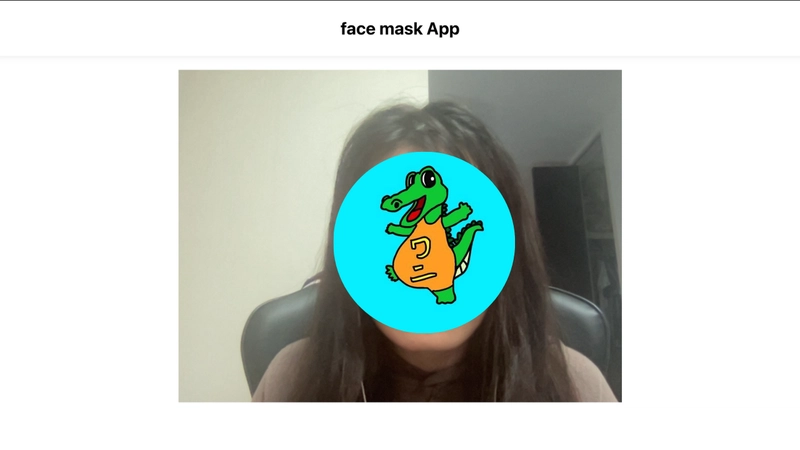
我开发了一款具有人脸检测功能的应用程序,可以实时自动将面罩戴到您的脸上。
在本文中,我将解释如何开发该应用程序。
DEMO→ https://mask-app-one.vercel.app/
github→ https://github.com/toffyui/mask-app
此应用程序没有加载动画,因此您必须在第一次加载时等待几秒钟。
设置 React 应用程序并安装 React-webcam
$ npx create-react-app face-mask-app --template typescript
$ yarn add react-webcam @types/react-webcam
然后,尝试设置网络摄像头。
// App.tsx

import { useRef } from "react";
import "./App.css";
import Webcam from "react-webcam";

const App = () => {
  const webcam = useRef<Webcam>(null);

  return (
    <div className="App">
      <header className="header">
        <div className="title">face mask App</div>
      </header>
      <Webcam
        audio={false}
        ref={webcam}
        style={{
          position: "absolute",
          margin: "auto",
          textAlign: "center",
          top: 100,
          left: 0,
          right: 0,
        }}
      />
    </div>
  );
}

export default App;
yarn start并访问http://localhost:3000/。
耶!网络摄像头现在可用了。
尝试使用 Tensorflow 进行人脸检测
在这里,我们使用这个模型。https ://github.com/tensorflow/tfjs-models/tree/master/face-landmarks-detection
$ yarn add @tensorflow-models/face-landmarks-detection @tensorflow/tfjs-core @tensorflow/tfjs-converter @tensorflow/tfjs-backend-webgl
- 如果您不使用 TypeScript,则不必全部安装。
@tensorflow/tfjs只需安装@tensorflow/tfjs-core、@tensorflow/tfjs-converter和 即可@tensorflow/tfjs-backend-webgl。
库版本
    "@tensorflow-models/face-landmarks-detection": "^0.0.3",
    "@tensorflow/tfjs-backend-webgl": "^3.6.0",
    "@tensorflow/tfjs-converter": "^3.6.0",
    "@tensorflow/tfjs-core": "^3.6.0",
// App.tsx

import "@tensorflow/tfjs-core";
import "@tensorflow/tfjs-converter";
import "@tensorflow/tfjs-backend-webgl";
import * as faceLandmarksDetection from "@tensorflow-models/face-landmarks-detection";
import { MediaPipeFaceMesh } from "@tensorflow-models/face-landmarks-detection/dist/types";

const App = () => {
  const webcam = useRef<Webcam>(null);

  const runFaceDetect = async () => {
    const model = await faceLandmarksDetection.load(
      faceLandmarksDetection.SupportedPackages.mediapipeFacemesh
    );
  /*
     Please check your library version.
     The new version is a bit different from the previous.
     You should write as followings in the new one.
     You will see more information from https://github.com/tensorflow/tfjs-models/tree/master/face-landmarks-detection.
     const model = faceLandmarksDetection.SupportedModels.MediaPipeFaceMesh;
      const detectorConfig = {
        runtime: 'mediapipe', // or 'tfjs'
        solutionPath: 'https://cdn.jsdelivr.net/npm/@mediapipe/face_mesh',
      }
      const detector = await faceLandmarksDetection.createDetector(model, detectorConfig);
    */
    detect(model);
  };

  const detect = async (model: MediaPipeFaceMesh) => {
    if (webcam.current) {
      const webcamCurrent = webcam.current as any;
      // go next step only when the video is completely uploaded.
      if (webcamCurrent.video.readyState === 4) {
        const video = webcamCurrent.video;
        const predictions = await model.estimateFaces({
          input: video,
        });
        if (predictions.length) {
          console.log(predictions);
        }
      }
    };
  };

  useEffect(() => {
    runFaceDetect();
  // eslint-disable-next-line react-hooks/exhaustive-deps
  }, [webcam.current?.video?.readyState])
检查日志。
好的,看起来不错。
设置画布以将面具覆盖在脸上
添加<canvas>下<Webcam>。
//App.tsx
const App = () => {
  const webcam = useRef<Webcam>(null);
  const canvas = useRef<HTMLCanvasElement>(null);

  return (
    <div className="App">
      <header className="header">
        <div className="title">face mask App</div>
      </header>
      <Webcam
        audio={false}
        ref={webcam}
      />
      <canvas
        ref={canvas}
      />
将画布的尺寸与视频相匹配。
    const videoWidth = webcamCurrent.video.videoWidth;
    const videoHeight = webcamCurrent.video.videoHeight;
    canvas.current.width = videoWidth;
    canvas.current.height = videoHeight;
那么,我们看一下这张地图,检查一下我们应该在哪里填写。
根据这张图,195号点位于鼻子周围。所以把这个点设为支点。让我们用 轻松绘制一个蒙版beginPath()〜closePath()。
// mask.ts

import { AnnotatedPrediction } from "@tensorflow-models/face-landmarks-detection/dist/mediapipe-facemesh";
import {
  Coord2D,
  Coords3D,
} from "@tensorflow-models/face-landmarks-detection/dist/mediapipe-facemesh/util";

const drawMask = (
  ctx: CanvasRenderingContext2D,
  keypoints: Coords3D,
  distance: number
) => {
  const points = [
    93,
    132,
    58,
    172,
    136,
    150,
    149,
    176,
    148,
    152,
    377,
    400,
    378,
    379,
    365,
    397,
    288,
    361,
    323,
  ];

  ctx.moveTo(keypoints[195][0], keypoints[195][1]);
  for (let i = 0; i < points.length; i++) {
    if (i < points.length / 2) {
      ctx.lineTo(
        keypoints[points[i]][0] - distance,
        keypoints[points[i]][1] + distance
      );
    } else {
      ctx.lineTo(
        keypoints[points[i]][0] + distance,
        keypoints[points[i]][1] + distance
      );
    }
  }
};

export const draw = (
  predictions: AnnotatedPrediction[],
  ctx: CanvasRenderingContext2D,
  width: number,
  height: number
) => {
  if (predictions.length > 0) {
    predictions.forEach((prediction: AnnotatedPrediction) => {
      const keypoints = prediction.scaledMesh;
      const boundingBox = prediction.boundingBox;
      const bottomRight = boundingBox.bottomRight as Coord2D;
      const topLeft = boundingBox.topLeft as Coord2D;
      // make the drawing mask larger a bit
      const distance =
        Math.sqrt(
          Math.pow(bottomRight[0] - topLeft[0], 2) +
            Math.pow(topLeft[1] - topLeft[1], 2)
        ) * 0.02;
      ctx.clearRect(0, 0, width, height);
      ctx.fillStyle = "black";
      ctx.save();
      ctx.beginPath();
      drawMask(ctx, keypoints as Coords3D, distance);
      ctx.closePath();
      ctx.fill();
      ctx.restore();
    });
  }
};
draw在 App.tsx 中导入此函数并使用它。
    const ctx = canvas.current.getContext("2d") as CanvasRenderingContext2D;
    requestAnimationFrame(() => {
      draw(predictions, ctx, videoWidth, videoHeight);
    });
结束!
感谢阅读。
这是我第一次使用 TensorFlow,但多亏了官方 GitHub 代码库的 README 文件,我可以轻松地开发一个小应用程序。我会继续使用 TensorFlow 进行开发🐣
🍎🍎🍎🍎🍎🍎
如果需要的话请给我发消息。
🍎🍎🍎🍎🍎🍎
 后端开发教程 - Java、Spring Boot 实战 - msg200.com


