我如何开发现代 JAMStack 网站
概述
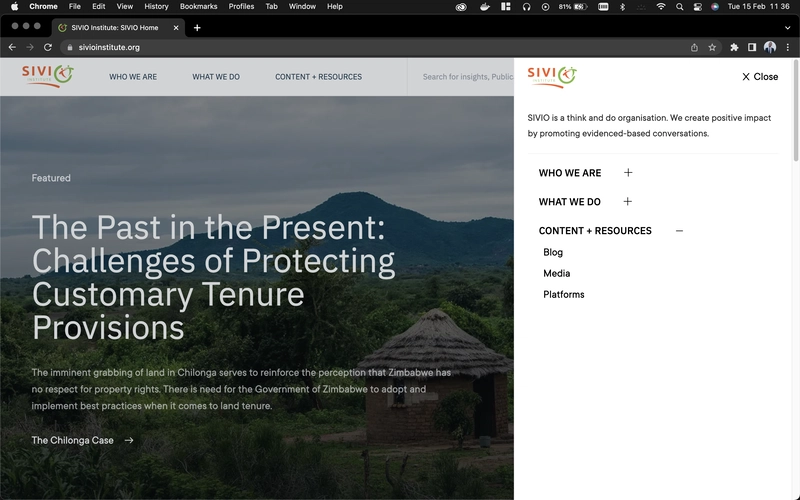
2021年,我开始为一家我2020年就职的公司进行品牌重塑项目。这是项目链接。这家公司已经有了一个不错的网站,但他们从2018年就开始使用这个网站了,他们想要一个新颖、现代,并且非开发人员也能轻松管理的网站。为了这个项目取得成功,我和一位设计师朋友合作。我们坐下来开始规划如何进行,因为即使是公司网站,它也包含很多活动部分,所以需要一些规划。
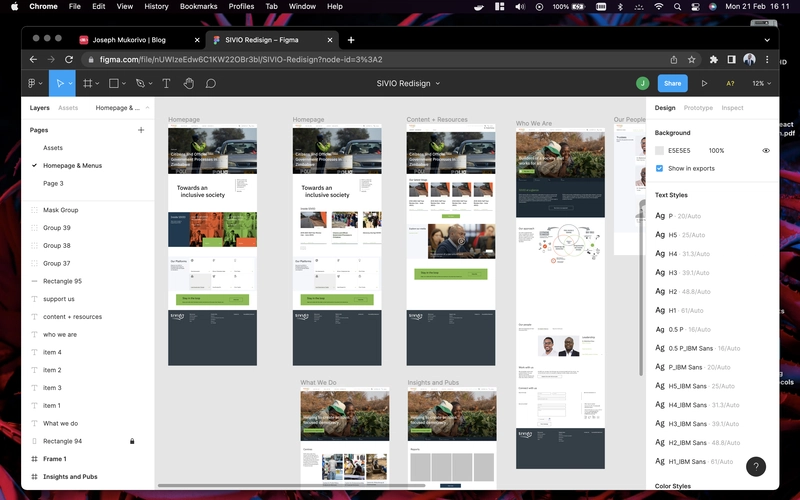
Figma 设计
主页设计

我和朋友之前都有一些使用 Scrum 进行项目管理的经验,所以决定在这个项目中使用 Scrum,因为它很合适。我们开始创建产品待办事项列表,确定功能的优先级,并将工作划分为多个冲刺。我们与产品负责人密切合作,以确保我们开发的是用户真正想要的东西。
技术栈选择
这是项目开发过程中一个有趣的阶段。出于多种原因,我们决定在项目中使用 JAMStack。项目设计使用figma完成,然后我开始使用React进行 UI 开发。我决定使用tailwind css进行样式设置,因为它可以非常快速地设置组件样式。我不喜欢在标记中使用一堆类,所以我使用了 tailwind 和 css 模块(我将展示部分代码片段)。因为我们希望这个网站性能良好且 SEO 友好,所以我决定使用NextJS(作者称其为用于生产的 React 框架,他们说得对)。NextJS 具有许多开箱即用的性能和 SEO 功能,例如服务器端渲染、代码拆分、图像优化、路由等等。在这个项目中,为后端启动自定义 API 是没有意义的,所以我决定使用一个现代 CMS,在本例中是strapi。这个网站上的所有后端内容都来自 strapi。
我还使用了许多其他工具,但我不会详细介绍它们。下面我将总结一下我使用的关键工具。
项目中使用的关键内容
React用于 UI
NextJS用于 SSR/CSR/Routing 等
Tailwindcss用于 UI 样式
Strapi作为 CMS
Docker用于应用程序容器化
nginx作为 Web 服务器和反向代理
git用于版本控制
mailchimp用于管理邮件列表
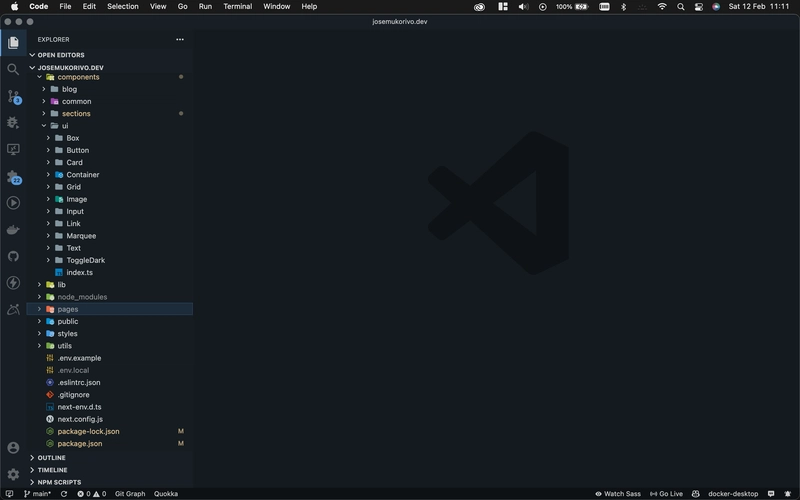
项目结构
项目结构方面,我沿用了这个结构,并进行了一些改进,但作为起点还是不错的。以下是总体概述。
创建组件
我尝试使我开发的组件可重复使用,下面是该Text组件的示例文件。
文本.css
.root {
  @apply mb-4;
}
.root:is(h1, h2, h3, h4, h5, h6) {
    @apply mb-7 2xl:mb-10 leading-tight dark:text-slate-200;
 }

.p {
  @apply text-lg 2xl:text-xl;
}
.span {
  @apply text-lg;
}

.h1 {
  @apply text-4xl md:text-5xl font-heading font-medium uppercase;
}

.h2 {
  @apply text-2xl md:text-4xl font-heading uppercase;
}

.h3 {
  @apply text-3xl;
}

.h4 {
  @apply text-2xl;
}

.h5 {
  @apply text-xl;
}

.h6 {
  @apply text-lg;
}
文本.tsx
import { FC, CSSProperties, ReactNode } from 'react';
import cn from 'classnames';

import s from './Text.module.scss';

type Variant = 'h1' | 'h2' | 'h3' | 'h4' | 'h5' | 'h6' | 'p' | 'span';

interface Props {
  as?: Variant;
  className?: string;
  style?: CSSProperties;
  children?: ReactNode | any;
  html?: string;
}

export const Text: FC<Props> = ({
  as: Tag = 'p',
  className = '',
  style = {},
  children,
  html,
  ...rest
}) => {
  const classes = cn(
    s.root,
    {
      [s.p]: Tag === 'p',
      [s.span]: Tag === 'span',
      [s.h1]: Tag === 'h1',
      [s.h2]: Tag === 'h2',
      [s.h3]: Tag === 'h3',
      [s.h4]: Tag === 'h4',
      [s.h5]: Tag === 'h5',
      [s.h6]: Tag === 'h6',
    },
    className // make sure to add the className last so it overwrites the other classes
  );

  const htmlProps = html
    ? {
        dangerouslySetInnerHTML: { __html: html },
      }
    : {};

  return (
    <Tag className={classes} {...rest} {...htmlProps}>
      {children}
    </Tag>
  );
};
示例用法
<Text as='h1'>
 Hi 👋🏼, I’m Joseph. Writer, Software Engineer, DevOps
</Text>

<Text className='cool'>
This is a sample paragraph
</Text>
托管和部署
我为这家公司开发了这个网站,这家公司规模不大,也没有庞大的技术团队,所以我使用了我认为其他人维护起来比较方便的工具。Strapi 使用 Docker 容器运行docker-compose,前端也以类似的方式运行。在 Strati 和前端的源代码中,我创建了一些Make文件来运行项目。下面是一个示例 Makefile。
down:
    docker-compose down

build:
    docker-compose up -d --build

redeploy:
    git pull && make down && make build
在这种情况下,如果源代码有变化,用户不需要知道如何使用 docker,他们只需make redeploy在项目的根目录中运行,所有代码提取和图像构建都为他们完成,当然这在README.
这些服务在服务器上的不同端口上运行,我使用 将它们暴露出来nginx。以下是如何为 strapi 配置 nginx 文件。请注意,在生产环境中,您必须确保以安全的方式进行配置,这只是为了帮助您入门。
server {
   server_name example.com www.example.com;

    location / {
        keepalive_timeout 64;
        proxy_pass http://localhost:8080; # use your local port where strapi is running
        proxy_http_version 1.1;
        proxy_set_header X-Forwarded-Host $host;
        proxy_set_header X-Forwarded-Server $host;
        proxy_set_header X-NginX-Proxy true;
        proxy_set_header X-Real-IP $remote_addr;
        proxy_set_header X-Forwarded-For $proxy_add_x_forwarded_for;
        proxy_set_header X-Forwarded-Proto $scheme;
        proxy_set_header Host $http_host;
        proxy_set_header Upgrade $http_upgrade;
        proxy_set_header Connection "upgrade";
        proxy_pass_request_headers on;
        proxy_max_temp_file_size 0;
        proxy_redirect off;
        proxy_read_timeout 240s;
    }

    listen 443 ssl; # managed by Certbot
    ssl_certificate /etc/letsencrypt/live/example.com/fullchain.pem; # managed by Certbot
    ssl_certificate_key /etc/letsencrypt/live/example.com/privkey.pem; # managed by Certbot
    include /etc/letsencrypt/options-ssl-nginx.conf; # managed by Certbot
    ssl_dhparam /etc/letsencrypt/ssl-dhparams.pem; # managed by Certbot


}
server {
    if ($host = www.example.com) {
        return 301 https://$host$request_uri;
    } # managed by Certbot


    if ($host = example.com) {
        return 301 https://$host$request_uri;
    } # managed by Certbot


   server_name example.com www.example.com;
    listen 80;
    return 404; # managed by Certbot
}
希望本文对你有所帮助。PS:你可以在Twitter上关注我。
文章来源:https://dev.to/josemukorivo/how-i-development-a-modern-jamstack-website-3heo 后端开发教程 - Java、Spring Boot 实战 - msg200.com

