🚀我如何在 Dub.co 中集成 AI 副驾驶(几分钟内)🤖✨
在本文中,您将学习如何向开源链接管理系统 Dub.co 添加 AI Copilot。您还将学习如何使用 CopilotKit 轻松创建和删除短链接,从而提升应用程序的整体用户体验。
你可以以此为案例,学习如何轻松地将 AI 副驾驶添加到任何开源应用程序(不仅仅是 Dub.co)。这会让你轻松成为 AI 编程忍者。

什么是 AI Copilot?
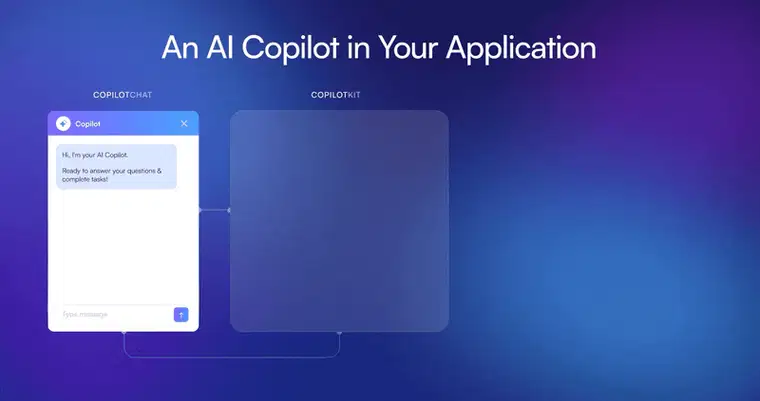
AI Copilot 是一款应用内 AI 助手,可帮助用户在应用程序内回答问题并采取行动。它将 LLM 智能直接引入您的应用程序。
一些常见的外形尺寸:
- ChatBot:具有上下文感知能力的应用内聊天机器人,可以在应用内采取行动💬
- AI 自动完成:具有上下文感知自动完成和插入功能的 AI 驱动的文本字段📝
- 合作代理:可以与您的应用和用户动态交互的应用内 AI 代理🤖
CopilotKit 是领先、强大且易于使用的开源框架,用于构建应用内 AI 副驾驶。只需几分钟,即可在您的应用中运行完全自定义的 AI 副驾驶。
先决条件
要完全理解本教程,您需要对 React 或 Next.js 有基本的了解。
我们还将利用以下内容:
- CopilotKit - 一个开源副驾驶框架,用于构建自定义 AI 聊天机器人、应用内 AI 代理和文本区域。
- Docker - 一个使用容器化技术的开源平台,可以更轻松地创建、部署和运行应用程序
- Docker Compose——用于定义和运行多容器 Docker 应用程序的软件应用程序。
- Python >= 3.8 - 用于配置 Dub.co。
- OpenAI API 密钥- 使我们能够使用 GPT 模型执行各种任务。
如何在本地计算机上设置 Dub.co
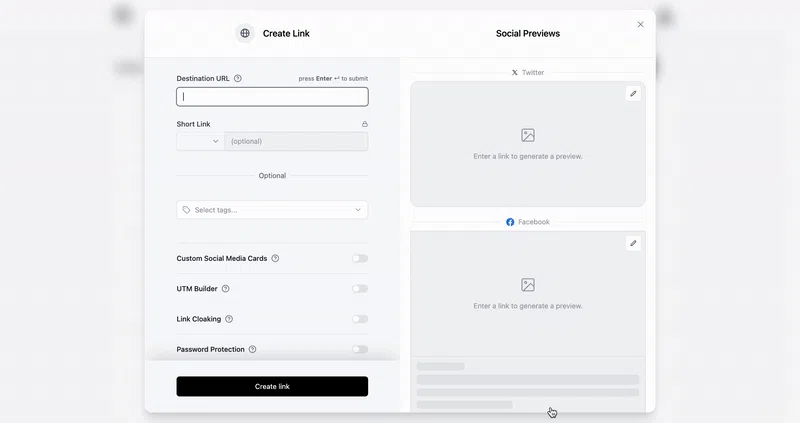
Dub.co是一个开源链接管理平台,允许用户使用自定义域名创建、共享和跟踪短链接。它由 Steven Tey(前 Vercel 员工)创建。
要开始在本地计算机上设置 Dub.co,请按照以下步骤操作:
通过运行下面的代码片段克隆Dub.co GitHub 存储库。
git clone https://github.com/dubinc/dub.git
导航到dub文件夹并安装项目依赖项:
pnpm install
在文件夹中apps/web,将.env.example文件重命名为.env。
创建一个新的Tinybird 帐户,并将您的复制Admin Auth Token到.env文件中。
TINYBIRD_API_KEY=<your_admin_auth_token>
导航到packages/tinybird目录并使用以下命令安装 Tinybird CLI:
pip3 install tinybird-cli
在终端中执行以下命令,并Admin Auth Token在提示使用 Tinybird CLI 进行身份验证时输入:
tb auth
通过运行以下代码片段发布 Tinybird 数据源和端点:
tb push
创建一个Upstash 数据库并将以下凭据从 REST API 部分复制到.env文件中:
UPSTASH_REDIS_REST_URL=<your_rest_url>
UPSTASH_REDIS_REST_TOKEN=<your_rest_token>
导航到QStash 选项卡并将以下凭据复制到.env文件中。
QSTASH_TOKEN=
QSTASH_CURRENT_SIGNING_KEY=
QSTASH_NEXT_SIGNING_KEY=
接下来,在apps/web目录中运行以下命令来启动 Docker Compose 堆栈:
docker-compose up
使用以下命令生成 Prisma 客户端并创建其数据库表:
npx prisma generate
npx prisma db push
Dub.co 支持多种身份验证方法。创建一个 GitHub 应用,并复制以下 URL 作为其回调 URL。
http://localhost:8888/api/auth/callback/github
最后,启动开发服务器:
pnpm dev
在浏览器中导航至 Web 应用程序http://localhost:8888,创建工作区并开始使用。如果您遇到任何问题,请参阅完整的安装指南以获取详细帮助。
如何将 CopilotKit 集成到 Dub.co
在本节中,您将学习如何使用 CopilotKit 向 Dub.co 添加 AI 副驾驶。
访问OpenAI 开发者平台并创建一个新的密钥。

添加新生成的密钥并在.env文件中指定 OpenAI 模型,如下所示:
OPENAI_API_KEY=<YOUR_OPENAI_SECRET_KEY>
OPENAI_MODEL=gpt-4-1106-preview
导航到app/api文件夹并创建copilotkit包含route.ts文件的目录。
cd app/api
mkdir copilotkit && cd copilotkit
touch route.ts
将以下代码片段复制到api/copilotkit/route.ts文件中:
import { CopilotRuntime, OpenAIAdapter } from "@copilotkit/backend";

export const runtime = "edge";

export async function POST(req: Request): Promise<Response> {
  const copilotKit = new CopilotRuntime({});
  const openaiModel = process.env["OPENAI_MODEL"];
  return copilotKit.response(req, new OpenAIAdapter({ model: openaiModel }));
}
CopilotKitRuntime 实例接受用户的请求并使用 OpenAI 模型做出决策。
要将 Dub.co 连接到后端 API 路由,请更新以下page.tsx内容app.dub.co/(dashboard)/[slug]:
"use client";
import WorkspaceLinksClient from "./page-client";
import { CopilotKit } from "@copilotkit/react-core";
import { CopilotPopup } from "@copilotkit/react-ui";
import "@copilotkit/react-ui/styles.css";

export default function WorkspaceLinks() {
  return (
    <CopilotKit runtimeUrl="/api/copilotkit/">
      <WorkspaceLinksClient />;
      <CopilotPopup
        instructions="Help the user create and delete links from the workspace"
        defaultOpen={true}
        labels={{
          title: "Dub.co Copilot",
          initial:
            "Hello there! I can help you create, edit, and delete short links in your workspace.",
        }}
        clickOutsideToClose={false}
      ></CopilotPopup>
    </CopilotKit>
  );
}
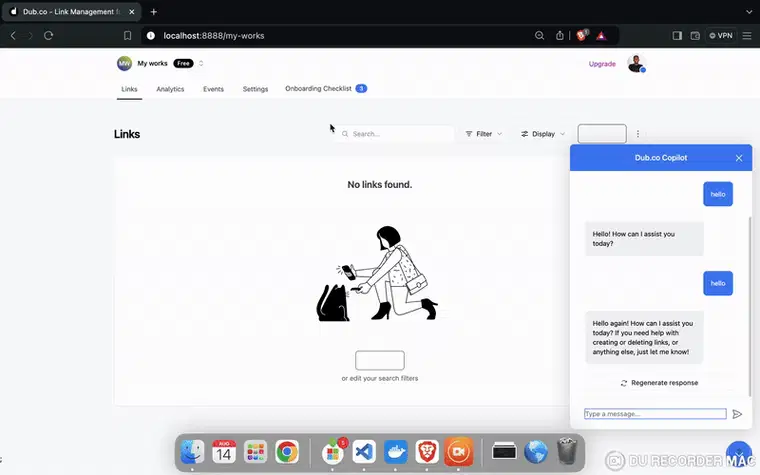
CopilotKit 组件包装了整个应用程序,并接受一个runtimeUrl包含指向 API 端点链接的 prop。该CopilotKitPopup组件为应用程序添加了一个聊天机器人侧边栏面板,使我们能够向 CopilotKit 提供各种指令。
如何使用 CopilotKit 执行各种操作
CopilotKit 提供了两个钩子,使我们能够处理用户的请求并插入应用程序状态:useCopilotAction和useCopilotReadable。
该useCopilotAction钩子允许您定义由 CopilotKit 执行的操作。它接受包含以下参数的对象:
- name——动作的名称。
- 描述——动作的描述。
- 参数——包含所需参数列表的数组。
- render - 默认的自定义函数或字符串。
- 处理程序——由操作触发的可执行函数。
useCopilotAction({
  name: "sayHello",
  description: "Say hello to someone.",
  parameters: [
    {
      name: "name",
      type: "string",
      description: "name of the person to say greet",
    },
  ],
  render: "Process greeting message...",
  handler: async ({ name }) => {
    alert(`Hello, ${name}!`);
  },
});
该useCopilotReadable钩子将应用程序状态传递到 CopilotKit。
import { useCopilotReadable } from "@copilotkit/react-core";

const myAppState = "...";
useCopilotReadable({
  description: "The current state of the app",
  value: myAppState,
});
现在,让我们将应用程序状态插入 CopilotKit 以执行各种操作,例如创建和删除短链接。
导航到ui/links/links-container.tsx文件夹并更新LinksContainer功能,如下所示:
export default function LinksContainer({
  AddEditLinkButton,
}: {
  AddEditLinkButton: () => JSX.Element;
}) {
  const { viewMode, sort, showArchived } = useContext(LinksDisplayContext);
  const { links, isValidating } = useLinks({ sort, showArchived });
  const { data: count } = useLinksCount({ showArchived });
  //👇🏻 React state for all links
  const [updatedLinks, setUpdatedLinks] = useState<ResponseLink[]>(links || []);

  //👇🏻 update the state with all the links
  useEffect(() => {
    setUpdatedLinks(links || []);
  }, [links]);

  useCopilotReadable({
    description:
      "This is the list of links you have saved. You can click on a link to view it, or use the search bar to find a specific link.",
    value: updatedLinks,
  });

  return (
    <MaxWidthWrapper className="grid gap-y-2">
      <LinksList
        AddEditLinkButton={AddEditLinkButton}
        links={links}
        count={count}
        loading={isValidating}
        compact={viewMode === "rows"}
      />
      <DeleteLinkModal />
    </MaxWidthWrapper>
  );
}
ReactupdatedLinks状态存储在应用程序内创建的链接,并将useCopilotReadable链接传递到 CopilotKit。
在钩子下面useCopilotReadable,添加以下代码片段以允许用户从应用程序中删除链接:
useCopilotAction({
  name: "deleteShortLink",
  description: "delete a link from the database via its ID",
  parameters: [
    {
      name: "id",
      type: "string",
      description: "The ID of a short link",
      required: true,
    },
  ],
  render: "Deleting link...",
  handler: async ({ id }) => {
    if (!id) return;
    const link = updatedLinks?.find((link) => link.id === id);
    if (!link) return;
    setSelectedLink(link);
    setShowDeleteLinkModal(true);
  },
});

为了允许用户使用 AI copilot 创建链接,请导航到目录index.tsx中的文件modals/add-edit-link-modal并更新useAddEditLinkModal函数,如下所示:
export function useAddEditLinkModal({
  props,
  duplicateProps,
  homepageDemo,
}: {
  props?: LinkWithTagsProps;
  duplicateProps?: LinkWithTagsProps;
  homepageDemo?: boolean;
} = {}) {
  const [updatedProps, setUpdatedProps] = useState(props || DEFAULT_LINK_PROPS);
  const [showAddEditLinkModal, setShowAddEditLinkModal] = useState(false);
  const [generatingRandomKey, setGeneratingRandomKey] = useState(false);
  const [keyError, setKeyError] = useState<string | null>(null);
  const { id: workspaceId } = useWorkspace();
  const { primaryDomain } = useDomains();

  const getKey = async (domain: string) => {
    setKeyError(null);
    setGeneratingRandomKey(true);
    const res = await fetch(
      `/api/links/random?domain=${domain}&workspaceId=${workspaceId}`,
    );
    const key = await res.json();
    return key;
  };

  useCopilotAction({
    name: "createNewLink",
    description: "Create a new link",
    parameters: [
      {
        name: "url",
        type: "string",
        description: "The destination URL for the short link",
        required: true,
      },
    ],
    render: "Loading...",
    handler: async ({ url }) => {
      const key = await getKey(primaryDomain);
      setUpdatedProps((prev) => ({
        ...prev,
        url,
        domain: primaryDomain,
        key,
        id: "",
      }));
      setGeneratingRandomKey(false);
      setShowAddEditLinkModal(true);
    },
  });

  const AddEditLinkModalCallback = useCallback(() => {
    return (
      <AddEditLinkModal
        showAddEditLinkModal={showAddEditLinkModal}
        setShowAddEditLinkModal={setShowAddEditLinkModal}
        props={updatedProps}
        keyError={keyError}
        setKeyError={setKeyError}
        generatingRandomKey={generatingRandomKey}
        setGeneratingRandomKey={setGeneratingRandomKey}
        duplicateProps={duplicateProps}
        homepageDemo={homepageDemo}
      />
    );
  }, [showAddEditLinkModal, setShowAddEditLinkModal]);

  //👉🏻 other functions
}
- 从提供的代码片段来看:
- 状态
updatedProps包含每个链接的数据结构。 - 该
getKey()函数生成一个唯一密钥,该密钥也包含在创建的短链接中。 - 该
useCopilotAction函数接受要缩短的 URL 并显示一个模式,允许用户确认并保存链接。
- 状态
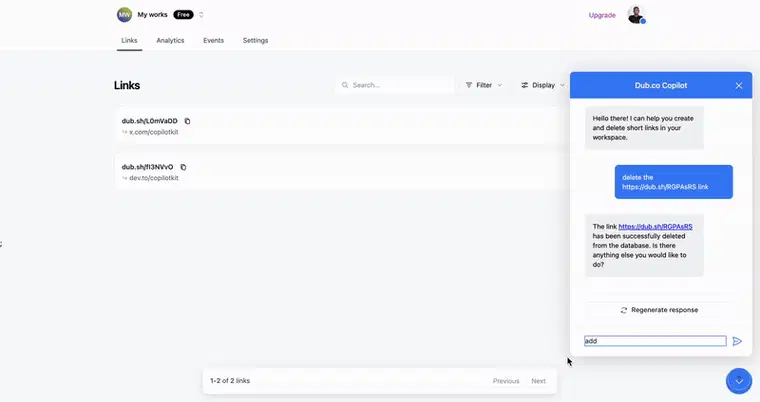
恭喜!您已成功将 CopilotKit 集成到 Dub.co。您可以访问此 GitHub 仓库中的源代码。
以下是一段简短的视频,展示了 CopilotKit 如何与 Dub.co 配合使用:
结论
CopilotKit 是一款功能强大的工具,可让您在几分钟内将 AI Copilot 添加到您的产品中。无论您对 AI 聊天机器人和助手感兴趣,还是对复杂任务的自动化感兴趣,CopilotKit 都能让您轻松实现。
如果您需要构建 AI 产品或将 AI 工具集成到您的软件应用程序中,您应该考虑 CopilotKit。
您可以在 GitHub 上找到本教程的源代码:
https://github.com/dha-stix/dub-with-copilotkit
感谢您的阅读!
文章来源:https://dev.to/copilotkit/how-i-integrated-an-ai-copilot-into-dubco-3lkj