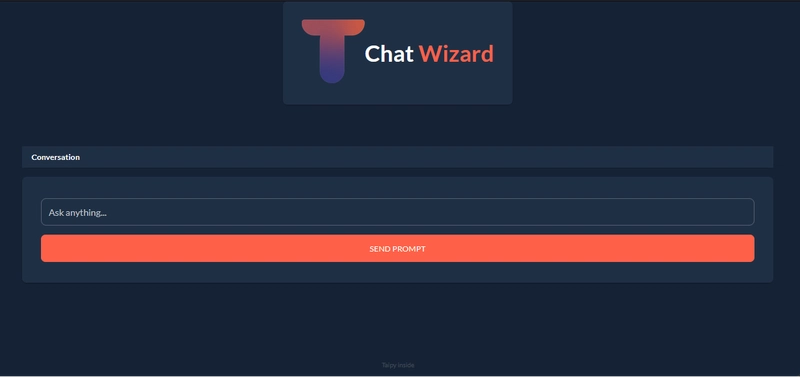
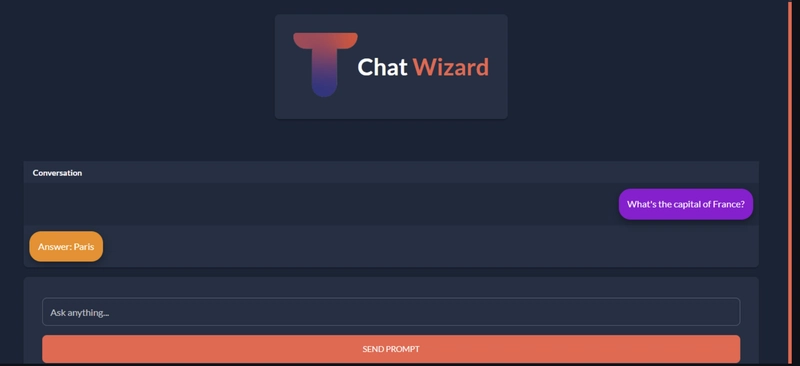
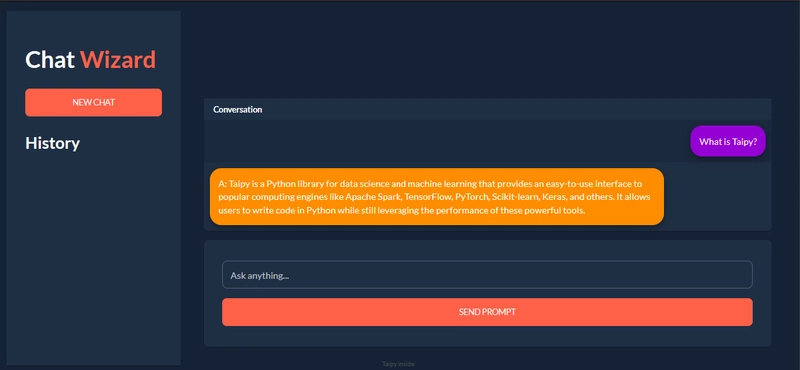
使用 Taipy 和 MistralAI 构建 ChatGPT 向导
加载 Mistral-7B-Instruct-v0.1-GGUF 模型
TL; DR
让我们学习如何使用 Taipy GUI 库和 ctransformers 库中的 Mistral-7B-Instruct-v0.1-GGUF 语言模型构建一个简单的聊天机器人。
演练
- 加载语言模型
- 生成对用户提示的响应
- 更新和清除对话历史记录
- 应用程序样式
在本文结束时,我们将对如何使用这些工具构建聊天机器人有一个基本的了解。
加载 Mistral-7B-Instruct-v0.1-GGUF 模型
Mistral 7B 是一款拥有 70 亿个参数的超级智能语言模型!
它在所有测试中都击败了最优秀的 13B 模型 Llama 2,甚至在推理、数学和代码生成方面超越了强大的 34B 模型 Llama 1。
它是如何做到的?
Mistral 7B 运用了一些智能技巧,例如分组查询注意力机制 (GQA) 来实现快速思考,以及滑动窗口注意力机制 (SWA),从而能够在不降低速度的情况下处理各种长度的文本。
还有更多!Mistral AI 团队针对特定任务对 Mistral 7B 进行了微调,推出了 Mistral 7B – Instruct。
它在聊天方面的表现远超 Llama 2 13B,并且在人工和自动化测试中都表现出色。
最棒的是?Mistral 7B – 基于 Apache 2.0 许可证发布。
使用 ctransformers 下载 GGUF 文件
步骤 1:安装 ctransformers
没有 GPU 加速
pip install ctransformers
或者使用带有 CUDA GPU 加速的 ctransformers 安装
pip install ctransformers[cuda]
或者使用带有 AMD ROCm GPU 加速的 ctransformers 安装(仅限 Linux)
CT_HIPBLAS=1 pip install ctransformers --no-binary ctransformers
或者使用仅适用于 macOS 系统的带有 Metal GPU 加速的 ctransformers 安装
CT_METAL=1 pip install ctransformers --no-binary ctransformers
加载模型
都准备好了吗?让我们运行下面的代码来下载并向模型发送提示。请确保您的电脑有足够的空间,并连接到良好的网络连接。
# import the AutoModelForCausalLM class from the ctransformers library
from ctransformers import AutoModelForCausalLM

# load Mistral-7B-Instruct-v0.1-GGUF, Set gpu_layers to the number of layers to offload to GPU. The value is set to 0 because no GPU acceleration is available on my current system.
llm = AutoModelForCausalLM.from_pretrained("TheBloke/Mistral-7B-Instruct-v0.1-GGUF", model_file="mistral-7b-instruct-v0.1.Q4_K_M.gguf", model_type="mistral", gpu_layers=0)

# call the model to generate text.
ask = 1000
turn = 0
while turn < ask:
    user = input("Enter your message: ")
    print(llm(user))
该模型将继续如下陈述,
向 Taipy 问好!
Taipy 是一个开源 Python 库,它简化了数据驱动的 Web 应用程序的创建。
它负责可见部分(前端)和幕后(后端)操作。
它的目标是加快应用程序的开发过程,从早期设计阶段到最终交付功能齐全、可供使用的产品。
来源:Taipy Docs
要求: Linux、Windows 和 Mac 上的 Python 3.8 或更高版本。
您的支持意义重大🌱,并在很多方面帮助我们,比如撰写文章!🙏
安装 Taipy:
打开终端并运行以下命令,这将安装 Taipy 及其所有依赖项。
pip install taipy
准备好了!
来跟 Taipy 打个招呼吧!
# import the library
from taipy import Gui

hello = "# Hello Taipy!"

# run the gui
Gui(hello).run()
将代码保存为 Python 文件:例如hi_taipy.py。
运行代码并等待客户端链接http://127.0.0.1:5000在浏览器中显示并弹出。
如果您想同时运行多个服务器,可以更改端口Gui(...).run(port=xxxx)。
使用 Taipy 创建聊天界面
现在我们已经熟悉了 Taipy,让我们开始构建我们的聊天界面。
步骤 1:从 ctransformers 库导入 AutoModelForCausalLM 类
在这一步中,我们从 ctransformers 库中导入 AutoModelForCausalLM 类,该类用于使用预先训练的语言模型生成文本。
from ctransformers import AutoModelForCausalLM
第 2 步:导入 Taipy 库
在此步骤中,我们导入 Taipy GUI 库,用于构建我们的聊天机器人的用户界面。
from taipy.gui import Gui, notify
步骤 3:加载 Mistral-7B-Instruct-v0.1-GGUF 模型
llm = AutoModelForCausalLM.from_pretrained("TheBloke/Mistral-7B-Instruct-v0.1-GGUF", model_file="mistral-7b-instruct-v0.1.Q4_K_M.gguf", model_type="mistral", gpu_layers=0)
步骤 4:初始化提示和响应变量
在此步骤中,我们将提示和响应变量初始化为空字符串。
prompt = ""
response = ""
步骤5:定义聊天功能
在此步骤中,我们定义聊天函数,当用户点击用户界面中的“聊天”按钮时,该函数会被调用。此函数将 GUI 的当前状态作为输入,根据用户的提示,使用预先训练的语言模型生成文本,并更新状态中的响应变量。
def chat(state):
    notify(state, 'info', 'Thinking...')
    state.response = llm(state.prompt)
步骤 6:定义用户界面
现在是时候使用 Taipy GUI 库来定义我们的聊天机器人的用户界面了。用户界面由一个输入框(用户可以在其中输入提示)、一个触发聊天功能的“聊天”按钮以及一个显示区域(用于显示聊天机器人的回复)组成。
page = """
# Chatbot Wizard! {: .color-primary}
Enter Prompt: <|{prompt}|input|> <br />
<|Chat|button|class_name=plain mt1|on_action=chat|> <br />
MistralAI: <br /> <|{response}|>
"""
步骤 7:运行 Taipy GUI 应用程序
现在让我们使用 run 方法运行 Taipy GUI 应用程序。
Gui(page).run(debug=True)
完整代码
# import the AutoModelForCausalLM class from the ctransformers library
from ctransformers import AutoModelForCausalLM

# import taipy library
from taipy.gui import Gui, notify

# load Mistral-7B-Instruct-v0.1-GGUF, Set gpu_layers to the number of layers to offload to GPU. The value is set to 0 because no GPU acceleration is available on my current system.
llm = AutoModelForCausalLM.from_pretrained("TheBloke/Mistral-7B-Instruct-v0.1-GGUF", model_file="mistral-7b-instruct-v0.1.Q4_K_M.gguf", model_type="mistral", gpu_layers=0)

# initialize the `prompt` and `response` variables as empty strings.
prompt = ""
response = ""

def chat(state):
    notify(state, 'info', 'Thinking...')
    state.response = llm(state.prompt)

page = """
# Chatbot Wizard! {: .color-primary}
Enter Prompt: <|{prompt}|input|>
<|Send Prompt|button|class_name=plain mt1|on_action=chat|> <br />
MistralAI: <br /> <|{response}|>
"""

Gui(page).run(debug=True)
一个简单的聊天界面就在这里! 让我们将应用程序升级,使其成为我们想象中的聊天机器人。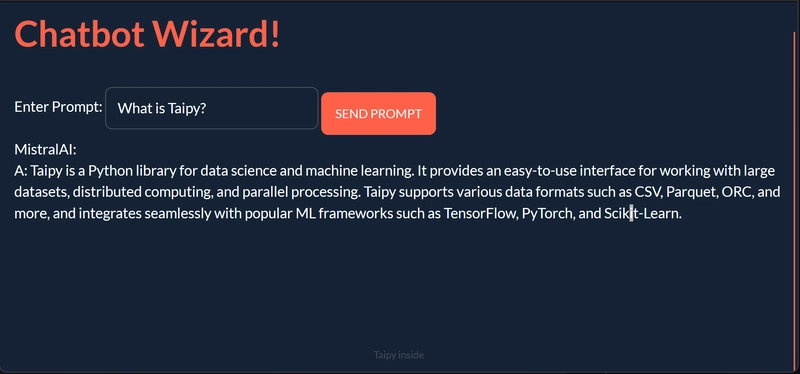
Mistral AI 聊天机器人
步骤 1:在此步骤中,我们初始化提示和响应以及对话
prompt = ""
response = ""
conversation = {
    "Conversation": ["Hello", "Hi there!   What would you like to talk about today?"]
}
第二步:更新聊天功能
def chat(state):
    # Notify the user that the chatbot is thinking
    notify(state, 'info', 'Thinking...')

    # Generate a response using the loaded language model
    response = llm(state.prompt)

    # Add the user's prompt and the bot's response to the conversation history
    state.conversation["Conversation"].append(state.prompt)
    state.conversation["Conversation"].append(response)

    # Update the conversation object to contain the entire conversation history
    state.conversation = {"Conversation": state.conversation["Conversation"]}

    # Clear the user's input prompt
    state.prompt = ""

    # Notify the user that the bot has generated a response
    notify(state, 'info', 'Response received!')
步骤3:添加 clear_conversation 函数来清除对话历史记录
该函数将state.conversation对象设置为一个包含单个键值对的新字典,其中键为Conversation,值是一个空列表。
这实际上会清除对话历史记录,因为state.conversation对象现在是一个包含单个键值对的空字典,该键值对包含一个空列表。
更新后的state.conversation对象将反映在聊天机器人 UI 中,显示一个空的对话历史记录。
def clear_conversation(state):
    state.conversation = {"Conversation": []}
步骤 4:搞定!
让我们定义聊天机器人的用户界面布局。
下载并保存一个 logo,放在脚本所在的目录中,添加 logo。
然后将clear_conversation附加到“新建聊天”按钮上。
使用 CSS 进行样式设置
现在,让我们通过将响应浮动在左侧并将提示浮动在右侧来设计我们的聊天用户界面。
步骤1:创建一个与python文件同名的CSS文件,并将其保存在同一目录中。
.mistral_mssg td {
    position: relative;
    display: inline-block;
    margin: 10px 10px;
    padding: 15px;
    background-color: #ff8c00;
    border-radius: 20px;
    max-width: 80%;
    box-shadow: 0 4px 8px 0 rgba(0, 0, 0, 0.2), 0 6px 20px 0 rgba(0, 0, 0, 0.19);
    font-size: medium;
  }

  .user_mssg td {
    position: relative;
    display: inline-block;
    float: right;
    margin: 10px 10px;
    padding: 15px;
    background-color: #9400D3;
    border-radius: 20px;
    max-width: 80%;
    box-shadow: 0 4px 8px 0 rgba(0, 0, 0, 0.2), 0 6px 20px 0 rgba(0, 0, 0, 0.19);
    font-size: medium;
  }

.flexy{
    display: flex;
    justify-content: center;
    max-width: 50vw;
    margin: 4em auto;
    align-items: center;
}
步骤 2:创建 style_conv 函数
style_conv函数是一个回调函数,用于将样式应用于 Taipy GUI 中的对话历史记录表。它接受三个参数:state、idx和row。
state参数是一个字典,包含 GUI 的当前状态,包括对话历史记录。idx
参数是表中当前行的索引,row 参数是表中当前列的索引。
该函数检查idx参数的值,以确定要应用于当前行的样式。如果idx为None,则函数返回None,表示不应应用任何样式。
如果idx为偶数,则函数返回字符串user_mssg,对应于用户提示的 CSS 类。如果idx为奇数,则函数返回字符串mistral_mssg,对应于聊天机器人响应的 CSS 类。
以下是 style_conv 函数的代码:
def style_conv(state, idx: int, row: int) -> str:
    if idx is None:
        return None
    elif idx % 2 == 0:
        return "user_mssg"  # return user_mssg style
    else:
        return "mistral_mssg"  # return mistral_mssg style
要在 Taipy GUI 中使用 style_conv 函数,我们需要将其作为 table 元素中 style 属性的值传递。例如:
<|{conversation}|table|style=style_conv|show_all|width=100%|rebuild|>
步骤 3:添加侧边栏
重新定义页面以添加侧边栏。
page = """
<|layout|columns=300px 1|
<|part|render=True|class_name=sidebar bg_black|
# Chat **Wizard**{: .color-primary} # {: .logo-text}
<|New Chat|button|class_name=fullwidth plain|on_action=clear_conversation|>

### History
<|{history}|table|show_all|>
|>

<|part|render=True|class_name=p2 align-item-bottom table|
<|{conversation}|table|style=style_conv|show_all|width=100%|rebuild|>

<|part|class_name=card mt1|
<|{prompt}|input|label=Ask anything...|class_name=fullwidth|on_action=chat|>
<|Send Prompt|button|class_name=plain mt1 fullwidth|on_action=chat|>
|>
|>
|>
"""
最后的想法
总而言之,本文演示了如何使用 Taipy GUI 库和 ctransformers 库中的 Mistral-7B-Instruct-v0.1-GGUF 语言模型构建一个简单的聊天机器人。提供的代码展示了如何加载语言模型、生成对用户提示的响应、更新对话历史记录以及清除对话历史记录。该聊天机器人的 UI 使用 Taipy GUI 库构建,提供了一个用户友好的界面,方便与聊天机器人交互。总而言之,本文为使用这些 Taipy 构建更复杂的聊天机器人提供了一个有用的起点。
资源:
HuggingFace:Mistral-7B-Instruct-v0.1-GGUF
Taipy:Taipy 文档
文章来源:https://dev.to/taipy/building-a-chatgpt-wizard-with-mistralai-using-taipy-54na 后端开发教程 - Java、Spring Boot 实战 - msg200.com


