使用代码生成器加速您的 React 开发人员工作流程
该文章最初发布在我的个人博客上。
作为 React 开发者,我们经常需要设置新组件,将它们与现有基础架构连接起来,或者搭建应用程序的脚手架。这需要大量重复的手动工作,虽然这种情况并不常见,但却非常繁琐,坦白说,甚至可以说是无聊。好消息是,代码生成器可以轻松实现自动化。这些生成器还可以与其他开发者共享,从而提高团队内部代码的一致性。
在本文中,我们将使用plop包来设置生成器,该生成器可以从头创建 React 组件文件夹,也可以将新组件添加到现有文件夹中。最终代码可在Github上获取。
假设您已经设置了 React 应用程序(我个人更喜欢使用 create-react-app来加快该过程),我们将从安装 plop 开始。
npm i -D plop
-D这是 的快捷方式--save-dev。同时,让我们将generate脚本添加到我们的 package.json 中。
    // package.json

    "generate": "./node_modules/.bin/plop --plopfile src/js/scripts/generator/index.js",
如果全局安装 plop(带有 -g前缀),则可以使用 plop命令代替./node_modules/.bin/plop。
基础结构是使用 create-react-app 创建的应用的典型结构。此外,每个组件都有一个包含组件文件的文件夹, index.js所有组件都从该文件夹导出。
    mysite/
        src/
            components/
                Component1/
                    Component1.js
                    index.js
            App.js
            App.css
            index.js
            index.css
scripts现在我们将在目录中创建文件夹src ,并在其中添加generator文件夹。在生成器内部,我们将添加index.js,用于设置生成器本身的文件夹,名为“component”。
    // index.js

    const config = require("./actions");

    module.exports = function(plop) {
      plop.setGenerator("component", config);
    };
我们还需要添加生成器的配置,这是我们设置的主要部分。为此,让我们创建config.js并开始充实它。
如果我们查看 plop文档,生成器配置对象有 3 个属性:
description- 简要描述该生成器的功能prompt- 收集用户输入的问题action- 根据输入执行的操作
让我们从添加描述开始。
    // config.js

    /**
     * Generate React component for an app
     */

    module.exports = {
        description: "Generate a new React component"
    }
嗯,很简单。现在我们来定义提示,它基本上是从用户获取输入的方式。
    prompts: [
        {
          type: "list",
          name: "action",
          message: "Select action",
          choices: () => [
            {
              name: "Create component folder",
              value: "create"
            },
            {
              name: "Add separate component",
              value: "add"
            }
          ]
        },
        {
          type: "list",
          name: "component",
          message: "Select component",
          when: answer => answer.action === "add",
          choices: listComponents,
        },
        {
          type: "input",
          name: "name",
          message: "Component name:",
          validate: value => {
            if (!value) {
              return "Component name is required";
            }
            return true;
          }
        },
        {
          type: "list",
          name: "type",
          message: "Select component type",
          default: "functional",
          choices: () => [
            { name: "Functional component", value: "functional" },
            { name: "Class Based Component", value: "class" }
          ]
        }
      ],
数组中每个对象的主要属性prompts是type、name和message。如果提示符的类型是list,我们需要提供一个选项列表。Plop 使用inquirer.js来处理提示符,因此如果您想深入了解可用的提示符类型,请查看其代码库。
提示的工作方式是,在收集到用户的输入后,它可以作为提示方法参数的属性使用。例如,在上面的第一个提示中,我们提供了一个可供选择的选项数组。用户选择一个选项后,它将在 数据对象的属性value上可用,因为我们将提示的指定为。然后在下一个提示对象中,我们可以通过方法访问此值 : 。该属性基本上检查是否应向用户显示当前提示。因此,在这种情况下,如果用户选择了操作,下一个提示将要求指定应添加组件的目录。 actionnameactionwhenwhen: answer => answer.action === "add"whenadd
您会注意到 这里使用实用函数来获取目录listComponents中的组件名称数组。components
    // listComponents.js

    const fs = require("fs");
    const path = require("path");

    module.exports = () => {
      return fs.readdirSync(path.join(__dirname, `../../components`));
    };
此外,我们使用它 validate来确保用户确实指定了组件的名称。在最后的提示中,我们要求选择要创建的组件类型,并提供功能组件作为默认选项,因为它可能是最常用的。
现在到了生成器最有趣的部分——它的动作。动作可以是要执行的命令列表,也可以是返回该列表的函数。在本例中,我们将使用函数形式,因为我们需要进行大量的检查和条件返回。
但在此之前,让我们在文件顶部添加一个常量, componentsPath这样可以免去在多个地方更新路径字符串的麻烦,以防我们决定将配置移动到其他地方。
    // config.js

    const componentsPath = "../../components";

    // ...

      actions: data => {
        const target = data.action === "create" ? "properCase name" : "dir";
        let actions = [
          {
            type: "add",
            path: `${componentsPath}/{{${target}}}/{{properCase name}}.js`,
            templateFile: "./templates/{{type}}.js.hbs"
          }
        ];

        if (data.action === "create") {
          actions = [
            ...actions,
            {
              type: "add",
              path: `${componentsPath}/{{properCase name}}/index.js`,
              templateFile: "./templates/index.js.hbs"
            }
          ];
        }

        if (data.action === "add") {
          actions = [
            ...actions,
            {
              type: "append",
              path: `${componentsPath}/{{dir}}/index.js`,
              templateFile: "./templates/index.js.hbs"
            }
          ];
        }

        return actions;
      }
    }
Actions 方法接受一个数据对象作为参数,该对象包含提示收集的所有数据。该方法需要返回一个操作对象数组。最重要的属性包括:
type- 此操作将执行哪种操作。此处的操作包括创建新文件、添加标题add或修改现有文件,具体操作方式如下append:path- 创建或修改组件的位置templateFile- 用于创建或修改文件的 Handlebars 模板路径。或者,template也可以使用属性,这对于需要单独保存的短 Handlebars 模板非常方便。
首先,我们用默认操作填充数组,这将在从下拉菜单中选择的目录中创建一个新组件,或者如果它是一个新的组件文件夹,则在具有该名称的文件夹中创建一个新组件。接下来有两个路径 - 当创建新的组件文件夹时,我们会index.js向该文件夹添加一个文件;如果它是一个新的组件文件,我们将index.js使用新的导出进行修改。Plop 有一些方便的内置文本转换器,我们在这里使用,即 properCase,它将 ChangeTextToThis。我们还可以使用 handlebars 语法来定义文件路径。这些字符串可以访问来自提示的数据,例如通过执行此操作, {{properCase name}} 我们可以访问用户在提示中键入的组件的名称。将它与 ES6 字符串插值相结合,可以提供一种强大的方式配置我们的路径。
现在让我们看一下用于生成和修改文件的模板。
    // index.js.hbs

    export {default as {{ properCase name }}, } from "./{{ properCase name }}";

    // functional.js.hbs

    import React from 'react';
    import PropTypes from 'prop-types';

    /**
     *
     * {{ properCase name }}
     *
     */
    const {{ properCase name }} = (props) => {
      return (
        <div>
          {{ properCase name }}
        </div>
      );
    }

    {{ properCase name }}.propTypes = {};

    export default {{ properCase name }};

    // class.js.hbs

    import React, { Component }  from 'react';
    import PropTypes from 'prop-types';

    /**
    *
    * {{ properCase name }}
    *
    */
    class {{ properCase name }} extends Component {
        static propTypes = {}

        constructor(props) {
            super(props);

            this.state = {};
        }

        render() {
            return (
              <div>
                {{ properCase name }}
              </div>
            );
        }
    }

    export default {{ properCase name }};
我们使用该格式filename.js.hbs来显示目标的文件类型。模板非常简单,它们基本上是各个文件的存根,只是缺少组件名称。值得注意的是,模板中还提供了 plop 的辅助方法,这对于自定义输出非常方便。
现在让我们尝试运行我们的生成器来验证它是否真的有效。
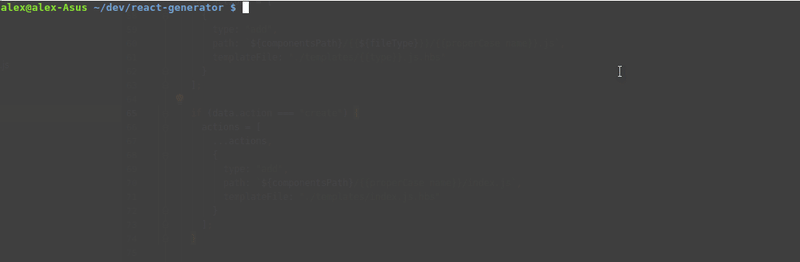
太棒了!现在只需一个命令即可生成新组件。这是一个非常简单的示例,但它很好地展示了代码生成器的强大功能。它可以轻松扩展,对于包含大量样板代码的组件更加有用。例如,如果每个组件都有一些翻译设置或大量的导入列表。
对这篇文章有任何问题/评论或其他反馈吗?请在这里的评论区或在 Twitter上告诉我。
鏂囩珷鏉ユ簮锛�https://dev.to/clarity89/speed-up-your-react-developer-workflow-with-code-generators-1ii4