🍝 使用 Next.js (React)、GraphQL、Strapi 和 Stripe 制作 Deliveroo 克隆版 - 🏗️ 设置(第 1/7 部分)
本教程将适用于在前端使用Next.js (React)而不是 Nuxt(Vue),并配备GraphQL、Stripe、Strapi 和 React Context。
准备好开发一个Deliveroo 克隆版吧,使用以下这些令人惊叹的技术:Next.js ( React )、GraphQL、Stripe和Strapi!从注册到下单,你将让用户探索餐厅、发现菜品,并选择他们的开心乐园餐。

最终结果的演示应该会让你垂涎欲滴:

注意:**源代码*可在 GitHub 上找到:https ://github.com/strapi/strapi-examples/tree/master/nextjs-react-strapi-deliveroo-clone-tutorial* 。
最终产品截图:


Strapi:
Strapi 是最先进的开源Node.js 无头内容管理系统,用于快速高效地构建可扩展、安全、可用于生产的 API,为开发人员节省无数的开发时间。
凭借其可扩展的插件系统,它提供了大量内置功能:管理面板、身份验证和权限管理、内容管理、API 生成器等。与在线 CMS 不同,Strapi 是 100% 开源的(查看GitHub 存储库),这意味着:
- Strapi完全免费。
- 您可以将其托管在您自己的服务器上,这样您就拥有了数据。
- 由于插件系统,它是完全可定制和可扩展的。
Next.js:
Next 是一个轻量级的开发框架,用于在React中创建静态的、服务器渲染的应用程序。Next.js 将负责应用程序的繁重工作,例如代码拆分、HMR(热模块替换)和 SSR(服务器端渲染),并使我们能够专注于应用程序本身。
反应:
React是最流行的前端 JavaScript 框架之一,由 Facebook 开发,并被Netflix、Airbnb 和 Github等众多科技公司用于构建应用程序。React 是一个声明式库,可以轻松创建交互式用户界面,并通过其基于组件的架构保持代码库的井然有序。
GraphQL:
GraphQL也是一种由 Facebook 开发的查询语言,它允许应用程序的前端轻松查询应用程序的 API。每个查询仅请求当前视图需要渲染的数据。这使得开发人员能够在多种设备和屏幕尺寸上打造出色的用户体验。
条纹:
Stripe是当今应用程序支付处理器之一(即使不是最大的)。Stripe 开发了工具和 SDK,让开发者能够轻松地设计并集成安全、合规的支付处理功能到任何应用程序中。
目录
- 🏗️设置(第 1 部分)-当前
- 🏠餐厅(第 2 部分)
- 🍔菜肴(第 3 部分)
- 🔐身份验证(第 4 部分)
- 🛒购物车(第 5 部分)
- 💵订购和结账(第 6 部分)
- 🚀奖励:部署(第 7 部分)## 🏗️ 设置
下一个
要设置 Next.js,我们需要一个空目录来安装库并托管我们的项目根目录。
我们将把项目分成两部分,一部分用于前端(Next.js 代码),一部分用于后端(Strapi 代码)。
mkdir strapi-deliveroo
cd strapi-deliveroo
mkdir frontend
cd frontend

yarn add next react react-dom
注意:我使用 yarn 作为我的包管理器,您也可以使用 npm 并执行npm install --save next react react-dom。
将以下内容添加到您的package.json文件中:
"scripts": {
  "dev": "next",
  "build": "next build",
  "start": "next start"
}
这样您的文件看起来就像这样(您的软件包依赖项可能根据安装时间而具有不同的版本):
{
  "dependencies": {
    "next": "^7.0.2",
    "react": "^16.6.1",
    "react-dom": "^16.6.1",
  },
  "scripts": {
    "dev": "next",
    "build": "next build",
    "start": "next start"
  }
}
Next.js 使用目录中的任何 JavaScript 文件/pages作为应用程序的路由。要设置,只需创建/pages目录并添加一个index.js文件:
mkdir pages
cd pages
touch index.js
现在我们有了主路由(index.js),每次浏览器 URL 位于根目录(例如www.yourapp.com)时都会加载它。为了测试这一点,你可以在 index.js 文件中插入以下内容:
export default () => <div>Welcome to next.js!</div>
要查看正在运行的应用程序,请使用以下命令启动本地开发服务器:
yarn dev
您的应用程序现在应该可以在http://localhost:3000上看到。
确保.gitignore在项目根目录中创建一个并向其中添加目录.next:node_modules
cd ..
touch .gitignore
/* .gitignore */
node_modules
.next
添加 Bootstrap
在本教程中,我们将使用react-strap将 Bootstrap 4 实现到我们的应用程序中。CSS 样式将直接从 CDN 导入。
首先安装 Reactstrap:
yarn add reactstrap bootstrap
reactstrap只是一个前端库,可以轻松创建 Bootstrap 组件和样式。
为了导入 CSS 并在所有页面上共享布局组件,我们将使用页面目录_app.js中的自定义文件。
该文件将覆盖 Next 使用的默认 App.js 并在每个页面上呈现,从而允许我们在一个地方设置全局样式/共享组件。
您可以_app.js在此处阅读有关处理的更多信息:https://nextjs.org/docs/#custom-app。
这将使我们能够导入<Head>组件并在标题内全局设置样式表。
cd pages
touch _app.js
小路:/frontend/pages/_app.js
| /* _app.js */ | |
| import React from "react"; | |
| import App, { Container } from "next/app"; | |
| import Head from "next/head"; | |
| export default class MyApp extends App { | |
| static async getInitialProps({ Component, router, ctx }) { | |
| let pageProps = {}; | |
| if (Component.getInitialProps) { | |
| pageProps = await Component.getInitialProps(ctx); | |
| } | |
| return { pageProps }; | |
| } | |
| render() { | |
| const { Component, pageProps } = this.props; | |
| return ( | |
| <> | |
| <Head> | |
| <link | |
| rel="stylesheet" | |
| href="https://maxcdn.bootstrapcdn.com/bootstrap/4.0.0/css/bootstrap.min.css" | |
| integrity="sha384-Gn5384xqQ1aoWXA+058RXPxPg6fy4IWvTNh0E263XmFcJlSAwiGgFAW/dAiS6JXm" | |
| crossOrigin="anonymous" | |
| /> | |
| </Head> | |
| <Container> | |
| <Component {...pageProps} /> | |
| </Container> | |
| </> | |
| ); | |
| } | |
| } |
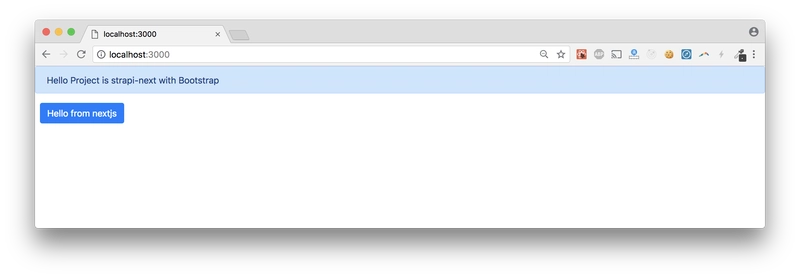
现在,如果我们在其中添加一些 reactstrap 组件,index.js我们应该会在重新启动服务器后看到应用的引导样式。
小路:/frontend/pages/index.js
| /* pages/index.js */ | |
| import { Button, Alert } from "reactstrap"; | |
| export default () => { | |
| return ( | |
| <div> | |
| <div> | |
| <Alert color="primary"> | |
| Hello Project is strapi-next with Bootstrap | |
| </Alert> | |
| <Button color="primary">Hello from nextjs</Button> | |
| </div> | |
| </div> | |
| ); | |
| }; |
重新启动服务器以应用新的更改。
设计页面
现在我们已经在 Next.js 项目中运行了 Bootstrap,我们可以开始设计导航栏等基本的共享前端组件。
首先创建一个文件夹来存储我们的组件并创建我们的布局组件:
cd ..
mkdir components
cd components
touch Layout.js
Nextjs 使用<Link>组件在页面之间执行客户端路由。Link 组件只是一个高阶组件,可以接受任何能够处理 onClick 处理程序的 HTML 标签(<a>、<button>等<div>)。
<style jsx>这将导致我们必须在 Reactstrap 文档之外进行一些修改。为了设置导航栏的样式,我们可以使用NextJS 默认提供的 JS 内置 CSS 。
在 JS 中插入 CSS 如下:
<style jsx> {`
  a { color: yellow }
`}
</style>
允许我们将 CSS 范围限定在样式标签所呈现的组件中,您还可以传入全局选项来设置全局样式:<style jsx global>
您可以在此处的下一篇文档中阅读有关 JS 中的 CSS 的更多信息。
打开Layout.js文件并创建共享布局组件并插入 Stripe 脚本(稍后使用),如下所示:
小路:/frontend/components/Layout.js
| /* /components/Layout.js */ | |
| import React from "react"; | |
| import Head from "next/head"; | |
| import Link from "next/link"; | |
| import { Container, Nav, NavItem } from "reactstrap"; | |
| class Layout extends React.Component { | |
| constructor(props) { | |
| super(props); | |
| } | |
| static async getInitialProps({ req }) { | |
| let pageProps = {}; | |
| if (Component.getInitialProps) { | |
| pageProps = await Component.getInitialProps(ctx); | |
| } | |
| return { pageProps }; | |
| } | |
| render() { | |
| const { children } = this.props; | |
| const title = "Welcome to Nextjs"; | |
| return ( | |
| <div> | |
| <Head> | |
| <title>{title}</title> | |
| <meta charSet="utf-8" /> | |
| <meta | |
| name="viewport" | |
| content="initial-scale=1.0, width=device-width" | |
| /> | |
| <link | |
| rel="stylesheet" | |
| href="https://maxcdn.bootstrapcdn.com/bootstrap/4.0.0/css/bootstrap.min.css" | |
| integrity="sha384-Gn5384xqQ1aoWXA+058RXPxPg6fy4IWvTNh0E263XmFcJlSAwiGgFAW/dAiS6JXm" | |
| crossOrigin="anonymous" | |
| /> | |
| <script src="https://js.stripe.com/v3" /> | |
| </Head> | |
| <header> | |
| <style jsx> | |
| {` | |
| a { | |
| color: white; | |
| } | |
| `} | |
| </style> | |
| <Nav className="navbar navbar-dark bg-dark"> | |
| <NavItem> | |
| <Link href="/"> | |
| <a className="navbar-brand">Home</a> | |
| </Link> | |
| </NavItem> | |
| <NavItem className="ml-auto"> | |
| <Link href="/signin"> | |
| <a className="nav-link">Sign In</a> | |
| </Link> | |
| </NavItem> | |
| <NavItem> | |
| <Link href="/signup"> | |
| <a className="nav-link"> Sign Up</a> | |
| </Link> | |
| </NavItem> | |
| </Nav> | |
| </header> | |
| <Container>{children}</Container> | |
| </div> | |
| ); | |
| } | |
| } | |
| export default Layout; |
编辑index.js文件以使用新的布局组件:
小路:/frontend/pages/index.js
| /* /pages/index.js */ | |
| import { Button, Alert } from "reactstrap"; | |
| import Layout from "../components/Layout"; | |
| export default () => { | |
| return ( | |
| <Layout> | |
| <div> | |
| <Alert color="primary"> | |
| Hello Project is strapi-next with Bootstrap | |
| </Alert> | |
| <Button color="primary">Hello from nextjs</Button> | |
| </div> | |
| </Layout> | |
| ); | |
| }; |
现在,您应该在所有页面上都有一个共享的标题栏:

我们将创建两个附加页面,分别允许用户在和登录/signin和注册/signup。
您需要在/pages目录中创建相应的文件以便下一步识别路线。
cd ..
cd pages

touch signin.js
touch signup.js
使用以下代码填充文件,一旦我们的 Strapi 服务器设置完成,我们就会返回这些代码。
小路:/frontend/pages/signup.js
| /* pages/register.js */ | |
| export default () => { | |
| return <h1>Sign Up</h1>; | |
| }; |
| /* pages/register.js */ | |
| export default () => { | |
| return <h1>Sign Up</h1>; | |
| }; |
小路:/frontend/pages/signin.js
| /* pages/login.js */ | |
| export default () => { | |
| return <h1>Sign In</h1>; | |
| }; |
| /* pages/login.js */ | |
| export default () => { | |
| return <h1>Sign In</h1>; | |
| }; |
您现在应该在http://localhost:3000看到路由。
斯特拉皮
拥有前端固然好,但您的应用显然需要一个后端来管理用户、餐厅、菜品和订单。为了实现这个奇迹,让我们创建一个 Strapi API。
安装 Strapi
要求:请确保使用Node 9(或更高版本)并且在您的机器上安装并运行MongoDB、Postgres 或 MySQL。
使用 npm 安装 Strapi:
npm i strapi@alpha -g
注意:Strapi v3 仍为 alpha 版本,但对于本教程来说已经足够了。
生成 Strapi 项目
strapi-deliveroo通过单个命令行在内部搭建您的 API :
在名为的目录中安装 strapi 服务器backend:
cd ..
cd ..
strapi new backend
CLI 会要求您选择数据库:选择 MongoDB、Postgres 或 MySQL。然后,填写数据库信息(如果您选择 MongoDB 以外的数据库,则需要在前面的 GraphQL 查询中将 _id 字段更改为 id)。如果您在计算机上正确安装了数据库系统,则默认值应该可以正常工作。
注意:本教程使用 MongoDB,一旦您创建 strapi 项目,系统将要求您启动 Mongo 实例,然后才能启动 strapi 服务器。
导航到 MongoDB 的安装位置(MacOS 上的默认位置)
cd ~./data/db
mongod
这将在您的本地机器上启动 MongoDB 服务器,现在您可以启动您的 Strapi 服务器。
启动服务器
启动 Node.js 服务器:
cd backend
strapi start

从现在开始,您应该能够访问项目的管理面板:http://localhost:1337/admin。
创建您的第一个用户
从注册页面添加您的第一个用户。

干得好,你成功设置了 Next.js 和 Strapi 项目!🎉
🏠 在下一节中,您将学习如何显示餐厅列表:https://dev.to/ryanrez/-cooking-a-deliveroo-clone-with-nextjs-react-graphql-strapi-and-stripe----restaurants-list-part-27-10ce
文章来源:https://dev.to/ryanaz/-cooking-a-deliveroo-clone-with-nextjs-react-graphql-strapi-and-stripe----setup-part-17-ked