让我们用 HTML、CSS 和 JavaScript 来制作圣诞灯🎄
在本文中,我将讨论如何使用
前端的三个火枪手(HTML、CSS 和 JavaScript)构建交互式灯光显示屏……
在本文中,我将讨论如何使用
前端的“三剑客”——HTML、CSS 和 JavaScript——来构建一个交互式灯光显示屏。我们将构建一串灯光,模拟 圣诞节期间看到的
类似圣诞彩灯闪烁的效果。
为了跟上这一步,您应该熟练使用 HTML、CSS
和 JavaScript。
您可以在Codepen上找到最终结果
结构
在继续其他操作之前,我们必须先
用 HTML 定义灯光显示的结构。我们将创建一个名为的文件index.html,并定义几个代表灯泡的元素
:divs
<!DOCTYPE html>
<html lang="en">
  <head>
    <meta charset="UTF-8" />
    <meta name="viewport" content="width=device-width, initial-scale=1.0" />
    <meta http-equiv="X-UA-Compatible" content="ie=edge" />
    <title>Christmas Lights</title>
  </head>
  <body>
    <section class="light-bulbs">
      <div class="light-bulb theme-color-one"></div>
      <div class="light-bulb theme-color-two"></div>
      <div class="light-bulb theme-color-three"></div>
      <div class="light-bulb theme-color-four"></div>
      <div class="light-bulb theme-color-five"></div>
      <div class="light-bulb theme-color-one"></div>
    </section>
  </body>
</html>
此时,我们应该有一个空白的页面,但通过我们定义的标记,我们为 要构建的
灯光显示奠定了必要的基础。
请注意,这不是强制性的divs使用,任何块级
元素都可以。
风格
现在我们已经完成了页面结构的初始设置,接下来开始样式设置。
我们的目标是divs将灯泡通过字符串连接起来
,并赋予每个灯泡独特的颜色,这些颜色还可以根据需要更改(我们将
在添加行为时实现)。如果您查看 HTML,您会
注意到每个 div 都有一个 类light-bulb和一个额外的类来表示
该 div 的颜色。
这样做是为了让我们既能应用
影响所有元素的通用样式,divs也能为每个
元素应用特定的样式div。让我们创建一个名为 的文件style.css,其中包含所有
必要的样式声明。然后,我们将此文件链接到
我们之前创建的 html 页面:
:root {
  --theme-color-one: #025ba0;
  --theme-color-two: #9bc72b;
  --theme-color-three: #f0c517;
  --theme-color-four: #bf1724;
  --theme-color-five: #5cc9f4;
  --white: #fff;
  --black: #000;
  --grey: #999;
  background: var(--black);
  color: var(--white);
}

body {
  font-family: 'Alatsi', sans-serif;
}

.light-bulbs {
  display: flex;
  justify-content: space-between;
  padding: 20px;
  width: 500px;
  margin: 0 auto;
}

.light-bulb {
  border-radius: 50%;
  height: 30px;
  width: 30px;
}

.light-bulb.theme-color-one {
  background: var(--theme-color-one);
}

.light-bulb.theme-color-two {
  background: var(--theme-color-two);
}

.light-bulb.theme-color-three {
  background: var(--theme-color-three);
}

.light-bulb.theme-color-four {
  background: var(--theme-color-four);
}

.light-bulb.theme-color-five {
  background: var(--theme-color-five);
}
<!DOCTYPE html>
<html>
  <head>
    . . .
    <link
      href="https://fonts.googleapis.com/css?family=Alatsi&display=swap"
      rel="stylesheet"
    />
    <link rel="stylesheet" href="./style.css" />
  </head>
  <body>
    . . .
  </body>
</html>
我们已经声明了变量来存储不同灯泡的颜色值以及
根元素中的一些常见颜色值(这将在我们稍后向页面添加行为时发挥作用)。
我们还将灯泡的包含元素设置为500px弹性容器
,并将其定位到页面的中心,并将其子元素(灯泡)设置为
在它们之间有相等的间距。
对于灯泡本身,我们设置了它们的尺寸以及
每个灯泡的背景颜色,并且我们还使用该border-radius
属性将它们制成一个圆圈。
我们还链接到了谷歌字体,并将页面Alatsi默认字体设置 为。如果需要,可以将其更改为任何其他字体。font-familyAlatsi
该页面现在应如下所示:
现在我们有了它,我们需要的就是造型来帮助代表灯泡的底座
和穿过并连接每个灯泡的灯绳。
让我们将以下内容添加到 css 文件:
.light-bulb {
  /* prior styles go here */
  position: relative;
}

.light-bulb::before {
  content: '';
  position: absolute;
  border: 2px solid #222;
  width: 10px;
  height: 10px;
  background: #222;
  border-top-left-radius: 5px;
  border-top-right-radius: 5px;
  left: 25%;
  top: -12px;
}
我们使用伪元素来生成 灯泡before底座的表示。我们设置了尺寸、背景颜色、位置, 然后使用和属性创建了弯曲的边框。border-top-left-radiusborder-top-right-radius
这将使之前的圆圈看起来更像真正的
灯泡。
该页面现在应如下所示:
下一步是添加连接每个灯泡的线。让我们将
其添加到我们的 css 文件中:
.light-bulb::after {
  content: '';
  top: -20px;
  left: 60%;
  position: absolute;
  width: 90px;
  height: 28px;
  border-bottom: 4px solid #222;
  border-radius: 50%;
  z-index: -1;
}

.light-bulb:last-of-type::after {
  border: none;
}
这里,我们使用了另一个伪元素,用来after模拟连接每个元素的字符串
。和之前的样式声明一样,我们设置了它的尺寸、
定位和边框半径。我们还将它的z-index属性设置为负一 (-1),这样
它就会出现在页面上所有其他元素的后面(尤其是表示灯泡底座的元素)。
我们还删除了最后一个灯泡的边框,因为它是最后一个项目
,不需要字符串模拟来显示。
应用此更改后,页面应如下所示:
现在,让我们通过调整box-shadow灯泡的属性,让我们的灯泡看起来像是慢慢地闪烁。
让我们将以下内容添加到 css 文件中元素的后面root:
@keyframes light-up-theme-color-one {
  0% {
    box-shadow: 0 1px 10px 5px var(--theme-color-one);
  }
  25% {
    box-shadow: 0 1px 15px 5px var(--theme-color-one);
  }
  50% {
    box-shadow: 0 1px 20px 5px var(--theme-color-one);
  }
  75% {
    box-shadow: 0 1px 25px 5px var(--theme-color-one);
  }
  100% {
    box-shadow: none;
  }
}

@keyframes light-up-theme-color-two {
  0% {
    box-shadow: 0 1px 10px 5px var(--theme-color-two);
  }
  25% {
    box-shadow: 0 1px 15px 5px var(--theme-color-two);
  }
  50% {
    box-shadow: 0 1px 20px 5px var(--theme-color-two);
  }
  75% {
    box-shadow: 0 1px 25px 5px var(--theme-color-two);
  }
  100% {
    box-shadow: none;
  }
}

@keyframes light-up-theme-color-three {
  0% {
    box-shadow: 0 1px 10px 5px var(--theme-color-three);
  }
  25% {
    box-shadow: 0 1px 15px 5px var(--theme-color-three);
  }
  50% {
    box-shadow: 0 1px 20px 5px var(--theme-color-three);
  }
  75% {
    box-shadow: 0 1px 25px 5px var(--theme-color-three);
  }
  100% {
    box-shadow: none;
  }
}

@keyframes light-up-theme-color-four {
  0% {
    box-shadow: 0 1px 10px 5px var(--theme-color-four);
  }
  25% {
    box-shadow: 0 1px 15px 5px var(--theme-color-four);
  }
  50% {
    box-shadow: 0 1px 20px 5px var(--theme-color-four);
  }
  75% {
    box-shadow: 0 1px 25px 5px var(--theme-color-four);
  }
  100% {
    box-shadow: none;
  }
}

@keyframes light-up-theme-color-five {
  0% {
    box-shadow: 0 1px 10px 5px var(--theme-color-five);
  }
  25% {
    box-shadow: 0 1px 15px 5px var(--theme-color-five);
  }
  50% {
    box-shadow: 0 1px 20px 5px var(--theme-color-five);
  }
  75% {
    box-shadow: 0 1px 25px 5px var(--theme-color-five);
  }
  100% {
    box-shadow: none;
  }
}
我们在这里所做的是声明关键帧动画,这些动画会blur在动画运行的不同点增加灯泡的亮度。这将产生
灯泡亮起并逐渐增强的效果。在 100% 时,
我们将亮度设置box-shadow为none,以产生灯泡熄灭的效果。
你还会注意到不同关键帧中存在一些重复,唯一的
区别在于所用的颜色。使用像sassbox-shadow这样的工具, 我们可以用循环和一些插值技巧来解决这个问题,但我们身处 CSS 的 世界,所以没有这样的选择。
我们还为关键帧命名了与灯泡颜色名称类似的名称,
但它们可以有不同的名称,并且不会有太大区别。
重要的是确保不同的主题颜色都有
其专属的关键帧。
关键帧声明本身不会有太大作用,除非使用它们。因此
,下一步我们将把关键帧动画应用到各个灯泡
元素上。让我们将以下内容添加到 CSS 文件:
.light-bulb {
  /* prior styles go here */
  animation-duration: 1.1s;
  animation-iteration-count: infinite;
}

.light-bulb.theme-color-one {
  animation-name: light-up-theme-color-one;
}

.light-bulb.theme-color-two {
  animation-name: light-up-theme-color-two;
}

.light-bulb.theme-color-three {
  animation-name: light-up-theme-color-three;
}

.light-bulb.theme-color-four {
  animation-name: light-up-theme-color-four;
}

.light-bulb.theme-color-five {
  animation-name: light-up-theme-color-five;
}
现在我们已经将其添加到 css 文件中,我们应该可以亲手制作一场真正的灯光秀了。
我们现在使用之前声明的关键帧动画,并
为每个灯泡指定了不同的动画名称。我们animation-duration为每个
元素设置了动画1.1s,并将动画设置为无限循环。
我们的页面现在看起来应该是这样的:
至此,我们的样式就全部完成了。现在,让我们添加一些行为
,以便可以切换灯光显示,动态设置
动画时长,以及根据需要更改灯泡的颜色。
行为
让我们继续为灯光显示添加一些行为。我们希望能够
打开和关闭它,更改动画时长,并且根据需要将
每个灯泡的颜色设置为不同的颜色。
幸运的是,我们可以使用 JavaScript 实现所有这些。首先,我们将创建
一个名为 的文件christmas-light.js(名称可以任意,但扩展名必须是js)。
完成此操作后,我们现在可以开始向页面添加一些交互性。
我们将从实现切换灯泡的功能开始。让我们
稍微修改一下 HTML,添加一个设置面板,并链接我们新创建的 js 文件。
将以下内容添加到 html 页面:
<!DOCTYPE html>
<html>
  <head>
    ...
  </head>
  <body>
    <section class="light-bulbs">...</section>
    <section class="light-bulb-settings">
      <h3>Settings</h3>
      <div class="group">
        <label>State:</label>
        <div class="checkbox-container">
          <input type="checkbox" class="light-switch" />
        </div>
        <span class="light-switch-state">off</span>
      </div>
    </section>

    <script src="./christmas-light.js"></script>
  </body>
</html>
这样,页面上应该会显示一个复选框,但它仍然是一个
普通的复选框,整个设置面板会移到
页面左侧。让我们
在 CSS 文件中添加一些样式声明,让设置面板看起来更美观一些:
.light-bulb-settings {
  background: var(--white);
  color: #333;
  width: 500px;
  margin: 30px auto 0;
  padding: 20px;
  border-radius: 10px;
}

.light-bulb-settings .group {
  align-items: center;
  display: flex;
  margin: 15px 0;
}

.light-bulb-settings .group label {
  flex-basis: 80px;
}

.checkbox-container {
  cursor: pointer;
  width: 43px;
  height: 20px;
  background: var(--grey);
  border-radius: 100px;
  margin-right: 5px;
  position: relative;
  padding: 6px 12px;
  transition-duration: 0.4s;
}

.checkbox-container.active {
  background: var(--black);
}

.checkbox-container.active::after {
  left: 50%;
}

.checkbox-container::after {
  content: '';
  position: absolute;
  width: 25px;
  height: 25px;
  background: var(--white);
  border-radius: 100%;
  left: 5%;
  top: 9%;
  transition-duration: 0.4s;
}

.light-switch {
  opacity: 0;
  visibility: hidden;
}
这样,我们的设置面板就会出现在灯泡正下方,而我们
常规的旧复选框将被隐藏(我们将使用 JavaScript 添加复选框行为)
,并且在它的位置应该出现一个切换开关:
现在,如果我们点击切换按钮,什么也不会发生,这是因为我们
需要将所需的行为添加到我们的脚本文件中:
const checkBoxContainer = document.querySelector('.checkbox-container');

checkBoxContainer.addEventListener('click', e => {
  e.target.classList.toggle('active');
});
完成这些之后,我们现在应该能够将开关从其
初始状态转换到另一个状态,然后再转换回初始状态。
我们将使用这些状态来表示灯泡的亮灭状态。
首先,我们需要修改 CSS 文件。目前,灯泡始终处于
激活状态,但我们希望改变这种行为,使其在
点击开关时亮起。最初,灯泡处于
非激活状态,当我们点击开关时,它会打开灯泡
,再次点击开关时,灯泡会关闭。
为了表示灯泡处于活动状态,我们将引入一个
名为 的新类,on并将其添加到灯泡容器中。
只有当这个类存在时,灯泡才会亮起,否则,灯泡将
保持非活动状态。
我们来修改一下css文件:
.light-bulbs.on .light-bulb {
  animation-duration: 1.1s;
  animation-iteration-count: infinite;
}

.light-bulbs.on .light-bulb.theme-color-one {
  animation-name: light-up-theme-color-one;
}

.light-bulbs.on .light-bulb.theme-color-two {
  animation-name: light-up-theme-color-two;
}

.light-bulbs.on .light-bulb.theme-color-three {
  animation-name: light-up-theme-color-three;
}

.light-bulbs.on .light-bulb.theme-color-four {
  animation-name: light-up-theme-color-four;
}

.light-bulbs.on .light-bulb.theme-color-five {
  animation-name: light-up-theme-color-five;
}
我们所做的就是在灯泡容器的声明前添加了一个额外的类。我们还将 和on
的声明移出了,并使用后代组合器来 设置 的值。所有这些意味着,只有 当容器的类为 时,动画才会运行。animation-durationanimation-iteration-count.light-bulb.light-bulbon
解决了这个问题后,我们现在可以将所需的行为添加到脚本中:
const checkBoxContainer = document.querySelector('.checkbox-container');
const lightSwitch = document.querySelector('.light-switch');
const lightBulbContainer = document.querySelector('.light-bulbs');

checkBoxContainer.addEventListener('click', e => {
  e.target.classList.toggle('active');
  lightSwitch.click();
});

lightSwitch.addEventListener('change', () => {
  lightBulbContainer.classList.toggle('on');
});
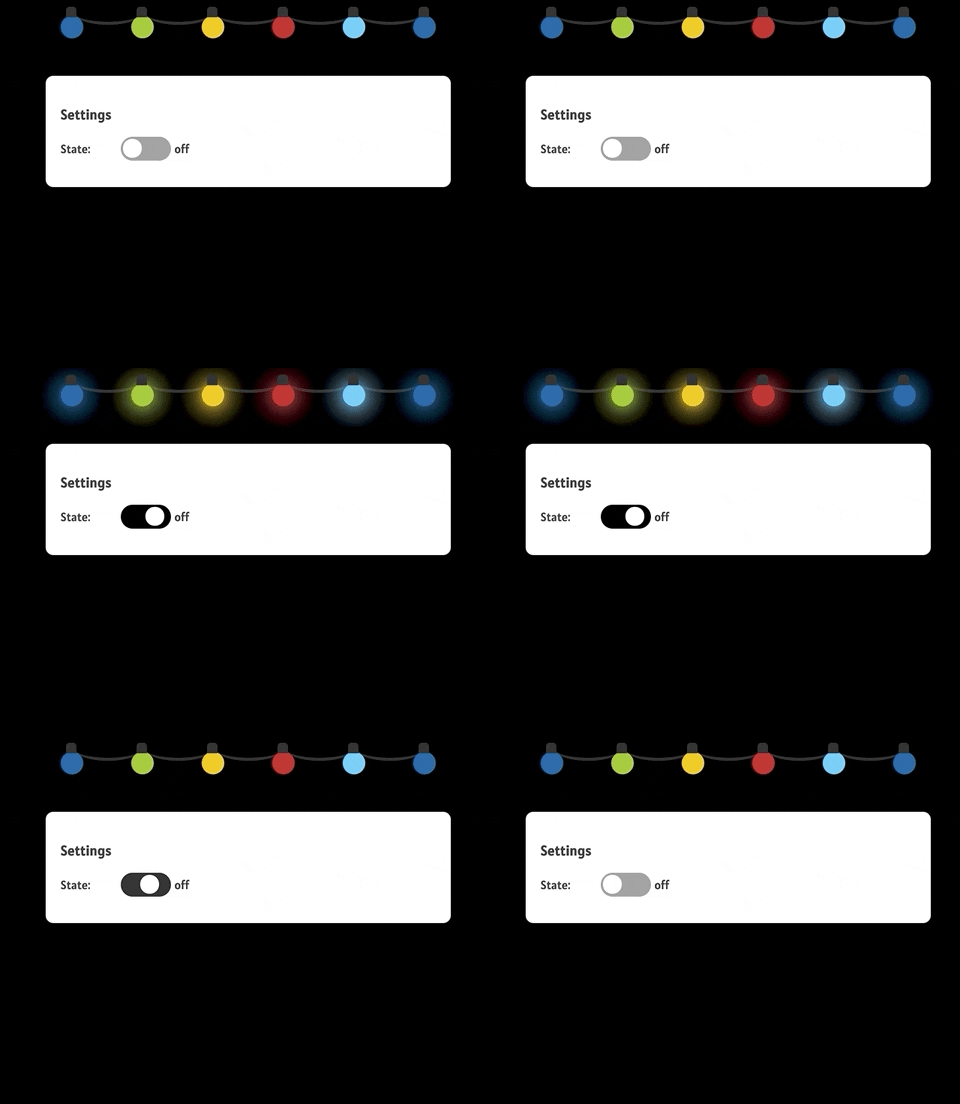
有了这个,我们现在应该能够切换灯泡的状态:
太棒了,现在点击切换开关时灯泡会亮起来,但
表示切换开关状态的文本并没有显示它何时处于
活动状态。让我们通过在 js 文件中添加以下内容来解决这个问题:
const lightSwitchState = document.querySelector('.light-switch-state');
const lightSwitchLabels = {
  on: 'off',
  off: 'on'
};
这里我们只是初始化一些稍后会用到的变量。我们存储了
表示灯开关状态的 DOM 元素的引用,以及一个
包含两个标签及其将要转换到的状态的对象。
现在,让我们为灯开关(复选框元素)的事件处理程序添加额外的行为:
// let's add this within the body of the function for the change event handler
lightSwitchState.textContent = lightSwitchLabels[lightSwitchState.textContent];
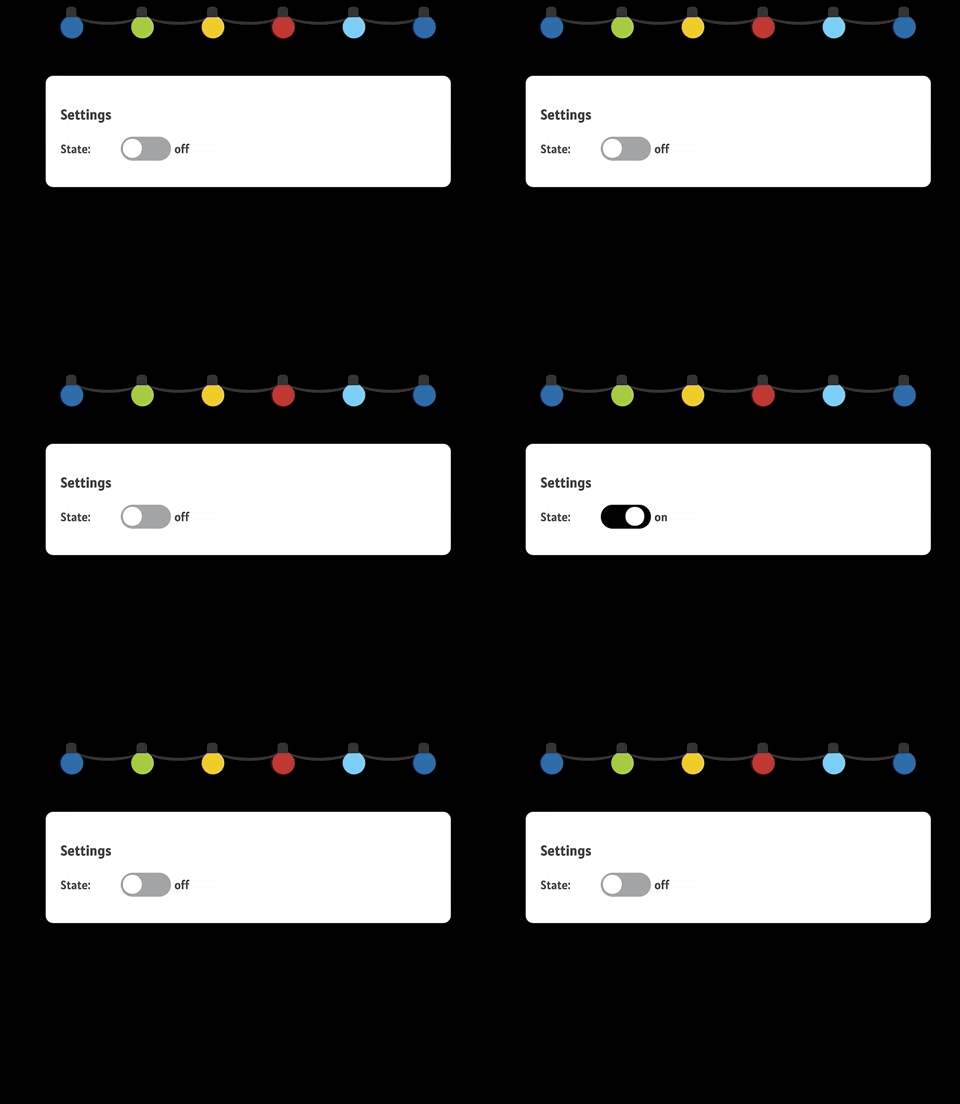
有了这个,标签现在将指示它何时处于活动状态以及
何时不处于活动状态:
现在,我们可以实现最初计划的下一组行为了。
下一步是提供一种动态更改动画时长的方法。我们将
使用一个数字输入框,并添加一个事件监听器,该监听器将
根据输入框的值更新动画时长。
首先,让我们将以下内容添加到我们的 html 文件:
<!DOCTYPE html>
<html>
  <head>
    ...
  </head>
  <body>
    <section class="light-bulbs">...</section>
    <section class="light-bulb-settings">
      <h3>Settings</h3>
      <div class="group">...</div>

      <div class="group">
        <label>Interval:</label>
        <input
          class="interval-control"
          type="number"
          value="1.1"
          step="0.1"
          min="0.1"
          max="2"
        />
      </div>
    </section>

    <script src="./christmas-light.js"></script>
  </body>
</html>
我们设置了输入框的默认值,以指示我们在样式中设置的动画持续时间。我们还设置了增量/减量 的
数字,以及允许的最小值和最大值。0.1
请注意,仍然可以在输入框中自由输入值,这些属性
仅在使用输入控件时适用。
现在,让我们修改脚本,添加以下内容:
// this should be at the top with all the prior declarations
const lightBulbs = lightBulbContainer.querySelectorAll('.light-bulb');
const intervalControl = document.querySelector('.interval-control');

// this should come after the event listener for the toggle switch
intervalControl.addEventListener('change', e => {
  const duration = e.target.value;
  lightBulbs.forEach(lightBulb => {
    lightBulb.style.animationDuration = `${duration}s`;
  });
});
有了这个,
当我们改变数字输入字段的值时,我们现在应该能够修改灯泡的动画持续时间属性。
我们还应该设置数字输入字段的样式,以使其与页面的其余部分更加一致:
.interval-control {
  border: 1px solid var(--black);
  border-radius: 5px;
  font-family: inherit;
  font-size: inherit;
  padding: 6px 12px;
}
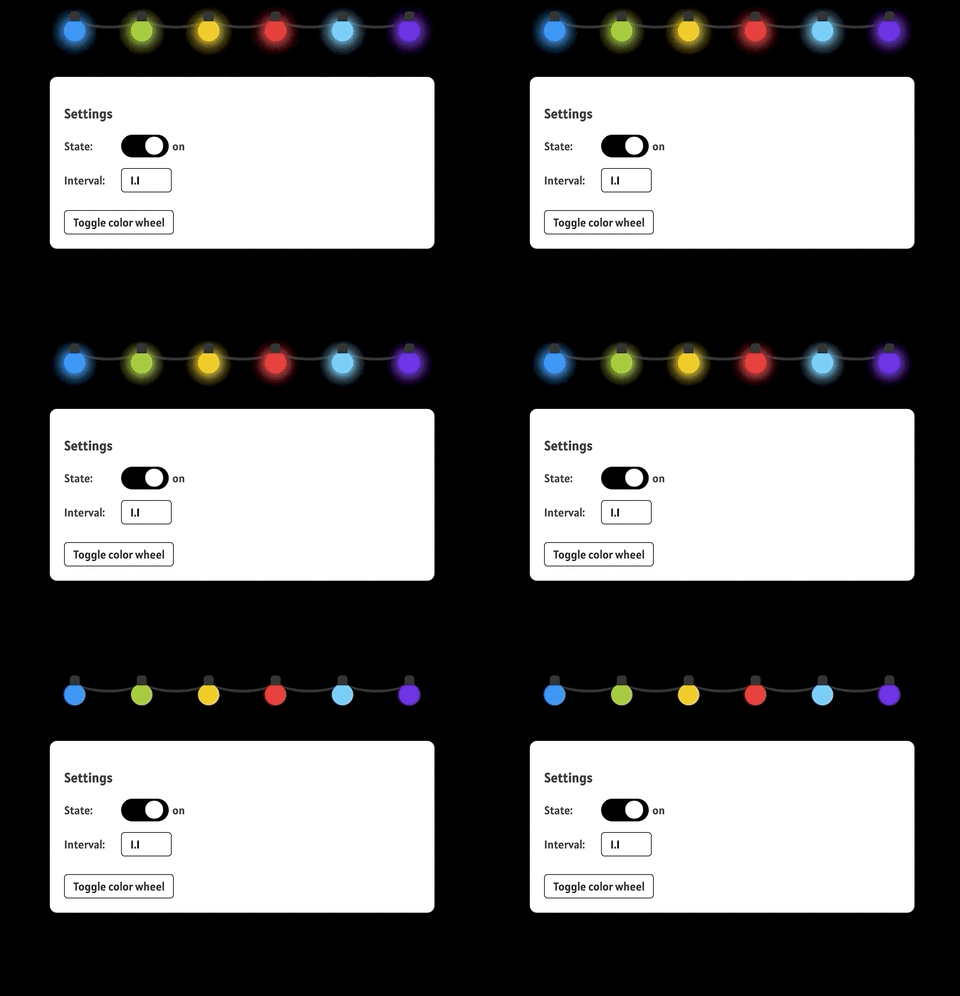
我们的页面现在看起来应该是这样的:
当我们与间隔控制交互时,灯泡的动画持续时间
也会发生变化。
让我们继续实现我们要创建的最后一个行为——
改变灯泡颜色的能力。
为此,我们将在每个灯泡下方添加一个颜色选择器。更改
某个颜色选择器的值将影响映射到该选择器的灯泡。
让我们稍微修改一下 html:
<!DOCTYPE html>
<html lang="en">
  <head>
    ...
  </head>
  <body>
    <section class="light-bulbs">
      <div class="light-bulb theme-color-one">
        <input
          type="color"
          class="color-setting"
          value="#025ba0"
          data-theme-color="one"
        />
      </div>
      <div class="light-bulb theme-color-two">
        <input
          type="color"
          class="color-setting"
          value="#9bc72b"
          data-theme-color="two"
        />
      </div>
      <div class="light-bulb theme-color-three">
        <input
          type="color"
          class="color-setting"
          value="#f0c517"
          data-theme-color="three"
        />
      </div>
      <div class="light-bulb theme-color-four">
        <input
          type="color"
          class="color-setting"
          value="#bf1724"
          data-theme-color="four"
        />
      </div>
      <div class="light-bulb theme-color-five">
        <input
          type="color"
          class="color-setting"
          value="#5cc9f4"
          data-theme-color="five"
        />
      </div>
      <div class="light-bulb theme-color-one">
        <input
          type="color"
          class="color-setting"
          value="#025ba0"
          data-theme-color="one"
        />
      </div>
    </section>

    <section class="light-bulb-settings">
      ...
    </section>

    <script src="./christmas-light.js"></script>
  </body>
</html>
在每个灯泡元素中,我们添加了一个颜色选择器,color-setting
每个颜色选择器都有一个 class,以便我们稍后为它们添加样式信息。我们还将
每个颜色选择器的值设置为其所属灯泡的初始颜色,
最后,我们添加了一个数据属性,其值指向其所属灯泡的主题
(这将在我们更新脚本时发挥作用)。
我们还将以下内容添加到我们的 css 文件中,以使颜色选择器显示
在灯泡正下方:
.light-bulb .color-setting {
  margin-top: 15px;
  position: absolute;
  top: 100%;
  left: -25%;
  transition-duration: 0.4s;
}
这会将每个颜色选择器放置在其所属灯泡的正下方。
我们还设置了过渡持续时间,因为稍后我们将隐藏颜色
选择器选项,只有当用户点击按钮(我们很快会将其添加到页面中)时才会显示它们,
并且我们希望颜色选择器缓慢淡入视图。
现在页面看起来应该是这样的:
我们已经准备好实现随意改变灯泡颜色的功能。
让我们将以下内容添加到脚本中:
lightBulbContainer.addEventListener('input', e => {
  /*
    This uses destructuring to get the themeColor
    value set using the data attribute
   */
  const { themeColor } = e.target.dataset;
  const lightBulb = e.target.parentElement;

  // This updates value of the css variable to the value set on the color picker
  lightBulb.style.setProperty(`--theme-color-${themeColor}`, e.target.value);
});
我们使用事件委托将输入事件附加到颜色选择器的父元素,并动态更新保存 灯泡颜色
值的 css 变量,使其变为颜色选择器上设置的颜色。
现在唯一剩下的事情就是单击按钮来切换颜色选择器的显示。
让我们修改一下html:
<!DOCTYPE html>
<html lang="en">
  <head>
    ...
  </head>
  <body>
    <section class="light-bulbs">
      <div class="light-bulb theme-color-one">
        <input
          type="color"
          class="color-setting hidden"
          value="#025ba0"
          data-theme-color="one"
        />
      </div>
      <div class="light-bulb theme-color-two">
        <input
          type="color"
          class="color-setting hidden"
          value="#9bc72b"
          data-theme-color="two"
        />
      </div>
      <div class="light-bulb theme-color-three">
        <input
          type="color"
          class="color-setting hidden"
          value="#f0c517"
          data-theme-color="three"
        />
      </div>
      <div class="light-bulb theme-color-four">
        <input
          type="color"
          class="color-setting hidden"
          value="#bf1724"
          data-theme-color="four"
        />
      </div>
      <div class="light-bulb theme-color-five">
        <input
          type="color"
          class="color-setting hidden"
          value="#5cc9f4"
          data-theme-color="five"
        />
      </div>
      <div class="light-bulb theme-color-one">
        <input
          type="color"
          class="color-setting hidden"
          value="#025ba0"
          data-theme-color="one"
        />
      </div>
    </section>

    <section class="light-bulb-settings">
      <h3>Settings</h3>
      <div class="group">
        <label>State:</label>
        <div class="checkbox-container">
          <input type="checkbox" class="light-switch" data-elem="switch" />
        </div>
        <span class="light-switch-state">off</span>
      </div>

      <div class="group">
        <label>Interval:</label>
        <input
          class="interval-control"
          type="number"
          value="1.1"
          step="0.1"
          min="0.1"
          max="2"
          data-elem="interval"
        />
      </div>

      <button class="color-wheel">Toggle color wheel</button>
    </section>

    <script src="./christmas-light.js"></script>
  </body>
</html>
hidden我们为页面上的所有颜色选择器添加了一个 类,这意味着
它们一开始会处于隐藏状态,直到我们切换它们的显示。在light bulb settings部分中,我们还添加了一个新按钮,用于
在点击时切换颜色选择器的显示。
我们应该更新颜色选择器切换按钮的样式,使其
与页面的其余部分更加一致,并为hidden
类添加样式:
.hidden {
  opacity: 0;
}

.color-wheel {
  border: 1px solid var(--black);
  border-radius: 5px;
  cursor: pointer;
  font-family: inherit;
  font-size: 16px;
  margin-top: 10px;
  padding: 6px 12px;
  outline: 0;
  transition-duration: 0.4s;
}

.color-wheel:active {
  transform: scale(0.9);
}
该页面现在应如下所示:
现在,我们已经解决了这个问题,我们将继续实现切换行为:
// These initializations should be at the top with the other declarations
const colorWheelBtn = document.querySelector('.color-wheel');
const colorWheels = lightBulbContainer.querySelectorAll('.color-setting');

// This can come right after the other event listener functions
colorWheelBtn.addEventListener('click', e => {
  colorWheels.forEach(colorWheel => {
    colorWheel.classList.toggle('hidden');
  });
});
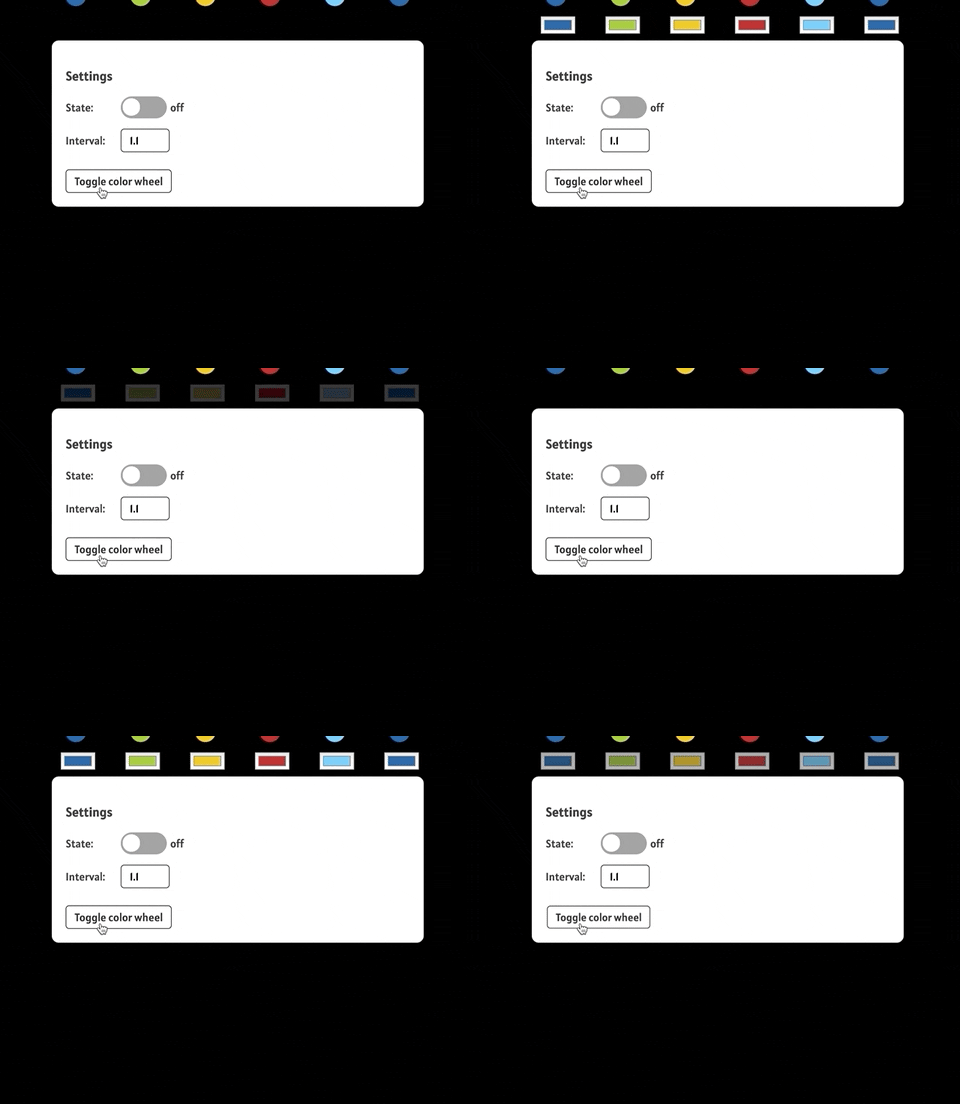
有了这个,当
单击按钮时,颜色选择器现在将切换其显示。
结论
呼,文章终于读完了👍🏾。希望我们能从中学到一些有用的东西
。如果你读完了整篇文章
,就应该得到一份奖励,来,吃块饼干(趁饼干怪兽还没把它们全吃掉之前)
最初发表于我的个人网站
鏂囩珷鏉ユ簮锛�https://dev.to/thechinedu/let-s-build-christmas-lights-with-html-css-and-javascript-2nb5 后端开发教程 - Java、Spring Boot 实战 - msg200.com


