具有模块联合的微前端 [第 1 部分] - Vite + React
大家好!很高兴再次见到你们!
这篇文章我打算分成两部分,分别讨论使用 Module Federation 的微前端。
第一部分我会使用 Vite,第二部分我会使用 Create React App (CRA)。
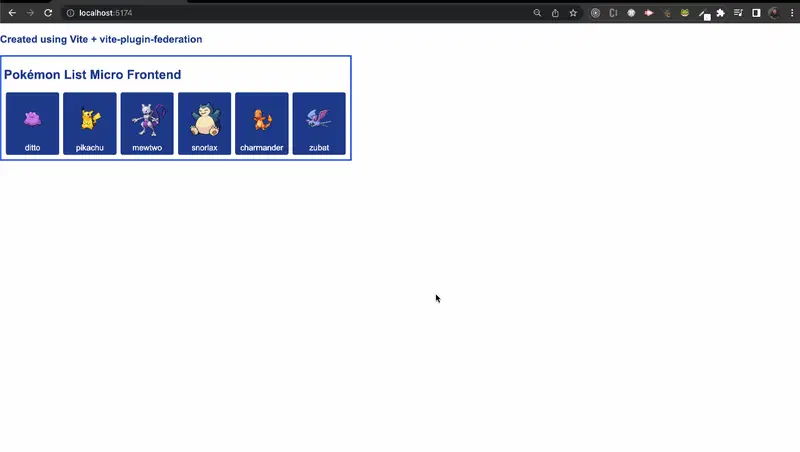
但我们将创造什么呢?(剧透)
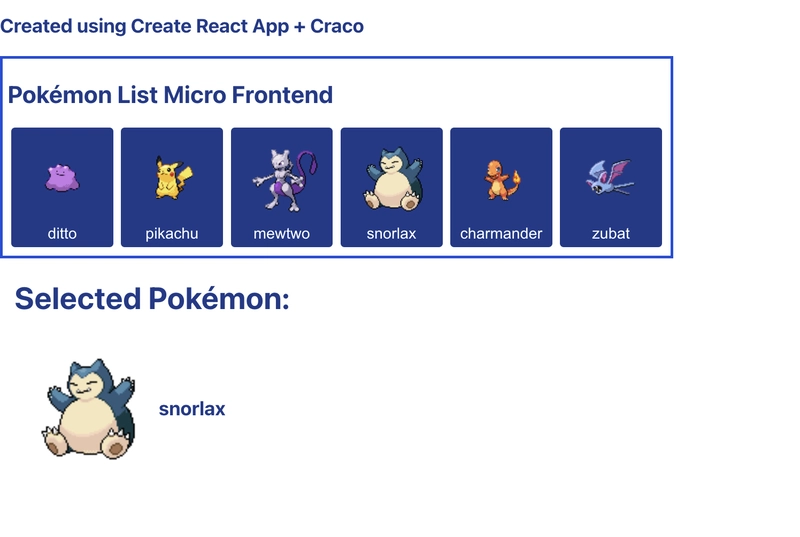
宝可梦列表是一个微前端 (MF),我将在其中公开组件和商店(已选择的宝可梦)。主页将使用 MF 并显示已选择的宝可梦,这些宝可梦由 MF 状态(使用 Jotai)提供。
概括:
介绍
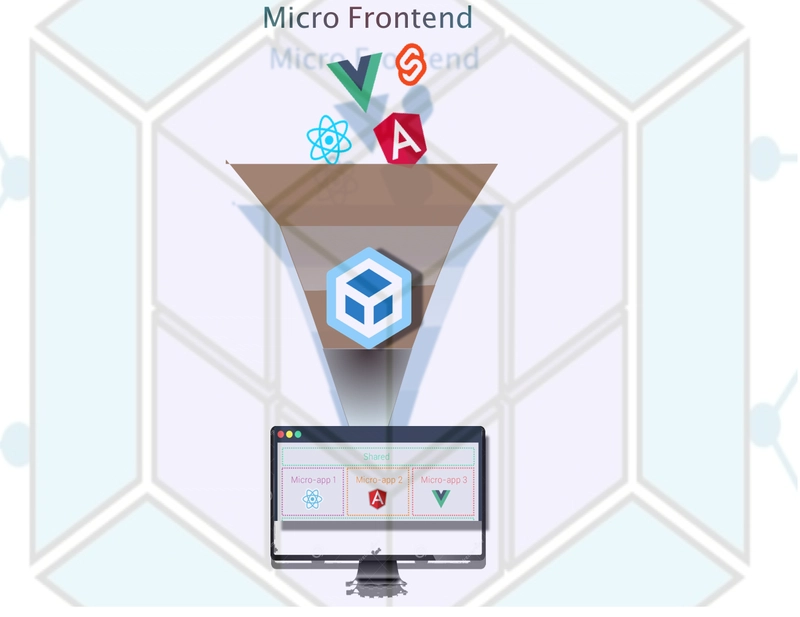
首先,我们需要了解什么是 MF?以及为什么可以使用这种方法。当我们拥有多个团队,并且需要在它们之间分离应用程序组件时,MF 的概念应运而生。
每个团队负责维护MF,可以是某个组件,也可以是某个MF页面路线。
想象一下,一个团队负责维护主页,另一个团队负责维护购物车组件或页面。这样,我们可以扩展应用程序,使其更小,但这需要一些权衡,我们稍后会讨论。
不久前,创建和维护 MF 还是一件很困难的事。但现在创建已经变得很容易了,但维护起来还是要看团队的。
因此 Webpack 5 引入了共享组件的新概念,即模块联合。
模块联合
模块联合是一种使用 Webpack 5 在 JavaScript 应用程序中启用通常称为“微前端”的特定方法。
根据 Webpack 文档:
多个独立的构建应该组成一个单一的应用程序。这些独立的构建就像容器一样,可以在构建之间公开和使用代码,从而创建一个统一的应用程序。
这通常被称为微前端,但不限于此。
请记住,模块联合仅在 webpack 版本 5 上可用。
通过模块联合,我们不仅可以共享组件,还可以共享我上面提到的状态(使用 Jotai)。
给我看代码
让我们创建应用程序,看看模块联合如何在 Vite 上工作。我们将使用 Vite 创建两个 Web 应用,第一个pokemons-list用于公开组件和状态。第二个pokemons-home用于使用 MF 并允许选择和显示宝可梦。
首先,让我们使用以下命令创建目录:
mkdir vite && cd vite
现在,我们将使用以下方法创建 MF:
yarn create vite pokemons-list --template react-ts
在创建的项目上安装软件包,只需使用:
yarn
让我们添加 jotai 作为依赖项,使用:
yarn add jotai
现在我们将使用 vite 提供的插件,名为originjs/vite-plugin-federation。因此,让我们使用以下命令将其安装为开发依赖项:
yarn add -D @originjs/vite-plugin-federation
现在让我们开始编码吧!
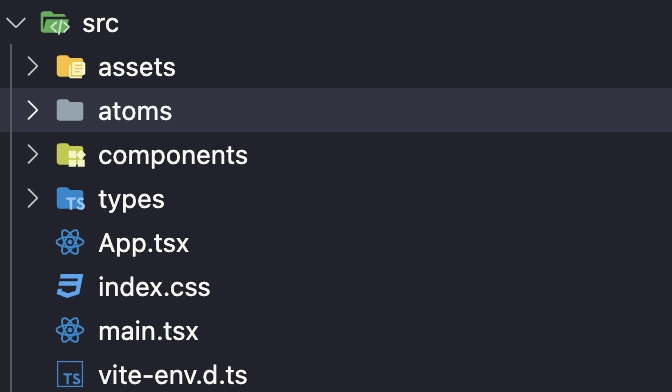
首先在src文件夹中,我将创建一些名为types、components和 的文件夹atoms。
- 类型将仅具有 Pokemon 定义的类型
- 组件将只有一个组件,即口袋妖怪列表
- Atoms 将拥有我们应用程序的状态
那么src/types,让我们创建Pokemon.ts
export interface IPokemon {
  id: number;
  name: string;
  sprite: string;
}
在 上src/atoms,让我们创建我们的宝可梦状态,我也将其命名为Pokemon.ts。
我将使用 Jotai,因此我不会深入探讨这个主题,因为有一篇文章专门讨论了这个状态管理器。
import { atom, useAtom } from "jotai";
import { IPokemon } from "../types/Pokemon";

type SelectPokemon = IPokemon | undefined;

export const pokemons = atom<IPokemon[]>([]);
export const addAllPokemons = atom(
  null,
  (_, set, fetchedPokemons: IPokemon[]) => {
    set(pokemons, fetchedPokemons);
  }
);
export const selectPokemon = atom<SelectPokemon>(undefined);

const useSelectPokemon = () => useAtom(selectPokemon);
export default useSelectPokemon;
在我们的组件中src/components/PokemonList,让我们创建两个文件。首先是PokemonList.module.css。
让我们将 CSS 模块应用于我们的样式。
.container {
    & > h1 {
    color:#1e3a8a;
    font-size: 25px;
    };

    display: flex;
    flex-direction: column;
    border: 3px solid #1d4ed8;
    width: fit-content;
    padding: 5px 5px;
}
.pokemonCardContainer {
    display: flex;
}

.pokemonCard {
    font-family: Arial, Helvetica, sans-serif;
    color: #fff;
    background-color: #1e3a8a;
    display: flex;
    flex-direction: column;
    justify-content: center;
    align-items: center;
    margin: 4px;
    padding: 5px;
    border-radius: 4px;
}

.pokemonCard:hover {
    cursor: pointer;
    background-color: #1d4ed8;
}
我将创建我们的src/components/PokemonListMF index.tsx:
import { useEffect } from "react";
import useSelectPokemon, {
  addAllPokemons,
  pokemons as pokemonState,
} from "../../atoms/Pokemon";
import { useAtom } from "jotai";

import style from "./PokemonList.module.css";

const PokemonList = () => {
  const [, addPokemons] = useAtom(addAllPokemons);
  const [pokemons] = useAtom(pokemonState);
  const [, setSelectPokemon] = useSelectPokemon();

  const fetchPokemons = async () => {
    const response = await fetch(
      "https://raw.githubusercontent.com/kevinuehara/microfrontends/main/mocks/pokemonList.json"
    );
    const jsonData = await response.json();
    addPokemons(jsonData);
  };

  useEffect(() => {
    fetchPokemons();
  }, []);

  return (
    <div className={style.container}>
      <h1>Pokémon List Micro Frontend</h1>
      <div className={style.pokemonCardContainer}>
        {pokemons.map((pokemon) => {
          return (
            <div
              className={style.pokemonCard}
              key={pokemon.id}
              onClick={() => setSelectPokemon(pokemon)}
            >
              <img
                src={pokemon.sprite}
                aria-label={`Image of pokemon ${pokemon.name}`}
              />
              <label>{pokemon.name}</label>
            </div>
          );
        })}
      </div>
    </div>
  );
};

export default PokemonList;
您可以清洁App.tsx、移除App.css并清洁index.css。
在你的组件上App.tsx你可以直接调用它:
import PokemonList from "./components/PokemonList";

function App() {
  return (
    <>
      <PokemonList />
    </>
  );
}

export default App;
不用担心获取 URL,因为我的存储库中已公开了 5 个神奇宝贝。
现在我们准备配置 MF。因此vite.config.ts,我们将在文件中导入@originjs/vite-plugin-federation并公开我们需要的内容。PokemonList 和 Jotai State。让我们更改为:
import { defineConfig } from "vite";
import react from "@vitejs/plugin-react";
import federation from "@originjs/vite-plugin-federation";

export default defineConfig({
  plugins: [
    react(),
    federation({
      name: "pokemonList",
      filename: "remoteEntry.js",
      exposes: {
        "./PokemonList": "./src/components/PokemonList",
        "./Pokemon": "./src/atoms/Pokemon.ts",
      },
      shared: ["react", "react-dom", "jotai"],
    }),
  ],
  build: {
    modulePreload: false,
    target: "esnext",
    minify: false,
    cssCodeSplit: false,
  },
});
我正在将其作为federation插件的默认选项导入,我们需要提供一些属性:
-
name:模块联合对象的名称
-
filename:这个非常重要,因为应用程序的构建会生成一个单独的文件,该文件将作为我们用来暴露组件的清单。(我建议使用
remoteEntry.js默认值) -
文件名:这非常重要,因为应用程序的构建将生成一个单独的文件,该文件将作为我们公开组件的清单。
-
暴露:我们将要暴露的对象。本例中是 jotai 的原子和 PokemonList 组件。
-
共享:这很重要,因为当其他应用程序运行我们的 MF 时,我们需要提供渲染 MF 所需的内容。在本例中,
react、react-dom和jotai。
即使使用它的其他应用程序在 React 中,模块联合插件也会定义导入,如果您已经拥有它,它就不会重新导入。
当我们有一个 MF 时,它是否在某个端口上运行非常重要runtime sharing。所以,让我们修复一下端口package.json:
 "scripts": {
    "dev": "vite --port 5173 --strictPort",
    "build": "tsc && vite build",
    "lint": "eslint src --ext ts,tsx --report-unused-disable-directives --max-warnings 0",
    "preview": "vite preview --port 5173 --strictPort"
  },
现在,您可以尝试运行该项目。但是您需要运行构建,以生成remoteEntry.js并使用预览模式。因此,只需使用以下命令运行:
yarn build && yarn preview
我们将拥有 MF:
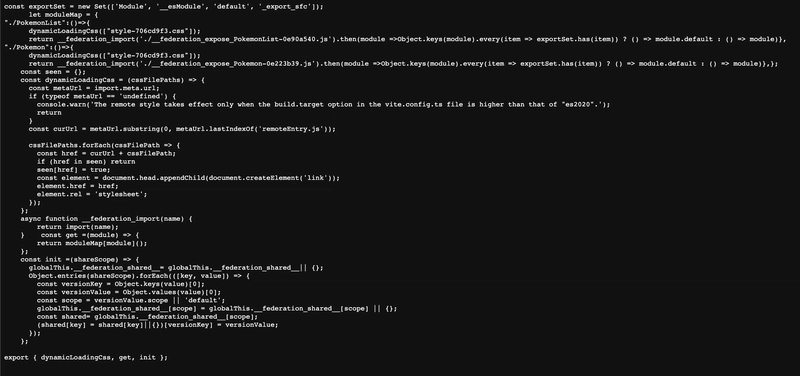
如果你访问该链接,http://localhost:5173/assets/remoteEntry.js你将看到 remoteEntry 清单文件:
我们的第一个MF完成了。现在让我们享用吧!
打开另一个终端并返回到 的根目录vite。让我们pokemons-home使用与 vite 相同的命令来创建 :
yarn create vite pokemons-home --template react-ts
使用以下方法安装依赖项:
yarn
使用以下方式安装originjs/vite-plugin-federation为开发依赖项:
yarn add -D @originjs/vite-plugin-federation
现在让我们开始设置vite.config.ts:
import { defineConfig } from "vite";
import react from "@vitejs/plugin-react";
import federation from "@originjs/vite-plugin-federation";

export default defineConfig({
  plugins: [
    react(),
    federation({
      name: "pokemonHome",
      remotes: {
        pokemonList: "http://localhost:5173/assets/remoteEntry.js",
      },
      shared: ["react", "react-dom"],
    }),
  ],
  build: {
    modulePreload: false,
    target: "esnext",
    minify: false,
    cssCodeSplit: false,
  },
});
请注意,我们有一些差异。现在我们有了remotes。
远程控制是可用remoteEntry的。所以我们启动了第一个应用。因为这很重要,所以我们定义了需要修复的端口。
我将删除index.css并重新将其App.css改为:
.container {
    display: flex;
    flex-direction: column;
    justify-content: center;
    margin-left: 15px;
}

.pokemon-card-container {
    display: flex;
    align-items: center;
}

.pokemon-name {
    font-weight: bold;
    color: #1e3a8a;
    font-size: 20px;
}

.pokemon-image {
    width: 150px;
}
还有一件非常重要的事情。
因为我们使用的是实时共享,所以我们没有 TypeScript 的类型。
所以我将 重命名为App.tsx,App.jsx因为当我导入 MF 时,TypeScript 不会报错。(这个问题有一个解决方案,但它是现成的)。在这个例子中,我们只需更改文件的类型即可。
import PokemonList from "pokemonList/PokemonList";
import usePokemonSelected from "pokemonList/Pokemon";

import "./App.css";

function App() {
  const [pokemon] = usePokemonSelected();

  return (
    <>
      <h3 style={{ color: "#1e3a8a", fontSize: "20px" }}>
        Created using Vite + vite-plugin-federation
      </h3>
      <PokemonList />
      {pokemon && (
        <div className="container">
          <h1 style={{ color: "#1e3a8a" }}>Selected Pokémon:</h1>
          <div className="pokemon-card-container">
            <img
              src={pokemon?.sprite}
              className="pokemon-image"
              aria-label="Image of Pokemon Selected"
            />
            <label className="pokemon-name">{pokemon?.name}</label>
          </div>
        </div>
      )}
    </>
  );
}

export default App;
很神奇,不是吗?我们正在使用 remoteEntry 的 MF 导出的 PokemonList 和 usePokemonSelected。
就这样!我们创建了使用 MF 的“宿主”应用。使用以下命令运行该应用:
yarn dev
我们在这里:
我们完成了两个应用程序pokemons-list(远程)和pokemons-home(主机)。
结论
MF 是一种非常棒的形式,可以分解我们的组件并暴露给其他应用程序使用。
但在这个技术的世界里,我们总会有所取舍。
假设 MF 团队实现了一个 bug,或者应用程序 remoteEntry 不可用。我们需要处理并解决这个问题。
当我们使用库或组件时,我们使用了构建时共享的概念。因此,组件将在应用程序构建时可用。
-
优点
- 完成申请
- Typescript 支持
- 单元或 E2E 测试
-
缺点
- 无运行时共享
但是当我们使用 MF 概念时,我们使用运行时共享
-
优点
- 未导入库的所有组件
- 运行时共享
-
缺点
- Typescript 支持
- 难以进行单元测试和端到端测试
所以你需要思考并问自己:我真的需要 MF 吗?需要权衡吗……等等。
例如,模块联合并不是唯一的解决方案single-spa
但最近社区已经开始采用 webpack 的模块联合。
因此,在这个例子中,我使用 Vite 创建,但我将使用 CRA 创建此内容的第 2 部分(某些设置将会改变)。
一些参考:
所以...
非常感谢你的支持,看到这里。
如果可以的话,请分享并点赞这篇文章,这对我很有帮助。
 后端开发教程 - Java、Spring Boot 实战 - msg200.com

