我使用 Twitter API、GPT4 和 CopilotKit 构建的项目……🚀🧑💻
TL;DR
上周我开发了一个应用程序,利用人工智能自动完成社交媒体发布。我会向你展示我是如何做到的。
我们将介绍如何:
- 将 Twitter 身份验证添加到 Next.js 应用程序,
- 从头开始创建一个类似日历的界面,
- 使用 CopilotKit 将 AI 助手集成到软件应用程序中,
- 创建特定于操作的 AI 副驾驶员来处理应用程序内的各种任务,以及
- 构建一个帖子生成器和调度应用程序。
这个项目是学习如何构建人工智能应用程序和掌握社交媒体 API 的好方法,但不要用它来做坏事😈

CopilotKit:构建应用内 AI 副驾驶的框架
CopilotKit 是一个 开源的 AI 副驾驶平台。我们可以轻松地将强大的 AI 集成到你的 React 应用中。
建造:
- ChatBot:具有上下文感知能力的应用内聊天机器人,可以在应用内采取行动💬
- CopilotTextArea:具有上下文感知自动完成和插入功能的 AI 驱动文本字段📝
- 合作代理:可以与您的应用和用户交互的应用内 AI 代理🤖

先决条件
要完全理解本教程,您需要对 React 或 Next.js 有基本的了解。
我们还将利用以下内容:
- CopilotKit - 一个开源副驾驶框架,用于构建自定义 AI 聊天机器人、应用内 AI 代理和文本区域。
- Redis——用于存储帖子时间表的内存数据库。
- BullMQ——一个管理和处理队列中的作业的 Node.js 库。
- Node Cron - 一个 Node.js 库,可以按特定时间间隔安排和运行任务(作业)。
- 无头 UI - 用于为应用程序创建可访问的 UI 组件。
- X 客户端 ID 和密钥- 用于验证用户身份并代表他们创建帖子。
- OpenAI API 密钥 - 使我们能够使用 GPT 模型执行各种任务。
项目设置和包安装
首先,通过在终端中运行以下代码片段来创建 Next.js 应用程序:
npx create-next-app social-media-scheduler
选择您喜欢的配置设置。在本教程中,我们将使用 TypeScript 和 Next.js App Router。

接下来安装项目依赖项:
npm install @headlessui/react lodash bullmq ioredis node-cron
最后,安装所需的CopilotKit 软件包。这些软件包使我们能够在应用程序内使用 AI 自动完成功能,允许 AI 副驾驶从 React 状态中检索数据,并在应用程序内做出决策。
npm install @copilotkit/react-ui @copilotkit/react-textarea @copilotkit/react-core @copilotkit/backend
恭喜!您现在可以构建应用程序了。
使用 Next.js 构建 Posts Scheduler 应用程序
在本节中,您将学习如何为调度应用程序创建用户界面。该应用程序分为两个页面:登录页面和仪表板页面,用户可以在其中创建和安排帖子。
登录页面使用用户的 X(Twitter)个人资料对用户进行身份验证,而仪表板页面允许用户创建、删除和安排帖子。
登录页面
登录页面是应用程序的主页。用户需要使用其 Twitter 帐户登录才能访问仪表板。
为了实现这一点,请更新page.tsx文件以显示登录按钮,如下所示:
import Link from "next/link";
import { getTwitterOauthUrl } from "@/app/util";

export default function Home() {
    return (
        <main className='w-full min-h-screen flex flex-col items-center justify-center p-8'>
            <h2 className='font-semibold text-2xl mb-4'>Your AI Post Scheduler</h2>
            <Link
                href={getTwitterOauthUrl()}
                className='bg-black py-3 px-6 hover:bg-gray-700 text-gray-50 rounded-lg'
            >
                Sign in with Twitter
            </Link>
        </main>
    );
}
上面的代码片段显示了一个Sign in with Twitter按钮,用于将用户重定向到 Twitter Oauth2 页面。您很快就会学习如何设置 Twitter 身份验证。

仪表板页面
在继续之前,请types.d.ts在 Next.js 项目的根目录创建一个文件。该文件将包含应用程序内变量的类型声明。
interface DelSelectedCell {
    content?: string;
    day_id?: number;
    day?: string;
    time_id?: number;
    time?: string;
    published?: boolean;
    minutes?: number;
}
interface SelectedCell {
    day_id?: number;
    day?: string;
    time_id?: number;
    time?: string;
    minutes?: number;
}

interface Content {
    minutes?: number;
    content?: string;
    published?: boolean;
    day?: number;
}

interface AvailableScheduleItem {
    time: number;
    schedule: Content[][];
}
utils在 Next.js 应用文件夹中创建一个文件,并将此代码片段从 GitHub 存储库复制到其中。它包含在应用程序内执行各种数据操作所需的函数。
接下来,在 Next.js 应用程序目录中创建一个dashboard包含文件的文件夹。page.tsx
cd app
mkdir dashboard && cd dashboard
touch page.tsx
将下面的代码片段复制到dashboard/page.tsx文件中。它会渲染一个App组件,该组件接受应用程序的时间表作为 props,并将其显示在表格中:
"use client";
import _ from "lodash";
import { useState } from "react";
import App from "@/app/components/App";
import { availableSchedule } from "../util";

export default function Dashboard() {
    //👇🏻 saves a deep copy of the availableSchedule array into the React state
    const [yourSchedule, updateYourSchedule] = useState<AvailableScheduleItem[]>(
        _.cloneDeep(availableSchedule)
    );

    return (
        <App yourSchedule={yourSchedule} updateYourSchedule={updateYourSchedule} />
    );
}
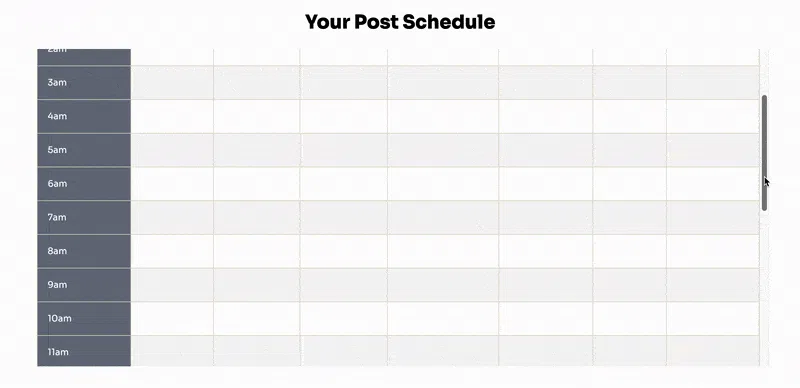
以下是上表的数据结构:
export const tableHeadings: string[] = [
    "Time",
    "Sunday",
    "Monday",
    "Tuesday",
    "Wednesday",
    "Thursday",
    "Friday",
    "Saturday",
];

export const availableSchedule: AvailableScheduleItem[] = [
    {
        time: 0,
        schedule: [[], [], [], [], [], [], []],
    },
    {
        time: 1,
        schedule: [[], [], [], [], [], [], []],
    },
    {
        time: 2,
        schedule: [[], [], [], [], [], [], []],
    },
    {
        time: 3,
        schedule: [[], [], [], [], [], [], []],
    },
    {
        time: 4,
        schedule: [[], [], [], [], [], [], []],
    },
    {
        time: 5,
        schedule: [[], [], [], [], [], [], []],
    },
    {
        time: 6,
        schedule: [[], [], [], [], [], [], []],
    },
    {
        time: 7,
        schedule: [[], [], [], [], [], [], []],
    },
    {
        time: 8,
        schedule: [[], [], [], [], [], [], []],
    },
    {
        time: 9,
        schedule: [[], [], [], [], [], [], []],
    },
    {
        time: 10,
        schedule: [[], [], [], [], [], [], []],
    },
    {
        time: 11,
        schedule: [[], [], [], [], [], [], []],
    },
    {
        time: 12,
        schedule: [[], [], [], [], [], [], []],
    },
    {
        time: 13,
        schedule: [[], [], [], [], [], [], []],
    },
    {
        time: 14,
        schedule: [[], [], [], [], [], [], []],
    },
    {
        time: 15,
        schedule: [[], [], [], [], [], [], []],
    },
    {
        time: 16,
        schedule: [[], [], [], [], [], [], []],
    },
    {
        time: 17,
        schedule: [[], [], [], [], [], [], []],
    },
    {
        time: 18,
        schedule: [[], [], [], [], [], [], []],
    },
    {
        time: 19,
        schedule: [[], [], [], [], [], [], []],
    },
    {
        time: 20,
        schedule: [[], [], [], [], [], [], []],
    },
    {
        time: 21,
        schedule: [[], [], [], [], [], [], []],
    },
    {
        time: 22,
        schedule: [[], [], [], [], [], [], []],
    },
    {
        time: 23,
        schedule: [[], [], [], [], [], [], []],
    },
];
数组tableHeadings包含表格列的标题,而availableSchedule数组包含一组对象。每个对象都有一个time属性表示一天中的每个小时,以及一个schedule包含嵌套数组的属性,每个元素表示一周中的某一天。
例如,当用户设置星期三上午 8 点的日程安排时,应用程序将搜索属性为 8 的对象,并通过将日程安排插入到第四个索引的嵌套数组中time来更新其属性。schedule
您可以从GitHub 存储库复制仪表板页面的其余 UI 元素。
在接下来的部分中,您将学习如何将 Twitter OAuth 和 CopilotKit 添加到应用程序中。
如何向 Next.js 应用程序添加 X 身份验证
在本节中,您将学习如何创建 X Developer 项目并为您的 Next.js 应用程序添加 X 身份验证。
确保您拥有 X 帐户并访问X 开发人员门户来创建新项目。

输入项目名称并提供所需问题的答案以创建新项目和应用程序。

设置用户身份验证设置以允许您代表用户读写帖子。

最后,App info按要求填写相应部分。

设置身份验证过程后,将 OAuth 2.0 客户端 ID 和密钥保存到 .env.local 文件中。
TWITTER_CLIENT_ID=<your_client_ID>
NEXT_PUBLIC_TWITTER_CLIENT_ID=<your_client_ID>
TWITTER_CLIENT_SECRET=<your_client_Secret>
通过 X 验证用户身份
api在 Next.js 文件夹中创建一个文件夹app。在 api 文件夹中,创建一个twitter包含文件的目录route.ts。这将创建一个 API 端点 ( /api/twitter),使我们能够对用户进行身份验证。
cd app
mkdir api && cd api
mkdir twitter && cd twitter
touch route.ts
将下面的代码片段复制到route.ts文件中:
import { NextRequest, NextResponse } from "next/server";

const BasicAuthToken = Buffer.from(
    `${process.env.TWITTER_CLIENT_ID!}:${process.env.TWITTER_CLIENT_SECRET!}`,
    "utf8"
).toString("base64");

const twitterOauthTokenParams = {
    client_id: process.env.TWITTER_CLIENT_ID!,
    code_verifier: "8KxxO-RPl0bLSxX5AWwgdiFbMnry_VOKzFeIlVA7NoA",
    redirect_uri: `http://www.localhost:3000/dashboard`,
    grant_type: "authorization_code",
};

//👇🏻 gets user access token
export const fetchUserToken = async (code: string) => {
    try {
        const formatData = new URLSearchParams({
            ...twitterOauthTokenParams,
            code,
        });
        const getTokenRequest = await fetch(
            "https://api.twitter.com/2/oauth2/token",
            {
                method: "POST",
                body: formatData.toString(),
                headers: {
                    "Content-Type": "application/x-www-form-urlencoded",
                    Authorization: `Basic ${BasicAuthToken}`,
                },
            }
        );
        const getTokenResponse = await getTokenRequest.json();
        return getTokenResponse;
    } catch (err) {
        return null;
    }
};

//👇🏻gets user's data from the access token
export const fetchUserData = async (accessToken: string) => {
    try {
        const getUserRequest = await fetch("https://api.twitter.com/2/users/me", {
            headers: {
                "Content-type": "application/json",
                Authorization: `Bearer ${accessToken}`,
            },
        });
        const getUserProfile = await getUserRequest.json();
        return getUserProfile;
    } catch (err) {
        return null;
    }
};

//👉🏻 API endpoint utilizing the functions above
- 从上面的代码片段来看,
- 该
BasicAuthToken变量包含您的令牌的编码版本。 - 包含
twitterOauthTokenParams获取用户访问令牌所需的参数。 - 该
fetchUserToken函数向 Twitter 的端点发送包含代码的请求并返回用户的访问令牌。 - 该
fetchUserData函数使用令牌来检索用户的 X 配置文件。
- 该
在函数下方添加此端点。它在用户登录时接受来自前端的代码,并将用户 ID、用户名和访问令牌存储在一个文件中,该文件可在服务器上执行作业时访问。
import { writeFile } from "fs";

export async function POST(req: NextRequest) {
    const { code } = await req.json();
    try {
        //👇🏻 get access token and the entire response
        const tokenResponse = await fetchUserToken(code);
        const accessToken = await tokenResponse.access_token;
        //👇🏻 get user data
        const userDataResponse = await fetchUserData(accessToken);
        const userCredentials = { ...tokenResponse, ...userDataResponse };

        //👇🏻  merge the user's access token, id, and username into an object
        const userData = {
            accessToken: userCredentials.access_token,
            _id: userCredentials.data.id,
            username: userCredentials.data.username,
        };
        //👇🏻 store them in a JSON file (for server-use)
        writeFile("./src/user.json", JSON.stringify(userData, null, 2), (error) => {
            if (error) {
                console.log("An error has occurred ", error);
                throw error;
            }
            console.log("Data written successfully to disk");
        });
        //👇🏻 returns a successful response
        return NextResponse.json(
            {
                data: "User data stored successfully",
            },
            { status: 200 }
        );
    } catch (err) {
        return NextResponse.json({ error: err }, { status: 500 });
    }
}
更新dashboard/page.tsx以在验证用户身份后将代码发送到 API 端点。
import { useSearchParams } from 'next/navigation'
const searchParams = useSearchParams()
    const code = searchParams.get('code')

    const fetchToken = useCallback(async () => {
            const res = await fetch("/api/twitter", {
                method: "POST",
                body: JSON.stringify({ code }),
                headers: {
                    "Content-Type": "application/json",
                },
            });
            if (res.ok) {
                const data = await res.json();
                console.log(data);
            }
    }, [code]);

    useEffect(() => {
        fetchToken();
    }, [fetchToken]);
恭喜!当用户点击Sign in with Twitter按钮时,它会将他们重定向到 Twitter 授权页面,以使他们能够访问该应用程序。

如何将 CopilotKit 添加到 Next.js 应用程序
在本节中,您将学习如何将 CopilotKit 添加到应用程序中,以使用户能够使用 AI 副驾驶自动安排帖子,并在创建帖子内容时添加自动完成功能。
在我们继续之前,请访问 OpenAI 开发者平台 并创建一个新的密钥。

创建一个.env.local文件并将您新创建的密钥复制到该文件中。
OPENAI_API_KEY=<YOUR_OPENAI_SECRET_KEY>
OPENAI_MODEL=gpt-4-1106-preview
接下来,您需要为 CopilotKit 创建一个 API 端点。在 Next.js 应用文件夹中,创建一个api/copilotkit包含route.ts文件的文件夹。
cd app
mkdir api && cd api
mkdir copilotkit && cd copilotkit
touch route.ts
将以下代码片段复制到 route.ts 文件中。CopilotKit后端会接受用户请求,并使用 OpenAI 模型做出决策。
import { CopilotRuntime, OpenAIAdapter } from "@copilotkit/backend";

export const runtime = "edge";

export async function POST(req: Request): Promise<Response> {
    const copilotKit = new CopilotRuntime({});
    const openaiModel = process.env["OPENAI_MODEL"];

    return copilotKit.response(req, new OpenAIAdapter({model: openaiModel}));
}
要将应用程序连接到后端 API 路由,请将下面的代码片段复制到dashboard/page.tsx文件中。
"use client";
import App from "@/app/components/App";
import _ from "lodash";
import { useState } from "react";
import { availableSchedule } from "../util";
//👇🏻 CopilotKit components
import { CopilotKit } from "@copilotkit/react-core";
import { CopilotPopup } from "@copilotkit/react-ui";
//👇🏻 CSS styles for CopilotKit components
import "@copilotkit/react-ui/styles.css";
import "@copilotkit/react-textarea/styles.css";
export default function Dashboard() {
const [yourSchedule, updateYourSchedule] = useState<AvailableScheduleItem[]>(
_.cloneDeep(availableSchedule)
);
//👉🏻 other UI states and functions
return (
<CopilotKit runtimeUrl='/api/copilotkit/'>
<App
yourSchedule={yourSchedule}
updateYourSchedule={updateYourSchedule}
/>
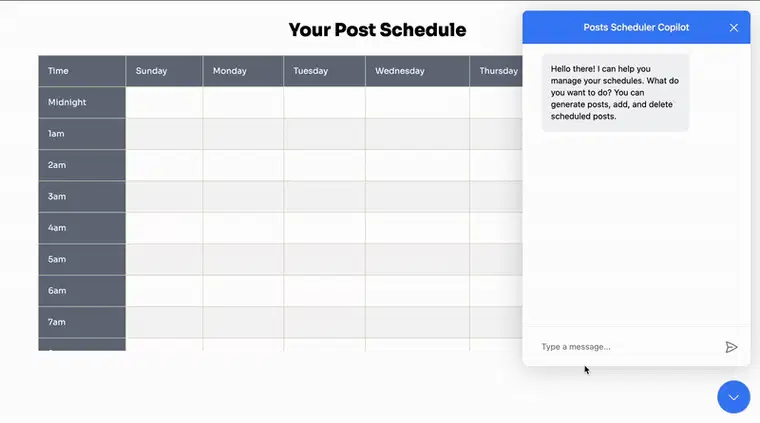
<CopilotPopup
instructions='Help the user create and manage ad campaigns.'
defaultOpen={true}
labels={{
title: "Posts Scheduler Copilot",
initial:
"Hello there! I can help you manage your schedule. What do you want to do? You can generate posts, add, and delete scheduled posts.",
}}
clickOutsideToClose={false}
></CopilotPopup>
</CopilotKit>
);
}
该CopilotKit组件包装了整个应用程序,并接受一个runtimeUrl包含指向 API 端点链接的 prop。该CopilotKitPopup组件向应用程序添加了一个聊天机器人侧边栏面板,使我们能够向 CopilotKit 提供各种指令。
如何使用 CopilotKit 安排帖子
CopilotKit 提供了两个钩子,使我们能够处理用户的请求并插入应用程序状态:useCopilotAction和useCopilotReadable。
该useCopilotAction钩子允许您定义由 CopilotKit 执行的操作。它接受包含以下参数的对象:
- name——动作的名称。
- 描述——动作的描述。
- 参数——包含所需参数列表的数组。
- render - 默认的自定义函数或字符串。
- 处理程序——由操作触发的可执行函数。
useCopilotAction({
    name: "sayHello",
    description: "Say hello to someone.",
    parameters: [
        {
            name: "name",
            type: "string",
            description: "name of the person to say greet",
        },
    ],
    render: "Process greeting message...",
    handler: async ({ name }) => {
        alert(`Hello, ${name}!`);
    },
});
该useCopilotReadable钩子向 CopilotKit 提供应用程序状态。
import { useCopilotReadable } from "@copilotkit/react-core";

const myAppState = "...";
useCopilotReadable({
  description: "The current state of the app",
  value: myAppState
});
现在,让我们将应用程序状态插入 CopilotKit 并创建一个帮助我们安排帖子的操作。
在组件内部App,将schedule状态传递给 CopilotKit。您还可以提供其他信息(上下文),以使 CopilotKit 做出充分且精确的决策。
//👇🏻 Application state
useCopilotReadable({
    description: "The user's Twitter post schedule",
    value: yourSchedule,
});

//👇🏻 Application context
useCopilotReadable({
    description: "Guidelines for the user's Twitter post schedule",
    value:
            "Your schedule is displayed in a table format. Each row represents an hour of the day, and each column represents a day of the week. You can add a post by clicking on an empty cell, and delete a post by clicking on a filled cell. Sunday is the first day of the week and has a day_id of 0.",
    });
创建一个 CopilotKit 操作,根据用户的提示安排帖子:
    useCopilotAction({
        name: "updatePostSchedule",
        description: "Update the user's Twitter post schedule",
        parameters: [
            {
                name: "update_schedule",
                type: "object",
                description: "The user's updated post schedule",
                attributes: [
                    {
                        name: "time",
                        type: "number",
                        description: "The time of the post",
                    },
                    {
                        name: "schedule",
                        type: "object[]",
                        description: "The schedule for the time",
                        attributes: [
                            {
                                name: "content",
                                type: "string",
                                description: "The content of the post",
                            },
                            {
                                name: "minutes",
                                type: "number",
                                description: "The minutes past the hour",
                            },
                            {
                                name: "published",
                                type: "boolean",
                                description: "Whether the post is published",
                            },
                            {
                                name: "day",
                                type: "number",
                                description: "The day of the week",
                            },
                        ],
                    },
                ],
            },
        ],
        handler: ({ update_schedule }) => {
            setAddEventModal(true);
            setSelectedCell({
                day_id: update_schedule.schedule[0].day + 1,
                day: tableHeadings[update_schedule.schedule[0].day + 1],
                time_id: update_schedule.time,
                time: formatTime(update_schedule.time),
            });
            setContent(update_schedule.schedule[0].content);
            setMinute(update_schedule.schedule[0].minutes);
        },
        render: "Updating schedule...",
    });
上面的代码片段展示了useCopilotAction钩子的实际作用。它接受一个包含name、description、parameters、handler和render属性的对象。
- 该
name属性代表动作的名称。 - 该
description属性简要概述了该函数的作用。 - 该
parameters数组包含一个update_schedule具有time和schedule属性的对象。该schedule对象包含content、minutes、published和day属性。 - 该
handler函数描述了触发时要执行的操作。在上面的示例中,该handler函数打开AddPost模态框,使用 AI 生成的输入更新其值,并允许用户相应地调整时间表。
使用 Redis 和 BullMQ 管理和安排帖子
在本节中,您将学习如何将发布计划存储在 Redis 数据库中,并创建一个定期检查计划以在 X(Twitter)上发布内容的作业。
首先,你需要在电脑上安装 Redis。如果你使用的是 MacOS 系统并且安装了Homebrew,请在终端中运行以下代码片段来安装 Redis:
brew --version
brew install redis
安装过程完成后,您可以通过在终端中运行以下代码片段来测试 Redis 服务器:
redis-server

现在,您可以在应用程序中使用Node.js Redis 客户端。
在服务器上创建一个/api/scheduleAPI 路由,当用户添加或删除预定帖子时,该路由接受整个预定表。
import { NextRequest, NextResponse } from "next/server";

export async function POST(req: NextRequest) {
    const { schedule } = await req.json();
    try {
         console.log({schedule})

        return NextResponse.json(
            { message: "Schedule updated!", schedule },
            { status: 200 }
        );

    } catch (error) {
        return NextResponse.json(
            { message: "Error updating schedule", error },
            { status: 500 }
        );

    }
}
更新 API 端点,将整个时间表存储在 Redis 数据库中。Redis 以键/值对的形式存储数据,使其存储和检索速度极快。
import { NextRequest, NextResponse } from "next/server";
import Redis from "ioredis";
const redis = new Redis();

export async function POST(req: NextRequest) {
    const { schedule } = await req.json();
    try {
        //👇🏻 saves the schedule
        await redis.set("schedule", JSON.stringify(schedule));

        return NextResponse.json(
            { message: "Schedule updated!", schedule },
            { status: 200 }
        );
    } catch (error) {
        return NextResponse.json(
            { message: "Error updating schedule", error },
            { status: 500 }
        );
    }
}
您还可以在文件中添加 GET 请求处理程序api/schedule/route.ts,以从 Redis 数据库获取现有的预定帖子,并在用户登录应用程序时显示它们。
export async function GET() {
    try {
        const schedule = await redis.get("schedule");
        if (schedule) {
            return NextResponse.json(
                { message: "Schedule found", schedule: JSON.parse(schedule) },
                { status: 200 }
            );
        }
    } catch (error) {
        return NextResponse.json(
        { message: "Schedule not found" },
        { status: 500 }
    );
}
}
最后,您需要设置一个每分钟运行一次的作业队列,以检查当天安排的帖子并在适当的时间发布它们。
worker.ts在 Next.js 文件夹中创建一个文件src,并将以下代码复制到该文件中:
import data from "./user.json";
import { Worker, Queue } from 'bullmq';
import Redis from "ioredis";

//👇🏻 initializes a job queue connected to the Redis database
const redis = new Redis({maxRetriesPerRequest: null});
const scheduleQueue = new Queue('schedule-queue', { connection: redis });
上面的代码片段创建了一个连接到 Redis 数据库的作业队列。
在文件中实现一个scheduleJobs函数worker.ts,获取当前时间安排的帖子并将其添加到作业队列中。
//👇🏻 add jobs to the queue
export const scheduleJobs = async (schedule: AvailableScheduleItem[]) => {
    //👇🏻 gets current time and day
    const now = new Date();
    const currentHour = now.getHours();
    const currentMinute = now.getMinutes();
    const currentDay = now.getDay();

    //👇🏻 gets posts for the current hour
    const currentSchedule = schedule.find((item) => item.time === currentHour);
    const schedulesForTheHour = currentSchedule?.schedule[currentDay];

    //👇🏻 gets scheduled posts for the current time
    if (schedulesForTheHour && schedulesForTheHour?.length > 0) {
        const awaitingJobs = schedulesForTheHour.filter(
            (scheduleItem) =>
                scheduleItem.minutes && scheduleItem.minutes <= currentMinute
        );

        //👇🏻 add jobs to queue
        return awaitingJobs.map(async (scheduleItem) => {
            const job = await scheduleQueue.add("jobs", {
                message: scheduleItem.content
            }, {
                removeOnComplete: true,
            });
            console.log(`Job ${job.id} added to queue`);
        });
    }
};
将scheduleJobs函数导入api/schedule端点并使用 Node Cron 每分钟触发该函数。
//👉🏻 api/schedule/route.ts
import cron from "node-cron";

export async function POST(req: NextRequest) {
    const { schedule } = await req.json();
    try {
        await redis.set("schedule", JSON.stringify(schedule));
        cron.schedule('* * * * *', async() => {
            console.log('Triggering jobs...');
            await scheduleJobs(schedule);
        });

        return NextResponse.json(
            { message: "Schedule updated!", schedule },
            { status: 200 }
        );
    } catch (error) {
        return NextResponse.json(
            { message: "Error updating schedule", error },
            { status: 500 }
        );
    }
}
接下来,在文件中添加一个工作函数workers.ts,通过将帖子的内容发送到 X(Twitter)来执行队列中的作业。
//👇🏻 processing jobs
const scheduleWorker = new Worker('schedule-queue', async (job) => {
  console.log(`Processing job ${job.id} of type ${job.name} with data: ${job.data.message}`)
    console.log("Posting content...")

    //👇🏻 post content to X
    const postTweet = await fetch("https://api.twitter.com/2/tweets", {
        method: "POST",
        headers: {
            "Content-type": "application/json",
            Authorization: `Bearer ${data.accessToken}`,
        },
        body: JSON.stringify({ text: job.data.message })
    });
    if (postTweet.ok) {
          console.log("Content posted!")
    }
}, { connection: redis})

//👇🏻 listening for completed job
scheduleWorker.on('completed', job => {
    console.log(`${job.id} has completed!`);
});
npm run worker最后,更新文件内的脚本后,即可通过运行来执行该工作程序package.json。
{
 "scripts": {
    "worker": "npx tsx --watch src/worker.ts"
  }
}
恭喜!您已完成本教程的项目。
结论
到目前为止,您已经学习了如何通过 X 对用户进行身份验证、如何将数据存储在 Redis 数据库中、如何用 Redis 和 BullMQ 创建和管理作业,以及如何使用 CopilotKit 将 AI 助手集成到您的 Next.js 应用程序中。
CopilotKit 是一款功能强大的工具,可让您在几分钟内将 AI Copilot 添加到您的产品中。无论您是对 AI 聊天机器人和助手感兴趣,还是想实现复杂任务的自动化,它都能简化流程。
如果您需要构建 AI 产品或将 AI 工具集成到您的软件应用程序中,您应该考虑 CopilotKit。
您可以在 GitHub 上找到本教程的源代码:
https://github.com/dha-stix/ai-post-generator-and-scheduler-with-copilotkit
感谢您的阅读!
文章来源:https://dev.to/github20k/i-10xd-my-x-posts-using-the-twitter-api-openai-copilotkit-2d5n