如何为多个 Github/Bitbucket 帐户设置多个 Ssh 密钥。
来自Unsplash的Jantine Doornbos的照片
大家好,
每次我买了一台新电脑(虽然不是经常买,但足以写这篇文章),我都会为我拥有的不同代码存储库帐户的 Git 配置而“苦苦挣扎”。
每次我买了新电脑,我都记不清几年前/几个月前是怎么设置好的。
所以这篇文章与其说是写给现在正在读的你,不如说是写给未来的我。🤔
总结
总结一下,我们将在 Github、Gitlab 和 Bitbucket 上为我们的个人和专业身份创建一组 SSH 密钥,并将它们添加到 SSH 代理中。
然后,我们将根据主机配置必须使用的密钥。 接下来,我们将将相关密钥添加到相应的服务(Github、Gitlab 和 Bitbucket)。 这样我们就可以用正确的身份克隆、推送和拉取到仓库了。 执行这些操作的每个命令都如下所示。👨💻 ⬇️ 尽情享受吧。😎
介绍
我在GitHub、Bitbucket和GitLab上都有个人帐户,在 Github、Gitlab 和 Bitbucket 上也有一些工作帐户。
我该如何通过 SSH 密钥定义所有功能,使其正常工作,以便我的系统根据其需要使用的身份依赖正确的 SSH 密钥?
在本文中,我们将为每个账户关联一个个人身份和职业身份。
不过,您可以根据需要添加任意数量的账户。😉
🔑 密钥生成
我们将创建一些默认身份。
我们可以使用相同的 SSH 密钥来执行此操作,也可以为每个帐户使用特定的密钥。
相同的密钥:id_rsa
每个帐户的特定密钥:id_rsa_github;id_rsa_bitbucket;id_rsa_gitlab
让我们使用“每个帐户一个密钥”的方法。这样每个人都能更清楚地理解这个概念。
此外,我们需要您用于这些帐户的电子邮件地址。
不过,您可以根据需要随意操作。😉
👨💻🗝️ 个人密钥生成
✍️ 必填信息
让我们在表格中总结一下我们需要的内容
| - | 默认 Github | 默认 Gitlab | 默认 Bitbucket |
|---|---|---|---|
| SSH 密钥名称 | id_rsa_github | id_rsa_gitlab | id_rsa_bitbucket |
| 电子邮件 | name.github@gmail.com | name.gitlab@gmail.com | name.bitbucket@gmail.com |
🛠️ 密钥创建
让我们运行这些命令来创建 SSH 密钥。
ssh-keygen -f "~/.ssh/id_rsa_github" -t rsa -b 4096 -C "name.github@gmail.com"
ssh-keygen -f "~/.ssh/id_rsa_gitlab" -t rsa -b 4096 -C "name.gitlab@gmail.com"
ssh-keygen -f "~/.ssh/id_rsa_bitbucket" -t rsa -b 4096 -C "name.bitbucket@gmail.com"
现在,我们有3把钥匙供个人使用。
🏢 🔑 组织密钥生成
✍️ 必填信息
让我们在表格中总结一下我们需要的内容
| - | 组织 Github | 组织 Gitlab | 组织 Bitbucket |
|---|---|---|---|
| SSH 密钥名称 | id_rsa_github_companyName | id_rsa_gitlab_companyName | id_rsa_bitbucket_companyName |
| 电子邮件 | name.github@company.com | name.gitlab@company.com | name.bitbucket@company.com |
🛠️ 密钥创建
让我们运行这些命令来创建 SSH 密钥。
ssh-keygen -f "~/.ssh/id_rsa_github_companyName" -t rsa -b 4096 -C "name.github@company.com"
ssh-keygen -f "~/.ssh/id_rsa_gitlab_companyName" -t rsa -b 4096 -C "name.gitlab@company.com"
ssh-keygen -f "~/.ssh/id_rsa_bitbucket_companyName" -t rsa -b 4096 -C "name.bitbucket@company.com"
现在,我们有 3 把钥匙供我们组织使用。
📦将 SSH 密钥添加到 SSH 代理
我们现在有 6 个 SSH 密钥。让我们将它们添加到 SSH 代理。
# Add the personal keys
ssh-add ~/.ssh/id_rsa_github
ssh-add ~/.ssh/id_rsa_gitlab
ssh-add ~/.ssh/id_rsa_bitbucket

# Add the organisation keys
ssh-add ~/.ssh/id_rsa_github_companyName
ssh-add ~/.ssh/id_rsa_gitlab_companyName
ssh-add ~/.ssh/id_rsa_bitbucket_companyName
因此,我们在 SSH-Agent 中有 3 个密钥供个人使用,还有 3 个密钥供组织使用。
现在必须设置配置,以便根据上下文定义必须使用哪个键。
📝 配置
打开~/.ssh/config文件,如果文件不存在则创建它。
nano ~/.ssh/config
我们将根据主机定义一些规则。
Host github.com
  HostName github.com
  IdentityFile ~/.ssh/id_rsa_github

Host gitlab.com
  HostName gitlab.com
  IdentityFile ~/.ssh/id_rsa_gitlab

Host bitbucket.org
  HostName bitbucket.org
  IdentityFile ~/.ssh/id_rsa_bitbucket


Host companyname.github.com
  HostName github.com
  IdentityFile ~/.ssh/id_rsa_github_companyName

Host companyname.gitlab.com
  HostName gitlab.com
  IdentityFile ~/.ssh/id_rsa_gitlab_companyName

Host companyname.bitbucket.org
  HostName bitbucket.org
  IdentityFile ~/.ssh/id_rsa_bitbucket_companyName
按 Ctrl+O(按 Ctrl+X 退出文件)保存并关闭文件。
💭 将密钥添加到您的存储库帐户
本地一切设置完毕。现在我们需要将 SSH 公钥添加到您正在使用的服务中。
在 MacOS 上,将 SSH 密钥复制到剪贴板非常容易。
pbcopy < ~/.ssh/id_rsa.pub
🐙 Github
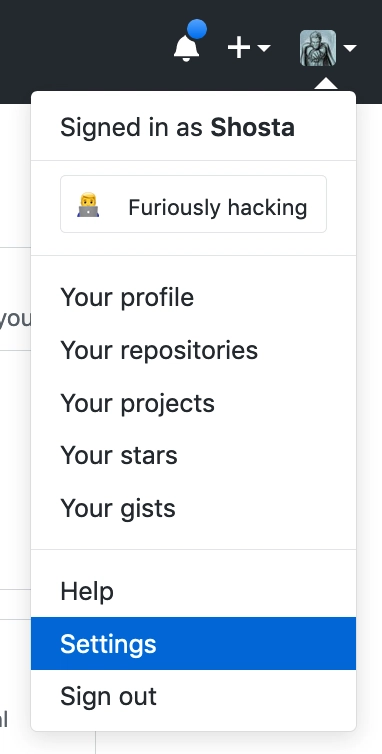
让我们登录您的 Github 帐户并转到帐户设置。
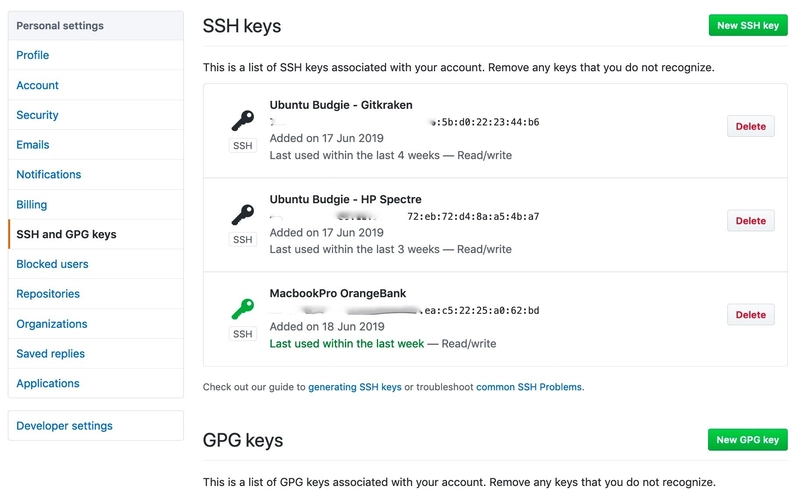
选择“SSH 和 GPG 密钥”。
点击“新建 SSH 密钥”按钮。
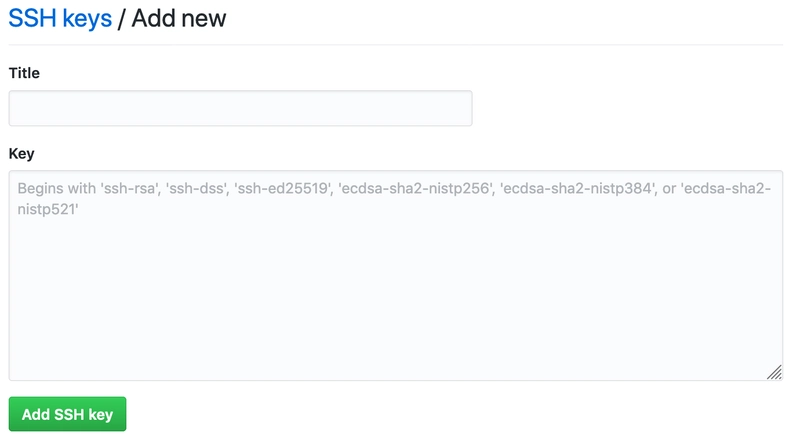
1.将个人 SSH 密钥添加到 Github:
- 为该 SSH 密钥定义一个相关标题,例如“FirstName LastName - MacBook Pro”。
- 将公钥的内容复制到剪贴板。
pbcopy < ~/.ssh/id_rsa_github.pub
- 将其粘贴到Github界面上的key内容即可。
- 单击“添加 SSH 密钥”保存。
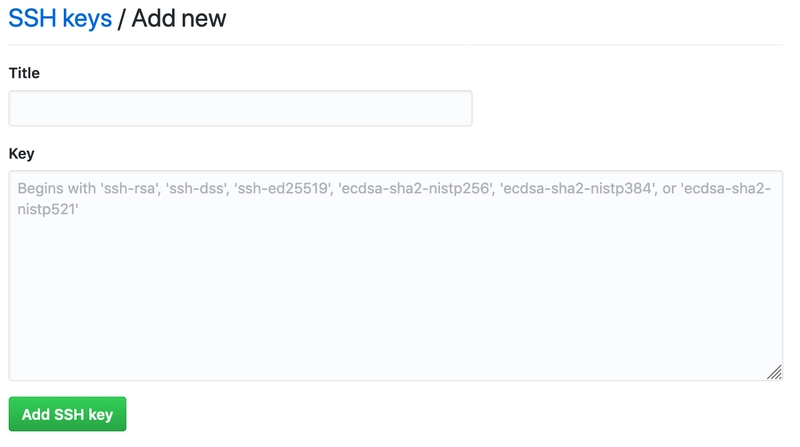
2.将组织 SSH 密钥添加到 Github:
- 为该 SSH 密钥定义一个相关标题,例如“FirstName LastName - MacBook Pro - Organization”。
- 将公钥的内容复制到剪贴板。
pbcopy < ~/.ssh/id_rsa_github_companyName.pub
- 将其粘贴到Github界面上的key内容即可。
- 单击“添加 SSH 密钥”保存。
GitLab
待添加
🗑️ Bitbucket
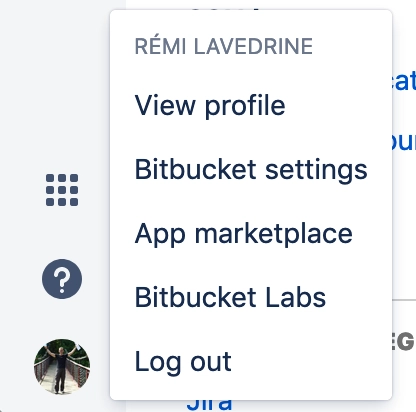
让我们登录您的 Bitbucket 帐户并转到该帐户的设置。
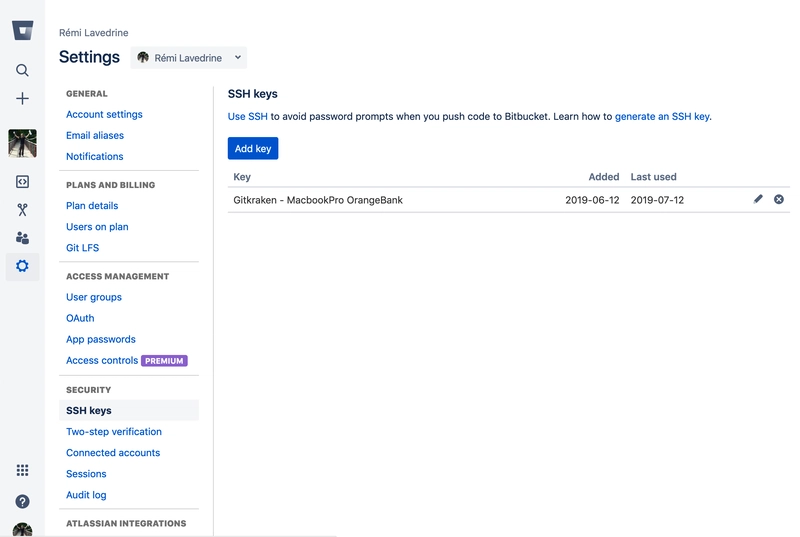
选择“Bitbucket 设置”和“SSH 密钥”。
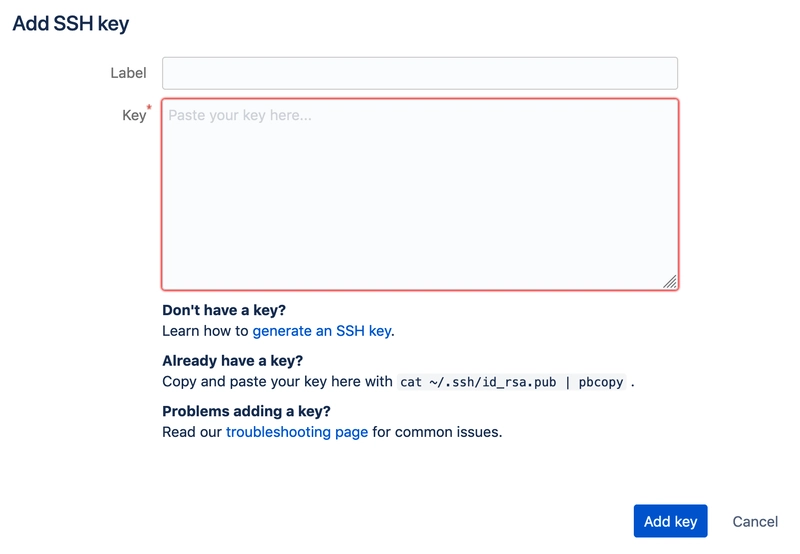
点击“添加密钥”按钮。
1.将个人 SSH 密钥添加到 Bitbucket:
- 为该 SSH 密钥定义一个相关标题,例如“FirstName LastName - MacBook Pro”。
- 将公钥的内容复制到剪贴板。
pbcopy < ~/.ssh/id_rsa_bitbucket.pub
- 将其粘贴到Bitbucket界面上的密钥内容中。
- 单击“添加密钥”保存。
2. 将组织 SSH 密钥添加到 Bitbucket:
- 为该 SSH 密钥定义一个相关标题,例如“FirstName LastName - MacBook Pro - Organization”。
- 将公钥的内容复制到剪贴板。
pbcopy < ~/.ssh/id_rsa_bitbucket_companyName.pub
- 将其粘贴到Bitbucket界面上的密钥内容中。
- 单击“添加密钥”保存。
👨👦克隆存储库
现在我们已经为所有环境完成了设置,我们可以使用适当的身份从 Github、Gitlab 或 Bitbucket 克隆存储库。
👨💻 个人仓库
因此,我们可以使用您应该多次使用的命令来克隆项目。
git clone git@bitbucket.org:yourPersonalAccount/pet-project.git
执行该命令时,git 使用的是“默认”SSH 密钥。它是在文件中为主机“Host github.com”定义的密钥~/.ssh/config。
然后您就可以使用该身份登录pull或push进入存储库。
🏢 专业存储库
对于您的组织项目,您只需克隆项目替换bitbucket.org为companyname.bitbucket.org(如~/.ssh/config文件中所定义)。
git clone git@companyname.bitbucket.org:companyName/company-project.git
所以,要使用的是正确的身份。然后,
您可以根据需要多次使用您组织的身份。pullpush
我希望这对你有帮助。
干杯🍻
这篇文章的灵感来自于Fredrik Andersson在Medium上发表的出色作品。
视频由Wild & Secure制作,我们是一家专注于安防和房地产领域的咨询公司。
如果您想每周收到高质量的安防内容,请在我们的网站上订阅我们的新闻通讯。
 后端开发教程 - Java、Spring Boot 实战 - msg200.com
