推出 Handsfree.js - 将手势、面部表情和姿势手势集成到您的前端🖐👀🖐
您好,感谢您阅读这篇介绍文章,我很高兴与您分享 Handsfree.js!Handsfree.js 是一个客户端库,可以帮助您快速为前端项目添加手势、面部和姿势估计功能 ✨👌
由于这是一篇入门文章,我会先分享一些我用它制作的东西,让你大致了解一下它的功能。等我稍微激发起你的热情后,我再教你如何开始!
Handsfree.js 可以帮你做很多事情,我正在用它来彻底解放你的双手,让网络,乃至我们周围的世界都变得如此。你可以在我的“总体规划”中看到我的计划,也可以在Twitter 上 @Midiblocks看到我实际的操作。
好的!让我来演示一下 Handsfree.js 的功能 ✨
示例
用它来触发事件
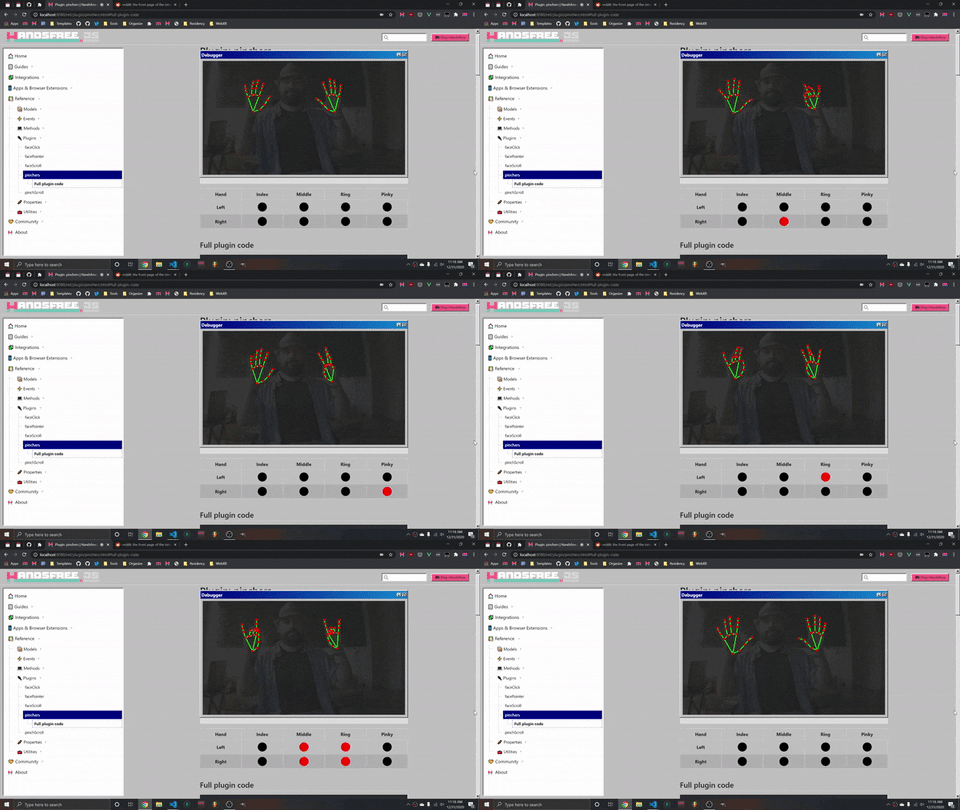
就在昨天,我发布了Pincher 插件,它可以发出 24 多个捏合事件,包含 3 种状态 - start、held、released- 分别用于食指、中指、无名指和小指的捏合。它以鼠标事件为模型,您可以通过以下方式监听它们document.addEventListener():https://handsfree.js.org/ref/plugin/pinchers.html
使用它来免提滚动页面
这是我正在开发的浏览器扩展程序,可以帮助你免提滚动网页。它使用MediaPipe Hands 模型来追踪你的手部。这个 GIF 实际上很容易用内置的 制作pinchScroll plugin,只需一行代码即可实现这一可自定义的功能:https://handsfree.js.org/ref/plugin/pinchScroll.html
用它来创造新型辅助技术
这是我最喜欢的应用之一,它使用了“Face Pointer”插件,允许你用脸部移动指针、滚动页面以及点击内容。它基于Jeeliz Weboji 模型和一些脸部插件。
用它来控制桌面游戏
这是我在桌面上使用 Face Pointers 和 Hand Pointers 玩《Into the Breach》时的效果。制作起来也非常简单,我只需要使用 Face Pointers 和 Hand Pointers 插件,然后用Robot.js将它们传输到桌面,触发原生鼠标事件:
使用它来制作你自己的游戏
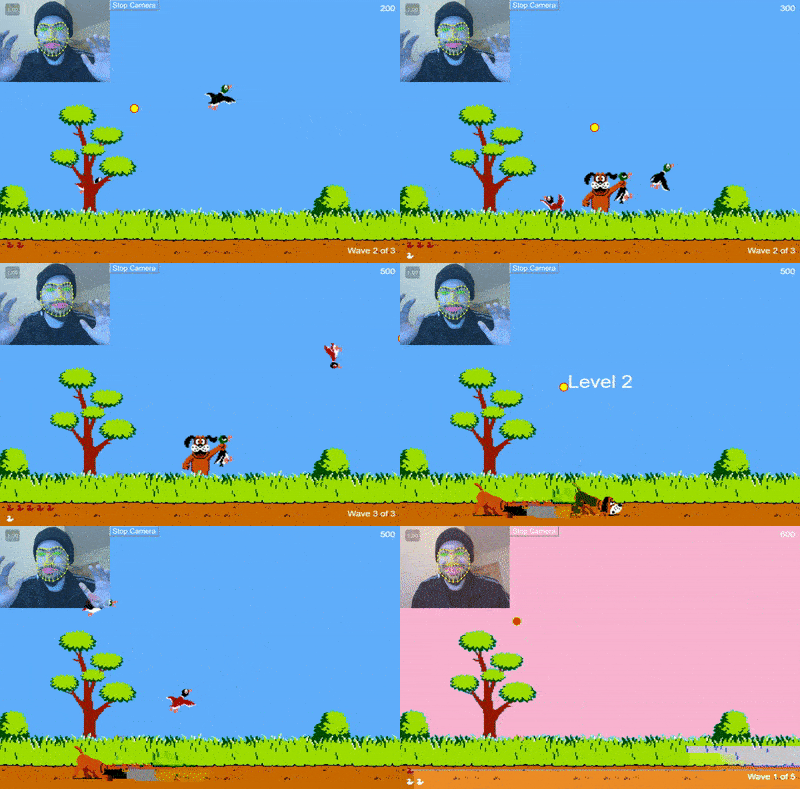
既然可以自己做游戏,为什么还要玩游戏呢?以下是我做的几个游戏,我打算把它们组合成类似“马里奥派对”的游戏,通过掷骰子在棋盘上移动,然后在每一轮结束时和朋友们一起玩这些小游戏。
以下是“DuckFace Hunt”、“Flappy Pose”和“Handsfree Jenga”:
用它来控制机器人和无人机
当然,你不仅限于控制网页或桌面上的东西。通过 WebSocket,你可以控制任何连接到你电脑的东西,比如这个我尝试用自己的头脑操控的 Universal Robot:
用于艺术、音乐和其他体验
你可以做的事情还有很多!这里还有一些其他的实验,比如我即将推出的“Diffusionist”应用,它可以帮助你创作出随着音乐节拍而产生的迷幻艺术作品(音频版本请见我全新的 Instagram)。我还在开发一个 WebXR DevTools Chrome 扩展程序,这样你就可以在没有 XR 设备的情况下,解放双手,轻松操作 WebXR 应用了:
入门
太棒了!现在我已经向你展示了一些你能做的事情,接下来让我来演示一下怎么做。如果一开始你觉得有点不知所措,不用担心,这只是一个概述。我很快会发布更多更短、更具体的教程🙏
如果你克隆我的代码库(并给它一颗星🤗),你可以在 中找到一个样板/boilerplate/cdn.html。我很快会发布更多😊
初始化并启动免提
最简单的入门方法是使用 CDN。如果您愿意,可以创建一个 HTML 文件并将其复制/粘贴到其中,而无需服务器:
<head>
  <!-- Import helper classes and styles -->
  <link
    rel="stylesheet"
    href="https://unpkg.com/handsfree@8.1.1/build/lib/assets/handsfree.css" />
</head>
<body>
  <!-- Import Handsfree.js in body (as it adds body classes) -->
  <script src="https://unpkg.com/handsfree@8.1.1/build/lib/handsfree.js"></script>

  <script>
    // Use the hand with defaults (and show the webcam with wireframes)
    handsfree = new Handsfree({
      showDebug: true,
      hands: true
    })

    // Start webcam and tracking (personally, I always like to ask first)
    handsfree.start()
  </script>
</body>
您也可以使用 NPM 导入。默认情况下,由于模型很大(有些超过 10MB),导入仍会从 CDN 加载。不过,我提供了一些将模型导出到资源文件夹的说明,请点击此处:https://handsfree.js.org/#hosting-the-models-yourself
npm i handsfree
handsfree = new Handsfree({
  showDebug: true,

  // Use the hand model with custom config
  hands: {
    // Always make sure to enable them
    enabled: true,

    // Let's track up to 4 hands. It's best to be kind and ask permission first tho!
    maxNumHands: 4,
  }
})

// Start webcam and tracking (personally, I always like to ask first)
handsfree.start()
有关可传递到 Handsfree 的配置选项的完整列表,请参阅:https ://handsfree.js.org/ref/prop/config.html#the-full-list
处理数据
当然,这只会在你的手上显示线框,但它实际上还不会做任何事情。使用 Handsfree.js 主要有两种方式,我更喜欢使用handsfree.use(newPluginName, callback)创建插件。我之所以称之为插件,是因为它们会“插入”到你运行 时启动的主摄像头循环中handsfree.start()。
插件会callback在每一帧网络摄像头图像上运行,并接收所有正在运行的计算机视觉模型的数据。这里有一个非常简单的插件,它只是简单地在控制台中记录数据。我称之为“logger”:
// Let's use our hands again
handsfree = new Handsfree({showDebug: true, hands: true})
handsfree.start()

// Let's create a plugin called "logger" to console.log the data
handsfree.use('logger', (data) => {
  // I like to always bail if there's no data,
  // which might happen if you swap out hands for the face later on
  if (!data.hands) return

  // Log the data
  console.log(data.hands)

  // Do something if we are pinching with left [0] pinky [3]
  if (data.hands.pinchState[0][3] === 'held') {
    console.log('pinching with left pinky')
  }
})
插件创建完成后,即可在以下位置使用,handsfree.plugin.pluginName并附带一些方法和属性。最重要的是,它们拥有一个.disable()and.enable()方法:
handsfree.plugin.logger.enable()
handsfree.plugin.logger.disable()

// This is what the callback gets mapped to,
// and is what gets called on every frame that this plugin is enabled
handsfree.plugin.logger.onFrame
如果您需要更高级的功能,可以传递一个带有特定钩子的对象,这些钩子将在插件的各个阶段运行。例如:
handsfree.use('advancedLogger', {
  // True by default
  enabled: true,

  // A list of strings for tagging this plugin.
  // Later you can bulk disable/enable these with: handsfree.enablePlugins(['tag1', 'tag2'])
  tags: [],

  // This special property can be adjusted later (or even before!) in various ways
  config: {},

  // Called immediately after the plugin is added, even if disabled
  // The `this` context is the plugin itself: handsfree.plugin.advancedLogger
  // If you need to create DOM elements or other setup, this is the method to do it in
  onUse () {},

  // Called when you .enable() this plugin
  onEnabled () {},
  // Called when you .disable() this plugin
  onEnabled () {}
})
无需插件即可使用数据
有时您可能只想跟踪一帧,或者使用图像、画布或视频元素代替网络摄像头,又或者您可能处于应用程序的某个部分,无法轻松访问handsfree(例如在 Node 模块中)。在这种情况下,您只需监听 上的事件即可document。
因为这些都是事件,所以你想要的数据总是在ev.detail.data
// This will get called on every frame
document.addEventListener('handsfree-data', ev => console.log(ev.detail.data))

// Listen to when the thumb and index (0) are pinched on any hand
document.addEventListener('handsfree-finger-pinched-0')

// Listen to when the right (1) thumb and pinky (3) are pinched
document.addEventListener('handsfree-finger-pinched-1-3')
另外,请注意,您始终可以直接在实例上访问数据handsfree:
console.log(handsfree.data.hands)
更新模型和插件
Handsfree.js 的真正魔力在于它能够即时切换模型和插件。如果你的应用中不同的路由有不同的免提用户体验,那么这一点就非常有用。这时,强大的handsfree.update(config)函数就派上用场了。我在 Handsfree.js.org 的各个地方都使用它,这样你就可以无需重启摄像头就能尝试不同的演示。
handsfree.use与实例化 Handsfree 时采用相同的配置对象,但它还做了一些额外的事情:
- 它会堆叠
handsfree.update({facemesh: true})变化,所以如果你只在打开双手的情况下传递,那么你最终会得到两者 - 它自动处理任何所需模型和依赖项的加载
- 让您能够配置插件,或完全关闭它们
这是一个例子
// Start with hands
const handsfree = new Handsfree({hands: true})
handsfree.start()

// Add facemesh
handsfree.update({facemesh: true})

// Replace both with pose
handsfree.update({
  hands: false,
  facemesh: false,
  pose: true
})

// Use Weboji and enable the Face Pointer plugins
handsfree.update({
  hands: false, facemesh: false, pose: false,
  weboji: true,

  plugin: {
    // Enable some plugins
    faceClick: true
    faceScroll: true,
    // Update the special .config properties of the plugins (this is so magical!)
    facePointer: {
      speed: {
        x: 2,
        y: 2
      }
    },
  }
})
您还可以批量禁用和启用插件,甚至可以通过标签:
// Disable and enable them all
handsfree.disablePlugins()
handsfree.enablePlugins()

// Disable all the "core" tagged plugins
handsfree.disablePlugins('core')

// Enable handsfree "browser" tagged plugins
handsfree.enablePlugins('browser')
每个当前插件都有一组可实时更新的配置。只需.config通过名称访问即可:
// Change the Face Pointer speed
handsfree.plugin.facePointer.config.speed.x = 2
handsfree.plugin.facePointer.config.speed.y = 2

// Set the threshold for how much you have to smile to click (0 - 1)
handsfree.plugin.faceClick.config.morphs[0] = .25
课程
每当 Handsfree.js 中发生任何事件时,都会向 中添加一个类document.body。这使得你可以根据状态轻松设置应用样式或显示或隐藏元素。你可以在以下位置找到它们:
- 通用类:https://handsfree.js.org/ref/util/classes.html
- 捏合状态:https://handsfree.js.org/ref/plugin/pinchers.html#classes
感谢阅读🙏
基本内容就这些了!我知道这么说可能有点让人不知所措,但我的新年愿望之一就是多写点东西,所以我会每周发布一些篇幅更小、更有针对性的教程,每次涵盖一个特定的主题。
本月,我将在创意探索工作室 (STUDIO for Creative Inquiry)开启我的第二次驻留项目,探索 Handsfree.js 的新应用方式。这是我的全职工作,所以请在下方留言或访问我的 Discord,我会帮助你以新颖且富有创意的方式整合 Handsfree.js。
如果您想了解我的故事以及三年前是什么激励我走上这条道路,请查看我的GitHub 赞助商。非常感谢你阅读这篇介绍,我迫不及待地想看看你用Handsfree.js做了什么🖐👀🖐
文章来源:https://dev.to/ozramos/introducing-handsfree-js-integrate-hand-face-and-pose-gestures-to-your-frontend-4g3p 后端开发教程 - Java、Spring Boot 实战 - msg200.com

