开始使用 spartan/ui - 类似 Shadcn 的 Angular UI 组件
我们都熟悉这样的情况:我们正在启动一个新项目,并正在寻找一些漂亮的 UI 组件。虽然从技术上讲,我们可以从头开始构建这些组件,但我们希望立即开始构建,而不是重新发明轮子。我们需要一个能够立即上手且不牺牲质量或可访问性 (a11y) 的解决方案。
因此,我们深入探索了 Angular 组件库的世界。
虽然它们种类繁多,并且大多数都具备可靠的无障碍功能,但似乎大多数 Angular UI 库都带有强烈的企业品牌标识,这往往与项目需求不太契合。更重要的是,它们大多缺乏便捷的组件自定义或扩展方法,不允许我们将其变为自己的组件。
然后我们来看看 React 生态系统,以及所有基于RadixUI和shadcn构建的优秀项目。我不知道你们怎么想,但每当我这样做的时候,我总会有点羡慕。
shadcn - 一个改变游戏规则的 UI 库(用于 React)
为什么?shadcn/ui包含了项目所需的所有组件,并且所有组件都默认带有精美的样式。同时,它仍然允许您根据需要调整和自定义每个 UI 元素。
它是如何做到的?
- 它建立在RadixUI之上,这是一个默认情况下完全没有样式的UI 库,并带有直观且可扩展的 API,而且非常出色。
- 它使用TailwindCSS类和CSS 变量进行样式设置,为您提供完美的灵活性,同时推动您使用可靠的设计原则。
- 它不需要您通过 npm 包安装样式,而是允许您将其精心制作的原语直接复制到您的代码库中,这意味着您拥有代码并可以调整一切以满足您的需要。
对于 Angular 开发人员来说,shadcn 的问题在于它建立在 React 之上……
现在想象一下一个易于访问的开源 Angular UI 库,它没有预先设置样式,允许你完全自主地控制其外观。可以说是 Angular 的 shadcn 实现。
spartan/ui - 适用于 Angular 的 shadcn
输入spartan/ui – 一组创新的 Angular UI 原语集合,默认情况下未设置样式且可访问。
brain & helm - spartan/ui 的构建模块
为了实现类似 shadcn 的开发体验的目标,spartan/ui 分为两部分:
- 通过spartan/ui/brain,我们的目标是让这个过程更加直接高效。我们提供一系列功能丰富的非样式化UI 构建块,可以轻松定制,以匹配您项目独特的视觉和功能偏好。
- spartan /ui/helm提供了基于TailwindCSS和CSS 变量构建的预设计样式。与 shadcn 一样,您可以将它们复制到项目中,从而完全控制其代码、外观和整体体验。
@spartan-ng/cli - 一个命令统治所有命令
为了尽可能简化操作,spartan/ui配备了 CLI,让您可以轻松地将我们的组件集成到您的 Nx 或 Angular 工作区中。只需一个命令,您就可以将其 30 多个 spartan/ui 原语中的任何一个添加到您的项目中。
但这还不是全部——CLI 的功能远不止添加组件。你还可以利用它将 12 个自定义主题之一集成到你的 Angular 或 Nx 应用程序中,让你真正掌控项目的视觉外观。
你的第一个简洁应用
那么让我们看看spartan/ui的启动和运行是什么样子的。
如果您更愿意观看本文的视频版本,请在YouTube 上查看。
设置 Nx 的 Angular 工作区
如上所述,spartan/ui遵循与shadcn相同的范例,即您应该拥有允许您设置样式、扩展和组合 UI 组件的代码。
虽然我们正在开发独立的 API,但 Nx 恰恰为这种用例提供了出色的工具。因此,spartan/ui的 CLI 的初始版本是一个 Nx 插件。
因此,对于本教程,我们将在 Nx 工作区内创建一个新的 Angular 项目。
运行 create-nx-workspace
再次强调,Nx 让这一切变得异常简单。只需运行以下命令即可。
npx create-nx-workspace@latest
出现提示时:
- 选择一个有意义的名字,我选择
- 选择 Angular 作为您的堆栈。
- 选择独立项目。
- 重要提示:选择 CSS 作为您的样式。
- 添加您选择的(可选)端到端测试运行器。
- 选择独立组件。
- 仅当您愿意时才添加路由。
最后,等待 Nx 发挥其魔力,安装所有必要的依赖项,并设置您的 Angular 工作区。
删除样板
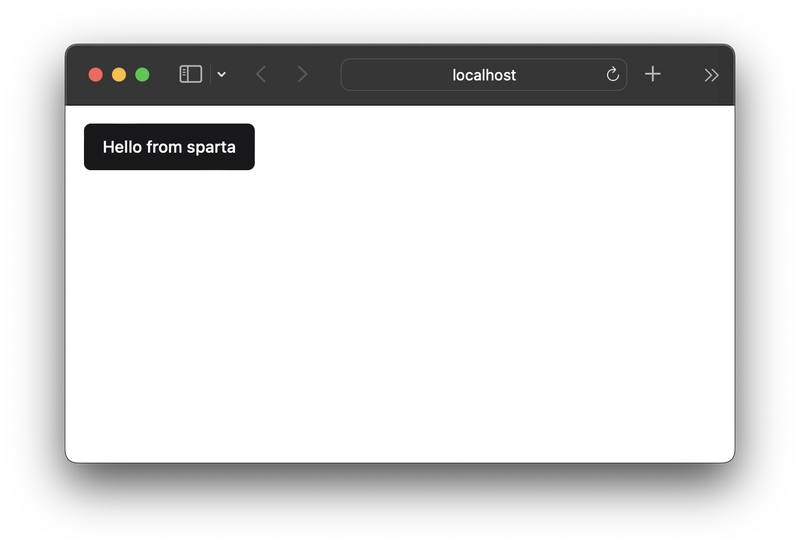
我非常支持将模板和样式与组件类放在同一个文件中。因此,我删除了工作区生成器创建的src/app/app.component.html和src/app/app.component.css文件。我还删除了 ,src/app/nx-welcome.component.ts并将 my 的内容更改src/app/app.component.ts为以下内容:
import { Component } from '@angular/core';

@Component({
  standalone: true,
  imports: [],
  selector: 'app-root',
  template: `<button>Hello from {{title}}</button>`
})
export class AppComponent {
  title = 'sparta';
}
在我们准备开始添加spartan/ui 之前还有一件事。
添加 TailwindCSS
由于spartan/ui建立在 TailwindCSS 之上,因此我们需要为我们的项目进行有效的设置。
值得庆幸的是,Nx 再次让我们的操作变得异常简单。只需运行以下命令,并在出现提示时选择您的应用程序即可:
npx nx g @nx/angular:setup-tailwind
这将创建一个tailwind.config.ts文件并安装所有必要的依赖项。让我们继续。
安装@spartan-ng/cli
现在我们可以将spartan/ui添加到项目中了。为了方便起见,我们将使用 Nx 插件,安装方法如下:
npm i @spartan-ng/cli
安装@spartan-ng/ui-core
然后我们添加@spartan-ng/ui-core库。
npm i @spartan-ng/ui-core
它包含一堆帮助程序,例如hlm函数,它为我们的 tailwind 类合并提供动力,最重要的是@spartan-ng/ui-core/hlm-tailwind-preset,它包含 tailwind 的所有必要扩展,使我们的spartan/ui/helm指令和组件能够工作。
设置 tailwind.config.js
现在,我们必须将这个 spartan 特定的配置添加到你的 TailwindCSS 设置中。只需将其添加@spartan-ng/ui-core/hlm-tailwind-preset到配置文件的 presets 数组中即可:
const { createGlobPatternsForDependencies } = require('@nx/angular/tailwind');
const { join } = require('path');

/** @type {import('tailwindcss').Config} */
module.exports = {
  presets: [require('@spartan-ng/ui-core/hlm-tailwind-preset')],
  content: [
    join(__dirname, 'src/**/!(*.stories|*.spec).{ts,html}'),
    ...createGlobPatternsForDependencies(__dirname),
  ],
  theme: {
    extend: {},
  },
  plugins: [],
};
添加 CSS 变量
为了完成 TailwindCSS 的设置,我们需要将 spartan 特有的 CSS 变量添加到你的样式入口点。入口点很可能位于你的应用程序文件夹styles.css中src。
再次,我们使用 Nx,因此我们的插件将负责繁重的工作:
npx nx g @spartan-ng/cli:ui-theme
出现提示时:
- 选择项目中唯一的应用程序
- 选择您想尝试的主题
- 选择你喜欢的边框半径
- 将路径留空(插件应该足够智能,可以找出大多数设置的正确路径)
- 将前缀留空,因为我们添加了默认主题
然后,检查您的并查看添加了styles.css以下spartan/ui特定变量:
:root {
--font-sans: ''
}

:root {
--background: 0 0% 100%;
--foreground: 240 10% 3.9%;
--card: 0 0% 100%;
--card-foreground: 240 10% 3.9%;
--popover: 0 0% 100%;;
--popover-foreground: 240 10% 3.9%;
--primary: 240 5.9% 10%;
--primary-foreground: 0 0% 98%;
--secondary: 240 4.8% 95.9%;
--secondary-foreground: 240 5.9% 10%;
--muted: 240 4.8% 95.9%;
--muted-foreground: 240 3.8% 46.1%;
--accent: 240 4.8% 95.9%;
--accent-foreground: 240 5.9% 10%;
--destructive: 0 84.2% 60.2%;
--destructive-foreground: 0 0% 98%;
--border: 240 5.9% 90%;
--input: 240 5.9% 90%;
--ring: 240 5.9% 10%;
--radius: 0.5rem;
}

.dark {
--background: 240 10% 3.9%;
--foreground: 0 0% 98%;
--card: 240 10% 3.9%;
--card-foreground: 0 0% 98%;
--popover: 240 10% 3.9%;
--popover-foreground: 0 0% 98%;
--primary: 0 0% 98%;
--primary-foreground: 240 5.9% 10%;
--secondary: 240 3.7% 15.9%;
--secondary-foreground: 0 0% 98%;
--muted: 240 3.7% 15.9%;
--muted-foreground: 240 5% 64.9%;
--accent: 240 3.7% 15.9%;
--accent-foreground: 0 0% 98%;
--destructive: 0 62.8% 30.6%;
--destructive-foreground: 0 0% 98%;
--border: 240 3.7% 15.9%;
--input: 240 3.7% 15.9%;
--ring: 240 4.9% 83.9%;
}
添加我们的第一个原语
太棒了!现在我们已经准备好在项目中使用spartan/ui 了。让我们再次利用 Nx 插件,将按钮原语添加到项目中:
npx nx g @spartan-ng/cli:ui button
出现提示时:
- 选择合适的目录来放置您的组件,例如 libs/spartan
- 当系统提示您是否要跳过安装必要的依赖项时,请选择默认的 false
插件完成后,您将看到libs/spartan/button-helm文件夹中添加了一个新的可构建库。
它包含的源代码HlmButtonDirective,带有一堆不同的样式,这些样式是通过HostBinding基于指令的不同输入来应用的。
import { Directive, HostBinding, Input } from '@angular/core';
import { cva, VariantProps } from 'class-variance-authority';
import { hlm } from '@spartan-ng/ui-core';
import { ClassValue } from 'clsx';

const buttonVariants = cva(
  'inline-flex items-center justify-center rounded-md text-sm font-medium transition-colors focus-visible:outline-none focus-visible:ring-2 focus-visible:ring-ring focus-visible:ring-offset-2 disabled:opacity-50 disabled:pointer-events-none ring-offset-background',
  {
    variants: {
      variant: {
        default: 'bg-primary text-primary-foreground hover:bg-primary/90',
        destructive: 'bg-destructive text-destructive-foreground hover:bg-destructive/90',
        outline: 'border border-input hover:bg-accent hover:text-accent-foreground',
        secondary: 'bg-secondary text-secondary-foreground hover:bg-secondary/80',
        ghost: 'hover:bg-accent hover:text-accent-foreground',
        link: 'underline-offset-4 hover:underline text-primary',
      },
      size: {
        default: 'h-10 py-2 px-4',
        sm: 'h-9 px-3 rounded-md',
        lg: 'h-11 px-8 rounded-md',
        icon: 'h-10 w-10',
      },
    },
    defaultVariants: {
      variant: 'default',
      size: 'default',
    },
  }
);
type ButtonVariants = VariantProps<typeof buttonVariants>;

@Directive({
  selector: '[hlmBtn]',
  standalone: true,
})
export class HlmButtonDirective {
  private _variant: ButtonVariants['variant'] = 'default';
  @Input()
  get variant(): ButtonVariants['variant'] {
    return this._variant;
  }

  set variant(value: ButtonVariants['variant']) {
    this._variant = value;
    this._class = this.generateClasses();
  }

  private _size: ButtonVariants['size'] = 'default';
  @Input()
  get size(): ButtonVariants['size'] {
    return this._size;
  }

  set size(value: ButtonVariants['size']) {
    this._size = value;
    this._class = this.generateClasses();
  }

  private _inputs: ClassValue = '';

  @Input()
  set class(inputs: ClassValue) {
    this._inputs = inputs;
    this._class = this.generateClasses();
  }

  @HostBinding('class')
  private _class = this.generateClasses();

  private generateClasses() {
    return hlm(buttonVariants({ variant: this._variant, size: this._size }), this._inputs);
  }
}
注意:目前,插件可以正确添加依赖项,但是它们的对等依赖项尚未由 Nx 安装。只需在调用后
运行以确保一切都正确安装。npm i@spartan-ng/cli:ui
使用我们的第一个原语
要使用我们的新指令,我们只需将指令添加到我们button的src/app/app.component/ts:
import { Component } from '@angular/core';
import { HlmButtonDirective } from '@spartan-ng/button-helm';

@Component({
  standalone: true,
  imports: [HlmButtonDirective],
  selector: 'app-root',
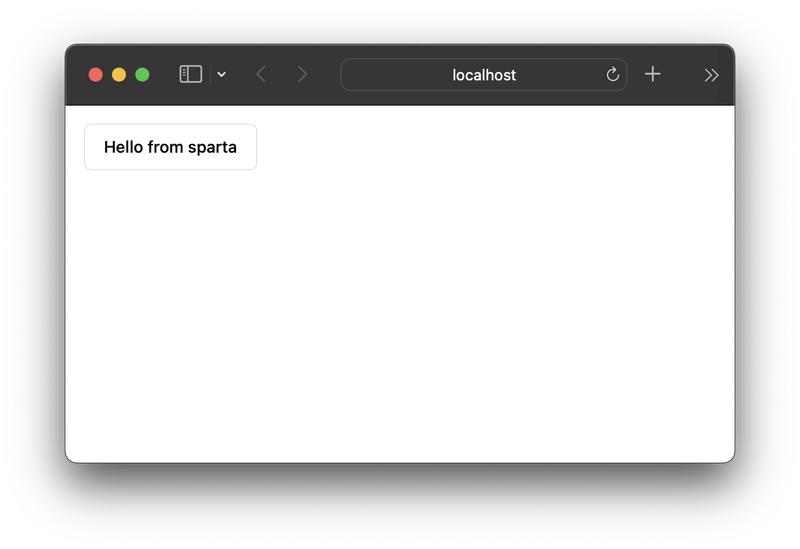
  template: `<button hlmBtn variant="outline">Hello from {{title}}</button>`
})
export class AppComponent {
  title = 'sparta';
}
然后我们启动我们的开发服务器:
npm start
并查看我们精美风格的spartan/ui按钮:
要将外观更改为另一种变体,我们只需variant向我们的添加一个输入<button hlmBtn>:
import { Component } from '@angular/core';
import { HlmButtonDirective } from '@spartan-ng/button-helm';

@Component({
  standalone: true,
  imports: [HlmButtonDirective],
  selector: 'app-root',
  template: `<button hlmBtn variant="outline">Hello from {{title}}</button>`
})
export class AppComponent {
  title = 'sparta';
}
我们的样式将相应更新,并且我们看到了轮廓按钮:
其他可用组件
随着初始 alpha 版本的发布,共有 30 个组件可用:
- 手风琴
- 警报
- 警报对话框
- 长宽比
- 阿凡达
- 徽章
- 按钮
- 卡片
- 可折叠
- 组合框
- 命令
- 上下文菜单
- 对话
- 下拉式菜单
- 输入
- 图标
- 标签
- 菜单栏
- 弹出窗口
- 进步
- 广播组
- 滚动区域
- 分隔符
- 床单
- 骨骼
- 转变
- 标签
- 文本区域(由 hlmInput 指令覆盖)
- 切换
- 排版
您可以按照我们为我所做的相同方式添加新组件,button.我还计划创建更多博客文章和视频,展示如何使用spartan/ui构建您的用户界面。
下一步是什么?
spartan/ui仍处于 alpha 阶段,所以我们还有很长的路要走(有些历史爱好者可能会说这是一场马拉松)。然而,我非常高兴这个项目终于启动了,您可以尝试一下,并给我提供非常宝贵的反馈。我希望 spartan/ui 能成为 Angular 生态系统的影子,并与AnalogJs等优秀的项目一起,为我们所有人带来类似的创新爆发。
和往常一样,您对博客文章还有其他问题或建议吗?您觉得 Spartan 怎么样?您有计划将它添加到您的项目中吗?我很想听听您的想法。请随时发表评论或给我留言。
最后,如果你喜欢这篇文章,欢迎点赞并与他人分享。如果你喜欢我的内容,请在Twitter或Github上关注我。
文章来源:https://dev.to/this-is-angular/getting-started-with-spartanui-shadcn-like-ui-components-for-angular-8df 后端开发教程 - Java、Spring Boot 实战 - msg200.com

