人工智能博客第二部分(Nextjs、GPT4、Supabase 和 CopilotKit)
CopilotKit:构建应用内 AI 副驾驶的框架
人工智能时代已经到来。想要成为优秀的开发者,在你的投资组合中拥有一些人工智能项目至关重要。
今天,我们将构建一个由人工智能驱动的博客平台,该平台具有一些很棒的功能,例如研究、自动完成和 Copilot。
我在这里构建了这个项目的初始版本。一位评论者提出了一些非常棒的建议,可以帮助它更上一层楼。
所以我们决定建造它!
TL;DR
我们正在构建一个由人工智能驱动的博客平台 Pt. II
CopilotKit:构建应用内 AI 副驾驶的框架
CopilotKit 是一个 开源的 AI 副驾驶平台。我们可以轻松地将强大的 AI 集成到你的 React 应用中。
建造:
- ChatBot:具有上下文感知能力的应用内聊天机器人,可以在应用内采取行动💬
- CopilotTextArea:具有上下文感知自动完成和插入功能的 AI 驱动文本字段📝
- 合作代理:可以与您的应用和用户交互的应用内 AI 代理🤖
现在回到文章!
先决条件
要完全理解本教程,您需要对 React 或 Next.js 有基本的了解。
以下是构建 AI 博客所需的工具:
- Quill 富文本编辑器 - 一种文本编辑器,可让您轻松地格式化文本、添加图像、添加代码以及在 Web 应用中创建自定义交互式内容。
- Supabase - 一种 PostgreSQL 托管服务,为您提供项目所需的所有后端功能。
- Langchain——提供一个框架,使 AI 代理能够搜索网络并研究任何主题。
- OpenAI API - 提供 API 密钥,使您能够使用 ChatGPT 模型执行各种任务。
- Tavily AI—— 一种搜索引擎,使人工智能代理能够在应用程序内进行研究并访问实时知识。
- CopilotKit - 一个开源副驾驶框架,用于构建自定义 AI 聊天机器人、应用内 AI 代理和文本区域。
项目设置和包安装
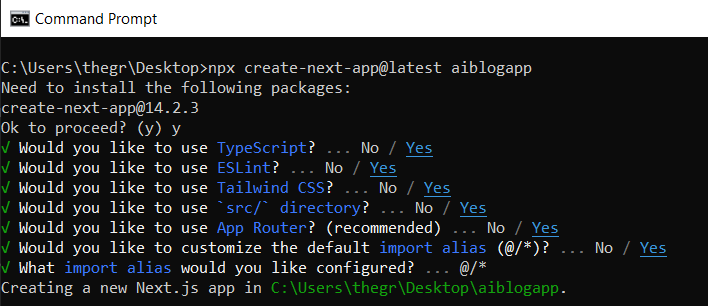
首先,通过在终端中运行以下代码片段来创建 Next.js 应用程序:
npx create-next-app@latest aiblogapp
选择您喜欢的配置设置。在本教程中,我们将使用 TypeScript 和 Next.js App Router。
接下来,安装 Quill 富文本编辑器、Supabase 和 Langchain 包及其依赖项。
npm install quill react-quill @supabase/supabase-js @supabase/ssr @supabase/auth-helpers-nextjs @langchain/langgraph
最后,安装 CopilotKit 软件包。这些软件包使我们能够从 React 状态中检索数据,并将 AI Copilot 添加到应用程序中。
npm install @copilotkit/react-ui @copilotkit/react-textarea @copilotkit/react-core @copilotkit/backend
恭喜!现在您可以创建一个 AI 博客了。
构建博客前端
在本节中,我将引导您完成使用静态内容创建博客前端的过程,以定义博客的用户界面。
博客的前端将由四个页面组成:主页、帖子页面、创建帖子页面和登录/注册页面。
首先, /[root]/src/app 在代码编辑器中转到 并创建一个名为 的文件夹 components。在 components 文件夹中,创建五个文件,分别名为 Header.tsx、、和Posts.tsx。Post.tsxComment.tsxQuillEditor.tsx
在该文件中Header.tsx,添加以下代码,定义一个名为 的功能组件, Header 该组件将呈现博客的导航栏。
"use client";

import Link from "next/link";

export default function Header() {
  return (
    <>
      <header className="flex flex-wrap sm:justify-start sm:flex-nowrap z-50 w-full bg-gray-800 border-b border-gray-200 text-sm py-3 sm:py-0 ">
        <nav
          className="relative max-w-7xl w-full mx-auto px-4 sm:flex sm:items-center sm:justify-between sm:px-6 lg:px-8"
          aria-label="Global">
          <div className="flex items-center justify-between">
            <Link
              className="flex-none text-xl text-white font-semibold "
              href="/"
              aria-label="Brand">
              AIBlog
            </Link>
          </div>
          <div id="navbar-collapse-with-animation" className="">
            <div className="flex flex-col gap-y-4 gap-x-0 mt-5 sm:flex-row sm:items-center sm:justify-end sm:gap-y-0 sm:gap-x-7 sm:mt-0 sm:ps-7">
              <Link
                className="flex items-center font-medium text-gray-500 border-2 border-indigo-600 text-center p-2 rounded-md hover:text-blue-600 sm:border-s sm:my-6 "
                href="/createpost">
                Create Post
              </Link>

              <form action={""}>
                <button
                  className="flex items-center font-medium text-gray-500 border-2 border-indigo-600 text-center p-2 rounded-md hover:text-blue-600 sm:border-s sm:my-6 "
                  type="submit">
                  Logout
                </button>
              </form>

              <Link
                className="flex items-center font-medium text-gray-500 border-2 border-indigo-600 text-center p-2 rounded-md hover:text-blue-600 sm:border-s sm:my-6 "
                href="/login">
                Login
              </Link>
            </div>
          </div>
        </nav>
      </header>
    </>
  );
}
在该文件中Posts.tsx,添加以下代码,定义一个名为的功能组件, Posts 该组件呈现博客平台主页,显示已发布文章的列表。
"use client";

import React, { useEffect, useState } from "react";
import Image from "next/image";
import Link from "next/link";

export default function Posts() {
  const [articles, setArticles] = useState<any[]>([]);

  return (
    <div className="max-w-[85rem] h-full  px-4 py-10 sm:px-6 lg:px-8 lg:py-14 mx-auto">
      <div className="grid sm:grid-cols-2 lg:grid-cols-3 gap-6">
        <Link
          key={""}
          className="group flex flex-col h-full bg-gray-800 border border-gray-200 hover:border-transparent hover:shadow-lg transition-all duration-300 rounded-xl p-5 "
          href="">
          <div className="aspect-w-16 aspect-h-11">
            <Image
              className="object-cover h-48 w-96 rounded-xl"
              src={`https://source.unsplash.com/featured/?${encodeURIComponent(
                "Hello World"
              )}`}
              width={500}
              height={500}
              alt="Image Description"
            />
          </div>
          <div className="my-6">
            <h3 className="text-xl font-semibold text-white ">Hello World</h3>
          </div>
        </Link>
      </div>
    </div>
  );
}
在该QuillEditor.tsx文件中,添加以下代码,动态导入 QuillEditor 组件,定义 Quill 编辑器工具栏的模块配置,并定义 Quill 编辑器的文本格式。
// Import the dynamic function from the "next/dynamic" package
import dynamic from "next/dynamic";
// Import the CSS styles for the Quill editor's "snow" theme
import "react-quill/dist/quill.snow.css";

// Export a dynamically imported QuillEditor component
export const QuillEditor = dynamic(() => import("react-quill"), { ssr: false });

// Define modules configuration for the Quill editor toolbar
export const quillModules = {
  toolbar: [
    // Specify headers with different levels
    [{ header: [1, 2, 3, false] }],
    // Specify formatting options like bold, italic, etc.
    ["bold", "italic", "underline", "strike", "blockquote"],
    // Specify list options: ordered and bullet
    [{ list: "ordered" }, { list: "bullet" }],
    // Specify options for links and images
    ["link", "image"],
    // Specify alignment options
    [{ align: [] }],
    // Specify color options
    [{ color: [] }],
    // Specify code block option
    ["code-block"],
    // Specify clean option for removing formatting
    ["clean"],
  ],
};

// Define supported formats for the Quill editor
export const quillFormats = [
  "header",
  "bold",
  "italic",
  "underline",
  "strike",
  "blockquote",
  "list",
  "bullet",
  "link",
  "image",
  "align",
  "color",
  "code-block",
];
在该文件中Post.tsx,添加以下代码,定义一个名为 的功能组件, CreatePost 该组件将用于呈现文章创建表单。
"use client";

// Importing React hooks and components
import { useRef, useState } from "react";
import { QuillEditor } from "./QuillEditor";
import { quillModules } from "./QuillEditor";
import { quillFormats } from "./QuillEditor";
import "react-quill/dist/quill.snow.css";

// Define the CreatePost component
export default function CreatePost() {
  // Initialize state variables for article outline, copilot text, and article title
  const [articleOutline, setArticleOutline] = useState("");
  const [copilotText, setCopilotText] = useState("");
  const [articleTitle, setArticleTitle] = useState("");

  // State variable to track if research task is running
  const [publishTaskRunning, setPublishTaskRunning] = useState(false);

  // Handle changes to the editor content
  const handleEditorChange = (newContent: any) => {
    setCopilotText(newContent);
  };

  return (
    <>
      {/* Main */}
      <div className="p-3 max-w-3xl mx-auto min-h-screen">
        <h1 className="text-center text-white text-3xl my-7 font-semibold">
          Create a post
        </h1>

        {/* Form for creating a post */}
        <form action={""} className="flex flex-col gap-4 mb-2 mt-2">
          <div className="flex flex-col gap-4 sm:flex-row justify-between mb-2">
            {/* Input field for article title */}
            <input
              type="text"
              id="title"
              name="title"
              placeholder="Title"
              value={articleTitle}
              onChange={(event) => setArticleTitle(event.target.value)}
              className="flex-1 block w-full rounded-lg border text-sm border-gray-600 bg-gray-700 text-white placeholder-gray-400 focus:border-cyan-500 focus:ring-cyan-500"
            />
          </div>

          {/* Hidden textarea for article content */}
          <textarea
            className="p-4 w-full aspect-square font-bold text-xl bg-slate-800 text-white rounded-lg resize-none hidden"
            id="content"
            name="content"
            value={copilotText}
            placeholder="Write your article content here"
            onChange={(event) => setCopilotText(event.target.value)}
          />

          {/* Quill editor component */}
          <QuillEditor
            onChange={handleEditorChange}
            modules={quillModules}
            formats={quillFormats}
            className="h-80 mb-12 text-white"
          />
          {/* Submit button for publishing the post */}
          <button
            type="submit"
            disabled={publishTaskRunning}
            className={`bg-blue-500 text-white font-bold py-2 px-4 rounded ${
              publishTaskRunning
                ? "opacity-50 cursor-not-allowed"
                : "hover:bg-blue-700"
            }`}
            onClick={async () => {
              try {
                setPublishTaskRunning(true);
              } finally {
                setPublishTaskRunning(false);
              }
            }}>
            {publishTaskRunning ? "Publishing..." : "Publish"}
          </button>
        </form>
      </div>
    </>
  );
}
在Comment.tsx文件中,添加以下代码,定义一个名为 Comment 的功能组件,该组件呈现发布评论表单并发布评论。
// Client-side rendering
"use client";

// Importing React and Next.js components
import React, { useEffect, useRef, useState } from "react";
import Image from "next/image";

// Define the Comment component
export default function Comment() {
  // State variables for comment, comments, and article content
  const [comment, setComment] = useState("");
  const [comments, setComments] = useState<any[]>([]);
  const [articleContent, setArticleContent] = useState("");

  return (
    <div className="max-w-2xl mx-auto w-full p-3">
      {/* Form for submitting a comment */}
      <form action={""} className="border border-teal-500 rounded-md p-3 mb-4">
        {/* Textarea for entering a comment */}
        <textarea
          id="content"
          name="content"
          placeholder="Add a comment..."
          rows={3}
          onChange={(e) => setComment(e.target.value)}
          value={comment}
          className="hidden"
        />

        {/* Submit button */}
        <div className="flex justify-between items-center mt-5">
          <button
            type="submit"
            className="bg-blue-500 text-white font-bold py-2 px-4 rounded">
            Submit
          </button>
        </div>
      </form>

      {/* Comments section */}
      <p className="text-white mb-2">Comments:</p>

      {/* Comment item (currently hardcoded) */}
      <div key={""} className="flex p-4 border-b dark:border-gray-600 text-sm">
        <div className="flex-shrink-0 mr-3">
          {/* Profile picture */}
          <Image
            className="w-10 h-10 rounded-full bg-gray-200"
            src={`(link unavailable){encodeURIComponent(
              "Silhouette"
            )}`}
            width={500}
            height={500}
            alt="Profile Picture"
          />
        </div>
        <div className="flex-1">
          <div className="flex items-center mb-1">
            {/* Username (currently hardcoded as "Anonymous") */}
            <span className="font-bold text-white mr-1 text-xs truncate">
              Anonymous
            </span>
          </div>
          {/* Comment text (currently hardcoded as "No Comments") */}
          <p className="text-gray-500 pb-2">No Comments</p>
        </div>
      </div>
    </div>
  );
}
接下来,转到 /[root]/src/app 并创建一个名为 的文件夹[slug]。在 [slug] 文件夹中,创建一个page.tsx文件。
Comment 然后将以下代码添加到导入组件的 文件中 Header ,并定义一个名为的功能组件, Post 该组件将呈现导航栏、帖子内容、评论表单和帖子评论。
import Header from "../components/Header";
import Comment from "../components/Comment";

export default async function Post() {
  return (
    <>
      <Header />
      <main className="p-3 flex flex-col max-w-6xl mx-auto min-h-screen">
        <h1 className="text-3xl text-white mt-10 p-3 text-center font-serif max-w-2xl mx-auto lg:text-4xl">
          Hello World
        </h1>
        <div className="flex justify-between text-white p-3 border-b border-slate-500 mx-auto w-full max-w-2xl text-xs">
          <span></span>
          <span className="italic">0 mins read</span>
        </div>
        <div className="p-3 max-w-2xl text-white mx-auto w-full post-content border-b border-slate-500 mb-2">
          No Post Content
        </div>
        <Comment />
      </main>
    </>
  );
}
然后, /[root]/src/app 创建一个名为 的文件夹 createpost。在该 createpost 文件夹中,创建一个名为 page.tsx file 的文件。
CreatePost 然后将以下代码添加到导入组件的 文件中 Header ,并定义一个名为的功能组件, WriteArticle 该组件将呈现导航栏和帖子创建表单。
import CreatePost from "../components/Post";
import Header from "../components/Header";
import { redirect } from "next/navigation";

export default async function WriteArticle() {
  return (
    <>
      <Header />
      <CreatePost />
    </>
  );
}
接下来,转到 /[root]/src/page.tsx 文件,并添加以下代码,导入 Posts 和 Header 组件并定义一个名为的功能组件 Home。
import Header from "./components/Header";
import Posts from "./components/Posts";

export default async function Home() {
  return (
    <>
      <Header />
      <Posts />
    </>
  );
}
之后,转到该 next.config.mjs 文件并将其重命名为next.config.js。然后添加以下代码,以便您可以使用 Unsplash 中的图像作为已发布文章的封面图片。
module.exports = {
  images: {
    remotePatterns: [
      {
        protocol: "https",
        hostname: "source.unsplash.com",
      },
    ],
  },
};
接下来,删除globals.css文件中的CSS代码,并添加以下CSS代码。
@tailwind base;
@tailwind components;
@tailwind utilities;

body {
  height: 100vh;
  background-color: rgb(16, 23, 42);
}

.ql-editor {
  font-size: 1.25rem;
}

.post-content p {
  margin-bottom: 0.5rem;
}

.post-content h1 {
  font-size: 1.5rem;
  font-weight: 600;
  font-family: sans-serif;
  margin: 1.5rem 0;
}

.post-content h2 {
  font-size: 1.4rem;
  font-family: sans-serif;
  margin: 1.5rem 0;
}

.post-content a {
  color: rgb(73, 149, 199);
  text-decoration: none;
}

.post-content a:hover {
  text-decoration: underline;
}
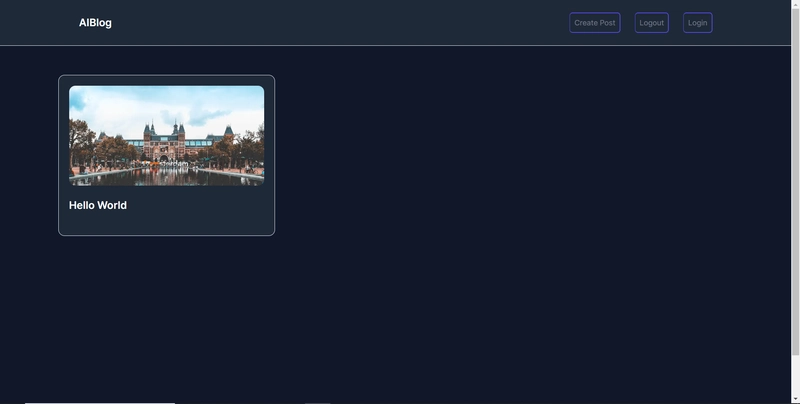
npm run dev 最后,在命令行上 运行该命令 ,然后导航到http://localhost:3000/。
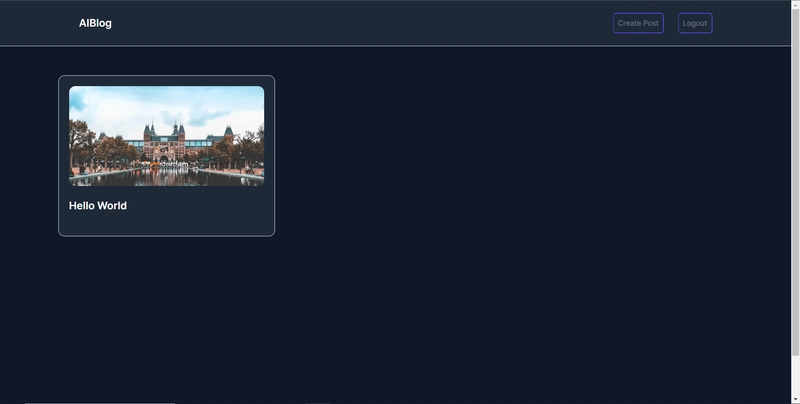
现在您应该在浏览器上查看博客平台前端,如下所示。
使用 CopilotKit 将 AI 功能集成到博客
在本节中,您将学习如何向博客添加 AI 副驾驶,以使用 CopilotKit 执行博客主题研究和内容自动建议。
CopilotKit 提供前端和 后端 软件包。它们使您能够接入 React 状态并使用 AI 代理在后端处理应用程序数据。
首先,让我们将 CopilotKit React 组件添加到博客前端。
将 CopilotKit 添加到博客前端
在这里,我将引导您完成将博客与 CopilotKit 前端集成的过程,以方便博客文章研究和文章大纲生成。
首先,使用下面的代码片段 在 文件 顶部 导入useMakeCopilotReadable、、 和 自定义挂钩useCopilotAction。 CopilotTextareaHTMLCopilotTextAreaElement/[root]/src/app/components/Post.tsx
import {
    useMakeCopilotReadable,
    useCopilotAction,
  } from "@copilotkit/react-core";
  import {
    CopilotTextarea,
    HTMLCopilotTextAreaElement,
  } from "@copilotkit/react-textarea";
在 CreatePost 函数内部,在状态变量下方,添加以下代码,该代码使用 useMakeCopilotReadable 钩子添加文章大纲,该大纲将作为应用内聊天机器人的上下文生成。该钩子使副驾驶能够读取文章大纲。
useMakeCopilotReadable(
    "Blog article outline: " + JSON.stringify(articleOutline)
  );
在钩子下面 useMakeCopilotReadable ,使用下面的代码创建 copilotTextareaRef 对名为 的 textarea 元素的 引用HTMLCopilotTextAreaElement。
const copilotTextareaRef = useRef<HTMLCopilotTextAreaElement>(null);
在上面的代码下方,添加以下代码,该代码使用 useCopilotAction 钩子来设置一个名为的操作, researchBlogArticleTopic 该操作将启用对博客文章中给定主题的研究。
该操作采用两个称为 articleTitle 和的 参数articleOutline ,用于生成文章标题和大纲。
该操作包含一个处理程序函数,该函数根据给定的主题生成文章标题和大纲。
在处理函数内部, articleOutline 状态使用新生成的大纲进行更新,而 articleTitle 状态使用新生成的标题进行更新,如下所示。
// Define a Copilot action
useCopilotAction(
  {
    // Action name and description
    name: "researchBlogArticleTopic",
    description: "Research a given topic for a blog article.",

    // Parameters for the action
    parameters: [
      {
        // Parameter 1: articleTitle
        name: "articleTitle",
        type: "string",
        description: "Title for a blog article.",
        required: true, // This parameter is required
      },
      {
        // Parameter 2: articleOutline
        name: "articleOutline",
        type: "string",
        description: "Outline for a blog article that shows what the article covers.",
        required: true, // This parameter is required
      },
    ],

    // Handler function for the action
    handler: async ({ articleOutline, articleTitle }) => {
      // Set the article outline and title using state setters
      setArticleOutline(articleOutline);
      setArticleTitle(articleTitle);
    },
  },
  [] // Dependencies (empty array means no dependencies)
);
在上面的代码下方,转到表单组件并添加以下 CopilotTextarea 组件,该组件使您能够向文章内容添加文本完成、插入和编辑。
<CopilotTextarea
            className="p-4 h-72 w-full rounded-lg mb-2 border text-sm border-gray-600 bg-gray-700 text-white placeholder-gray-400 focus:border-cyan-500 focus:ring-cyan-500 resize-none"
            ref={copilotTextareaRef}
            placeholder="Start typing for content autosuggestion."
            value={articleOutline}
            rows={5}
            autosuggestionsConfig={{
              textareaPurpose: articleTitle,
              chatApiConfigs: {
                suggestionsApiConfig: {
                  forwardedParams: {
                    max_tokens: 5,
                    stop: ["\n", ".", ","],
                  },
                },
                insertionApiConfig: {},
              },
              debounceTime: 250,
            }}
          />
之后,转到 /[root]/src/app/createpost/page.tsx 文件并使用以下代码在顶部导入 CopilotKit 前端包和样式。
import { CopilotKit } from "@copilotkit/react-core";
import { CopilotPopup } from "@copilotkit/react-ui";
import "@copilotkit/react-ui/styles.css";
然后使用 CopilotKit 包装CopilPopup和CreatePost组件,如下所示。 组件指定 CopilotKit 后端端点 ( ) CopilotKit 的 URL,而 则 渲染应用内聊天机器人,您可以提示用户研究文章中的任何主题。/api/copilotkit/CopilotPopup
export default async function WriteArticle() {
  return (
    <>
      <Header />
      <CopilotKit url="/api/copilotkit">
        <CopilotPopup
          instructions="Help the user research a blog article topic."
          defaultOpen={true}
          labels={{
            title: "Blog Article Research AI Assistant",
            initial:
              "Hi! 👋 I can help you research any topic for a blog article.",
          }}
        />
        <CreatePost />
      </CopilotKit>
    </>
  );
}
之后,使用下面的代码片段 在 文件 顶部 导入useMakeCopilotReadable、、 和 自定义钩子CopilotKit。 CopilotTextareaHTMLCopilotTextAreaElement/[root]/src/app/components/Comment.tsx
import { useMakeCopilotReadable, CopilotKit } from "@copilotkit/react-core";
import {
  CopilotTextarea,
  HTMLCopilotTextAreaElement,
} from "@copilotkit/react-textarea";
在 Comment 函数内部,在状态变量下方,添加以下代码,使用 useMakeCopilotReadable 钩子将帖子内容添加为评论内容自动建议的上下文。
useMakeCopilotReadable(
    "Blog article content: " + JSON.stringify(articleContent)
  );

  const copilotTextareaRef = useRef<HTMLCopilotTextAreaElement>(null);
然后将CopilotTextarea组件添加到评论表单中,并用来 CopilotKit 包裹表单,如下所示。
<CopilotKit url="/api/copilotkit">
        <form
          action={""}
          className="border border-teal-500 rounded-md p-3 mb-4">
          <textarea
            id="content"
            name="content"
            placeholder="Add a comment..."
            rows={3}
            onChange={(e) => setComment(e.target.value)}
            value={comment}
            className="hidden"
          />

          <CopilotTextarea
            className="p-4 w-full rounded-lg mb-2 border text-sm border-gray-600 bg-gray-700 text-white placeholder-gray-400 focus:border-cyan-500 focus:ring-cyan-500 resize-none"
            ref={copilotTextareaRef}
            placeholder="Start typing for content autosuggestion."
            onChange={(event) => setComment(event.target.value)}
            rows={5}
            autosuggestionsConfig={{
              textareaPurpose: articleContent,
              chatApiConfigs: {
                suggestionsApiConfig: {
                  forwardedParams: {
                    max_tokens: 5,
                    stop: ["\n", ".", ","],
                  },
                },
                insertionApiConfig: {},
              },
              debounceTime: 250,
            }}
          />

          <div className="flex justify-between items-center mt-5">
            <button
              type="submit"
              className="bg-blue-500 text-white font-bold py-2 px-4 rounded">
              Submit
            </button>
          </div>
        </form>
      </CopilotKit>
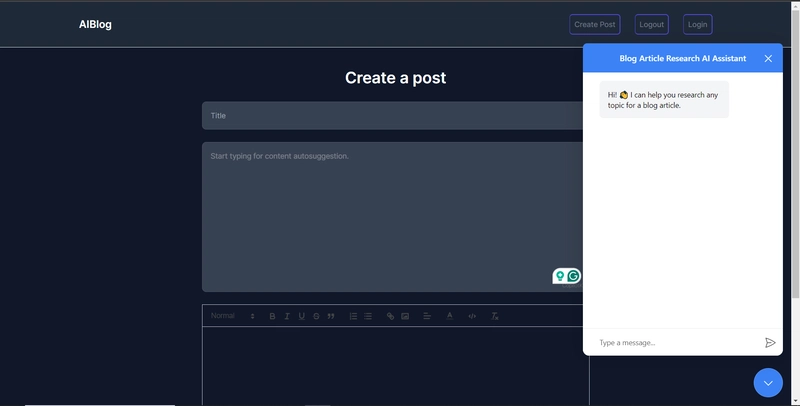
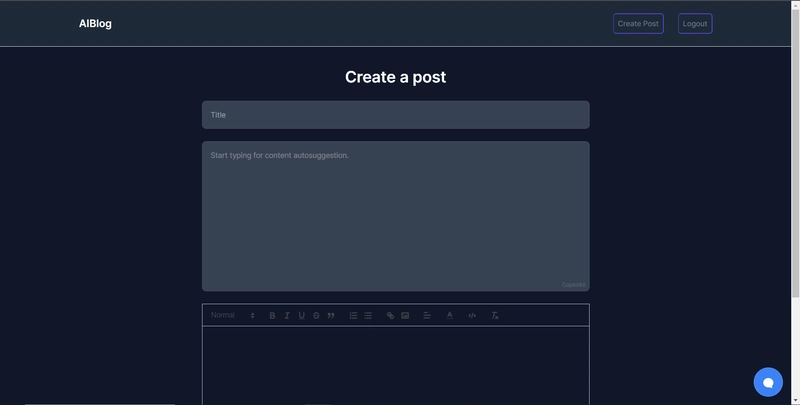
之后,运行开发服务器并导航至 http://localhost:3000/createpost。您应该会看到弹出式应用内聊天机器人和 CopilotTextarea 已集成到博客中。
恭喜!您已成功将 CopilotKit 添加到博客前端* 。 *
将 CopilotKit 后端添加到博客
在这里,我将引导您完成将博客与 CopilotKit 后端集成的过程,该后端处理来自前端的请求,并提供函数调用和各种 LLM 后端(例如 GPT)。
此外,我们还将整合一个名为 Tavily 的人工智能代理,它可以在网络上研究任何主题。
首先,在根目录中创建一个名为 的文件 。然后在保存您的 搜索 API 密钥.env.local 的文件中添加以下环境变量 。ChatGPTTavily
OPENAI_API_KEY="Your ChatGPT API key"
TAVILY_API_KEY="Your Tavily Search API key"
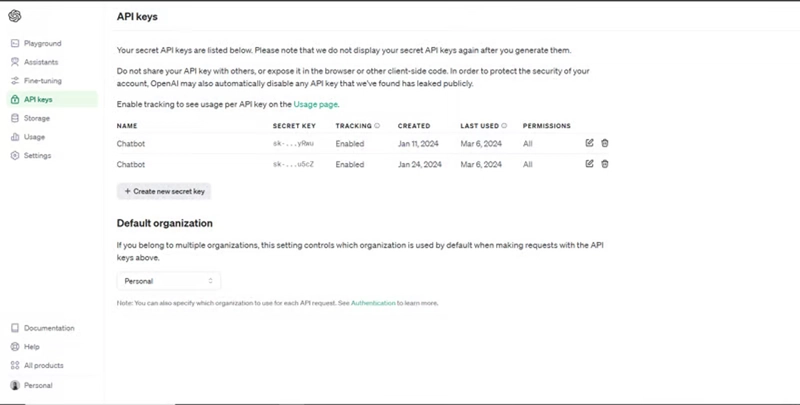
要获取 ChatGPT API 密钥,请导航至 https://platform.openai.com/api-keys。
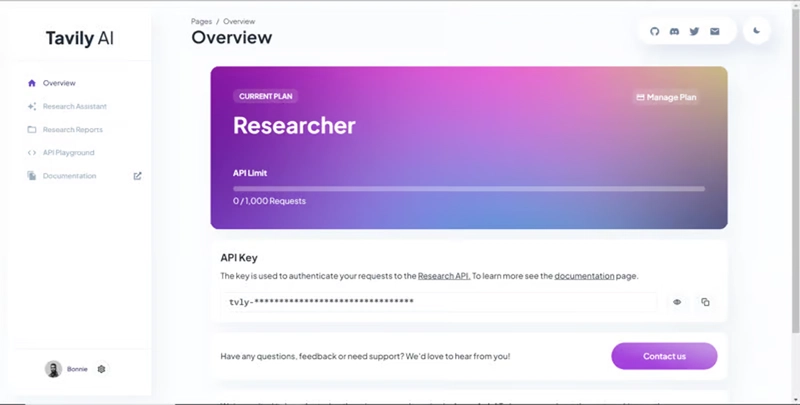
要获取 Tavily Search API 密钥,请导航至 https://app.tavily.com/home
然后,转到 /[root]/src/app 并创建一个名为 的文件夹 api。在该 api 文件夹中,创建一个名为 的文件夹 copilotkit。
在文件夹中 copilotkit ,创建一个名为的文件 research.ts。然后导航到此 research.ts gist 文件,复制代码并将其添加到 research.ts 文件中
route.ts 接下来,在文件夹中 创建一个名为的文件 /[root]/src/app/api/copilotkit 。该文件将包含设置后端功能以处理 POST 请求的代码。它有条件地包含一个“研究”操作,该操作针对给定主题执行研究。
现在在文件顶部导入以下模块。
import { CopilotBackend, OpenAIAdapter } from "@copilotkit/backend"; // For backend functionality with CopilotKit.
import { researchWithLangGraph } from "./research"; // Import a custom function for conducting research.
import { AnnotatedFunction } from "@copilotkit/shared"; // For annotating functions with metadata.
在上面的代码下方,定义一个运行时环境变量和一个名为的函数 researchAction ,使用下面的代码研究某个主题。
// Define a runtime environment variable, indicating the environment where the code is expected to run.
export const runtime = "edge";

// Define an annotated function for research. This object includes metadata and an implementation for the function.
const researchAction: AnnotatedFunction<any> = {
  name: "research", // Function name.
  description: "Call this function to conduct research on a certain topic. Respect other notes about when to call this function", // Function description.
  argumentAnnotations: [ // Annotations for arguments that the function accepts.
    {
      name: "topic", // Argument name.
      type: "string", // Argument type.
      description: "The topic to research. 5 characters or longer.", // Argument description.
      required: true, // Indicates that the argument is required.
    },
  ],
  implementation: async (topic) => { // The actual function implementation.
    console.log("Researching topic: ", topic); // Log the research topic.
    return await researchWithLangGraph(topic); // Call the research function and return its result.
  },
};
然后在上面的代码下添加下面的代码,定义一个处理POST请求的异步函数。
// Define an asynchronous function that handles POST requests.
export async function POST(req: Request): Promise<Response> {
  const actions: AnnotatedFunction<any>[] = []; // Initialize an array to hold actions.

  // Check if a specific environment variable is set, indicating access to certain functionality.
  if (process.env["TAVILY_API_KEY"]) {
    actions.push(researchAction); // Add the research action to the actions array if the condition is true.
  }

  // Instantiate CopilotBackend with the actions defined above.
  const copilotKit = new CopilotBackend({
    actions: actions,
  });

  // Use the CopilotBackend instance to generate a response for the incoming request using an OpenAIAdapter.
  return copilotKit.response(req, new OpenAIAdapter());
}
恭喜!您已成功将 CopilotKit 后端添加到博客* 。 *
使用 Supabase 将数据库集成到博客
在本节中,我将引导您完成将博客与 Supabase 数据库集成以插入和获取博客文章和评论数据的过程。
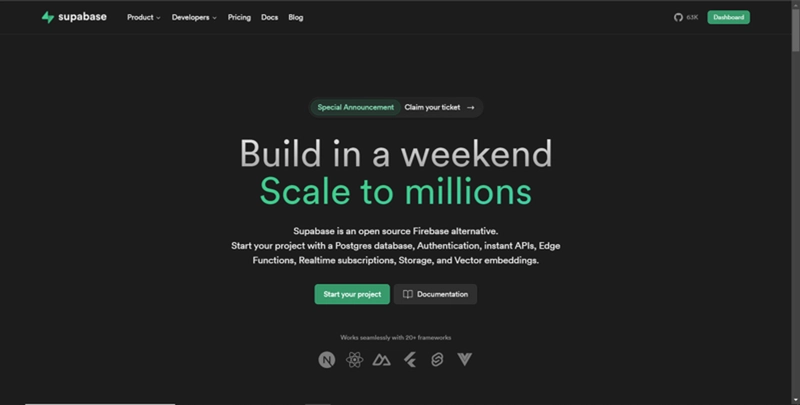
首先,导航至 supabase.com 并单击主页上的“开始您的项目”按钮。
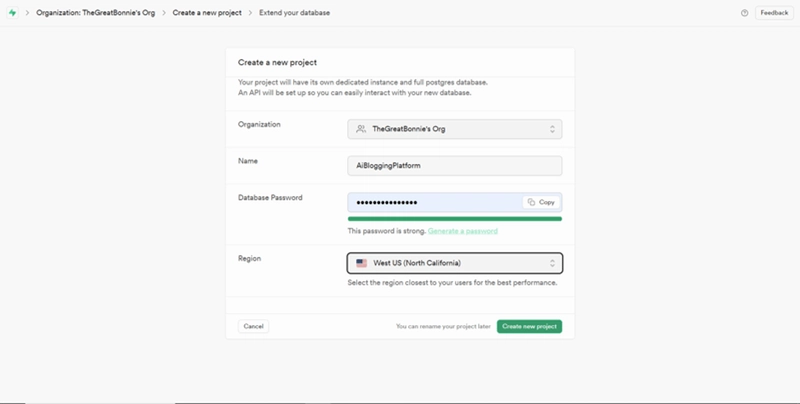
然后创建一个名为AiBloggingPlatform的新项目,如下所示。
创建项目后,将您的 Supabase URL 和 API 密钥添加到env.local文件中的环境变量中,如下所示。
NEXT_PUBLIC_SUPABASE_URL=”Your Supabase URL”
NEXT_PUBLIC_SUPABASE_ANON_KEY=”Your Supabase API Key”
为博客设置 Supabase 身份验证
在这里,我将引导您完成设置博客身份验证的过程,使用户能够注册、登录或注销。
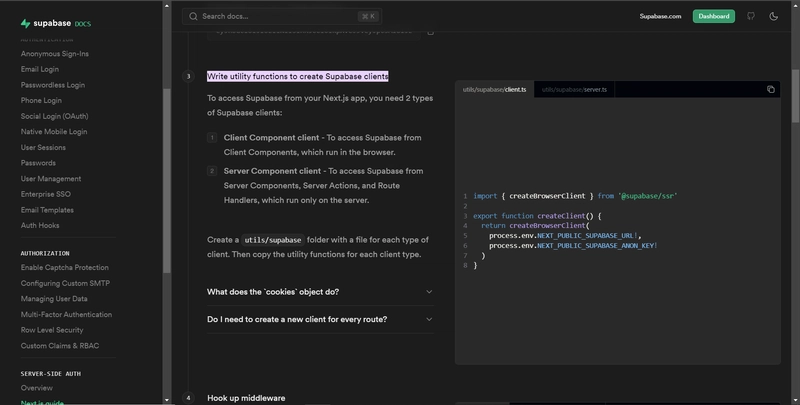
首先,转到/[root]/src/并创建一个名为 的文件夹utils。在该utils文件夹内,创建一个名为 的文件夹supabase。
然后在文件夹内创建两个名为client.ts和的文件。server.tssupabase
之后,导航到此supabase 文档链接,复制那里提供的代码,然后将其粘贴到您在supabase文件夹中创建的相应文件中。
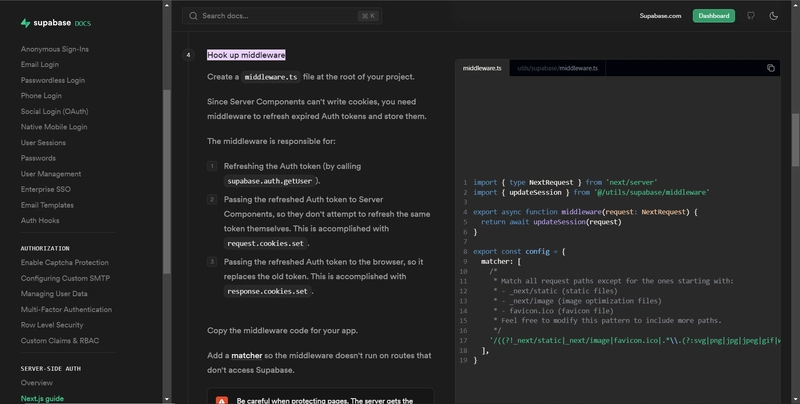
接下来,在项目根目录下创建一个名为的文件middleware.ts,并在文件夹内创建另一个同名的文件/[root]/src/utils/supabase。
之后,导航到此supabase 文档链接,复制那里提供的代码,然后将其粘贴到相应的middleware.ts文件中。
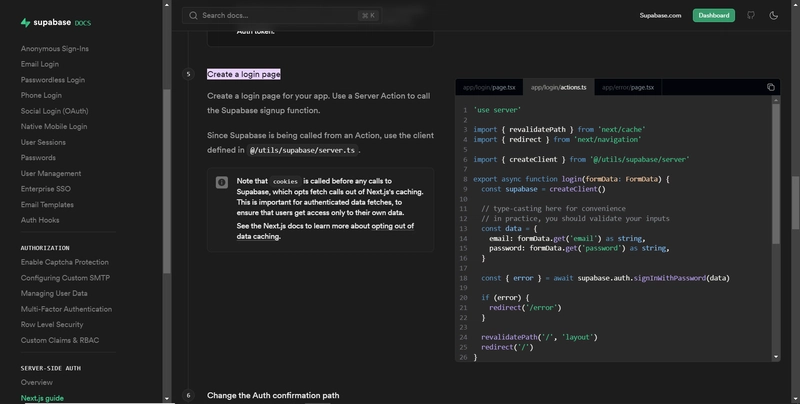
接下来,转到/[root]/src/app/login文件夹并创建一个名为的文件actions.ts。之后,导航到此supabase 文档链接,复制那里提供的代码,然后将其粘贴到actions.ts。
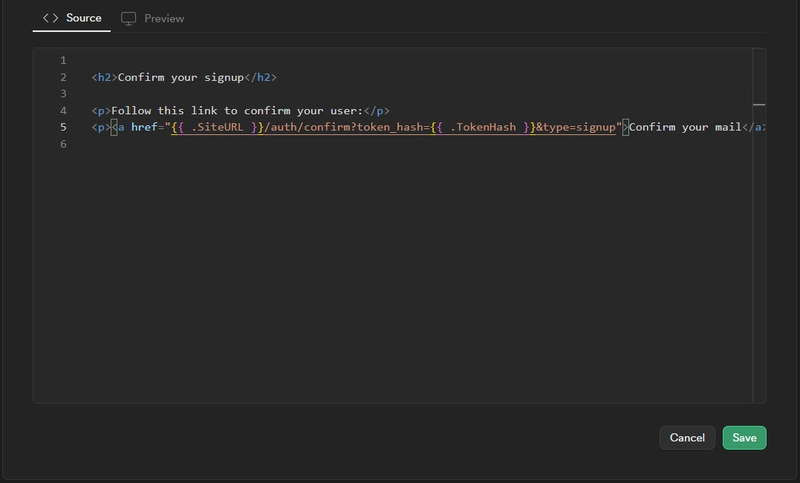
之后,更改电子邮件模板以支持身份验证流程。为此,请转到Supabase 仪表板中的“身份验证模板”页面。
在Confirm signup模板中,更改{{ .ConfirmationURL }}为{{ .SiteURL }}/auth/confirm?token_hash={{ .TokenHash }}&type=signup如下所示,然后单击保存按钮。
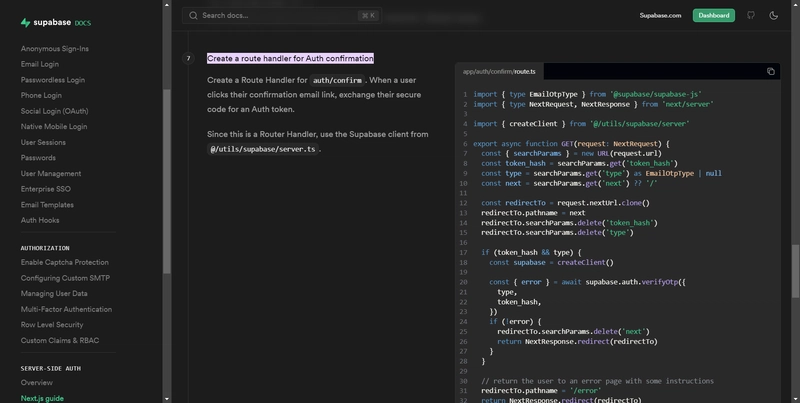
之后,创建一个使用电子邮件* 进行身份验证确认的路由处理程序。 *为此* ,请转到*/[root]/src/app/并创建一个名为 的文件夹。然后在该文件夹内auth创建一个名为 的文件夹。confirmauth
在文件夹中confirm,创建一个名为的文件route.ts并导航到此supabase 文档链接,复制那里提供的代码,然后将其粘贴到route.ts文件中。
之后,转到/[root]/src/app/login/page.tsx文件并使用下面的代码片段导入 Supabasesignup和login函数。
import { login, signup } from "./actions";
在注册/登录表单中,使用 formAction 在点击登录和注册按钮时调用 Supabasesignup和login函数,如下所示。
<button
    className="bg-blue-500 text-white font-bold py-2 px-4 rounded"
    formAction={login}>
    Log in
</button>
<button
    className="bg-blue-500 text-white font-bold py-2 px-4 rounded"
    formAction={signup}>
    Sign up
</button>
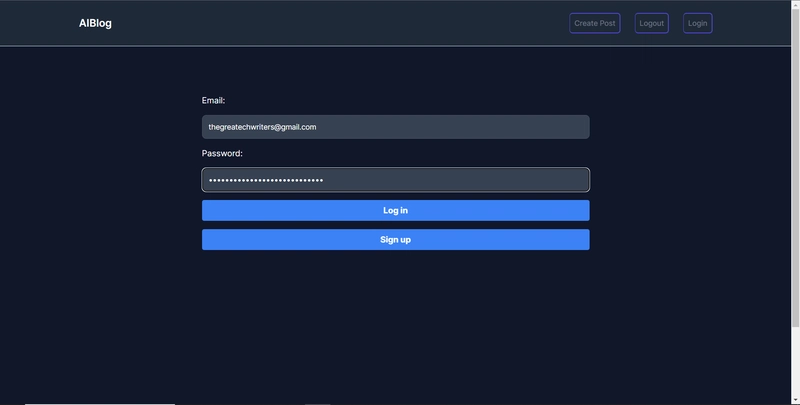
之后,运行开发服务器并导航至 http://localhost:3000/login。如下所示添加电子邮件和密码,然后单击“注册”按钮。
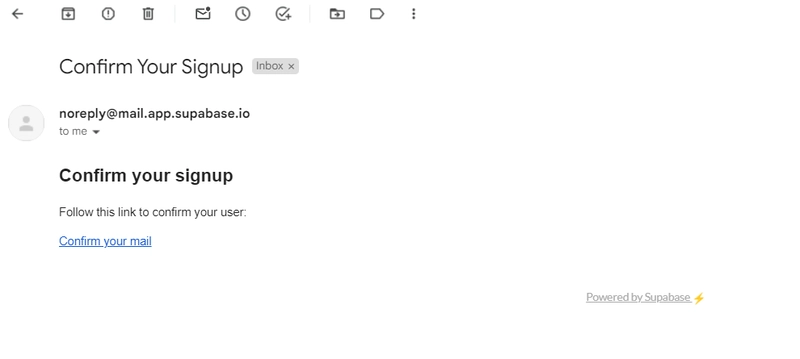
然后进入您注册时所用邮箱的收件箱,点击确认您的邮箱按钮,如下图所示。
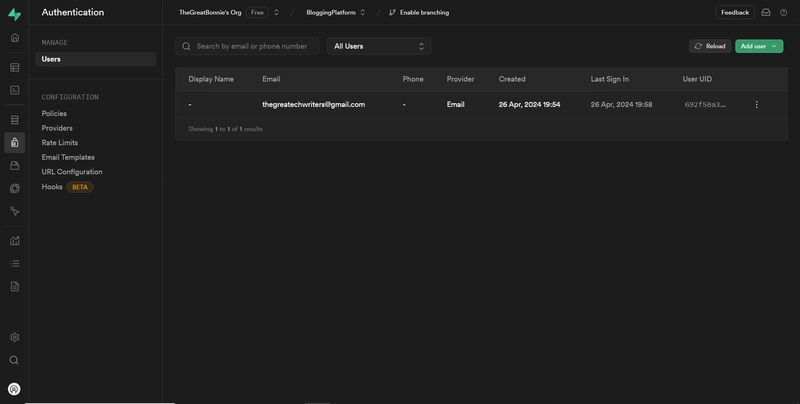
之后,转到Supabase 仪表板中的Auth 用户页面,您应该会看到新创建的用户,如下所示。
接下来,设置注销功能。为此,请转到/[root]/src/app并创建一个名为 的文件夹logout。然后创建一个名为 的文件route.ts,并将以下代码添加到该文件中。
// Server-side code
"use server";

// Importing Next.js functions
import { revalidatePath } from "next/cache";
import { redirect } from "next/navigation";

// Importing Supabase client creation function from utils
import { createClient } from "@/utils/supabase/server";

// Exporting the logout function
export async function logout() {
  // Creating a Supabase client instance
  const supabase = createClient();

  // Signing out of Supabase auth
  const { error } = await supabase.auth.signOut();

  // If there's an error, redirect to the error page
  if (error) {
    redirect("/error");
  }

  // Revalidate the "/" path for the "layout" cache
  revalidatePath("/", "layout");

  // Redirect to the homepage
  redirect("/");
}
之后,转到/[root]/src/app/components/Header.tsx文件并使用下面的代码片段导入 Supabase 注销功能。
import { logout } from "../logout/actions";
然后将注销函数添加到表单动作参数中,如下所示。
<form action={logout}>
    <button
        className="flex items-center font-medium text-gray-500 border-2 border-indigo-600 text-center p-2 rounded-md hover:text-blue-600 sm:border-s sm:my-6 "
        type="submit">
        Logout
    </button>
</form>
如果单击“注销”按钮,已登录的用户将被注销。
为博客设置用户角色和权限
在这里,我将引导您完成设置用户角色和权限的过程,以控制不同用户可以在博客上执行的操作。
首先,转到/[root]/src/app/components/Header.tsx文件并导入 Supabase createClient 函数。
import { createClient } from "@/utils/supabase/client";
然后导入useState并useEffect挂钩,并使用下面的代码片段定义一个名为用户的类型。
import { useEffect, useState } from "react";

type User = {};
在 Header 功能组件中,添加以下代码,使用useState钩子存储user数据admin,并useEffect在组件挂载时使用钩子从 Supabase 身份验证中获取用户数据。该getUser函数检查错误并相应地设置用户和管理员状态。
// State variables for user and admin
const [user, setUser] = useState<User | null>(null);
const [admin, setAdmin] = useState<User | null>(null);

// useEffect hook to fetch user data on mount
useEffect(() => {
  // Define an async function to get the user
  async function getUser() {
    // Create a Supabase client instance
    const supabase = createClient();

    // Get the user data from Supabase auth
    const { data, error } = await supabase.auth.getUser();

    // If there's an error or no user data, log a message
    if (error || !data?.user) {
      console.log("No User");
    }
    // If user data is available, set the user state
    else {
      setUser(data.user);
    }

    // Define the email of the signed-up user
    const userEmail = "email of signed-up user";

    // Check if the user is an admin (email matches)
    if (!data?.user || data.user?.email !== userEmail) {
      console.log("No Admin");
    }
    // If the user is an admin, set the admin state
    else {
      setAdmin(data.user);
    }
  }
  // Call the getUser function
  getUser();
}, []); // Dependency array is empty, so the effect runs only once on mount
之后,更新导航栏代码,如下所示。更新后的代码控制着根据用户是否登录或登录用户是否为管理员来渲染哪些按钮。
<div id="navbar-collapse-with-animation" className="">
  {/* Navbar content container */}
  <div className="flex flex-col gap-y-4 gap-x-0 mt-5 sm:flex-row sm:items-center sm:justify-end sm:gap-y-0 sm:gap-x-7 sm:mt-0 sm:ps-7">
    {/* Conditional rendering for admin link */}
    {admin ? (
      // If admin is true, show the "Create Post" link
      <Link
        className="flex items-center font-medium text-gray-500 border-2 border-indigo-600 text-center p-2 rounded-md hover:text-blue-600 sm:border-s sm:my-6 "
        href="/createpost">
        Create Post
      </Link>
    ) : (
      // If admin is false, render an empty div
      <div></div>
    )}

    {/* Conditional rendering for user link/logout button */}
    {user ? (
      // If user is true, show the logout button
      <form action={logout}>
        <button
          className="flex items-center font-medium text-gray-500 border-2 border-indigo-600 text-center p-2 rounded-md hover:text-blue-600 sm:border-s sm:my-6 "
          type="submit">
          Logout
        </button>
      </form>
    ) : (
      // If user is false, show the "Login" link
      <Link
        className="flex items-center font-medium text-gray-500 border-2 border-indigo-600 text-center p-2 rounded-md hover:text-blue-600 sm:border-s sm:my-6 "
        href="/login">
        Login
      </Link>
    )}
  </div>
</div>
如果您导航到http://localhost:3000,您应该会看到仅呈现“创建帖子”和“注销”按钮,因为用户已登录并设置为管理员。
之后,转到/[root]/src/app/createpost/page.tsx文件并导入 Supabase createClient 函数。
import { createClient } from "@/utils/supabase/client";
在 WriteArticle 功能组件内,添加以下代码,使用 Supabase createClient 函数获取登录用户,并验证用户的电子邮件是否与设置为管理员的用户的电子邮件相同。
// Define the email of the user you want to make admin
const userEmail = "email of admin user";

// Create a Supabase client instance
const supabase = createClient();

// Get the user data from Supabase auth
const { data, error } = await supabase.auth.getUser();

// Check for errors or if the user data doesn't match the expected email
if (error || !data?.user || data?.user.email !== userEmail) {
  // If any of the conditions are true, redirect to the homepage
  redirect("/");
}
现在只有设置为admin的用户才能访问http://localhost:3000/createpost页面,如下所示。
使用 Supabase 功能设置插入和获取帖子数据
在这里,我将引导您完成使用 Supabase 数据库为博客设置插入和获取数据功能的过程。
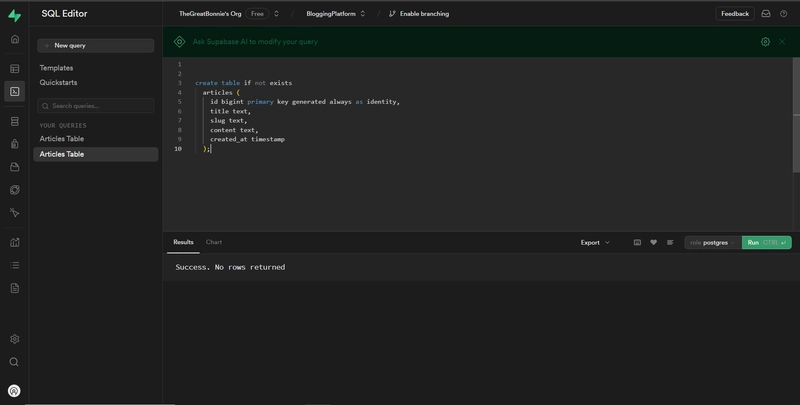
首先,请转到Supabase 仪表板中的SQL 编辑器页面。然后将以下 SQL 代码添加到编辑器中,并单击 CTRL + Enter 键创建一个名为“articles”的表。
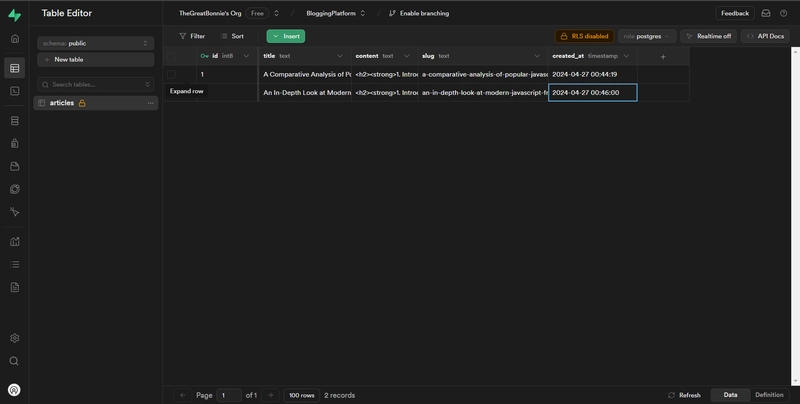
文章表有 id、title、slug、content 和 created_at 列。
create table if not exists
  articles (
    id bigint primary key generated always as identity,
    title text,
    slug text,
    content text,
    created_at timestamp
  );
一旦表创建完成,您应该会收到一条成功消息,如下所示。
之后,转到 /[root]/src/utils/supabase 文件夹并创建一个名为的文件 AddArticle.ts。然后将以下将博客文章数据插入 Supabase 数据库的代码添加到该文件中。
// Server-side code
"use server";

// Importing Supabase auth helpers and Next.js functions
import { createServerComponentClient } from "@supabase/auth-helpers-nextjs";
import { cookies } from "next/headers";
import { redirect } from "next/navigation";

// Exporting the addArticle function
export async function addArticle(formData: any) {
  // Extracting form data
  const title = formData.get("title");
  const content = formData.get("content");
  const slug = formData
    .get("title")
    .split(" ")
    .join("-")
    .toLowerCase()
    .replace(/[^a-zA-Z0-9-]/g, ""); // Generating a slug from the title
  const created_at = formData.get(new Date().toDateString()); // Getting the current date

  // Creating a cookie store
  const cookieStore = cookies();

  // Creating a Supabase client instance with cookie store
  const supabase = createServerComponentClient({ cookies: () => cookieStore });

  // Inserting data into the "articles" table
  const { data, error } = await supabase.from("articles").insert([
    {
      title,
      content,
      slug,
      created_at,
    },
  ]);

  // Handling errors
  if (error) {
    console.error("Error inserting data", error);
    return;
  }

  // Redirecting to the homepage
  redirect("/");

  // Returning a success message
  return { message: "Success" };
}
接下来,转到 /[root]/src/app/components/Post.tsx 文件并导入 addArticle 函数。
import { addArticle } from "@/utils/supabase/AddArticle";
然后添加该 addArticle 函数作为表单操作参数,如下所示。
<form
   action={addArticle}
   className="w-full h-full gap-10 flex flex-col items-center p-10">

</form>
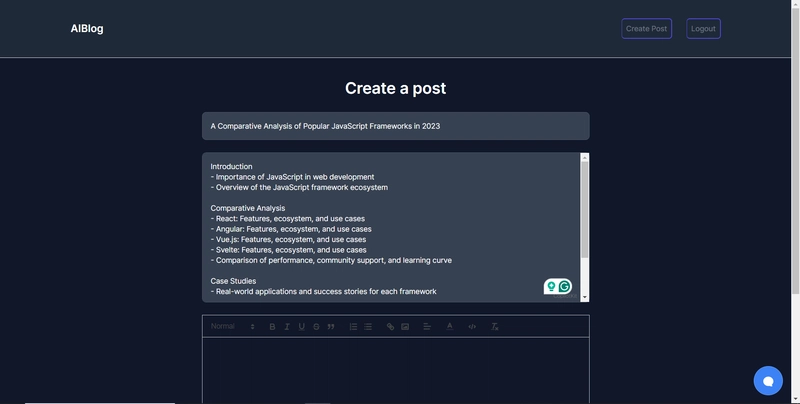
之后,导航到http://localhost:3000/createpost并向右侧的聊天机器人发出提示,例如“研究有关 JavaScript 框架的博客文章主题”。
聊天机器人将开始研究该主题,然后生成博客标题和大纲,如下所示。
当您开始在 CopilotKitTextarea 上书写时,您应该会看到内容自动建议,如下所示。
如果内容符合您的喜好,请将其复制并粘贴到 Quill 富文本编辑器中。然后开始编辑,如下所示。
然后点击底部的发布按钮发布文章。前往 Supabase 上的项目仪表板,并导航到“表编辑器”部分。单击“文章”表,您应该会看到文章数据已插入 Supabase 数据库,如下所示。
接下来,转到 /[root]/src/app/components/Posts.tsx 文件并导入 createClient 函数。
import { createClient } from "@/utils/supabase/client";
在 Posts 功能组件中,添加以下代码,该代码使用 useState 钩子存储文章数据,并使用 useEffect 钩子在组件挂载时从 Supabase 获取文章。fetchArticles 函数会创建一个 Supabase 客户端实例,获取文章,并在数据可用时更新状态。
// State variable for articles
const [articles, setArticles] = useState<any[]>([]);

// useEffect hook to fetch articles on mount
useEffect(() => {
  // Define an async function to fetch articles
  const fetchArticles = async () => {
    // Create a Supabase client instance
    const supabase = createClient();

    // Fetch articles from the "articles" table
    const { data, error } = await supabase.from("articles").select("*");

    // If data is available, update the articles state
    if (data) {
      setArticles(data);
    }
  };

  // Call the fetchArticles function
  fetchArticles();
}, []); // Dependency array is empty, so the effect runs only once on mount
之后,更新元素代码如下所示,以在博客主页上呈现已发布的文章。
// Return a div element with a max width, full height, padding, and horizontal margin
return (
  <div className="max-w-[85rem] h-full  px-4 py-10 sm:px-6 lg:px-8 lg:py-14 mx-auto">
    // Create a grid container with dynamic number of columns based on screen size
    <div className="grid sm:grid-cols-2 lg:grid-cols-3 gap-6">
      // Map over the articles array and render a Link component for each item
      {articles?.map((post) => (
        <Link
          // Assign a unique key prop to each Link component
          key={post.id}
          // Apply styles for the Link component
          className="group flex flex-col h-full bg-gray-800 border border-gray-200 hover:border-transparent hover:shadow-lg transition-all duration-300 rounded-xl p-5 "
          // Set the href prop to the post slug
          href={`/${post.slug}`}>
          // Create a container for the image
          <div className="aspect-w-16 aspect-h-11">
            // Render an Image component with a dynamic src based on the post title
            <Image
              className="object-cover h-48 w-96 rounded-xl"
              src={`(link unavailable){encodeURIComponent(
                post.title
              )}`}
              // Set the width and height props for the Image component
              width={500}
              height={500}
              // Set the alt prop for accessibility
              alt="Image Description"
            />
          </div>
          // Create a container for the post title
          <div className="my-6">
            // Render an h3 element with the post title
            <h3 className="text-xl font-semibold text-white ">
              {post.title}
            </h3>
          </div>
        </Link>
      ))}
    </div>
  </div>
);
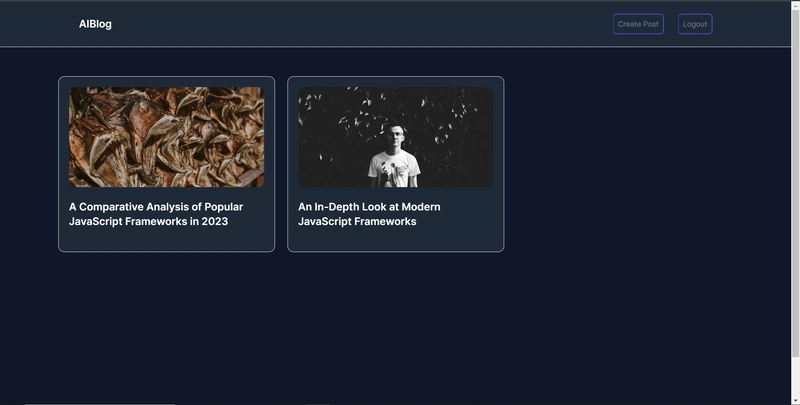
然后导航到 http://localhost:3000 您应该会看到您发布的文章,如下所示。
接下来,转到 /[root]/src/app/[slug]/page.tsx 文件并导入 createClient 函数。
import { createClient } from "@/utils/supabase/client";
在导入下方,定义一个名为“getArticleContent”的异步函数,该函数根据 slug 参数从 supabase 数据库中检索文章数据,如下所示。
// Define an asynchronous function to retrieve article content
async function getArticleContent(params: any) {
  // Extract the slug parameter from the input params object
  const { slug } = params;

  // Create a Supabase client instance
  const supabase = createClient();

  // Query the "articles" table in Supabase
  // Select all columns (*)
  // Filter by the slug column matching the input slug
  // Retrieve a single record (not an array)
  const { data, error } = await supabase
    .from("articles")
    .select("*")
    .eq("slug", slug)
    .single();

  // Return the retrieved article data
  return data;
}
之后,更新功能组件 Post 如下所示,以呈现文章内容。
export default async function Post({ params }: { params: any }) {
  // Fetch the post content using the getArticleContent function
  const post = await getArticleContent(params);

  // Return the post component
  return (
    // Fragment component to wrap multiple elements
    <>
      // Header component
      <Header />
      // Main container with max width and height
      <main className="p-3 flex flex-col max-w-6xl mx-auto min-h-screen">
        // Post title
        <h1 className="text-3xl text-white mt-10 p-3 text-center font-serif max-w-2xl mx-auto lg:text-4xl">
          {post && post.title} // Display post title if available
        </h1>
        // Post metadata (author, date, etc.)
        <div className="flex justify-between text-white p-3 border-b border-slate-500 mx-auto w-full max-w-2xl text-xs">
          <span></span>
          // Estimated reading time
          <span className="italic">
            {post && (post.content.length / 1000).toFixed(0)} mins read
          </span>
        </div>
        // Post content
        <div
          className="p-3 max-w-2xl text-white mx-auto w-full post-content border-b border-slate-500 mb-2"
          // Use dangerouslySetInnerHTML to render HTML content
          dangerouslySetInnerHTML={{ __html: post && post.content }}></div>
        // Comment component
        <Comment />
      </main>
    </>
  );
}
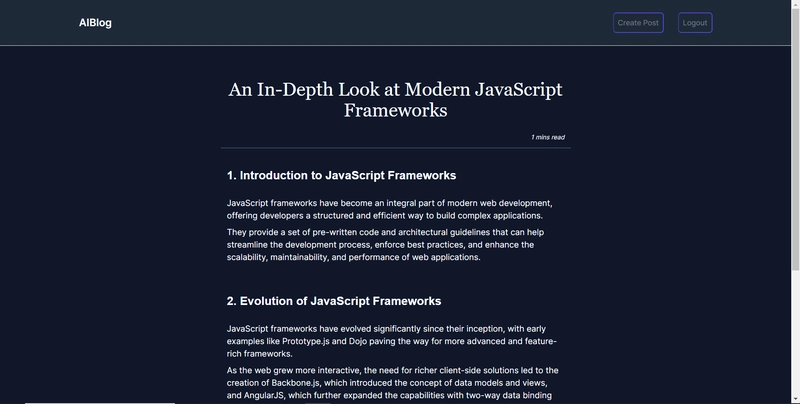
导航到 http://localhost:3000 并点击博客首页上显示的一篇文章。然后,您将被重定向到文章内容,如下所示。
使用 Supabase 功能设置插入和获取评论数据
在这里,我将引导您完成使用 Supabase 数据库为博客内容评论设置插入和获取数据功能的过程。
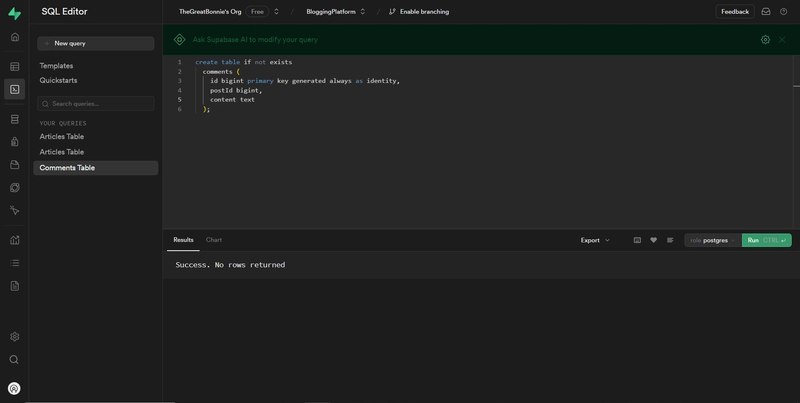
首先,请转到Supabase 仪表板中的SQL 编辑器页面。然后将以下 SQL 代码添加到编辑器中,并按下 CTRL + Enter 键创建一个名为 comments 的表。comments 表包含 id、content 和 postId 列。
create table if not exists
  comments (
    id bigint primary key generated always as identity,
    postId text,
    content text,
  );
一旦表创建完成,您应该会收到一条成功消息,如下所示。
之后,转到 /[root]/src/utils/supabase 文件夹并创建一个名为的文件 AddComment.ts。然后将以下将博客文章评论数据插入 Supabase 数据库的代码添加到该文件中。
// Importing necessary functions and modules for server-side operations
"use server";
import { createServerComponentClient } from "@supabase/auth-helpers-nextjs";
import { cookies } from "next/headers";
import { redirect } from "next/navigation";

// Define an asynchronous function named 'addComment' that takes form data as input
export async function addComment(formData: any) {
  // Extract postId and content from the provided form data
  const postId = formData.get("postId");
  const content = formData.get("content");

  // Retrieve cookies from the HTTP headers
  const cookieStore = cookies();

  // Create a Supabase client configured with the provided cookies
  const supabase = createServerComponentClient({ cookies: () => cookieStore });

  // Insert the article data into the 'comments' table on Supabase
  const { data, error } = await supabase.from("comments").insert([
    {
      postId,
      content,
    },
  ]);

  // Check for errors during the insertion process
  if (error) {
    console.error("Error inserting data", error);
    return;
  }

  // Redirect the user to the home page after successfully adding the article
    redirect("/");

  // Return a success message
  return { message: "Success" };
}
接下来,转到 /[root]/src/app/components/Comment.tsx 文件,导入addArticle createClient函数。
import { addComment } from "@/utils/supabase/AddComment";

import { createClient } from "@/utils/supabase/client";
然后将 postId 作为 prop 参数添加到 Comment 功能组件。
export default function Comment({ postId }: { postId: any }) {}
在函数内部,添加以下代码,该代码使用useEffect钩子在组件挂载或更改时从 Supabase 获取评论和文章内容postId。fetchComments函数获取所有评论,而fetchArticleContent函数使用当前 来获取文章内容postId。
useEffect(() => {
  // Define an async function to fetch comments
  const fetchComments = async () => {
    // Create a Supabase client instance
    const supabase = createClient();
    // Fetch comments from the "comments" table
    const { data, error } = await supabase.from("comments").select("*");
    // If data is available, update the comments state
    if (data) {
      setComments(data);
    }
  };

  // Define an async function to fetch article content
  const fetchArticleContent = async () => {
    // Create a Supabase client instance
    const supabase = createClient();
    // Fetch article content from the "articles" table
    // Filter by the current postId
    const { data, error } = await supabase
      .from("articles")
      .select("*")
      .eq("id", postId)
      .single();
    // If the fetched article ID matches the current postId
    if (data?.id == postId) {
      // Update the article content state
      setArticleContent(data.content);
    }
  };

  // Call the fetch functions
  fetchArticleContent();
  fetchComments();
}, [postId]); // Dependency array includes postId, so the effect runs when postId changes
然后添加该 addComment 函数作为表单操作参数,如下所示。
<form
          action={addComment}
          className="border border-teal-500 rounded-md p-3 mb-4">
          <textarea
            id="content"
            name="content"
            placeholder="Add a comment..."
            rows={3}
            onChange={(e) => setComment(e.target.value)}
            value={comment}
            className="hidden"
          />

          <CopilotTextarea
            className="p-4 w-full rounded-lg mb-2 border text-sm border-gray-600 bg-gray-700 text-white placeholder-gray-400 focus:border-cyan-500 focus:ring-cyan-500 resize-none"
            ref={copilotTextareaRef}
            placeholder="Start typing for content autosuggestion."
            onChange={(event) => setComment(event.target.value)}
            rows={5}
            autosuggestionsConfig={{
              textareaPurpose: articleContent,
              chatApiConfigs: {
                suggestionsApiConfig: {
                  forwardedParams: {
                    max_tokens: 5,
                    stop: ["\n", ".", ","],
                  },
                },
                insertionApiConfig: {},
              },
              debounceTime: 250,
            }}
          />
          <input
            type="text"
            id="postId"
            name="postId"
            value={postId}
            className="hidden"
          />
          <div className="flex justify-between items-center mt-5">
            <button
              type="submit"
              className="bg-blue-500 text-white font-bold py-2 px-4 rounded">
              Submit
            </button>
          </div>
        </form>
在表单元素下方,添加以下呈现帖子评论的代码。
{comments?.map(
          (postComment: any) =>
            postComment.postId == postId && (
              <div
                key={postComment.id}
                className="flex p-4 border-b dark:border-gray-600 text-sm">
                <div className="flex-shrink-0 mr-3">
                  <Image
                    className="w-10 h-10 rounded-full bg-gray-200"
                    src={`https://source.unsplash.com/featured/?${encodeURIComponent(
                      "Silhouette"
                    )}`}
                    width={500}
                    height={500}
                    alt="Profile Picture"
                  />
                </div>
                <div className="flex-1">
                  <div className="flex items-center mb-1">
                    <span className="font-bold text-white mr-1 text-xs truncate">
                      Anonymous
                    </span>
                  </div>
                  <p className="text-gray-500 pb-2">{postComment.content}</p>
                </div>
              </div>
            )
        )}
接下来,转到 /[root]/src/app/[slug]/page.tsx 文件并将 postId 作为 prop 添加到 Comment 组件。
<Comment postId={post && [post.id](http://post.id/)} />
前往已发布文章内容页面,在文本框中输入评论。输入评论时,您应该会收到内容自动建议。
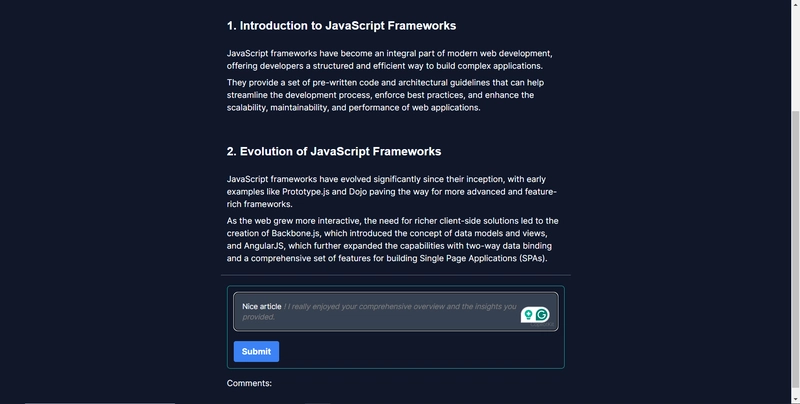
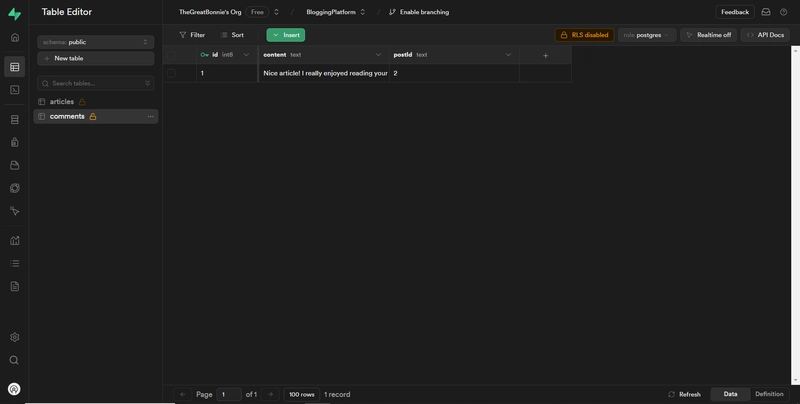
然后点击提交按钮添加您的评论。前往 Supabase 上的项目仪表板,并导航到“表编辑器”部分。点击评论表,您应该会看到您的评论数据已插入 Supabase 数据库,如下所示。
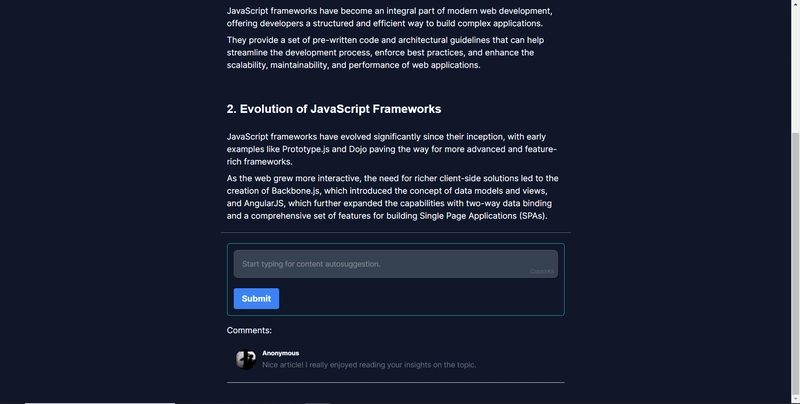
返回您评论的已发布文章内容页面,您应该会看到您的评论,如下所示。
恭喜!您已完成本教程的项目。
结论
CopilotKit 是一款功能强大的工具,可让您在几分钟内将 AI Copilot 添加到您的产品中。无论您对 AI 聊天机器人和助手感兴趣,还是对复杂任务的自动化感兴趣,CopilotKit 都能让您轻松实现。
如果您需要构建 AI 产品或将 AI 工具集成到您的软件应用程序中,您应该考虑 CopilotKit。
您可以在 GitHub 上找到本教程的源代码:https://github.com/TheGreatBonnie/aiblogapp
文章来源:https://dev.to/copilotkit/im-building-an-ai-powered-blog-nextjs-langchain-supabase-5145 后端开发教程 - Java、Spring Boot 实战 - msg200.com
