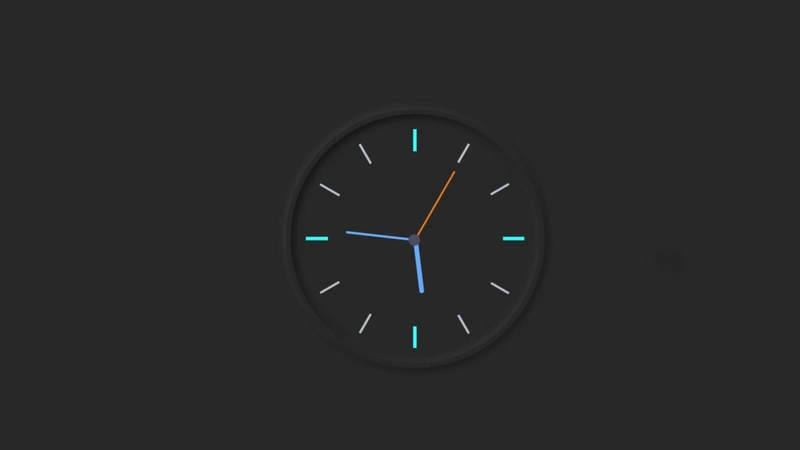
使用 Html、CSS 和 Javascript 的简单模拟时钟
在本文中,我将向您展示如何使用 HTML、CSS 和 JavaScript 代码制作一个模拟时钟。我已经设计过许多类型的模拟时钟。这款手表采用深色新拟态设计。它像典型的模拟风筝一样,有三根指针指示小时、分钟和秒。在这里,我使用了符号而不是 1 到 12 的数字。
您可以观看现场演示,了解这款模拟时钟的工作原理。由于我采用了同态设计,因此时钟背景和页面背景使用了相同的颜色。首先,我30 rem width and 30 rem height在网页上创建了一个带有 的盒子Border-radius 50%,用于使这个盒子圆润。我在这里使用了 box-shadow 来实现同态设计。
✅观看实时预览👉👉 JavaScript 模拟时钟
它非常简单,我基本上已经完成了。下面我将逐步展示我如何制作这个JavaScript 模拟时钟。首先,创建一个 HTML 和 CSS 文件。请务必将 CSS 文件附加到 HTML 文件中。
步骤 1:创建时钟的基本设计
我使用以下 HTML 和 CSS 代码制作了这个模拟时钟的背景。我使用代码创建了这个时钟的结构<div class = "clock"></div>。首先,我background: # 282828;在 CSS 代码中指定了页面的背景颜色()。
<div class="clock">

</div>
 html {
  background: #282828;
  text-align: center;
  font-size: 10px;
}

body {
  margin: 0;
  font-size: 2rem;
  display: flex;
  flex: 1;
  min-height: 100vh;
  align-items: center;
}

.clock {
  width: 30rem;
  height: 30rem;
  position: relative;
  padding: 2rem;
  border: 7px solid #282828;
  box-shadow: -4px -4px 10px rgba(67,67,67,0.5),
                inset 4px 4px 10px rgba(0,0,0,0.5),
                inset -4px -4px 10px rgba(67,67,67,0.5),
                4px 4px 10px rgba(0,0,0,0.3);
  border-radius: 50%;
  margin: 50px auto;

}
第 2 步:在时钟中画两条彩色线条
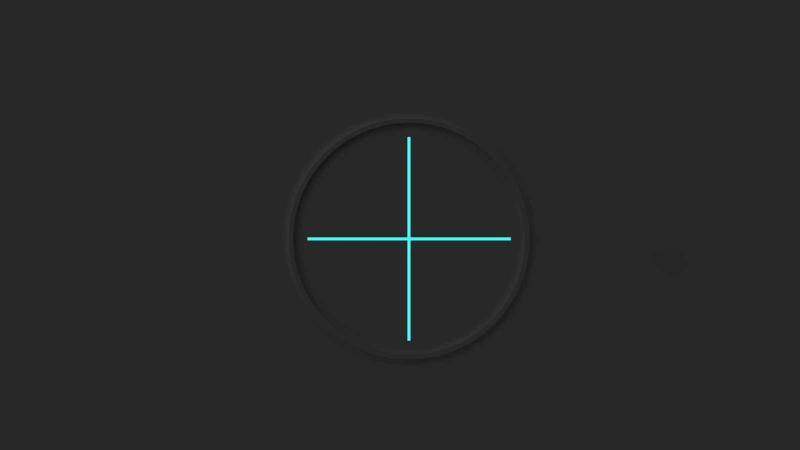
我使用了以下 HTML 和 CSS 代码来制作这款手表上用于指示时间的符号。首先,我使用以下代码创建了两条线。我将这两条线放在一起90 degree angle。我background: # 282828让线条更亮一些。
<div class="outer-clock-face">

</div>
.outer-clock-face {
  position: relative;
  background: #282828;
  overflow: hidden;
  width: 100%;
  height: 100%;
  border-radius: 100%;
}

.outer-clock-face::after {
  -webkit-transform: rotate(90deg);
  -moz-transform: rotate(90deg);
  transform: rotate(90deg)
}

.outer-clock-face::after,
.outer-clock-face::before,
.outer-clock-face .marking{
  content: '';
  position: absolute;
  width: 5px;
  height: 100%;
  background: #1df52f;
  z-index: 0;
  left: 49%;
}
步骤 3:再画四条线
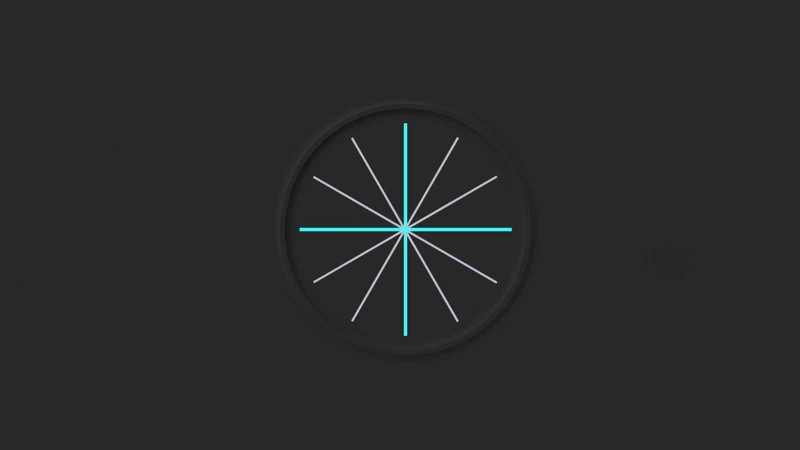
我使用以下 HTML 和 CSS 代码在这个时钟上添加了四条线条。我使用 CSS 代码根据需要调整了这些线条的角度。我使用了白色,您可以使用任何其他颜色。
<div class="marking marking-one"></div>
<div class="marking marking-two"></div>
<div class="marking marking-three"></div>
<div class="marking marking-four"></div>
.outer-clock-face .marking {
  background: #bdbdcb;
  width: 3px;
}

.outer-clock-face .marking.marking-one {
  -webkit-transform: rotate(30deg);
  -moz-transform: rotate(30deg);
  transform: rotate(30deg)
}

.outer-clock-face .marking.marking-two {
  -webkit-transform: rotate(60deg);
  -moz-transform: rotate(60deg);
  transform: rotate(60deg)
}

.outer-clock-face .marking.marking-three {
  -webkit-transform: rotate(120deg);
  -moz-transform: rotate(120deg);
  transform: rotate(120deg)
}

.outer-clock-face .marking.marking-four {
  -webkit-transform: rotate(150deg);
  -moz-transform: rotate(150deg);
  transform: rotate(150deg)
}
步骤 4:在模拟时钟的中间画一个圆圈
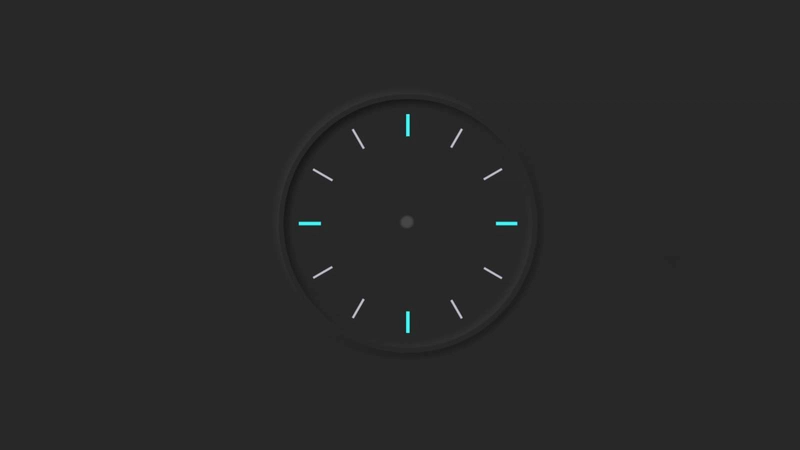
我在钟的中间画了一个圆圈。这个圆圈位于预先绘制的线条交汇处。由此产生的线条成为了符号。
          <div class="inner-clock-face">

          </div>
.inner-clock-face {
  position: absolute;
  top: 10%;
  left: 10%;
  width: 80%;
  height: 80%;
  background: #282828;
  -webkit-border-radius: 100%;
  -moz-border-radius: 100%;
  border-radius: 100%;
  z-index: 1;
}

.inner-clock-face::before {
  content: '';
  position: absolute;
  top: 50%;
  left: 50%;
  width: 16px;
  height: 16px;
  border-radius: 18px;
  margin-left: -9px;
  margin-top: -6px;
  background: #4d4b63;
  z-index: 11;
}
第五步:制作时钟的三根指针
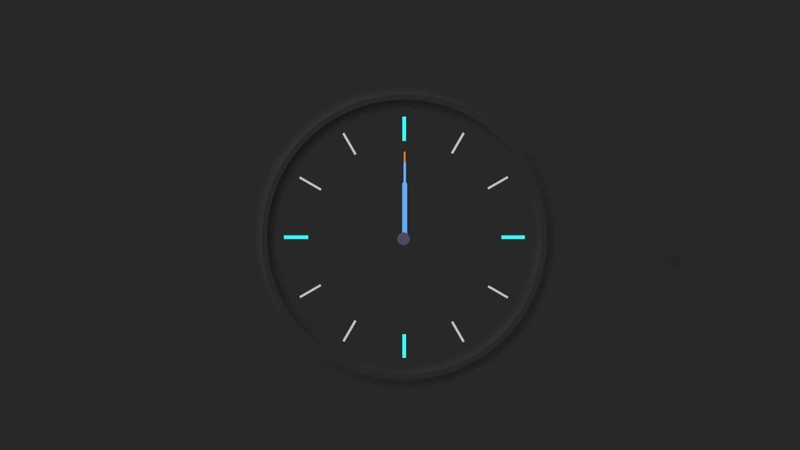
像普通的模拟时钟一样,我使用了三个指针来指示小时、分钟和秒。我使用下面的 HTML 和 CSS 代码创建并设计了这些指针。
    <div class="hand hour-hand"></div>
    <div class="hand min-hand"></div>
    <div class="hand second-hand"></div>
.hand {
  width: 50%;
  right: 50%;
  height: 6px;
  background: #61afff;
  position: absolute;
  top: 50%;
  border-radius: 6px;
  transform-origin: 100%;
  transform: rotate(90deg);
  transition-timing-function: cubic-bezier(0.1, 2.7, 0.58, 1);
}

.hand.hour-hand {
  width: 30%;
  z-index: 3;
}

.hand.min-hand {
  height: 3px;
  z-index: 10;
  width: 40%;
}

.hand.second-hand {
  background: #ee791a;
  width: 45%;
  height: 2px;
}
步骤 6:使用 JavaScript 代码激活模拟时钟
我们已经完成了这款模拟手表的设计工作。现在,我们将借助 JavaScript 来实现这款手表。在本例中,我没有使用任何插件或 JavaScript 库。我只使用 JavaScript 实现了这款手表的指针。即使您是初学者,也能理解这个设计。在每段代码下方,我都完整解释了我使用这些代码的原因。
我们将使用以下内容获取参考querySelector():
➤ .second-hand
➤.min-hand
➤.hour-hand
const secondHand = document.querySelector('.second-hand');
const minsHand = document.querySelector('.min-hand');
const hourHand = document.querySelector('.hour-hand');
 function setDate() {
  const now = new Date();
➤new Date()创建 Date 类的实例,从中我们可以获取各种信息,例如当前日期、小时、分钟、秒等。
  const seconds = now.getSeconds();
  const secondsDegrees = ((seconds / 60) * 360) + 90;
  secondHand.style.transform = `rotate(${secondsDegrees}deg)`;
➤ 我已经存储了'secondsDegrees'秒针的旋转方式。➤
然后我用它rotate(${secondsDegrees}deg)来旋转指针。➤
我除以 60,因为 1 分钟等于 60 秒。➤
我乘以 360,因为 360 度形成一个圆。
  const mins = now.getMinutes();
  const minsDegrees = ((mins / 60) * 360) + ((seconds/60)*6) + 90;
  minsHand.style.transform = `rotate(${minsDegrees}deg)`;
➤ 我已经保存了'minsDegrees'如何转动分针。➤
然后用它rotate(${minsDegrees}deg)来旋转指针。➤
我除以 60,因为 1 小时等于 60 分钟。➤
添加了秒针和分钟的位置。因为分针的位置取决于秒数。
  const hour = now.getHours();
  const hourDegrees = ((hour / 12) * 360) + ((mins/60)*30) + 90;
  hourHand.style.transform = `rotate(${hourDegrees}deg)`;
}
setInterval(setDate, 1000);

setDate();
➤ 我们需要rotate()每 1 秒调用一次此函数(1000 milliseconds)。
最终的 Javascript 代码
const secondHand = document.querySelector('.second-hand');
const minsHand = document.querySelector('.min-hand');
const hourHand = document.querySelector('.hour-hand');

 function setDate() {
  const now = new Date();

  const seconds = now.getSeconds();
  const secondsDegrees = ((seconds / 60) * 360) + 90;
  secondHand.style.transform = `rotate(${secondsDegrees}deg)`;

  const mins = now.getMinutes();
  const minsDegrees = ((mins / 60) * 360) + ((seconds/60)*6) + 90;
  minsHand.style.transform = `rotate(${minsDegrees}deg)`;

  const hour = now.getHours();
  const hourDegrees = ((hour / 12) * 360) + ((mins/60)*30) + 90;
  hourHand.style.transform = `rotate(${hourDegrees}deg)`;
}

setInterval(setDate, 1000);

setDate();
希望您通过本教程学会了如何制作这款模拟时钟。如有任何疑问,欢迎评论区留言。当然,如果我做错了什么,也可以告诉我。
相关文章:
您可以访问我的博客获取更多类似教程。https
://groundtutorial.com/
 后端开发教程 - Java、Spring Boot 实战 - msg200.com

