如何在 Visual Studio Code 中显示 Nerd 字体
Nerd Fonts 提供了一系列精美的图标,可以无缝集成到您计算机上的各种应用程序中,从记事本到电子邮件客户端。但是,要将这些图标配置为在 Visual Studio Code 中显示,需要进行特定的设置。在本文中,我们将指导您如何在 Visual Studio Code 中显示 Nerd Fonts。
安装 Nerd 字体
要安装 Nerd Fonts,请按照官方网站的说明进行操作。如果您是 Mac 用户,我建议使用“brew”命令进行安装。您可以在以下网址找到字体和安装详细信息:
https://www.nerdfonts.com/font-downloads
设置 Visual Studio Code
如果没有正确配置,Visual Studio Code 很遗憾无法正确显示 Nerd Fonts 图标。因此,您需要在 Visual Studio Code 中执行以下设置:
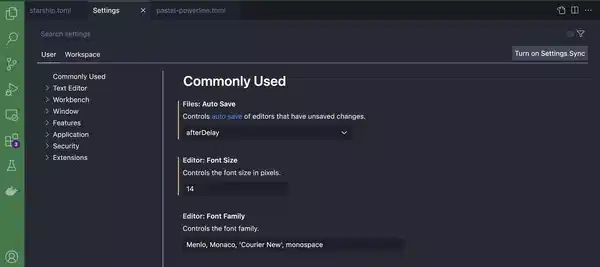
- 打开设置页面。
- 使用关键字“terminal.integrated.fontFamily”搜索设置。
- 在‘编辑器:字体系列’字段中输入“‘Hack Nerd Font’”,如下所示:
以下影片演示了上述步骤:
(注:我尝试按照官网https://code.visualstudio.com/docs/terminal/appearance的说明进行配置,官网建议在“编辑器:字体系列”字段中使用“Hack NF”。然而,这并没有达到预期的效果。相反,在字段中使用“'Hack Nerd Font'”却可以正常工作。)
结论
配置完成后,Nerd Fonts 图标将出现在您的 Visual Studio Code 中。祝您 VSCode 愉快!
文章来源:https://dev.to/owl777/how-to-show-nerd-fonts-in-visual-studio-code-15fd 后端开发教程 - Java、Spring Boot 实战 - msg200.com

