响应式网页设计简介
...开创了“响应式设计”这一概念的人。——
Ethan Marcotte
“响应式设计”这一术语由网页设计师 Ethan Marcotte 在 2010 年发表于在线杂志A List Apart的一篇题为《响应式网页设计》的文章中首次提出。Ethan 在文章中列举了实现响应式网站所需的要素(稍后讨论)。
近年来,由于大量用户通过手机访问互联网,响应式设计的采用率一路飙升。如今,大多数网站(包括开发者网站)都采用响应式设计。其中一些网站是从零开始手工制作的,而另一些则使用框架来完成工作。
这篇文章将向您展示使用 HTML 和 CSS 从零开始构建响应式网站所需的工具。我们将讨论构建响应式网站的推荐方法,并在整个过程中编写代码来支持所有理论。
推荐的方法看起来很先进,因为它们包含了考虑到最终用户来提供快速网站的技巧和窍门,但我们会尽力解释。
如果您一直关注本系列文章直至本文,非常感谢!请注意,为了充分利用本文,您应该了解以下几点:
所有截图均来自Firefox 72.0.1及其开发者工具。Firefox 72.0.1 中一个值得一提的功能是控制台中的多行代码编辑器。
让我们开始吧。
设计一个网站很难,特别是当你使用 HTML 和 CSS 从头开始手工制作,同时又要充分考虑用户体验时。
读到最后一段你可能会问:在设计过程中我如何考虑用户体验?
有很多方法可以在设计时考虑用户,其中之一就是本文的主题——响应式设计——它围绕设计您的网站以适应不同的设备屏幕和分辨率。
Ethan 在他的开创性文章中提出了响应式设计的三个要素。它们是:
- 流体网格
- 灵活的图像
- 媒体查询
多年来,成分不断演变,添加了以下成分:
- 响应式排版
- 在媒体查询中使用相对单位
- 为内容而非设备而设计
从上面的列表来看,唯一可能对你来说比较陌生的就是响应式排版。从初学者的角度来看,响应式排版是一个高级概念。我们不会在本文中讨论它,但我们会编写代码来演示它的工作原理。如果你想深入了解这个主题,文章末尾会提供一个链接。
我们在讨论CSS 单位时已经介绍了相对单位。
另一方面,当你读到“为内容而非设备设计”时,你可能会认为这与我们之前关于为不同设备屏幕和屏幕分辨率进行设计的说法相矛盾。完整的说法应该是:
针对不同的设备和屏幕分辨率设计您的网站内容。
根据网站内容进行设计,是“设备无关设计”设计方法的一部分。我们将在代码示例中采用这种方法。
现在你可能会问:我为什么要关注响应式设计?我们来看三个用例。
第一个用例→用户可能正在智能手机上浏览您的网站,并且可能由于其坐姿(或躺姿)的变化而决定在其设备上打开自动旋转,这会导致他们在浏览您的内容时设备分辨率发生变化。
当这种情况发生时,他们仍然期望获得相同的浏览体验。如果您在设计网站时没有考虑到这种情况,并且网站在他们更改查看分辨率时放弃他们,他们可能会离开并且永远不会回来。
第二个用例是这样的→如果您的网站在桌面版本上可读但在移动设备上难以阅读,则用户可能会去其他地方寻找。
对于第三种情况,如果您将2MB图像传送到较小的设备,而用户的互联网连接速度恰好较慢,则图像将需要一段时间才能下载,并且他们可能会在下载完成之前离开。
当你以负责任的方式运用响应式设计时,你就能尽最大努力提供最佳的用户体验。你无需任何特殊工具即可实现这一点,因为所有功能都可在原生 CSS 中找到。
理论讲完了,我们来写点代码吧。准备好了吗?开始吧!
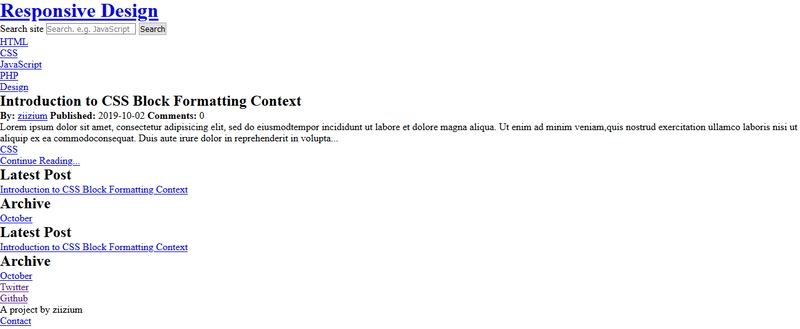
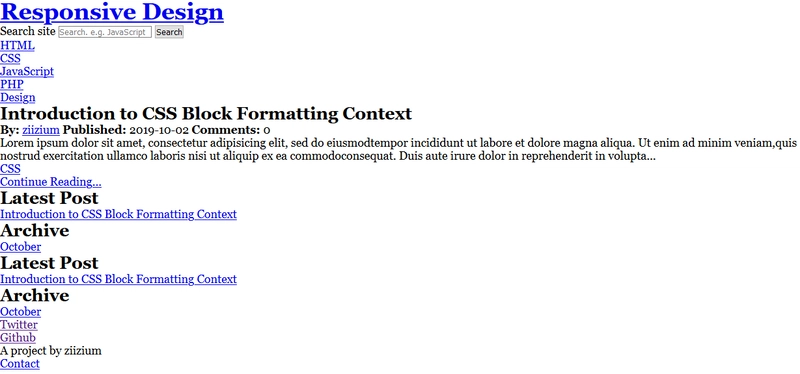
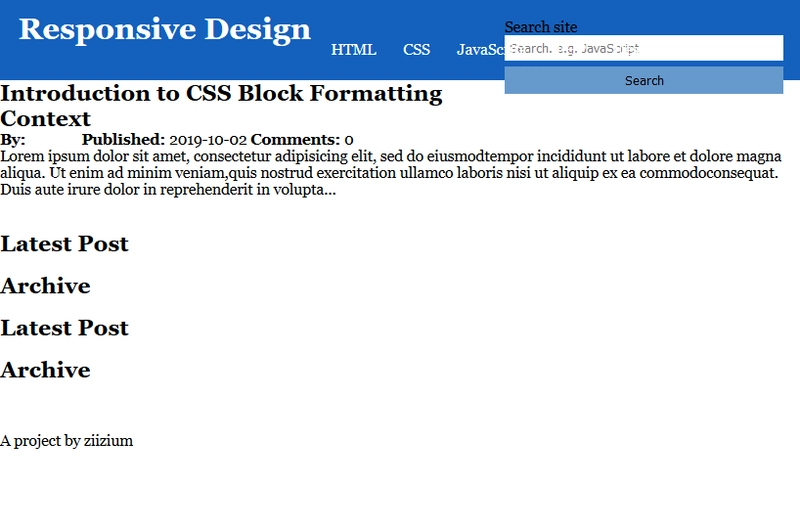
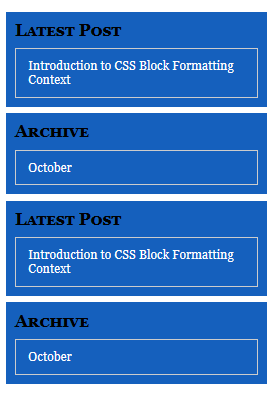
下面的图像是我们将要处理的示例的不同视图:
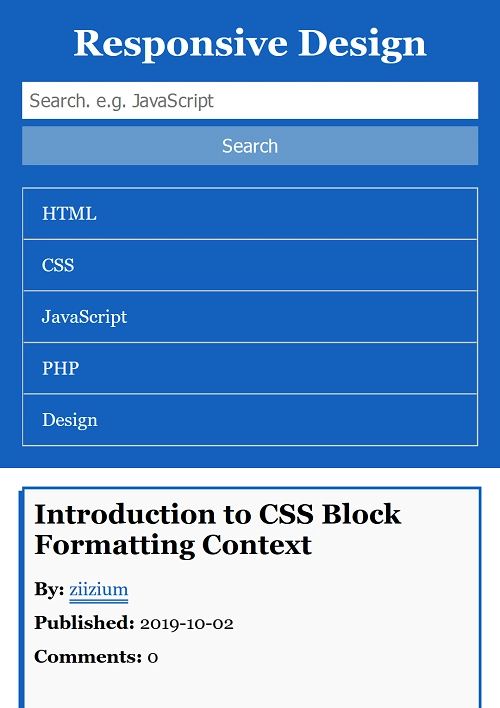
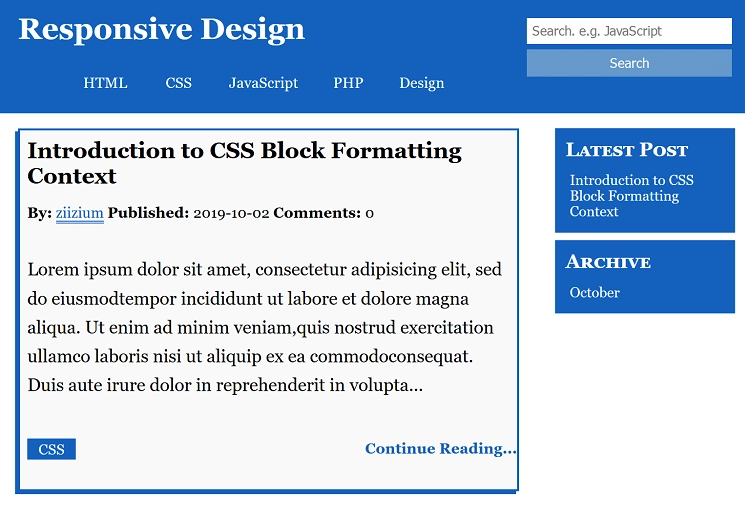
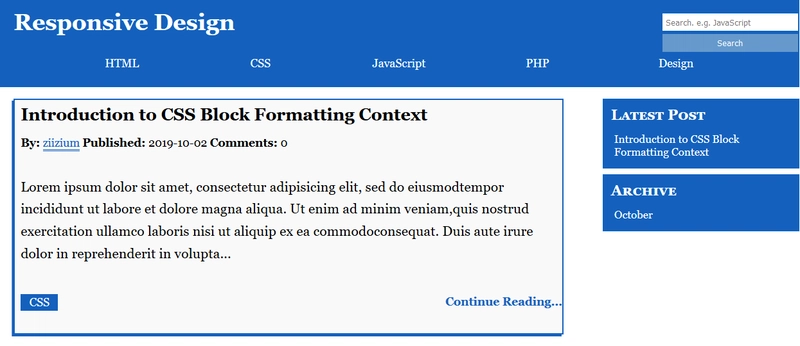
我们主要关注的是逐步解释 CSS,因此这里是整个 HTML 标记:
<!DOCTYPE html>
<html>
<head>
    <meta charset="utf-8">
    <meta http-equiv="X-UA-Compatible" content="IE=edge">
    <meta name="viewport" content="width=device-width, initial-scale=1, shrink-to-fit=no">
    <meta name="author" content="Habdul Hazeez">
    <title>Introdction to Responsive Design</title>
    <link rel="stylesheet" type="text/css" href="responsive.css">
</head>
<body>

<!-- Header -->
<header class="header">
    <h1 class="header__app-name c-white text-center">
        <a href="">Responsive Design</a>
    </h1>

    <form class="search-form" action="" method="post">
        <label for="search-site" class="hidden">Search site</label>
        <input class="search-form__input" type="search" name="search" id="search-site" value="" placeholder="Search. e.g. JavaScript" required>
        <button type="submit" value="Search" name="submit_search" class="search__button c-white">Search</button>
    </form>

    <nav class="navigation">
        <ul class="navigation__menu">
            <li class="navigation__item">
                <a class="navigation__link" href="#">HTML</a>
            </li>
            <li class="navigation__item">
                <a class="navigation__link" href="#">CSS</a>
            </li>
            <li class="navigation__item">
                <a class="navigation__link" href="#">JavaScript</a>
            </li>
            <li class="navigation__item">
                <a class="navigation__link" href="#">PHP</a>
            </li>
            <li class="navigation__item">
                <a class="navigation__link" href="#">Design</a>
            </li>
        </ul>
    </nav>
</header> <!-- ./Header -->

<div class="container">
    <main class="blog-content clearfix"><!-- Blog Article -->
        <article class="post">
            <header class="post__header">
                <div class="post__meta">
                    <h1 class="post__title">Introduction to CSS Block Formatting Context</h1>
                    <span class="post__author">
                        <strong>By:</strong> <a class="post__author-link" href="#">ziizium</a>
                    </span>
                    <span class="post__date"><strong>Published: </strong> 2019-10-02</span>
                    <span class="post__comment"><strong>Comments: </strong>0</span>
                </div>
            </header>

            <div class="post__entry">
                <p class="post__content">
Lorem ipsum dolor sit amet, consectetur adipisicing elit,
sed do eiusmodtempor incididunt ut labore et dolore magna
aliqua. Ut enim ad minim veniam,quis nostrud exercitation
ullamco laboris nisi ut aliquip ex ea commodoconsequat.
Duis aute irure dolor in reprehenderit in volupta...</p>
            </div>

            <div class="tag">
                <ul>
                    <li class="tag__item">
                        <a class="tag__link" href="#">CSS</a>
                    </li>
                  </ul>
            </div>

            <div class="post__continue">
                <a href="#" class="post__continue-reading">Continue Reading...</a>
            </div>
        </article> <!--./Blog Article -->
    </main>

    <aside class="sidebar desktop"> <!-- Sidebar -->
        <div class="sidebar__container">
            <h1 class="sidebar__heading c-white">Latest Post</h1>
            <ol class="sidebar__menu">
                <li class="sidebar__item">
                    <a class="sidebar__link" href="#">Introduction to CSS Block Formatting Context</a>
                </li>
            </ol>
        </div>
        <div class="sidebar__container">
            <h1 class="sidebar__heading c-white">Archive</h1>
            <ul class="sidebar__menu">
                <li class="sidebar__item">
                        <a class="sidebar__link" href="#">October</a>
                </li>
            </ul>
        </div>
    </aside> <!--./Sidebar-->

    <aside class="sidebar mobile"> <!-- Sidebar Mobile -->
        <div class="sidebar__container">
            <h1 class="sidebar__heading c-white">Latest Post</h1>
            <ol class="sidebar__menu">
                <li class="sidebar__item">
                    <a class="sidebar__link" href="#">Introduction to CSS Block Formatting Context</a>
                </li>
            </ol>
        </div>

        <div class="sidebar__container">
            <h1 class="sidebar__heading c-white">Archive</h1>
            <ul class="sidebar__menu">
                <li class="sidebar__item">
                    <a class="sidebar__link" href="#">October</a>
                </li>
            </ul>
        </div>
    </aside> <!--./Sidebar-->

    <div class="push"></div>
    <div class="clearfix"></div>

</div> <!--./container-->

<!-- Footer -->
<footer class="footer c-white text-center">
    <div class="social-media">
        <li class="social-media__item"><a href="https://twitter.com/ziizium">Twitter</a></li>
        <li class="social-media__item"><a href="https://github.com/ziizium">Github</a></li>
    </div>

    <div class="author-info">
        <p class="author-info__content">A project by ziizium</p>
    </div>

    <div class="site-info">
        <ul class="site-info__menu">
            <li class="site-info__item"><a href="#">Contact</a>
        </li>
        </ul>
    </div>
</footer> <!--./Footer-->
</body>
</html>
观察上面的代码,您会注意到我们使用了文章中讨论的BEM命名方法——CSS 命名约定。
您还应该注意到,我们已经创建了一个名为的 CSS 文件responsive.css。请创建您的 CSS 文件并赋予您想要的名称,并确保它与 HTML 文件链接。
当您仔细查看<head>代码部分时,您会注意到以下内容:
<meta http-equiv="X-UA-Compatible" content="IE=edge">
<meta name="viewport" content="width=device-width, initial-scale=1, shrink-to-fit=no">
第一个元标记会告诉 IE 如何根据你设置的值(例如 IE=edge 等)进行操作。如果不存在该元标记,IE 会向网站显示它认为最佳的显示方式。这可能是兼容模式,也可能是 IE 的最新版本(来源)。
第二个元标记告诉浏览器以下内容:
- 内容的宽度应等于
viewport(可用的浏览器窗口) - 内容应缩放至浏览器窗口
- 浏览器不应该缩小内容以适应浏览器窗口
如果您还记得前面讨论过的其中一个用例,您会注意到上面列表中的第一点应该处理它。
在我们的 CSS 文件中,我们要做的第一件事是使用通用 CSS 选择器 ( )重置页面上所有元素的边距和填充*。为什么要这样做?我们采用这种方法的原因是浏览器默认应用于 HTML 元素的样式。
当我们这样做时,除非我们真的需要很大的边距,否则任何边距值都会很小。如果你在浏览器中加载 HTML,你会注意到页面的所有边和块元素都应用了边距和填充。
重置边距和填充后,我们还将box-sizing属性更改为。如果您想了解我们这样做的原因,请参阅有关CSS 盒子模型border-box的文章。
以下 CSS 将处理该问题:
/**
  * Reset all margins and paddings
  * and set box sizing to border-box
  */
* {
    margin: 0;
    padding: 0;
    box-sizing: border-box;
}
保存 CSS 并刷新浏览器以查看更改。
接下来,我们为一些重复的值设置变量。这些变量将在全局范围内应用,因此我们使用:root伪类选择器:
/*
  * Variables for some repeated data
  */
:root {
    --none: none;
    --white: white;
    --light-blue: hsl(210, 50%, 60%);
    --light-grey: hsl(53.2, 4%, 41.2%);
    --width-100: 100%;
}
目前我们正在使用浏览器默认的font-family和font-size(Times New Roman和16px),让我们随着页面height和一些美学方面的变化来改变它。
/**
  * Set the font family to Georgia with "Trebuchet MS"
  * and Verdana as backup options
  *
  * We also make use of responsive typography
  * by performing some calculations using the
  * calc() function available in CSS
  *
  * The height is set to 100% due to the approach
  * we'll take in sticking the footer to the bottom
  * of the page.
  *
  * The word-wrap property with the break-word value
  * will allow word to break into multiple lines
  */
html,
body {
    font-family: Georgia, "Trebuchet MS", Verdana, san-serif;
    font-size: calc(13px + (22 - 16) * (100vw - 320px) / 1200);
    height: 100%;
    word-wrap: break-word;
}
保存文件并刷新浏览器以查看更改。
下一段代码将删除 HTML 列表和text decoration链接的默认样式。我们还将 更改font-color为白色。请注意,我们使用了之前设置的变量。
/**
  * Remove the default styling for the lists
  * and links.
  */
li {
    list-style-type: var(--none);
}

a {
    text-decoration: var(--none);
    color: var(--white);
}
如果你保存并刷新浏览器,所有链接都会“消失”,因为它们的颜色与背景色融合了。让我们给页眉添加一个背景色。
/**
  * Here we change the background-color of
  * the header to blue, we apply some paddings
  * on all side and we give the app-name some
  * margin-bottom to create some space
  * between the app-name and the links
  */
.header {
    background-color: #1560bd;
    padding: 1.2em;             /* Internal Spacing */
}
.header__app-name {
    margin-bottom: 0.5em;
}
我们采取“移动优先”的策略,这意味着目前所有的样式都将适用于移动设备。同时,我们的设计以内容为中心,而非设备。
以下样式是为了使搜索表单更加用户友好,同时我们也考虑到触摸设备。
/**
  * Styling the search form
  */
.search-form__input {
    padding: 0.4em;
    margin-right: 0.2em;
    border: var(--none);
    width: var(--width-100);
}

.search__button {
    margin-top: 0.4em;
    padding: 0.45em;
    border: var(--none);
    background-color: var(--light-blue);
    width: var(--width-100);
}

.search__button:hover {
    background-color: var(--light-grey);
    cursor: pointer;
}
保存并刷新浏览器,你会发现搜索按钮现在是扁平化的,表单输入框的默认边框也消失了。这是一种被称为扁平化设计的设计方法。
在浏览器中,通过开发者工具或在 Windows™ 系统中启用“响应式设计模式”。您可以将浏览器窗口大小调整为移动视图,如下图所示。Ctrl + Shift + M
现在,轻轻调整浏览器窗口的大小,直到页眉看起来不合适为止。在我们的例子中,页眉的大小是768px。我们必须将此值转换为 ,em以使布局能够轻松适应。
结果为48em( 768/16)。我们将在媒体查询中利用此值。
/**
  * The header looks out of place at about
  * 768px which is equal to 48em
  */
@media screen and (min-width: 48em) { /* 768/16 = 48 */
  /* The app name is floated left */
  .header__app-name {
      float: left;
      margin-top: -0.2em; /* This will move the header down a little bit */
  }

  /* The search form is floated right */
  .search-form {
      float: right;
  }
}
导航在移动设备上看起来不错,请将浏览器大小调整到某个点,使导航看起来比实际需要的更大,这将是一个很好的断点。560px看起来不错,em单位是35em。我们将在此点进行更改。
/**
  * The navigation menu is transformed to a flex
  * container, we remove the border and then add
  * some padding.
  *
  */
@media screen and (min-width: 35em) {
  .navigation__menu {
      display: flex;       /* We change display to flexbox */
      border: var(--none);
      padding: 0 1em;
  }

  .navigation__item {
       flex: 1;
       margin-right: 1.2em;
  }

  /**
    * We remove the border from the navigation
    * then we add some padding and we align the
    * text to the center
    */
  .navigation__item:not(:first-child) {
      border: 0;
  }

  .navigation__link {
      padding: 0.3em;
      text-align: center;
  }
}
调整浏览器大小,直到导航崩溃。
这应该是另一个断点,它看起来像平板电脑的布局,例如768px或48em。我们需要的是一些边距和填充。
/**
  * Our next break point for the navigation.
  * We apply some margin and padding to sort
  * of keep it in check.
  */
@media screen and (min-width: 48em) {
  .navigation__menu {
      margin-top: 3.5em;  /* Outer spacing to bring it down */
      padding: 0 4em;     /* Padding applied to all four sides */
  }
}
保存并刷新您的浏览器,它应该看起来更好。
我们实现粘性页脚的方法涉及一些额外的标记(我知道我们可以使用弹性盒子)。额外的标记将是一个div具有一定高度的空元素,以便它可以将页脚进一步向下推。我们将使用min-height值为 的属性100%来确保容器占用足够的空间。
/**
  * Most of the code here allow us to create a sticky
  * footer.
  */
.container {
    margin-bottom: -3.125em;  /* The height of the push element */
    min-height: 100%;         /* This make the sticky footer possible */
    padding: 1em;
    overflow: auto;
}
保存并刷新浏览器。您会注意到页脚文本移动到了页面底部。
我们尝试实现的布局是两列布局——博客内容和侧边栏。目前,由于链接颜色与背景颜色混合,侧边栏“不可见”。
/**
  * The sidebar container is given a background color
  * of blue with some margin and padding applied.

  * We apply style to the heading and menu as decoration.
  *
  * In the process we make the sidebar links clickable
  * on mobile.
  */
.sidebar__container {
    background-color: #1560bd; /* A variant of blue */
    margin-bottom: 0.5em;
    padding: 0.7em;
}

.sidebar__heading {
    font-size: 130%;           /* Typography */
    font-variant: small-caps;  /* Typography */
    margin-bottom: 0.5em;
}

.sidebar__menu {
    font-size: 95%;
    border: 1px solid #cccccc; /* A variant of silver */
}

.sidebar__item:not(:first-child) {
    border-top: 1px solid #cccccc;
}

.sidebar__link {
    display: block;           /* Setup to make it clickable */
    padding: 0.8em 1em;       /* Creating the clickable area */
    width: 100%;
}

.sidebar__link:hover {
    text-decoration: underline;         /* Visual effects */
    background-color: var(--light-blue);
}
保存并刷新。你会发现布局上有个问题。有两个侧边栏,一个是桌面用户用的,另一个是移动用户用的。
解决方案很简单,我们要做的就是在移动设备上隐藏桌面侧边栏,然后在桌面上隐藏移动侧边栏(如果你可以这么说的话,这很黑客! )。
/**
  * Allow the sidebar to take up much needed space
  * then hide the desktop version.
  */
.sidebar {
    width: 100%;
}

.sidebar.desktop {
    display: var(--none);  /* We are using CSS variables */
}
当您将浏览器调整为平板电脑布局时,博客容器和侧边栏会显示彼此的顶部,此时采用两列布局是个好主意。
/**
  * We float the blog-content to the left
  * and set its width to 70%. The overflow property
  * is set to auto to prevent the content from
  * overflowing.
  */
@media screen and (min-width: 48em) {
  .blog-content {
      float: left;
      width: 70%;
      margin-bottom: 1.2em;
      overflow: auto;
  }

  /**
    * Sidebar is floated to the right and given
    * a width of 25%
    */

   .sidebar {
       float: right;
       width: 25%;
   }

  /**
    * Hide the mobile sidebar,then
    * show the desktop sidebar
    */
    .sidebar.mobile {
        display: var(--none);
    }

    .sidebar.desktop {
        display: block;
    }

   /**
     * Remove the border-top property of the
     * sidebar item
     */
     .sidebar__item {
         border-top: var(--none);
     }

   /**
     * Reduce the padding of the sidebar links
     */
     .sidebar__link {
         padding: 0.2em 0.3em;
     }

   /**
     * Remove the border from the sidebar
     * in tablet and desktop mode
     */
      .sidebar__menu {
          border: var(--none);
      }

}
保存并刷新浏览器以查看更改。
根据我们的设计,帖子部分有一个具有一定效果的边框box-shadow,让我们来实现它。
/**
  * We add borders to the post area and some
  * box shadow effect.
  *
  * The first value supplied to the box-shadow
  * will be for the x axis (horizontal) and the second value
  * is fr the y axis (vertical)
  */
.post {
    border: 2px solid #1560bd;
    box-shadow: -3px 3px #1560bd;
    background-color: #f9f9fa;
    margin: 0 0 1.5em 0.2em;
    overflow: hidden;
}
帖子元数据(即作者姓名、日期和评论)当前显示在其默认inline 位置,但我们需要它们在移动设备上看起来不错,因此我们将它们更改display为块并应用一些填充和边距。
/**
  * Here we change the display property of the post
  * author, date and comment to block
  */
.post__author,
.post__date,
.post__comment {
    display: block;
    margin: 0.6em 0 0.7em 0;
}
在平板电脑和桌面版网站上,我们必须将显示改回原样,inline以便所有内容在一行上对齐。
/**
  * We reset the display back to inline
  * on tablet and desktop
  */
@media screen and (min-width: 48em) { /* Tablet upwards */
    .post__author,
    .post__date,
    .post__comment {
         display: inline;
    }
}
您可以保存文件然后调整浏览器大小来查看更改。
作者链接目前不可见,让我们修复它。
/**
  * Change the author link to blue
  * and apply a border-bottom with a
  * value of double
  */
.post__author-link {
    color: #1560bd;
    border-bottom: double;
}
将显示画面切换回移动端。现在,如果您查看段落文本,您会注意到当前格式的文本几乎无法阅读。我们必须增加font-size,应用line-height和一些边距。我们将利用hyphens属性,以便浏览器可以在单词换行时在段落末尾插入连字符。
我们必须将一些内容应用margin-bottom到帖子元数据、帖子标题和帖子作者,以便在桌面视图中正确对齐它们。
/**
  * Typography for the paragraph text and
  * post meta data.
  */
.post__content  {
    margin: 0.5em 0 1.2em 0;
    line-height: 1.618;
    font-size: 1.2em;
    hyphens: auto;
}

.post__meta,
.post__title {
    margin-bottom: 0.7em;
}

.post__author {
    margin-right: 0.5em;
}
我们需要对标签、帖子元数据和帖子条目应用一些内部间距。
/**
  * Internal spacing applied to the tag
  * post meta data and post entry
  */
.tag,
.post__meta,
.post__entry {
    padding: 0.5em;
}
由于链接颜色问题,标签目前不可见。我们来解决这个问题。
/**
  * Cosmetics for the tag. First we move the tag down
  * a little bit and then customize the tag item
  * and tag link
  */
.tag {
    margin-top: 0.2em;
}

.tag__item {
    display: inline-block;
    text-transform: uppercase;
    margin-right: 0.5em;
    background-color: #1560bd;
    padding: 0.8em;
    margin-bottom: 1.5em;
}

.tag__link {
    padding: 0.6em;
}
下一步是什么?继续阅读链接。该链接必须在移动设备上可点击。通过设置一些内边距和宽度来实现。其余代码只是一些修饰,使其更加醒目。
/**
  * Here we make sure the "continue reading" link
  * is clickable and usable on mobile
  */
.post__continue-reading {
    display: block;    /* Setup to make it clickable */
    padding: 0.6em;    /* Creating the clickable area */
    color: #1560bd;
    background-color: #dddddd;
    margin-top: 0.8em;
    width: 100%;
    text-align: center;
    font-weight: bold;
    border-top: 2px solid #1560bd;
}

.post__continue-reading:hover,
.post__continue-reading:focus { /* For human interaction */
    text-decoration: underline;
    background-color: #1560bd;
    color: #ffffff;
}
对于此设计的桌面版本,我们更倾向于让用户使用鼠标。用户与元素交互的指示也会发生变化,这次会变成下划线。
标签也向左浮动,并赋予其宽度,50%继续阅读将占据剩余的空间。
/**
  * On tablet and on desktop we change the
  * "continue reading" link to a text the
  * user click on by eliminating all the effects
  * added for mobile users - padding and border.
  */
@media screen and (min-width: 48em) {
  .post__continue-reading {
       padding: 0;
       border: var(--none);
       background-color: #f9f9fa;;
       text-align: right;
  }

  .post__continue-reading:hover {
       text-decoration: underline; /* Serve as an indicator on mouse over */
       background-color: #f9f9fa;
       color: #1560bd;
  }

  /**
    * The tag and post__continue container are
    * floated left
    */
    .tag,
    .post__continue {
        width: 50%
        float: left;
    }

  /**
    * A little bit of padding
    */
    .tag__item {
        padding: 0.15em;
    }

}
保存并刷新浏览器,你会发现页脚在移动视图中与侧边栏紧密贴合。记住,我们使用了额外的标记来将页脚进一步下移。
我们已经在 HTML 中创建了空<div>元素,剩下的就是 CSS 了。在 CSS 中,我们将添加<div>一个height,用于始终分隔页脚和侧边栏的空间。
/**
  * The div in our HTML with a class pf push is
  * given an height that'll push the footer further
  * down the page.
  */
.push {
    height: 3.125em;
}
快完成了!接下来是页脚,下面的代码片段让页脚变得生动活泼。
/**
  * The footer style, the code is quiet
  * simple
  */
.footer {
    background-color: hsl(53.2, 4%, 41.2%);
    color: #ffffff;  /* White */
    overflow: auto;
    padding: 1.25em;
    margin-top: 1.2em;
}

/**
  * All footer elements are given a margin bottom
  * of 1.2em
  */
.footer * {
    margin-bottom: 1.2em;
}

.footer a {
    text-decoration: underline;
}
这在移动设备上有效,但在桌面设备上看起来不太合适。我们只需要一个媒体查询断点来更改布局。
/**
  * We change the footer layout to a three
  * column layout on tablet and desktop devices
  */
@media screen and (min-width: 32em) {
  .footer div {
      width: 33.33%;
      float: left;
  }

  .social-media li {
      display: inline;
      margin-right: 1.2em;
  }
}
快完成了!我们在 HTML 中使用了一些实用类,例如c-white(白色文本)、text-center(居中对齐)和hidden(隐藏页面元素)。现在我们来编写 CSS。
在此之前,我们使用float进行布局,由于浮动元素的行为,在 之后添加其他元素时会出现问题<main>。因此需要一个 clearfix。
clearclearfix 的主要成分是带有伪元素的CSS属性::before,::after我们可以确保在添加元素后<main>不会破坏布局。
/**
  * Utility classes
  */
.clearfix {
    overflow: auto;
}

.clearfix::before,
.clearfix::after {
    display: table;
    content: " ";
}

.clearfix::after {
    clear: both;
}

.c-white {
    color: #ffffff;
}

.text-center {
    text-align: center;
}

.hidden {
    position: absolute;
    text-indent: -9999px;
}
好了,一个完全响应式的布局就完成了。尝试手动调整浏览器大小,看看布局如何适应,或者更好的是,在浏览器中开启响应式设计模式。
Firefox 的快捷方式位于Windows 上。Chrome 的快捷方式相同,但必须打开并激活开发者工具才能使快捷方式生效。Ctrl + Shift + M
以下是关于设计响应式网站的建议:
- 从移动布局开始
- 将浏览器窗口扩展到布局中断的点,这将是您的断点
遵循这些建议,您将针对内容而非设备进行设计。因此,您的布局将根据需要进行调整。
此外:
em像在媒体查询中使用相对单位
我鼓励你先破解代码,然后尽力修复。没有比自己解决问题更好的学习方法了。
旁白
在我们的示例中,我们没有实现响应式图像,但我们一定会在本系列的最终项目中做到这一点。
除此之外,如果您想了解有关响应式排版的更多信息,请查看以下资源:
我们的下一个主题是理论性的,它是关于此示例的布局设计和一些编码决策——渐进式增强。
到时候见。
鏂囩珷鏉ユ簮锛�https://dev.to/ziizium/introduction-to-responsive-web-design-45g6 后端开发教程 - Java、Spring Boot 实战 - msg200.com
