如何使用 Gatsby 💻 搭建博客
Gatsby 是什么?🤔
Gatsby是一个基于React、由GraphQL支持的静态站点生成器。
它使用强大的预配置来构建一个仅使用静态文件的网站,以实现极快的页面加载、服务工作者、代码拆分、服务器端渲染、智能图像加载、资产优化和数据预取。
内容🔥
- 创建新页面
- 盖茨比链接
- 设置页面样式
- 向页面添加元标记
- MDX
- 处理图像
- 图像优化
- 将图像添加到 MDX 帖子
- 语法高亮
- 分析捆绑包大小
- 建立网站
盖茨比有什么特别之处?😲
- Gatsby 使用 GraphQL 构建数据层。Gatsby 可以从任何位置收集你的数据:Markdown、JSON、你常用的 CMS、第三方 API,任何地方!并且在构建时,它会创建一个包含所有这些数据的内部 GraphQL 服务器。因此,在你的 React 组件中,所有数据都会在构建时通过 GraphQL 从同一个服务器以相同的方式进行查询。
- Gatsby 删除了启动和部署应用程序到生产的样板。
- Gatsby 部署静态资产,因为它是静态的,所以您不必担心数据库访问、服务器宕机等。
- 完成 Gatsby 统一查询后,运行 Gatsby 构建过程,它会生成一个包含静态资产的文件夹。之后,您就可以在任何服务器(例如 Netlify、S3、FTP)上进行托管。
- 一旦你打开浏览器,它就会重新水化成一个功能齐全的 React 应用。所以,你提供的不仅仅是静态网站,你实际上是在提供渐进式 Web 应用。
- Gatsby 遵循PRPL 模式和其他性能最佳实践。它仅生成静态资源(无需服务器)。
- 如果您想更改或修改 webpack 或 babel,您可以这样做。修改 webpack 时,您无需修改全部配置,因为 Gatsby 会负责将它们组合在一起。您可以只自定义需要的部分,无需弹出(就像维护所有内容一样弹出整个应用程序)。
让我们开始创建 Gatsby 页面📄
让我们克隆这个 repo Gatsby 简介
现在,我们将浏览这些文件:
- 在 中
package.json,你只需要三个依赖项来构建 Gatsby:gatsby、react、react-dom。 - 在 中
src,您拥有所有视图代码。 - 在 中
static,它将在构建页面后生成所有静态资产。
运行:
$ npm install

$ npm run develop
在浏览器中输入主机http://localhost:8000。
1️⃣ 创建新页面🆕
在src/pages路径中,添加名为about.js
about.js:
import React from 'react'

export default() => (
<>
    <div> About Me</div>
</>
)
如您所知,文件名为 about.js,因此您可以简单地导航到关于页面,如下所示localhost:8000/about
创建页面后无需重启服务器,只需创建一个文件,然后在浏览器中输入新的页面 URL 即可查看。Gatsby还支持热加载。🥳
2️⃣ 盖茨比链接🔗
你可以使用锚标签,但使用锚标签时,它会重新加载整个页面(这对性能来说不是一个好兆头)。众所周知,Gatsby 生成的 React App 可以进行动态路由。
因此 Gatsby 预先打包了 React Router。
import React from 'react';
import {Link} from 'gatsby'
export default () => (
<>
<div>Homepage</div>
<Link to='/about'>About Us →</Link>
</>
)
3️⃣ 设置页面样式🎨
对于样式,您可以使用任何插件,如情感、SASS 等。我将在这里使用 SASS。
要设置 SASS,请按照本文操作
4️⃣ 向页面添加元标记🔖
当您想要重复使用整个网站的常见数据(例如,您的网站标题)时,您可以将该数据存储在 siteMetadata 中。
要向页面添加元标记以提高 SEO 性能,请按照本文操作
5️⃣ MDX
MDX 是一种在 mark down 中启用 React 组件的方法。
在 MDX 中渲染组件:
要在组件中渲染 MDX,需要安装一些依赖项:
$ npm i gatsby-plugin-mdx @mdx-js/mdx @mdx-js/react
一旦插件安装完毕,您需要进行配置gatsby-config.js。
gatsby-config.js:
plugins: [
        'gatsby-plugin-sass',
        'gatsby-plugin-react-helmet',
          {
            resolve: 'gatsby-plugin-mdx',
            options: {
                defaultLayouts: {
                    default: require.resolve('./src/components/layout')
                }
            }
          }
          ]
gatby-mdx需要一些配置,比如传递选项。因此,在 resolve 中写入。
在选项中,我们需要传递您将用于 MDX 的布局。
笔记:此布局将会在所有页面上使用。
添加上述配置后,重启服务器。然后创建一个页面team.mdx。由于我们添加了 mdx 插件,现在它会在 pages 目录中查找 mdx 文件。
团队.mdx:
# My team

Welcome to Our Team 😋
勾选后localhost:8000/team会显示团队页面。
如何在 MDX 文件中添加 React 组件?🤔
我们将创建一个wave组件,在其中增加点击按钮的次数。
wave.js:
import React, {useState} from 'react'
import './wave.scss'

const Wave = () => {
    const [waves, setWaves] = useState(0);
    const label = `👋 ${waves} ${waves == 1 ? 'wave' : 'waves'}`;

    return (
        <button onClick={() => setWaves(waves+1)}>{label}</button>
    )
}

export default Wave
我们如何将组件添加到 mdx 文件?😲
团队.md:
import Wave from '../components/wave/wave'

# Contact Me

Welcome to contact page 🥳

## You can wave to Me

<Wave />
是的,就是这样。只需导入组件并将其添加到该位置即可。🤩
另外,您可以将 JSX 添加到 MDX 中。
笔记:你需要有 4 行换行符才能让 JSX 将 markdown 部分保留在里面😐
<div style = {{background: 'red'}}>
// 1
// 2
## helloo
// 3
// 4
</div>
使用 MDX 构建博客
使用 mdx 创建两个帖子。
你好世界.mdx:
---
title: "Hello World!"
slug: hello-world
author: Suprabha
---

This is my first blog post!
里面---叫做frontmatter。
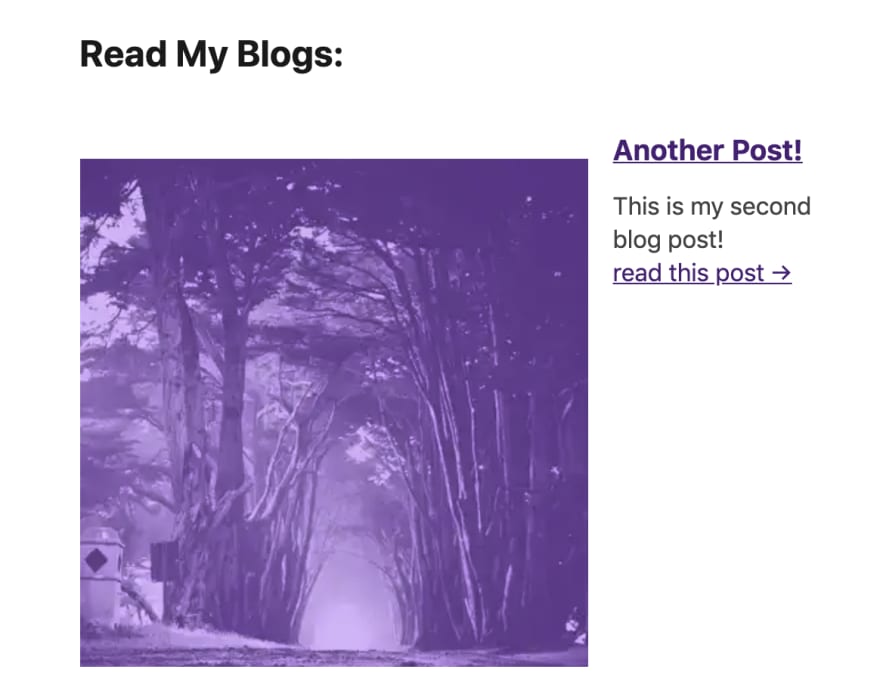
另一篇帖子.mdx:
---
title: Another Post!
slug: another-post
author: Suprabha
---

This is my second blog post!
我们如何将这些帖子放入 Gatsby 视图中?🤔
使用gatsby-source-filesystem插件,您将进入数据层,以便您可以在页面中访问它们。
$ npm i gatsby-source-filesystem
gatsby-config.js:(进入插件)
{
    resolve: 'gatsby-source-filesystem',
    options: {
        name: 'posts',
        path: 'posts'
    }
}
在上面的代码片段中,我指定了路径,所以它只会在posts文件夹中查找。它会将找到的所有内容加载到 posts 路径中的数据层中。
它将获取 MDX 文件并将其转换为 GraphQL 节点。
现在,我们将使用 GraphQL 从帖子中进行查询。
在 GraphQL 中,边描述的是关系,节点描述的是数据本身。(仅限 Gatsby)
您可以在此处找到与创建帖子相关的所有更改
首页显示帖子列表后,点击任意帖子,都会显示404页面。
要解决这个问题,您需要在根目录中配置 gatsby 节点配置。
gatsby-node.js:
// gatsby give utility methods actions, graphql, reporter
// reporter is gatsby console log
exports.createPages = async ({actions, graphql, reporter}) => {
    // passing only slug, so accg to page we will fetch the rest of the data
    const result = await graphql(`
        query {
            allMdx {
                nodes {
                    frontmatter {
                        slug
                    }
                }
            }
        }
    `);
        // check the error scenario
    if(result.errors) {
        reporter.panic("failed to craete post", result.errors)
    }
        // if there is no error then getting nodes into posts variable
    const posts = result.data.allMdx.nodes
        // need to iterarte through the posts so using forEach here
    posts.forEach(post => {
        actions.createPage({
            path: post.frontmatter.slug,
            component: require.resolve("./src/templates/post/post.js"),
            context: {
                slug: `/${post.frontmatter.slug}`
            }
        });
    });
};
在上面的代码片段中,你有一个叫做 的东西context。要获取数据,post.js你需要查看 context。你可以在 Post 组件中通过以下方式获取 contextpageContext
post.js:
const PostTemplate = ({pageContext}) => (
    <pre>{JSON.stringify(pageContext, null, 2)}</pre>
)

//output
{
    "slug": "/hello-world/"
}
现在,您可以使用数据了。您也可以在 context 中传递数据title, author, body,但稍后会比较复杂,因此只需添加slug并使用该 slug 获取其余数据即可。
每当您更改gatsby 节点时,请重新启动服务器。
此处已完成以下代码。
要获取帖子预览页面中的数据,您需要查看上下文。您将根据slug/url上下文对所有数据进行查询。
post.js:
import React from 'react'
import {graphql} from 'gatsby'
import {Link} from 'gatsby'
import {MDXRenderer} from 'gatsby-plugin-mdx'
import './post.scss'
import Layout from '../../components/layout'
export const query = graphql`
query($slug: String!) {
mdx(frontmatter: {slug: {eq: $slug}}) {
frontmatter {
title
author
}
body
}
}
`
// aboved query will return data
const PostTemplate = ({data: {mdx: post }}) => (
<Layout className='post-wrapper'>
<h1>{post.frontmatter.title}</h1>
<p className='author'>Posted by author</p>
<MDXRenderer>{post.body}</MDXRenderer>
{/* <pre>{JSON.stringify(pageContext, null, 2)}</pre> */}
<Link to="/">← back to all posts</Link>
</Layout>
)
export default PostTemplate
在上面的代码片段中,您可以看到我们正在使用MDXRenderer。当您检查查询时,body它将以您无法读取的不同形式(混合了 MDX 和 JSX)。通过使用MDXRenderer,您可以以正确的格式呈现正文。
您可以在此处找到所有 graphql 操作符。
6️⃣ 处理图像
将图像添加到易于访问的静态文件夹中。
您可以将图像添加到主页,如下所示:
<div className='hero-bg'> </div>
.hero-bg {
    background-image: url('../../../static/images/banner.jpg');
    height: 50vh;
    background-position: top 40% center;
    background-size: cover;
}
我在这里添加了更改。
7️⃣ 图像优化
在此处查找有关图像优化的文章。
8️⃣ 向 MDX 帖子添加图片
您可以通过安装依赖项将图像添加到 MDX 帖子中gatsby-image:
$ npm i gatsby-image
gatsby-background-image它与gatsby-image常规图像相同。
post-preview.js:
import Image from 'gatsby-image'

<Image
    className='post-image'
    fluid={post.image.sharp.fluid}
    alt={post.title}
/>
笔记:您需要将图像添加到查询中,以便能够在帖子数据中获取它。
要将其添加到帖子数据中:
import {graphql, useStaticQuery} from 'gatsby';

const usePosts = () => {
    const data = useStaticQuery(graphql`
        query {
            allMdx {
            nodes {
                frontmatter{
                    title
                    slug
                    author
                    image {
                        sharp: childImageSharp {
                            fluid(
                                maxWidth: 200
                                maxHeight: 200
                                duotone: {shadow: "#663399", highlight: "#ddbbff"}
                            ) {
                                ...GatsbyImageSharpFluid_withWebp
                            }
                        }
                    }
                }
                excerpt
            }
            }
        }
    `)
    return data.allMdx.nodes.map(post => ({
        title: post.frontmatter.title,
        slug: post.frontmatter.slug,
        image: post.frontmatter.image,
        author: post.frontmatter.author,
        excerpt: post.excerpt
    })
    )
}

export default usePosts
在上面的代码片段中,您添加了maxWidth、maxHeight和duoTone来定义大小,而双色调则用于模糊图像的背景颜色。
双色调选项,给定两个十六进制颜色阴影和高光定义双色调渐变的开始和结束颜色,将源图像颜色转换为匹配基于每个像素相对亮度选择的渐变颜色。
你可以在这里找到所有片段
向帖子添加优化图像
如果您想在线或在博客中显示图像,则需要安装一个名为gatsby-remark-images的插件。
你好世界.mdx:

上面的代码片段不起作用,因为 Gatsby 构建了所有文件,并且无法找到我们期望的图像路径。
$ npm i gatsby-remark-images
评论是一个可以将 markdown 转换为 HTML 的 mark down 解析器。
gatsby-config.js:
{
    resolve: 'gatsby-plugin-mdx',
    options: {
        defaultLayouts: {
            default: require.resolve('./src/components/layout')
        },
        gatsbyRemarkPlugins: ['gatsby-remark-images'],
        plugins: ['gatsby-remark-images'],
    }
}
现在,只要你重启服务器,镜像就可以正常工作了🙌🏻
9️⃣ 语法高亮
🔟 分析 Bundle 大小 🎒
最后一步是检查输出,确保你添加的内容唯一存在。为了确认这一点,你需要检查 bundle。
为了检查这一点,您将使用gatsby-plugin-webpack-bundle-analyzer插件
$ npm i gatsby-plugin-webpack-bundle-analyzer
gatsby-config.js:
{
    resolve: 'gatsby-plugin-webpack-bundle-analyzer',
    options: {
        production: true,
        disable: !process.env.ANALYZE_BUNDLE_SIZE,
        generateStatsFile: true,
        analyzerMode: 'static',
    }
}
您希望此插件仅在生产包上运行,那么禁用应该只在某些环境检查上运行。
包.json:
"scripts": {
    "analyze": "ANALYZE_BUNDLE_SIZE=true gatsby build"
}
如果你使用的是 MACbook,那么没问题。但如果你使用的是 Windows,则需要添加此脚本并添加跨环境依赖项。
"scripts": {
    "analyze": "cross-env ANALYZE_BUNDLE_SIZE=true gatsby build"
}
完成后,在终端中运行分析命令
$ npm run analyze
它会将您重定向到以下页面:

在上面的代码片段中,您可以看到捆绑包的大小以及您正在使用的图像。
如果您要导入任何 lodash 函数,请尝试通过导入它lib,这样它将下载整个 lodash 函数。
你可以在这里找到完整的代码片段😎
建立网站⛩
运行构建命令后:
$ npm run build
它会将所有静态文件生成到公共文件夹中。
然后您可以通过以下命令提供该页面:
$ npm run serve
您可以在localhost:9000
还有一件很棒的事情,如果你在主页,鼠标悬停在菜单about us链接上,它就会预加载关于我们页面的数据。所以当你进入关于我们页面时,加载速度会非常快,😍🤩(文件已经可用了)
我很快会写一篇关于如何在Netlify😍上部署 Gatsby 博客的文章
Gatsby 中的缓存清理
将以下脚本添加到package.json:
"cache": "gatsby clean"
在终端中运行它:
$ npm run cache