VSCode 和“Dev Containers”实践
“远程容器”扩展
我如何创建我的第一个开发容器
将项目作为开发容器打开
今天我想第一次尝试一下Visual Studio Code。虽然我还没找到用起来的方法,但我发现了一个扩展,它真的可以彻底改变我的工作流程!🧨 想和大家分享一下。
“远程容器”扩展
简单来说,这个扩展允许你使用 Docker 容器作为开发环境。🤯
一切都将包含在其中:您的代码、SDK、依赖项、OS 包……一切!
我已经期待这样的事情很久了,我不得不说,这个 VSCode 扩展经过深思熟虑。
使用“开发容器”有几个优点......
- 兼容性:您的代码从开发机器一直到生产都在完全相同的环境中运行
- 自动化与速度:全新开发环境的创建完全自动化。您可以在几秒钟内恢复损坏的环境(或引入新的开发人员)。
- PR 审查:您可以在新的、独立的容器中检出 PR 中的代码,而不会影响您的工作
- 太干净了!我的笔记本电脑里有很多小项目,现在都找不到了。有了开发容器,我可以:检出一个项目 -> 构建一个开发容器 -> 开发并提交我的更改 -> 立即销毁它
我如何创建我的第一个开发容器
我现在将逐步向您展示我今天如何创建我的第一个“开发容器”。
我选了一个将在本次 Hacktoberfest 上合作的项目。它是一个 Django 应用程序,所以需要我们的开发环境使用 Python3 来运行。
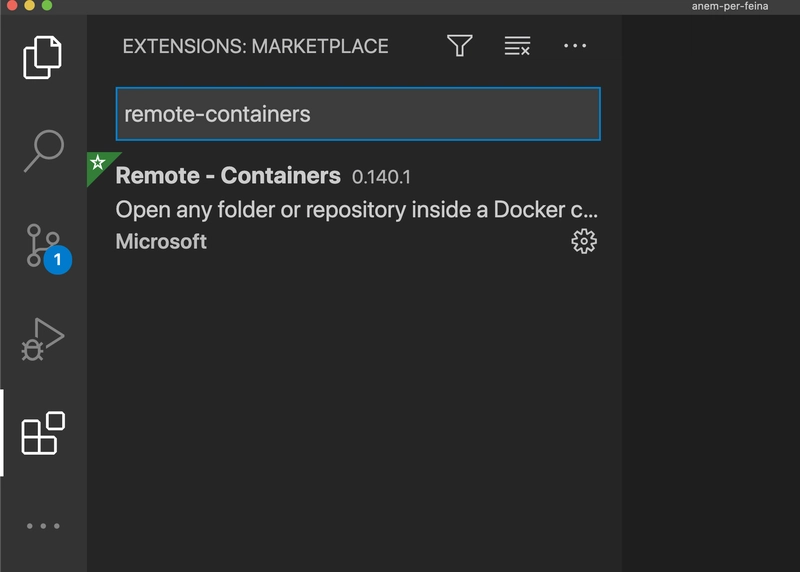
首先,从 VSCode 市场安装“远程 - 容器”扩展
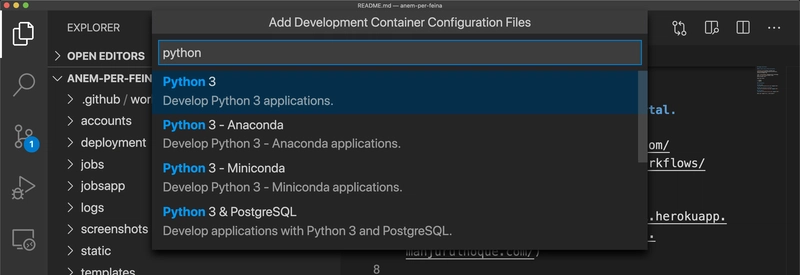
第二步,按F1打开VSCode菜单,搜索“添加开发容器配置文件”。
接下来,你需要告诉 VSCode你想如何创建配置文件。VSCode 为最流行的语言提供了预定义的配置文件,所以我很容易就找到了一个 Python3 的配置文件😊
然后会要求您选择要使用的 Python 次要版本,以及是否要在容器中安装 NodeJS(不确定为什么🤔,但我现在不在乎)。
VSCode 应该已经为您创建了一个名为的新文件夹.devcontainer并生成了两个文件:
- a
Dockerfile:这是新开发环境的容器定义 - 一个
devcontainer.json文件:一个配置文件,您可以使用它来进一步定制您的开发容器构建过程。
自定义.devcontainer/Dockerfile
我们首先看一下 Dockerfile,它看起来应该是这样的:
# See here for image contents: https://github.com/microsoft/vscode-dev-containers/tree/v0.140.1/containers/python-3/.devcontainer/base.Dockerfile

# [Choice] Python version: 3, 3.8, 3.7, 3.6
ARG VARIANT="3"
FROM mcr.microsoft.com/vscode/devcontainers/python:0-${VARIANT}

# [Option] Install Node.js
ARG INSTALL_NODE="true"
ARG NODE_VERSION="lts/*"
RUN if [ "${INSTALL_NODE}" = "true" ]; then su vscode -c "source /usr/local/share/nvm/nvm.sh && nvm install ${NODE_VERSION} 2>&1"; fi

# [Optional] If your pip requirements rarely change, uncomment this section to add them to the image.
# COPY requirements.txt /tmp/pip-tmp/
# RUN pip3 --disable-pip-version-check --no-cache-dir install -r /tmp/pip-tmp/requirements.txt \
#    && rm -rf /tmp/pip-tmp

# [Optional] Uncomment this section to install additional OS packages.
# RUN apt-get update && export DEBIAN_FRONTEND=noninteractive \
#     && apt-get -y install --no-install-recommends <your-package-list-here>

# [Optional] Uncomment this line to install global node packages.
# RUN su vscode -c "source /usr/local/share/nvm/nvm.sh && npm install -g <your-package-here>" 2>&1
我们在这里要做的是确保这个容器镜像包含运行项目所需的一切。在本例中,我需要安装文件中列出的所需 Pip 包requirements.txt。
生成的 Dockerfile 已经给出了操作建议,我只需取消几行注释即可。这将是我最终的 Dockerfile:
# [Choice] Python version: 3, 3.8, 3.7, 3.6
ARG VARIANT="3"
FROM mcr.microsoft.com/vscode/devcontainers/python:0-${VARIANT}

# [Option] Install Node.js
ARG INSTALL_NODE="true"
ARG NODE_VERSION="lts/*"
RUN if [ "${INSTALL_NODE}" = "true" ]; then su vscode -c "source /usr/local/share/nvm/nvm.sh && nvm install ${NODE_VERSION} 2>&1"; fi

COPY requirements.txt /tmp/pip-tmp/
RUN pip3 --disable-pip-version-check --no-cache-dir install -r /tmp/pip-tmp/requirements.txt \
   && rm -rf /tmp/pip-tmp
配置.devcontainer/devcontainer.json
VSCode 生成的第二个文件是devcontainer.json。它包含 VSCode 创建开发容器的附加信息。以下是我的设置方法。
第一部分是定义如何构建容器。我保留了所有内容的默认值。
        "name": "Python 3",
    "build": {
        "dockerfile": "Dockerfile",
        "context": "..",
        "args": {
            // Update 'VARIANT' to pick a Python version: 3, 3.6, 3.7, 3.8
            "VARIANT": "3.8",
            // Options
            "INSTALL_NODE": "false",
            "NODE_VERSION": "lts/*"
        }
    },
由于我的 Django 应用程序将在 上运行http://127.0.0.1:8000,我需要将端口 8000 从主机转发到容器中,因此我取消注释并编辑了下面的行。
    // Use 'forwardPorts' to make a list of ports inside the container available locally.
    "forwardPorts": [8000],
我建议您花时间阅读该文件以了解所有可用的选项,但以下是更改后的文件内容:
// For format details, see https://aka.ms/devcontainer.json. For config options, see the README at:
// https://github.com/microsoft/vscode-dev-containers/tree/v0.140.1/containers/python-3
{
    "name": "Python 3",
    "build": {
        "dockerfile": "Dockerfile",
        "context": "..",
        "args": {
            // Update 'VARIANT' to pick a Python version: 3, 3.6, 3.7, 3.8
            "VARIANT": "3.8",
            // Options
            "INSTALL_NODE": "false",
            "NODE_VERSION": "lts/*"
        }
    },

    // Set *default* container specific settings.json values on container create.
    "settings": {
        "terminal.integrated.shell.linux": "/bin/bash",
        "python.pythonPath": "/usr/local/bin/python",
        "python.linting.enabled": true,
        "python.linting.pylintEnabled": true,
        "python.formatting.autopep8Path": "/usr/local/py-utils/bin/autopep8",
        "python.formatting.blackPath": "/usr/local/py-utils/bin/black",
        "python.formatting.yapfPath": "/usr/local/py-utils/bin/yapf",
        "python.linting.banditPath": "/usr/local/py-utils/bin/bandit",
        "python.linting.flake8Path": "/usr/local/py-utils/bin/flake8",
        "python.linting.mypyPath": "/usr/local/py-utils/bin/mypy",
        "python.linting.pycodestylePath": "/usr/local/py-utils/bin/pycodestyle",
        "python.linting.pydocstylePath": "/usr/local/py-utils/bin/pydocstyle",
        "python.linting.pylintPath": "/usr/local/py-utils/bin/pylint"
    },

    // Add the IDs of extensions you want installed when the container is created.
    "extensions": [
        "ms-python.python"
    ],

    // Use 'forwardPorts' to make a list of ports inside the container available locally.
    "forwardPorts": [8000],

    // Use 'postCreateCommand' to run commands after the container is created.
    // "postCreateCommand": "pip3 install --user -r requirements.txt",

    // Uncomment to connect as a non-root user. See https://aka.ms/vscode-remote/containers/non-root.
    // "remoteUser": "vscode"
}
将项目作为开发容器打开
现在一切准备就绪,我们F1再次按下并搜索“在容器中重新打开”选项。
VSCode 现在将从您创建的创建一个新的开发Dockerfile容器devcontainer.json。
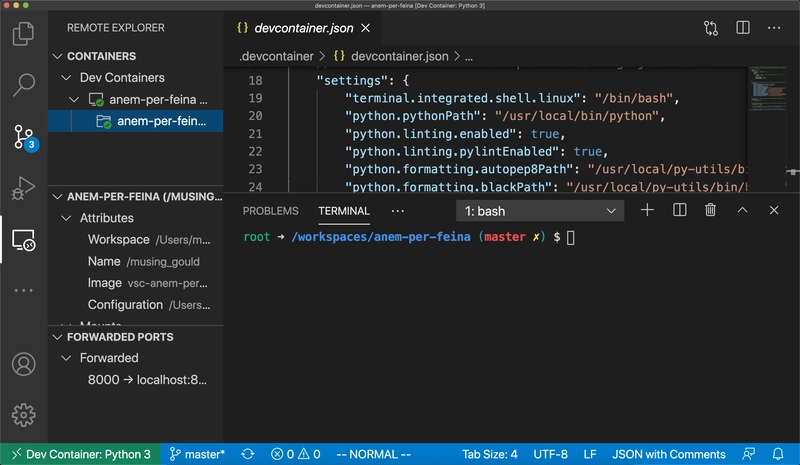
您的工作区中的项目文件现在已与容器同步,VSCode 将直接在其中编辑它们。
您会注意到屏幕左下方的绿色条纹,表示 VSCode 未附加到我们的Python 3开发容器。
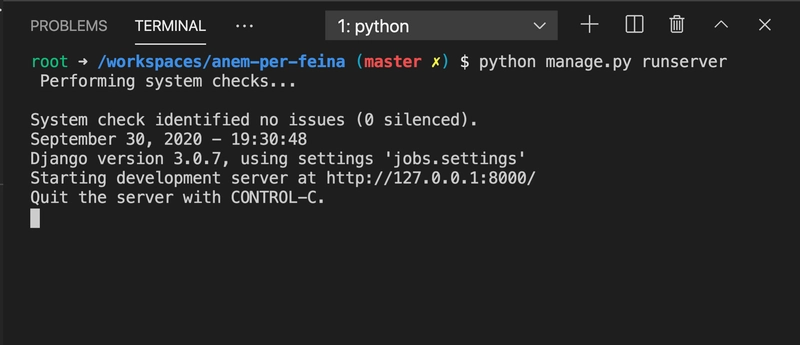
为了测试我们的全新环境,让我们运行该应用程序python manage.py runserver
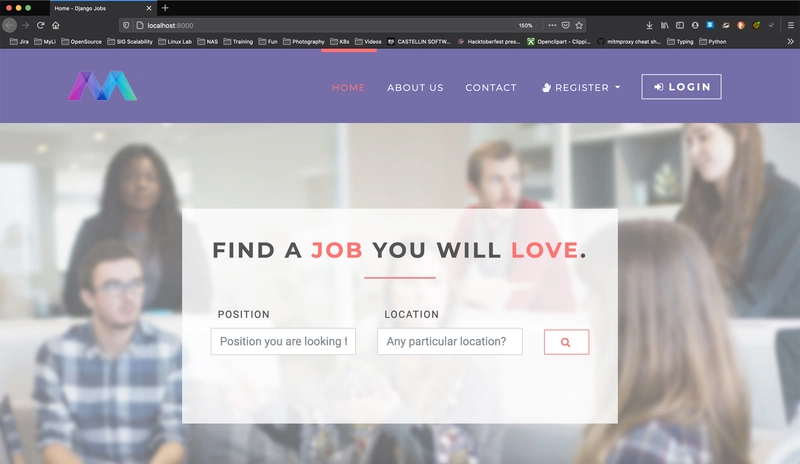
耶!应用程序现在已在端口上运行8000,并已正确转发localhost!
这是我今天使用 Dev Containers 的经历......
到目前为止,这个 VSCode 扩展给我留下了深刻的印象,我期待着通过每天使用它来了解更多信息。
希望这个介绍能够激励其他人开始使用 VSCode 中的 Dev Containers。
感谢你读到最后!想看更多类似内容,别忘了关注我!
文章来源:https://dev.to/mcastellin/hands-on-with-vscode-dev-containers-33bf 后端开发教程 - Java、Spring Boot 实战 - msg200.com
