使用 react 和 Emly 构建自动 URL 缩短器
自动链接缩短功能正日益流行。顶级科技公司(例如 Twitter 和 LinkedIn)正在利用自动链接缩短功能来缩短那些看起来糟糕的 URL 的长度。Twitter 利用T.co这种技术来缩短在其微博平台上发布的 URL。LinkedIn 也使用同样的技术来缩短其平台上发布的链接。
在本教程中,我们将探讨如何使用Emly.cc在 React 中实现自动链接缩短。
要学习本 React 教程,您应该具备:
- 熟悉 CSS、HTML 和 Javascript ES6
- 您的系统上安装了 Node.js
- 系统中安装的网络浏览器,例如 Chrome
- 安装在开发机器上的代码编辑器,即 VS Code
- 对 React 的基本了解
设置 Emly 帐户
访问http://emly.cc/register创建一个新帐户。
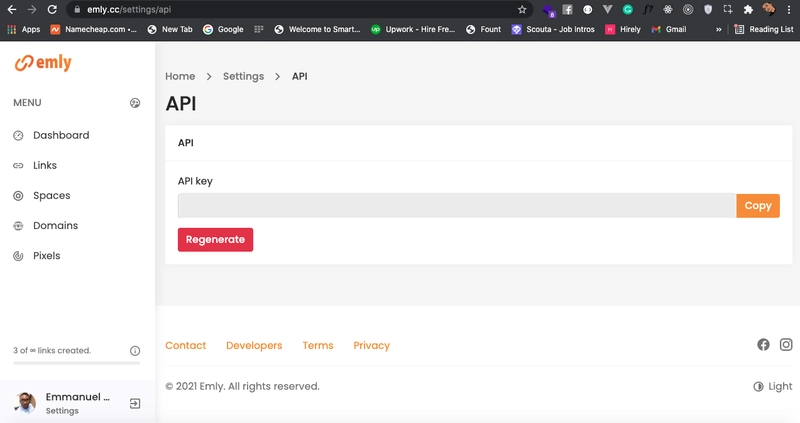
接下来,从仪表板获取 API 密钥。向下滚动到页脚,点击“开发者”,选择链接,然后点击“获取 API 密钥”。参见下方截图:
有了您的 API 密钥,让我们在下一部分继续构建我们的项目。
构建前端
在开始之前,让我们初始化一个新的 React 应用,安装emly-nodejs SDK,并为项目设置一个后端服务器。导航到你的工作目录,并在终端(mac用户终端)或命令提示符(windows用户命令提示符)中运行以下代码,以初始化一个新的 React 项目。
npx create-react-app emly-app
接下来,运行下面的代码来测试运行您的应用程序。
cd emly-app &&
npm start
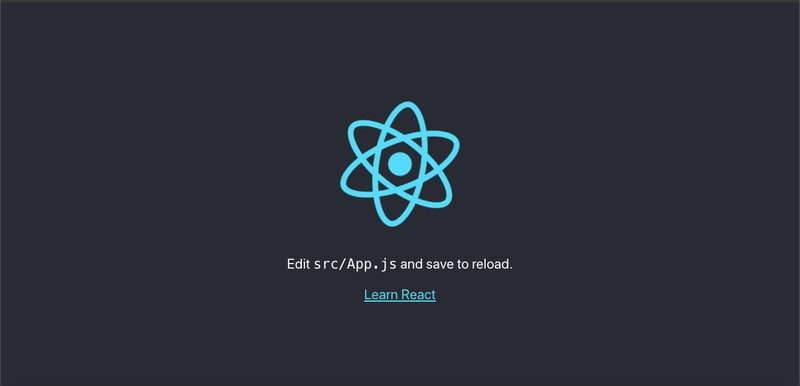
您的应用程序应该看起来类似于下面的屏幕截图。
接下来,创建一个新文件夹components,导航到该文件夹并创建一个文件ResizeableTextbox.js,然后复制粘贴下面的代码。
import React from 'react';
import axios from 'axios';
class ResizableTextarea extends React.PureComponent {
    constructor(props) {
        super(props);
        this.state = {
            post: '',
            rows: 5,
            minRows: 5,
            maxRows: 20,
            showPost: false,
            newPost: null,
        };
        this.handelSubmit = this.handelSubmit.bind(this);
        this.handleChange = this.handleChange.bind(this);
        this.getUrl = this.getUrl.bind(this);
        this.replaceUrl =  this.replaceUrl.bind(this);
    }

    replaceUrl = (post) => {
        if(!post) return;
        var urlRegex = /(((https?:\/\/)|(www\.))[^\s]+)/g;
        return post.replace(urlRegex, function(url) {
            var link = url;
            if (!link.match('^https?:\/\/') ) {
                link = 'http://' + link;
            }
        return '<a href="' + link + '" target="_blank" rel="noopener noreferrer">' + url + '</a>'
        })
    }
    getUrl = (post) => {
        var urlRegex = /(((https?:\/\/)|(www\.))[^\s]+)/g;
        return post.match(urlRegex);
    }
    handleChange = (event) => {
        const textareaLineHeight = 24;
        const { minRows, maxRows } = this.state;
        const previousRows = event.target.rows;
        event.target.rows = minRows; // reset number of rows in textarea
        const currentRows = ~~(event.target.scrollHeight / textareaLineHeight);
        if (currentRows === previousRows) {
            event.target.rows = currentRows;
        }
        if (currentRows >= maxRows) {
            event.target.rows = maxRows;
            event.target.scrollTop = event.target.scrollHeight;
        }
        this.setState({
            post: event.target.value,
            rows: currentRows < maxRows ? currentRows : maxRows,
        });
    };
    handelSubmit = (e) => {
        e.preventDefault();
        let post = this.state.post;
        let urls = this.getUrl(post);
        var urlRegex = /(((https?:\/\/)|(www\.))[^\s]+)/g;
        var self = this;

        axios.post('http://localhost:9000/create',
            { url: urls[0] })
            .then(function (res) {
                if (res.data) {
                    const url = res.data.data.short_url;
                    const newPost =   post.replace(urlRegex, res.data.data.short_url);
                  self.setState({
                    showPost: true,
                    newPost: newPost
                });
                }
            })
    }
    render() {
        return (
            <div className="col-md-8">
                {!this.state.showPost && <form onSubmit={this.handelSubmit}>
                    <label className="form-label">Creat a Post</label>
                    <textarea
                        rows={this.state.rows}
                        value={this.state.post}
                        placeholder={'Enter your text here...'}
                        className={'textarea'}
                        onChange={this.handleChange}
                    />
                    <button type="submit" className="btn btn-warning">Publish</button>
                </form>}
                {this.state.showPost &&
                    <div className="card" style={{border: '1px', margin: "20px"}}>
                        <div className="card-body">
                            <p className="card-text m-4">
                            <span dangerouslySetInnerHTML={{__html: this.replaceUrl(this.state.newPost)}} />
                            </p>
                        </div>
                    </div>
                }
            </div>
        );
    }
}
export default ResizableTextarea;
从上面的代码片段可以看出,当用户提交表单时,handelSubmit函数会被调用,我们使用正则表达式urlRegex从帖子中搜索 URL,并将其传递给后端服务器,后端服务器随后与 emly.cc 的 API 通信以获取缩短的链接。该replaceUrl函数会再次搜索帖子,这次将缩短的 URL 转换为可点击的超链接。
App.js接下来,使用下面的代码更新代码。
import './App.css';
import ResizableTextarea from './components/ResizeableTextbox';
function App() {
  return (
    <div className="App">
      <header className="App-header">
      <ResizableTextarea/>
      </header>
    </div>
  );
}
export default App;
mac接下来,在终端或命令提示符中运行以下代码,以便windows用户启动您的应用程序。
最后,使用下面的代码更新 App.css。
.App-header {
  background-color: #282c34;
  min-height: 100vh;
  display: flex;
  flex-direction: column;
  align-items: center;
  justify-content: center;
  font-size: calc(10px + 2vmin);
  color: #ffffff;
}

.App-link {
  color: #61dafb;
}

.textarea {
  box-sizing: border-box;
  border: none;
  border-radius: 3px;
  resize: none;
  font-size: 20px;
  line-height: 24px;
  overflow: auto;
  height: auto;
  color: #282c34;
  padding: 8px;
  width: 100%;
  box-shadow: 0px 4px 10px -8px black;
}
.textarea::-moz-placeholder {
  color: gainsboro;
}
.textarea:-ms-input-placeholder {
  color: gainsboro;
}
.textarea::placeholder {
  color: gainsboro;
}
.textarea:focus {
  outline: none;
}
现在,使用以下命令运行该应用程序。
npm run start
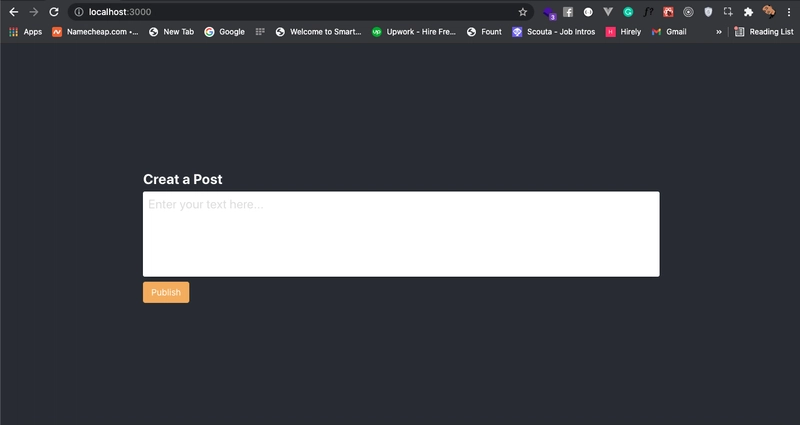
您的应用程序应该看起来类似于下面的屏幕截图。
构建后端服务器
现在您已经完成了项目的前端,让我们继续构建一个可以处理所有后端请求的服务器。
导航到您的工作目录并按照以下说明初始化一个新Nodjs项目。
mkdir emly-server &&
npm init -y
初始化完成后,运行以下代码来安装emly-nodejsSDK和本节所需的其他依赖项。
npm i emly-nodejs body-parser cors dotenv express nodemon
现在,创建一个新文件 index.js,并复制粘贴下面的代码。
require('dotenv').config();
const express = require('express');
const app = express();
const cors = require('cors');
const bodyParser = require('body-parser');
const port = 9000;
const emly = require('emly-nodejs')(process.ev.KEY);

//Body-Parser
app.use(express.json({limit: '50mb'}));
app.use(bodyParser.urlencoded({limit: "50mb", extended: true }));
app.use(bodyParser.json());
//handel cors
app.use(function(req, res, next) {
    res.header("Access-Control-Allow-Origin", "*");
    res.header("Access-Control-Allow-Headers", "X-Requested-With");
    next();
});
app.use(cors({
    origin: '*',
    methods: ['GET','POST','DELETE','UPDATE','PUT','PATCH']
}));

app.get('/links', (req, res) => {
   emly.link.list()
   .then(function(body){
       res.send(body);
   })
   .catch(function(error){
       res.send(error);
   })
})
app.post('/create', (req, res) => {
    const {url} = req.body;
    emly.link.create({
        url: url,
      })
        .then(function(error, body) {
            res.send(error);
            res.send(body);
    });
 })

app.listen(port, () => {
    console.log(`Server is listening at ${port}`);
})
注意:请尽量创建一个 .env 文件并添加你的 API 密钥。请参阅下面的示例。
KEY=your_api_key_goes_here
接下来运行下面的代码来启动服务器。
npm run serve
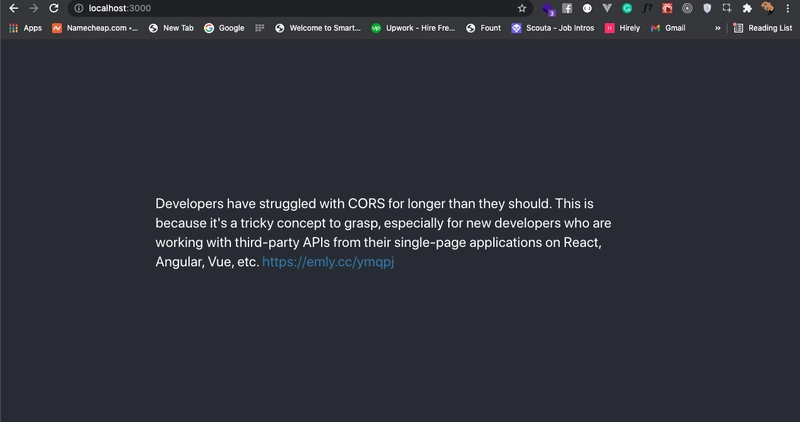
在后端和前端服务器运行后,在文本框中添加带有长 URL 的文本,然后点击“发布”。文章发布后,您的应用应该类似于下面的屏幕截图。
结论
无论您是想为现有的 React 应用程序添加自动URL缩短功能,还是想获得移动/网络应用程序上共享的所有链接的详细分析,emly.cc的 URL 缩短器都可以API在几分钟内为您提供详细的帮助。
 后端开发教程 - Java、Spring Boot 实战 - msg200.com
