如何使用 HTML、CSS 和 JavaScript 构建待办事项列表应用程序
JavaScript 项目 52 周中的第 01 周
概述:
欢迎来到我们的 JavaScript 待办事项列表应用程序编码教程。
在本文中,我们将引导您逐步使用HTML、CSS以及JavaScript从头开始构建功能齐全的待办事项列表应用程序。
您将学习如何实现基本的CRUD操作(创建、读取、更新和删除),从而有效地管理您的任务。这些操作包括从列表中读取数据、添加任务、将其标记为已完成、编辑现有任务以及从列表中移除任务等功能,并且我们为上述操作制作了炫酷的😍动画。
💫观看实时预览👉待办事项列表应用程序
在整个视频中,我们将介绍 DOM 操作、事件处理和本地存储集成等关键概念,使您能够无缝保存和检索任务。
📝 使用 JavaScript 实现本地存储的 Todo 应用 👇
看完本视频后,您将拥有一个功能强大的待办事项列表应用程序,您可以轻松地自定义它并用于日常任务管理。
重要提示:
In the Todo App tutorial, we have stored our data list in local storage. The localStorage object allows you to save key/value pairs in the browser. The data is not deleted when the browser is closed/refreshed and is available for future sessions.
现在就让我们开始创建你自己的 JavaScript 待办事项列表应用吧!祝你编程愉快!
您可能会喜欢这个: 初学者应该如何开始编程?
介绍:
待办事项列表应用是提升效率的绝佳方式,也是保持井然有序、有效管理任务的绝佳方式。在本快速指南中,我们将引导您逐步创建自己的待办事项列表应用。
先决条件:
具备 HTML、CSS 和 JavaScript 的基础知识。
自选代码编辑器。
步骤 1:设置您的项目:
为您的项目创建一个新文件夹,项目名称根据您的意愿而定(我创建的项目名为) Todo App,并在其中创建三个文件:index.html、style.css和script.js。这些文件将作为您的待办事项列表应用的基础。或者,如果您想克隆我的Project-Structure-Example并开始与我合作。
第 2 步:构建基本 HTML 结构:
在index.html文件中,为您的应用创建 HTML 结构,并将带有链接文件(style.css,script.js)的 HTML 样板添加到 HTML 文件中。
<!DOCTYPE html>
<html lang="en">
  <head>
    <meta charset="UTF-8" />
    <meta name="viewport" content="width=device-width, initial-scale=1.0" />
    <title>To Do Application - By Sharathchandar.K</title>
    <link rel="stylesheet" href="style.css" />
  </head>
  <body>
    <script type="text/javascript" src="script.js"></script>
  </body>
</html>
首先,在 body 元素中添加divwith 类container。div 标签定义 HTML 文档中的分区或部分。
<div class="container">
<!-- Inside the container will add an input field for adding tasks, a list to display the tasks, and buttons for adding and removing tasks.-->
</div>
步骤 3:使用 CSS 设置您的 Todo 应用程序的样式:
在style.css文件中,添加 CSS 规则以使您的应用程序具有视觉吸引力。
我们将所有元素的边距和填充都设置为零,从而使它们在所有浏览器中看起来都一样。借助*我最喜欢的 font-family Poppins。
@import url("https://fonts.googleapis.com/css2?family=Poppins:wght@400;500;600&display=swap");
* {
  margin: 0;
  padding: 0;
  font-family: "Poppins", sans-serif;
  box-sizing: border-box;
}
现在将所有 HTML 元素设置到屏幕的中心,因为这将为和添加body样式.container。
body {
  background: #78c1f3;
  min-height: 100vh;
  display: flex;
  align-items: center;
  justify-content: center;
}

.container {
  background: #ffffff;
  padding: 25px;
  width: 550px;
  border-radius: 10px;
}
步骤 4:实现 Todo Header 和 Body:
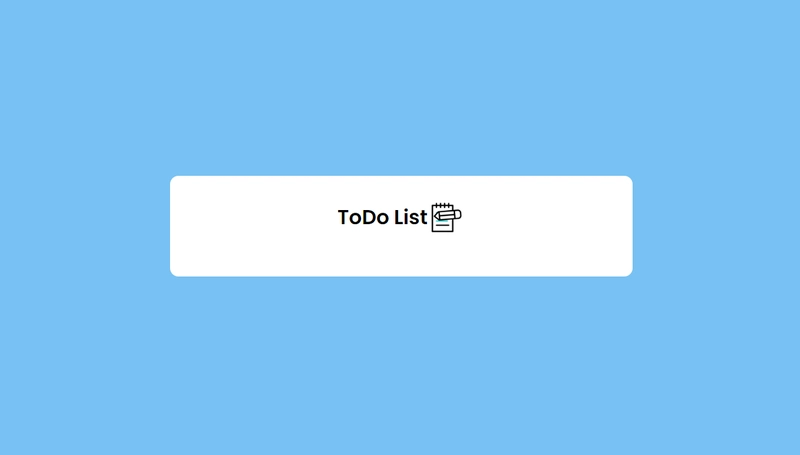
现在我们将在容器内添加 Todo Header 的 HTML 元素。
<div class="todo-header">
     <h2>ToDo List</h2>
     <img src="/images/notebook.gif" height="50px" />
</div>
.todo-header {
  display: flex;
  align-items: center;
  margin-bottom: 20px;
  padding-left: 5px;
  justify-content: center;
}
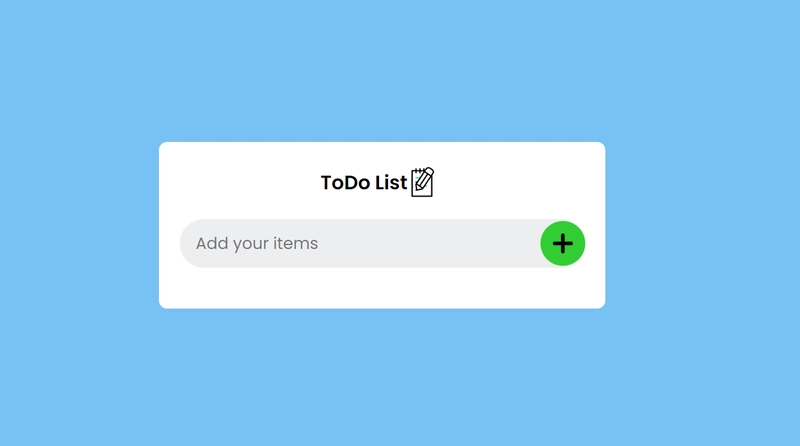
现在我们将在 todo 标题下方的容器内添加 Todo Body 的 HTML 元素,您需要一个用于添加任务的输入字段、一个用于显示任务的列表以及用于添加和删除任务的按钮。
<div class="todo-body">
<input
    type="text"
    id="todoText"
    class="todo-input"
    placeholder="Add your items"
/>
<img
    src="/images/plus.png"
    alt="+"
    id="AddUpdateClick"
    onclick="CreateToDoItems();"
/>
</div>
.todo-body {
  display: flex;
  align-items: center;
  justify-content: space-between;
  background: #edeef0;
  border-radius: 30px;
  padding-left: 20px;
  margin-bottom: 25px;
}

.todo-body input {
  flex: 1;
  border: none;
  outline: none;
  background: transparent;
  padding: 15px 0;
  font-size: 20px;
}

.todo-body img {
  cursor: pointer;
  border-radius: 40px;
  height: 55px;
  width: 55px;
  padding: 15px;
  background: limegreen;
}
步骤 5:创建一个带有验证的列表来显示待办事项信息:
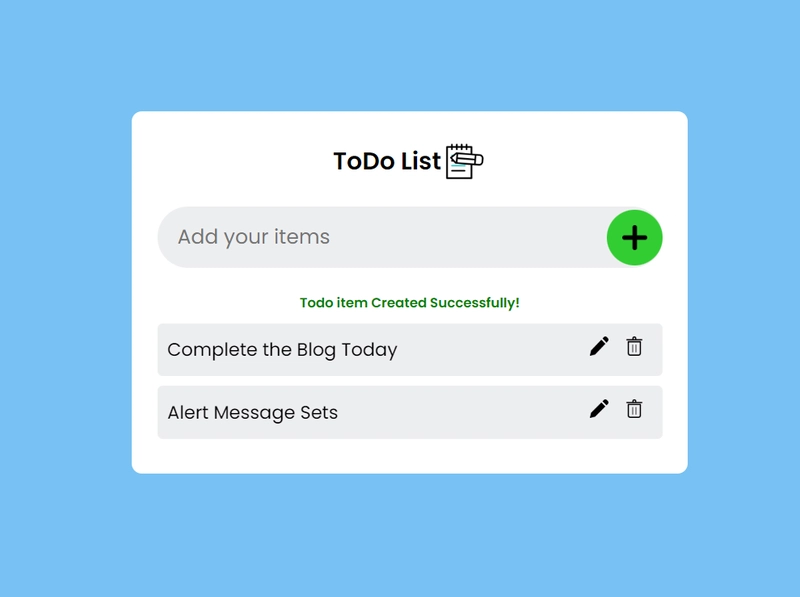
此处将添加h5标签来显示用户所做活动的验证。例如:用户添加、更新、完成或删除待办事项,然后添加ul无序列表来显示包含用户添加信息的数据列表。
<h5 id="Alert"></h5>
<ul id="list-items" class="list-items"></ul>
ul li {
  list-style: none;
  font-size: 18px;
  cursor: pointer;
  padding: 10px;
}

li {
  display: flex;
  align-items: center;
  justify-content: space-between;
  background: #edeef0;
  margin-bottom: 10px;
  border-radius: 5px;
}

h5 {
  text-align: center;
  margin-bottom: 10px;
  color: green;
}

.todo-controls {
  width: 25px;
  height: 25px;
  padding: 3px;
  margin-right: 5px;
}
步骤 6:实现 JavaScript 功能:
在script.js文件中编写 JavaScript 代码,使您的应用具有交互性。创建用于添加任务、删除任务和清除整个列表的函数。您可以使用文档对象模型 (DOM) 来操作 HTML 中的元素。
首先将借助document对象声明所有声明,文档对象代表网页上所有其他对象的所有者。
const todoValue = document.getElementById("todoText");
const todoAlert = document.getElementById("Alert");
const listItems = document.getElementById("list-items");
const addUpdate = document.getElementById("AddUpdateClick");
接下来将localstorage借助 来声明对象key:todo-list。
let todo = JSON.parse(localStorage.getItem("todo-list"));
if (!todo) {
  todo = [];
}
接下来将添加functions用于CREATE、READ、UPDATE和DELETE
的函数 。该函数是用于执行特定任务的代码块。JavaScript 函数在“某些东西”调用它时执行。
下面这个函数将有助于在列表中创建新任务以及一些附加功能:
- 第一个工具将检查用户是否输入了任务,如果用户未输入就尝试添加工具,将显示名为“请输入您的待办事项文本!”的错误消息。
- 如果用户在文本框中输入任何任务并点击其旁边的按钮,工具将自动添加到列表中
localstorage。 - 如果用户添加列表中已经存在的相同任务,则该工具将通知“该项目已存在于列表中!”。
- 添加任务是唯一的,因为如果已经存在添加相同的任务,则无需再次添加,因此该工具将发出警报。
- 一旦用户将任务添加到列表工具中将显示响应消息“待办事项创建成功!”;
- 在列表中,用户可以看到具有两个选项的列表,一个是🖉编辑,另一个是🗑️删除。(这将通过下面的功能进行解释)
function CreateToDoItems() {
  if (todoValue.value === "") {
    todoAlert.innerText = "Please enter your todo text!";
    todoValue.focus();
  } else {
    let IsPresent = false;
    todo.forEach((element) => {
      if (element.item == todoValue.value) {
        IsPresent = true;
      }
    });

    if (IsPresent) {
      setAlertMessage("This item already present in the list!");
      return;
    }

    let li = document.createElement("li");
    const todoItems = `<div title="Hit Double Click and Complete" ondblclick="CompletedToDoItems(this)">${todoValue.value}</div><div>
                    <img class="edit todo-controls" onclick="UpdateToDoItems(this)" src="/images/pencil.png" />
                    <img class="delete todo-controls" onclick="DeleteToDoItems(this)" src="/images/delete.png" /></div></div>`;
    li.innerHTML = todoItems;
    listItems.appendChild(li);

    if (!todo) {
      todo = [];
    }
    let itemList = { item: todoValue.value, status: false };
    todo.push(itemList);
    setLocalStorage();
  }
  todoValue.value = "";
  setAlertMessage("Todo item Created Successfully!");
}
下面这个函数帮助我们从本地存储读取数据并在待办事项列表中显示一些附加功能:
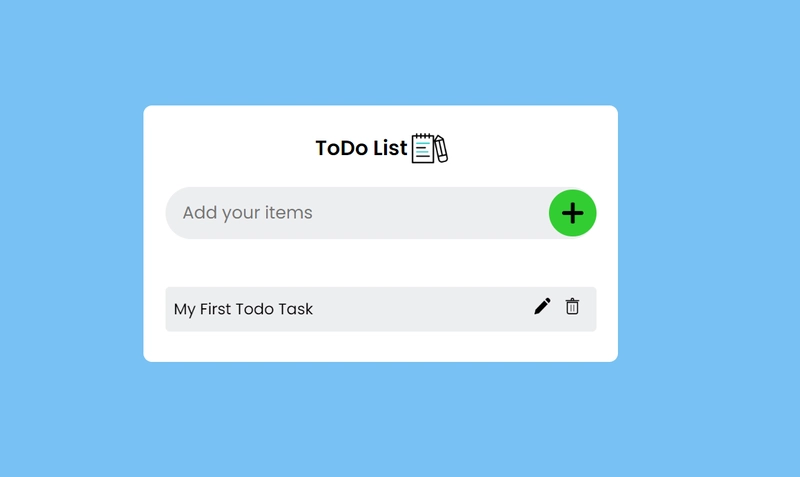
- 在列表中,用户可以列出添加到任务应用程序的所有数据。它是从中检索的
localstorage。 - 如果用户刷新浏览器或关闭浏览器,
localstorage数据将一直保留并再次显示。 - 在列表中,用户可以看到一个包含两个选项的列表,一个是🖉编辑,另一个是🗑️删除。(这将通过下面的功能进行解释)
function ReadToDoItems() {
  todo.forEach((element) => {
    let li = document.createElement("li");
    let style = "";
    if (element.status) {
      style = "style='text-decoration: line-through'";
    }
    const todoItems = `<div ${style} title="Hit Double Click and Complete" ondblclick="CompletedToDoItems(this)">${
      element.item
    }
    ${
      style === ""
        ? ""
        : '<img class="todo-controls" src="/images/check-mark.png" />'
    }</div><div>
    ${
      style === ""
        ? '<img class="edit todo-controls" onclick="UpdateToDoItems(this)" src="/images/pencil.png" />'
        : ""
    }
    <img class="delete todo-controls" onclick="DeleteToDoItems(this)" src="/images/delete.png" /></div></div>`;
    li.innerHTML = todoItems;
    listItems.appendChild(li);
  });
}
ReadToDoItems();
以下函数将有助于将用户添加的任务更新到同一列表中,并附带一些附加功能:
- 用户可以借助列表上的铅笔图标编辑选项来修改列表中已有的待办事项数据。
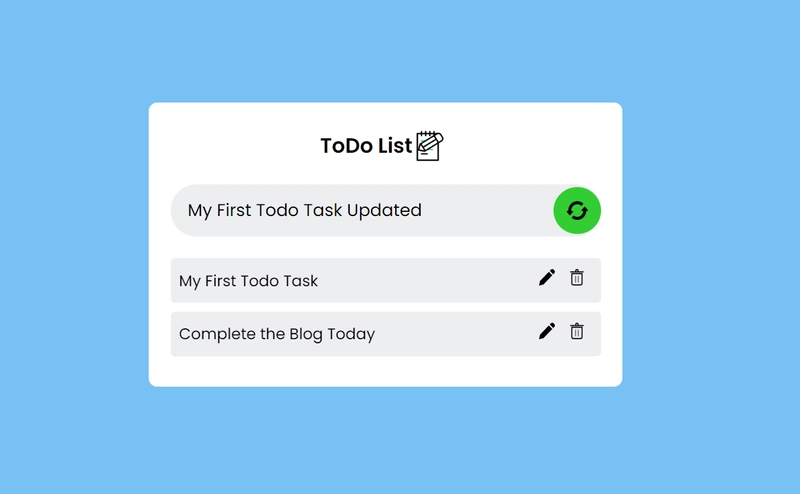
- 一旦用户点击此🖉工具将获取所选任务值并将其分配给文本框和按钮图标更改以更新。
- 如果用户对任务进行任何更改并点击更新,它也会在列表中更新
localstorage。 - 如果未进行任何更改并且用户尝试点击更新,该工具将显示警告消息“此项目已存在于列表中!”。
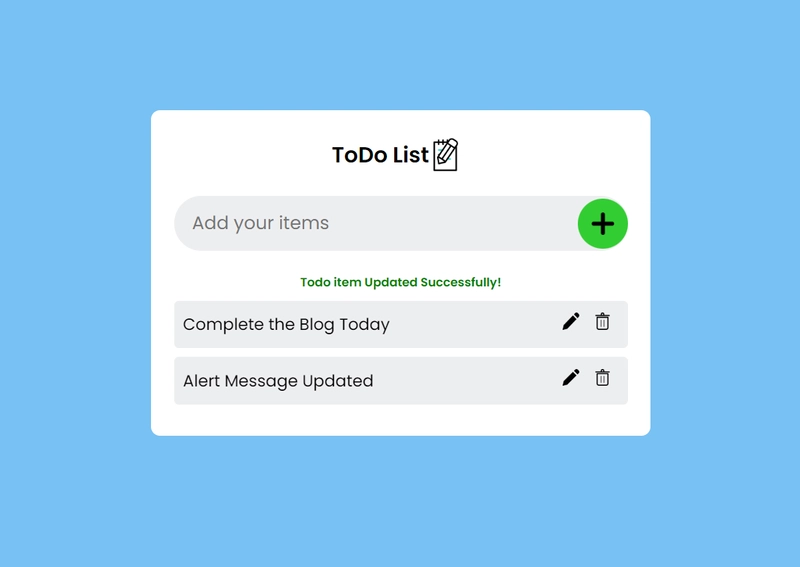
- 一旦用户更改并点击更新工具将发送响应消息“待办事项更新成功!”
function UpdateToDoItems(e) {
  if (
    e.parentElement.parentElement.querySelector("div").style.textDecoration ===
    ""
  ) {
    todoValue.value =
      e.parentElement.parentElement.querySelector("div").innerText;
    updateText = e.parentElement.parentElement.querySelector("div");
    addUpdate.setAttribute("onclick", "UpdateOnSelectionItems()");
    addUpdate.setAttribute("src", "/images/refresh.png");
    todoValue.focus();
  }
}

function UpdateOnSelectionItems() {
  let IsPresent = false;
  todo.forEach((element) => {
    if (element.item == todoValue.value) {
      IsPresent = true;
    }
  });

  if (IsPresent) {
    setAlertMessage("This item already present in the list!");
    return;
  }

  todo.forEach((element) => {
    if (element.item == updateText.innerText.trim()) {
      element.item = todoValue.value;
    }
  });
  setLocalStorage();

  updateText.innerText = todoValue.value;
  addUpdate.setAttribute("onclick", "CreateToDoItems()");
  addUpdate.setAttribute("src", "/images/plus.png");
  todoValue.value = "";
  setAlertMessage("Todo item Updated Successfully!");
}
以下功能有助于从列表中删除localstorage任务数据以及一些附加功能:
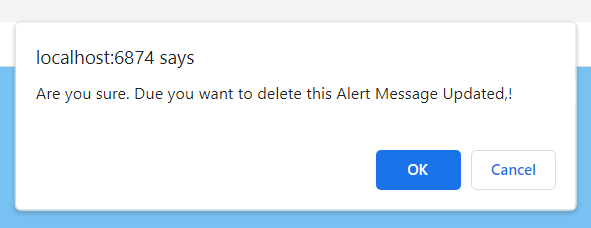
- 如果用户点击列表工具中的🗑️删除图标,将显示确认警报消息“您确定吗?由于您要删除此$TaskName”。
- 如果用户在确认窗口上说“确定”,工具也会自动从列表中删除任务数据
localstorage。 - 如果用户说取消,则什么都不会改变。此确认消息显示用户意识到点击了正确的事件。
function DeleteToDoItems(e) {
  let deleteValue =
    e.parentElement.parentElement.querySelector("div").innerText;

  if (confirm(`Are you sure. Due you want to delete this ${deleteValue}!`)) {
    e.parentElement.parentElement.setAttribute("class", "deleted-item");
    todoValue.focus();

    todo.forEach((element) => {
      if (element.item == deleteValue.trim()) {
        todo.splice(element, 1);
      }
    });

    setTimeout(() => {
      e.parentElement.parentElement.remove();
    }, 1000);

    setLocalStorage();
  }
}
以下函数有助于更改任务的状态(如果任务已完成✔则为完成状态),并附带一些附加功能:
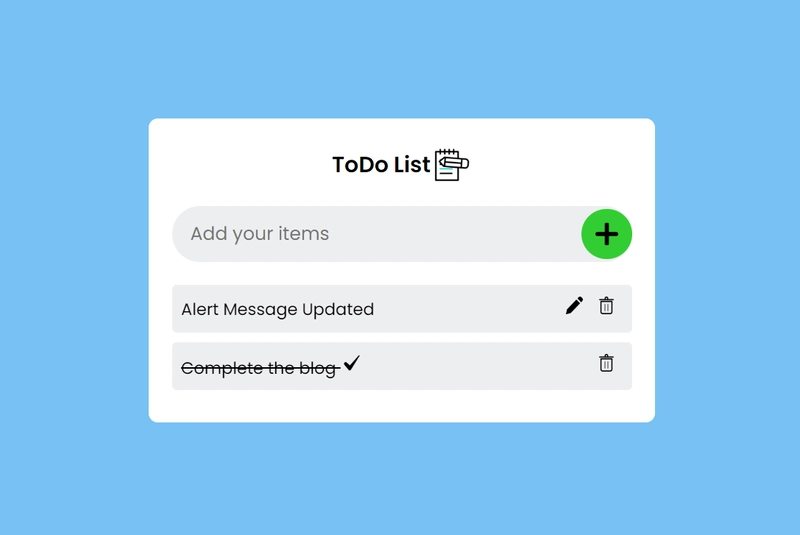
- 一旦用户完成任务,他希望该任务留在列表中而不被删除,因此我们想出了一个想法来改变样式并将该任务设置为已完成图标✔。
- 因此,一旦用户完成任务,他/她可以双击该任务,工具将更改样式为划线并在其旁边添加复选标记✔图标。
- 一旦用户完成任务,他/她将无法编辑,用户需要在设置完成之前确认。
- 只会向用户显示一个选项,他/她可以🗑️删除该任务。
function CompletedToDoItems(e) {
  if (e.parentElement.querySelector("div").style.textDecoration === "") {
    const img = document.createElement("img");
    img.src = "/images/check-mark.png";
    img.className = "todo-controls";
    e.parentElement.querySelector("div").style.textDecoration = "line-through";
    e.parentElement.querySelector("div").appendChild(img);
    e.parentElement.querySelector("img.edit").remove();

    todo.forEach((element) => {
      if (
        e.parentElement.querySelector("div").innerText.trim() == element.item
      ) {
        element.status = true;
      }
    });
    setLocalStorage();
    setAlertMessage("Todo item Completed Successfully!");
  }
}
下面的函数将有助于设置localstorage项目,我将其分离为单独的函数并在CREATE,UPDATE和DELETE函数上调用它,借助它我们不会在多个地方使用相同的代码。
function setLocalStorage() {
  localStorage.setItem("todo-list", JSON.stringify(todo));
}
下面的函数将根据应用程序中的用户活动设置警报消息,根据用户函数调用将发送和保留消息到参数中,并在 innerText 的帮助下将警报设置到 HTML 元素中。
function setAlertMessage(message) {
  todoAlert.removeAttribute("class");
  todoAlert.innerText = message;
  setTimeout(() => {
    todoAlert.classList.add("toggleMe");
  }, 1000);
}
第 6 步:在创建和删除待办事项以及隐藏警报消息上实现动画:
下面的代码将有助于在待办事项上设置动画。
li {
  opacity: 0;
  animation: new-item-animation 0.3s linear forwards;
}

@keyframes new-item-animation {
  from {
    opacity: 0;
    transform: translateY(-400px);
  }

  to {
    opacity: 1;
    transform: translateY(0);
  }
}

li.deleted-item {
  animation: removed-item-animation 1s cubic-bezier(0.55, -0.04, 0.91, 0.94)
    forwards;
  transform-origin: 0% 100%;
}

@keyframes removed-item-animation {
  0% {
    opacity: 1;
    transform: rotateZ(0);
  }

  100% {
    opacity: 0;
    transform: translateY(600px) rotateZ(90deg);
  }
}
一旦用户完成列表上的活动,下面的代码将慢慢隐藏消息。
.toggleMe {
  animation: hideMe 5s forwards;
}
@keyframes hideMe {
  0% {
    opacity: 1;
  }
  100% {
    opacity: 0;
  }
}
步骤 7:测试和自定义:
在网页浏览器中 打开index.html文件,测试您的待办事项列表应用。添加任务、移除任务并清空列表,确保一切正常。您可以进一步自定义和增强您的应用,例如添加任务优先级、截止日期或使用本地存储实现数据持久化等功能。
结论:
恭喜!您已成功使用 HTML、CSS 和 JavaScript 创建了一个基本的待办事项列表应用。该项目是学习 Web 开发的绝佳起点,并且可以根据您的需求扩展其他功能。祝您编程愉快!
加入我们不断壮大的YouTube社区,一起探索全栈开发,学习并享受乐趣。您的订阅就是对我们最大的信任,它使我们能够持续制作高质量、内容丰富的视频,让您尽情享受并与亲朋好友分享。
所以,如果您还没有订阅,请点击订阅按钮,点击通知铃,加入我们的 YouTube 大家庭。让我们继续学习、成长,并以激动人心和创新的方式分享知识。
再次感谢您的支持,我们期待在我们的 YouTube 频道上见到您!
文章来源:https://dev.to/sharathchandark/how-to-build-a-todo-list-app-using-html-css-and-javascript-4mg6 后端开发教程 - Java、Spring Boot 实战 - msg200.com

