使用 VanillaJS 构建自定义 SPA 路由器
介绍
窗口 - 历史记录和位置对象
实现路由器
结论
路线现在
介绍
在本文中,我将解释如何使用 Vanilla JavaScript 构建自定义 SPA 路由器。我必须构建一个不使用任何框架的 UI 项目,并且必须弄清楚如何处理路由,然后发现可以使用 Vanilla JavaScript 构建自己的路由器。
免责声明
我完全赞同这样的理念:我们不应该把时间浪费在那些已经很好解决的问题上。随着框架的出现,市面上有很多现成的路由器可供使用。本文旨在解释如何使用 VanillaJS 编写自定义路由器,并帮助理解其背后的原理。
窗口 - 历史记录和位置对象
为了构建自定义路由器,我们首先需要了解“窗口”对象的“历史记录”和“位置”对象以及处理页面导航所需的一些方法。
历史对象
window.history对象提供有关浏览器会话历史记录的详细信息。它包含一些方法和属性,可帮助您在用户历史记录中来回导航。
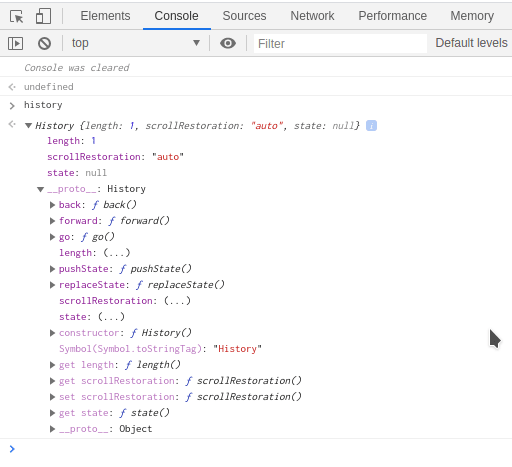
您可以打开浏览器控制台并输入 history,您将看到 history 对象的所有方法和属性,如下所示。
位置对象
window.location包含与当前位置相关的所有信息,例如原点、路径名等。
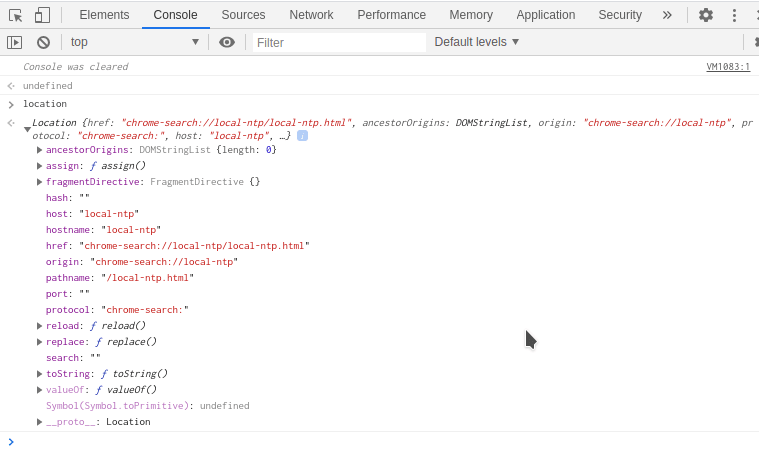
您可以打开浏览器控制台并输入位置,您将看到与位置对象相关的所有各种属性和方法,如下所示。
历史记录 - pushState()
方法pushState用于将状态添加到浏览器的会话历史堆栈。
语法:history.pushState(state, title, [, url]);
- state - 与新历史记录条目关联的 JavaScript 对象。状态对象可以是任何可序列化的对象。
- title - 现代浏览器实际上尚未使用标题。传递空字符串或您希望引用状态的标题是安全的。
- url - 此参数指定新的历史记录条目的 URL。
我们将使用 pushState 方法在页面导航期间更新浏览器的 URL。
窗口 - popstate 事件
当用户浏览会话历史记录时,如果活动历史记录发生变化,则会触发popstate 事件。
换句话说,每当在浏览器上按下后退或前进按钮时,历史记录就会发生变化,此时 popstate 事件就会被触发。
每当历史记录发生变化时,我们将使用 popstate 事件来处理逻辑。
实现路由器
现在我们已经掌握了基础知识,我们将逐步介绍使用 VanillaJS 实现路由器的方法。
观点
index.html 是一个非常简单的页面,其中包含页面链接的无序列表 -
- 家
- 关于
- 接触
此外,还有 3 个单独的 HTML,分别用于主页、关于和联系视图。
索引.html
<!DOCTYPE html>
<html lang="en">
  <head>
    <meta charset="UTF-8" />
    <meta name="viewport" content="width=device-width, initial-scale=1.0" />
    <title>Vanilla JS Router</title>
  </head>
  <body>
    <ul class="navbar-list">
      <li class="navbar-item">
        <a href="#" onclick="onNavClick('/about'); return false;">About</a>
      </li>
      <li class="navbar-item">
        <a href="#" onclick="onNavClick('/'); return false;">Home</a>
      </li>
      <li class="navbar-item">
        <a href="#" onclick="onNavClick('/contact'); return false;">Contact</a>
      </li>
    </ul>
    <div id="root"></div>
    <script src="./js/app.js"></script>
  </body>
</html>
主页.html
<div>
  <h1>******Welcome to the Home Page*****</h1>
</div>
关于.html
<div>
  <h1>******Welcome to the About Page*****</h1>
</div>
联系方式.html
<div>
  <h1>******Welcome to the Contact Page*****</h1>
</div>
加载 HTML 页面(异步)
我使用 async/await 和“fetch API”来异步加载页面,并使用“promise”为 home、about 和 contact 变量赋值。
//Declare the variables for home, about & contact html pages
let home = '';
let about = '';
let contact = '';

/**
 *
 * @param {String} page - Represents the page information that needs to be retrieved
 * @returns {String} resHtml - The Page's HTML is returned from the async invocation
 */

const loadPage = async (page) => {
  const response = await fetch(page);
  const resHtml = await response.text();
  return resHtml;
};

/**
 * The Async function loads all HTML to the variables 'home', 'about' & 'contact'
 */
const loadAllPages = async () => {
  home = await loadPage('home.html');
  about = await loadPage('about.html');
  contact = await loadPage('contact.html');
};
让我们来看一下一个页面的流程:
- 当调用“loadAllPages”函数时,第一个函数loadPage('home.html')首先被触发。
- 在“loadPage”函数内部,将触发 fetch('home.html') 来异步加载 home.html。
- 由于文本是在 API 调用中返回的,因此“await”关键字可确保“response”变量被填充,并且“resHtml”被分配“response.text()”。
- “resHtml”的值返回给“loadAllPages”函数并分配给“home”变量。
同样,也会对“关于”和“联系”页面进行 API 调用,并将值填充到变量 about 和 contact 中。
主要功能和根元素
从“index.html”文档中获取“rootDiv”。
页面加载时,main 函数会被调用。在 main 函数内部,我们首先确保所有 HTML 页面都加载到变量“home”、“about”和“contact”中。
为了确保在页面加载时将“home”页面加载到根元素,rootDiv.innerHTML 被设置为“home”变量。
此外,使用相应的页面映射来设置“路线”,以便在调用路线时加载适当的页面。
//Get the Element with the Id 'root'
const rootDiv = document.getElementById('root');

/**
 * The Main Function is an async function that first loads All Page HTML to the variables
 * Once the variables are loaded with the contents, then they are assigned to the 'routes' variable
 */
const main = async () => {
  await loadAllPages();
  rootDiv.innerHTML = home;
  routes = {
    '/': home,
    '/contact': contact,
    '/about': about,
  };
};

// Invoke the Main function
main();
路由 - 在主页上单击链接时
从上面的 index.html 中,我们调用“onNavClick”方法并在单击“a”链接时传入“route”,如下面的代码片段所示。
<li class="navbar-item">
    <a href="#" onclick="onNavClick('/about'); return false;">About</a>
</li>
/**
 *
 * @param {String} pathname - Pass the 'pathname' passed from onClick function of the link (index.html)
 * The function is invoked when any link is clicked in the html.
 * The onClick event on the html invokes the onNavClick & passes the pathname as param
 */
const onNavClick = (pathname) => {
  window.history.pushState({}, pathname, window.location.origin + pathname);
  rootDiv.innerHTML = routes[pathname];
};
onNavClick 方法接受“pathname”,即“route”链接,并使用 window.history.'pushState' 方法来改变状态。
第二行“rootDiv.innerHTML = routes[pathname]”将根据主函数中路由的配置呈现适当的页面(见上文)。
此时,您有一个功能齐全的路由器,单击链接后它会导航到相应的页面,并且相应的链接也会在 URL 浏览器中更新。
您唯一会注意到的是,当您点击浏览器上的“后退”或“前进”按钮时,链接会在 URL 上正确更新,但页面上的内容不会刷新。
让我们在文章的最后一部分来解决这个问题。
处理状态改变时的页面渲染
如果您还记得上面“onpopstate event”方法的定义,那么每当浏览器中的活动历史记录发生变化时就会调用该方法。
我们使用该钩子来确保根据配置的路由使用适当的页面填充 rootDiv。
就是这样!现在你应该拥有一个功能齐全的自定义路由器,全部使用 Vanilla JavaScript 构建。
/**
 * The Function is invoked when the window.history changes
 */
window.onpopstate = () => {
  rootDiv.innerHTML = routes[window.location.pathname];
};
如果您想要完整的代码,您可以在这里的Github 上找到它。
结论
总而言之,我们介绍了如何使用 VanillaJS 构建一个基本的自定义路由器。该路由器主要使用窗口的 history 和 location 对象以及 pushState 和 onpopstate 事件方法。
希望你喜欢这篇文章。请告诉我你的反馈和评论。
您可能还对以下内容感兴趣:
鏂囩珷鏉ユ簮锛�https://dev.to/skaytech/build-a-custom-spa-router-using-vanillajs-4a9l 后端开发教程 - Java、Spring Boot 实战 - msg200.com

