使用 Amazon S3 和 AWS Amplify 构建音乐共享应用程序
2024 年 6 月 27 日:这篇博文使用 Amplify Gen 1,如果您要启动新的 Amplify 应用程序,我建议您尝试Gen 2!
Amazon S3 是我使用过的第一个 AWS 服务,我猜这是一种相当常见的现象——它非常简单,允许您在您的网站上存储图像或视频等文件。
S3 是 Simple Storage Service 的缩写,用于对象存储。这意味着您可以存储不经常更改的平面文件,例如视频、图像和文本文件。
在 S3 中,数据被组织在类似于文件夹的存储桶 (bucket)中。存储桶内的对象包含键 (key)、文件名以及包含数据的字节值 (value)。
我们将继续构建一个音乐共享应用程序,用户可以上传.mp3文件,然后其他用户可以收听!
请注意,我是 AWS Amplify 团队的开发倡导者,如果您对此有任何反馈或疑问,请联系我或在我们的 discord 上提问 - discord.gg/amplify!
安全
在开始之前,有必要先讨论一下这类应用的安全性。Amazon S3为您的账户提供第一年的免费套餐;但是,如果您允许任何人上传到您的 S3 存储桶,那么不法分子可能会将大量文件上传到您的账户,从而导致您产生费用。
因此,最佳做法是遵循最小特权原则,将上传权限限制为仅需要访问权限的人员。
为了方便演示,我的应用允许任何人上传和下载文件,这样我们就无需进行身份验证了。在实际应用中,请仔细考虑哪些人需要上传文件,并只授予他们访问权限。
设置
我们首先初始化AWS Amplify,这是一套辅助 AWS 上前端和移动开发的工具。
然后,创建一个项目,或者迁移到你已经创建的项目。我将从一个 HTML/CSS/Vanilla JavaScript 项目开始,并使用 Parcel 进行打包。你可以按照本教程中的“设置”说明操作,或者下载此代码并运行npm install以获取我的设置!
然后,我们可以运行$ amplify init并初始化 AWS Amplify 项目。然后系统会提示您回答一些问题——如果您使用其他文本编辑器,可能需要根据设置稍微调整答案,但以下是我选择的设置!其中许多都是默认设置。
? Enter a name for the project: tunelify
? Enter a name for the environment: dev
? Choose your default editor: Visual Studio Code
? Choose the type of app that you're building: javascript
? What javascript framework are you using: none
? Source Directory Path: src
? Distribution Directory Path: dist
? Build Command: npm run-script build
? Start Command: npm run-script start
? Do you want to use an AWS profile: Yes
? Please choose the profile you want to use: aspittel
然后,我们将使用 AWS Amplify 为我们的应用程序添加身份验证,我们实际上不会将它用于这个项目,但在底层它将用于我们的 S3 权限。
$ amplify add auth
Do you want to use the default authentication and security configuration: Default configuration
How do you want users to be able to sign in: Username
Do you want to configure advanced settings: No, I am done.
只需再进行一步配置,我保证!这次我们将添加 S3 存储。在本演示中,任何人都可以创建和读取数据。在实际生产中,您很可能希望限制哪些人可以上传文件!
$ amplify add storage
? Please select from one of the below mentioned services: Content (Images, audio, video, etc.)
? Please provide a friendly name for your resource that will be used to label this category in the project: tunelify
? Please provide bucket name: tunes
? Who should have access: Auth and guest users
? What kind of access do you want for Authenticated users: create/update, read
? What kind of access do you want for Guest users: create/update, read
? Do you want to add a Lambda Trigger for your S3 Bucket: No
现在,运行$ amplify push以部署您的更改!
代码
现在我们已经完成了应用程序的所有配置,我们只需要一点自己的代码来创建图像上传表单并显示我们的曲调。
让我们安装 AWS Amplify 库:
$ npm i aws-amplify
现在,我们将在前端配置 Amplify。在您的script.js添加中:
import Amplify, { Storage } from 'aws-amplify'
import awsconfig from './aws-exports'

Amplify.configure(awsconfig)
在您的 HTML 中,添加以下表单:
<form id="upload-form">
  <input type="file" name="filename" id="file-upload" accept=".mp3">
  <input type="submit" value="Upload">
</form>
这将允许用户上传文件,但只允许带有.mp3扩展名的文件。
然后,在您的 JavaScript 中添加:
// select the upload form we created, and listen for a submit event on it
document.getElementById('upload-form').addEventListener('submit', e => {
  // don't refresh the page on submit
  e.preventDefault()
  // get the file from the file upload element, this will be an array.
  // we only want the first element
  const file = document.getElementById('file-upload').files[0]
  // put our file in storage, use the file's name as its S3 Key
  Storage.put(file.name, file)
    .then(item => {
      console.log(item)
    })
    .catch(err => console.error(err))
})
🎉 就这样,我们将文件上传到了 S3!
现在,让我们列出存储桶中的所有文件:
Storage.list('')
  .then(result => {
    result.forEach(item => console.log(item))
  })
  .catch(err => console.error(err))
您可以更改参数.list()以便仅获取具有特定前缀的文件。
让我们来实现在页面上播放音频文件的功能!将console.log(item)上面两段代码中的更改为 ,createAudioPlayer(item)并添加以下代码,即可在页面上添加音频元素:
const createAudioPlayer = track => {
  // Get the track from S3
  Storage.get(track.key).then(result => {
    // create an audio element and add a source element to it
    const audio = document.createElement('audio')
    const source = document.createElement('source')
    audio.appendChild(source)
    // add controls to the audio element
    audio.setAttribute('controls', '')
    // add the track source and type
    source.setAttribute('src', result)
    source.setAttribute('type', 'audio/mpeg')
    // add the item to the page
    document.querySelector('.tracks').appendChild(audio)
  })
}
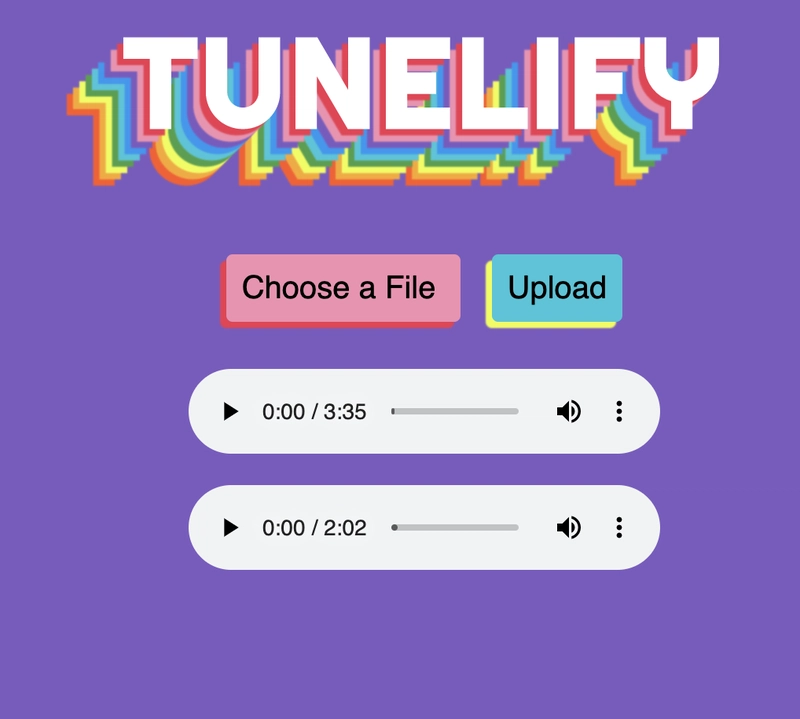
我还为我的应用程序添加了一些样式,使最终产品看起来像这样:
完整的代码在我的 GitHub 上,如果你想看看的话!我这里还有一个关于如何重新创建彩虹文字的教程🌈。
结论
我希望这是一个有趣的演示,教你如何使用 AWS Amplify 启动并运行 Amazon S3。如果你想了解更多,这里有一个使用 AWS Amplify 创建 CRUD 应用的教程,这里有一个关于 Amplify、S3 和 Svelte 的扩展演示,还有一篇关于在 AWS Amplify 中使用现有 S3 存储桶的文章。
文章来源:https://dev.to/aws/getting-started-with-amazon-s3-using-aws-amplify-5ake 后端开发教程 - Java、Spring Boot 实战 - msg200.com
