样式组件 101 💅 讲座 2:创建主题 + 明暗主题切换器示例 ☀️🌙
创建主题文件🔮
使主题文件可供应用程序访问🕵️
在样式组件中使用主题💅
在自定义 React 组件中使用主题⚛️
主题道具🤖
使用 JavaScript 对象而不是 CSS 来编写样式
现在...👑 皇冠上的宝石:让我们用 Styled Components 创建一个明暗主题切换器
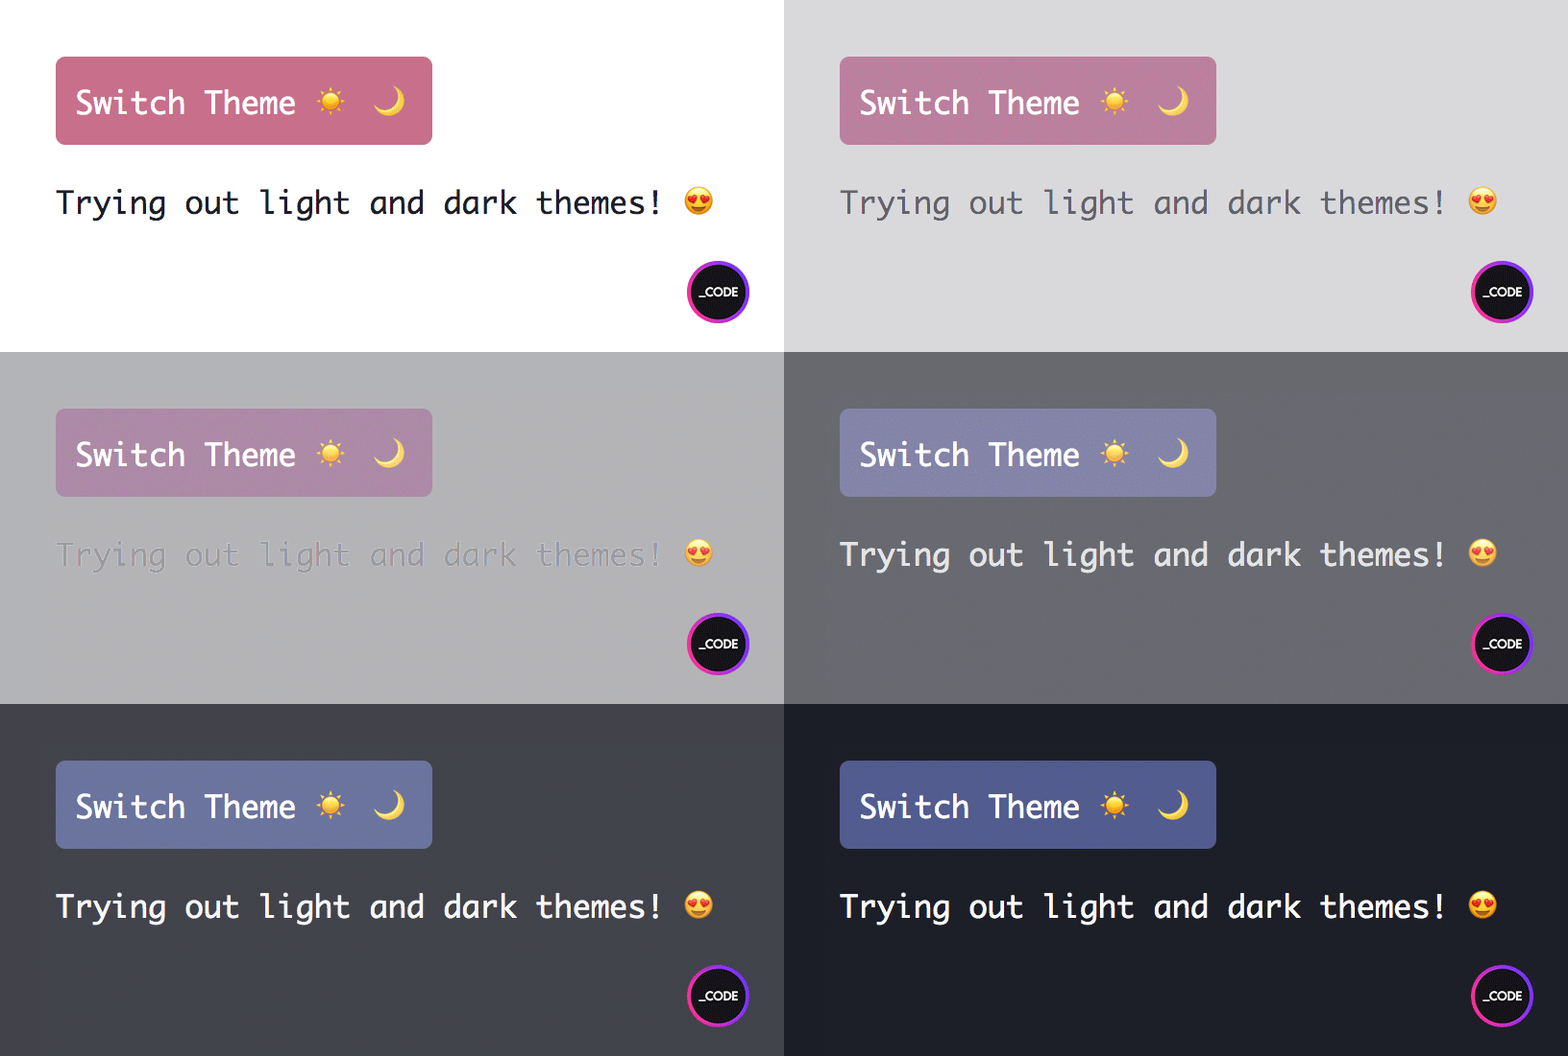
结果☀️➡️🌙
大家好!👋欢迎来到Styled Components 101 系列
的第二讲🙌
在本讲座中,我们将介绍如何使用 Styled Components创建自定义主题。
如果您是 Styled Components 的新手,并且本讲座是您遇到的第一个讲座,我建议您先看一下上一讲座,我们在上一讲座中介绍了 Styled Components 的一些基本概念和示例。
说了这么多,我们进入今天的主题吧👇
创建主题文件🔮
首先,在开始生成组件和其他与组件相关的内容之前,我们需要做的是创建托管我们应用主题的文件。
这个主题文件只是一个带有js扩展名的常规 JavaScript 文件,它将包含一个名为theme的对象,该对象具有我们将用于设置组件样式的属性和值。
就这么简单💁♂️
让我们看看这个文件是什么样子的:
theme.js
const theme = {
   colors: {
      plum: "#52314b",
      rose: "#c3537d",
      dryrose: "#dd7f9a",
      primrose: "#e8babf",
      white: "#fff"
   }
}

export default theme;
目前,我们只处理颜色,但您能想到的用于样式的每个属性/值也将在此文件中设置:有关字体、填充、边距等的值。简而言之,您在 CSS 文件中设置的每个值。
别忘了导出你的主题对象。否则,应用根本找不到它👍
主题文件就到这里。现在我们准备进入下一步了😼
使主题文件可供应用程序访问🕵️
为了能够访问主题文件,我们需要将其提供给应用程序。为此,我们将从styled-components中导入ThemeProvider组件,并用它来包装我们的应用程序。
App.js
import { ThemeProvider } from "styled-components";
import theme from "./theme";

const App = () => {
   return(
      <ThemeProvider theme={theme}>
         //your code here
      </ThemeProvider>
   )
}
export default App;
现在,我们的主题已被应用程序识别,并且可以从应用程序的任何位置访问和使用。
在样式组件中使用主题💅
从样式组件中检索主题值是一个非常简单的过程,因为主题对于组件道具来说是隐含的。
让我们看看如何利用自定义主题中的几个值来设置样式组件的样式:
BasicThemedButton.js
import styled from "styled-components";

export default styled.button`
   background-color: ${props => props.theme.colors.primrose};
   color: ${props => props.theme.colors.white};
   font-size: 1.25rem;
   border: none;
   border-radius: 5px;
   padding: 10px;
`
我们的自定义主题作为 prop 隐式传递,并且可以轻松访问,因为组件也由提供程序包装:
App.js
import { ThemeProvider } from "styled-components";
import theme from "./theme";
import BasicThemedButton from "./components/BasicThemedButton";

const App = () => {
   return(
      <ThemeProvider theme={theme}>
         <BasicThemedButton>I am a basic themed button! 🤗</BasicThemedButton>
      </ThemeProvider>
   )
}
export default App;
在自定义 React 组件中使用主题⚛️
要在自定义 React 组件中使用我们的主题,我们需要编写更多一点代码,但这没什么大不了的。
ThemedButton.js≡ React 组件
import React, { useContext } from "react";
import StyledButton from "./StyledButton";
import { ThemeContext } from "styled-components";

const ThemedButton = () => {
   const theme = useContext(ThemeContext);
   return(
      <StyledButton bgColor={theme.colors.plum} color={theme.colors.white}>I am a themed button 😜</StyledButton>
   )
}

export default ThemedButton;
StyledButton.js≡ 样式化组件
import styled from "styled-components";

export default styled.button`
   background-color: ${props => props.bgColor};
   color: ${props => props.color};
   padding: 10px;
   border: none;
   border-radius: 5px;
   font-size: 1.25rem;
`
这一次,主题中的值通过 props传递给样式组件,这些值之前已经通过使用useContext钩子和styled-components中的ThemeContext组件在 React 组件中检索到。
请注意,我们将像平常一样调用我们的 React 组件:
App.js
import { ThemeProvider } from "styled-components";
import theme from "./theme";
import ThemedButton from "./components/ThemedButton";

const App = () => {
   return(
      <ThemeProvider theme={theme}>
         <ThemedButton/>
      </ThemeProvider>
   )
}
export default App;
主题道具🤖
主题道具用于将包含主题规范的内联对象传递给样式组件。
App.js
import { ThemeProvider } from "styled-components";
import StyledButton from "./components/StyledButton";
import theme from "./theme";

const App = () => {
   return(
      <ThemeProvider theme={theme}>
         <StyledButton theme={{bg: theme.colors.primrose, color: theme.colors.white}}>I am a button with a theme prop! 😎</StyledButton>
      </ThemeProvider>
   )
}
export default App;
StyledButton.js
import styled from "styled-components";

export default styled.button`
   background-color: ${props => props.theme.bg};
   color: ${props => props.theme.color};
   padding: 10px;
   border: none;
   border-radius: 5px;
`
如果我们没有很多属性,这种方法可能很有用,但是,当我们有一个具有多个属性和样式值的健壮应用程序时,这种方法变得难以维护且难以处理❌
使用 JavaScript 对象而不是 CSS 来编写样式
你知道吗?在 Styled Components 中,除了 CSS,你还可以使用 JS 编写自定义样式。而且比你想象的还要简单。
让我们看一下下面的代码片段:
JSStyledButton.js
import styled from "styled-components";

export default styled.button(props => ({
   backgroundColor: props.bgColor,
   fontSize: "1.5rem",
   color: props.color
}));
App.js
import { ThemeProvider } from "styled-components";
import theme from "./theme";
import JSStyledButton from "./components/JSStyledButton";

const App = () => {
   return(
      <ThemeProvider theme={theme}>
         <JSStyledButton bgColor={theme.colors.plum} color={theme.colors.white}>I am a JS Styled Button 🤠</JSStyledButton>
      </ThemeProvider>
   )
}
export default App;
请注意,由于我们使用的是 JavaScript 对象,因此属性名称采用驼峰式命名法书写,但也可以使用双引号来书写,如下所示:
import styled from "styled-components";

export default styled.button(props => ({
   "background-color": props.bgColor,
   "font-size": "1.5rem",
   color: props.color
}));
还要注意,指定样式的方法与我们从超级组件扩展样式时使用的方法类似(讲座 1 - 从另一个组件继承样式部分):
...
export default styled.button(...);
...
现在...👑 皇冠上的宝石:让我们用 Styled Components 创建一个明暗主题切换器
理论很酷,但是,让我们动手,用主题创造一些有趣的东西👏
不好意思,但是...主题切换器到底是什么?🤔
我们可以说,主题切换器是一个只需点击一下按钮或表情符号即可在明暗主题之间切换的系统。很酷吧?
在本教程中,我们将实现一个样式按钮,以便快速高效地执行此任务。
现在,让我们开始吧👉
组件和文件🎬
这些是组成我们应用程序的组件和文件:
Button.js:切换主题的按钮。
GlobalStyles.js:将全局样式注入应用程序的组件。
ThemeToggler.js:将接收主题作为 prop 的组件,然后将其传递给Button组件。
useDarkTheme.js:包含业务逻辑的自定义钩子。
App.js:主应用。它将使用主题提供程序包装所有内容,并包含全局样式。
themes.js:将托管我们的主题的文件(此时我们已经知道如何执行此操作😺)。
让我们首先创建主题文件📝
themes.js
export const lightTheme = {
    background: '#fff',
    color: '#1d1f28',
    buttonBg: '#c5718d'
}

export const darkTheme = {
    background: '#1d1f28',
    color: '#fafafa',
    buttonBg: '#515d90'
}
这里没什么需要注意的:我们已经定义了两个主题及其各自的样式属性。别忘了将它们都导出👍
现在让我们使用开关按钮🔵
Button.js
import styled from "styled-components";

export default styled.button`
   font-family: "Monaco", monospace;
   cursor: pointer;
   border: none;
   background-color: ${({ theme }) => theme.buttonBg};
   color: #fff;
   padding: 10px;
   border-radius: 5px;
   font-size: 1.5rem;
`
常规样式的按钮。您可以根据自己的喜好设置样式。
请注意,的值background-color将根据所选主题进行设置。剩下的就交给你了😇
是时候展现全球风格了😼
GlobalStyles.js
import { createGlobalStyle } from "styled-components";

export const GlobalStyles = createGlobalStyle`
   body {
     font-family: "Monaco", monospace;
     background: ${({ theme }) => theme.background};
     color: ${({ theme }) => theme.color};
     transition: all 0.50s linear;
  }
`
GlobalStyles定义了我们应用的全局样式。它们将通过 in 注入到我们的应用中App.js。
请注意,为了这个目的,我们将从styled-components导入createGlobalStyle助手,它将创建一个处理全局样式的新样式组件。
至于属性,背景和文本颜色将从主题中获取。我们还将添加一个过渡属性,使切换效果更加流畅。
创建主题切换器💁
ThemeToggler.js
import React from 'react';
import Button from "./Button";

const ThemeToggler = (props) => {
   const { themeToggler } = props;
   return (
      <Button onClick={themeToggler}>Switch Theme ☀️ 🌙</Button>
   );
};

export default ThemeToggler;
ThemeToggler呈现 Button 组件并为其提供与传入主题相对应的样式属性。
useDarkTheme.js
import { useState } from 'react';

const THEMES = {
   LIGHT: "light",
   DARK: "dark"
}

const useDarkTheme = () => {
    const [theme, setTheme] = useState(THEMES.LIGHT);
    const themeToggler = () => {
        theme === THEMES.LIGHT ? setTheme(THEMES.DARK) : setTheme(THEMES.LIGHT);
    };
    return [theme, themeToggler];
};

export default useDarkTheme;
useDarkTheme是一个自定义钩子,包含切换器的逻辑。我们使用钩子来尽可能地抽象我们的应用。
切换过程很简单:如果传入的主题是亮色,则设置暗色主题,反之亦然。
构建主应用程序😈
App.js
import React from "react";
import { ThemeProvider } from "styled-components";
import { GlobalStyles } from "./components/GlobalStyles";
import { lightTheme, darkTheme } from "./themes";
import ThemeToggler from "./components/ThemeToggler";
import useDarkTheme from "./hooks/useDarkTheme";

const App = () => {
   const [theme, themeToggler] =
   useDarkTheme();
   const selectedTheme = theme === 'light' ? lightTheme : darkTheme;

   return (
      <ThemeProvider theme={selectedTheme}>
         <>
            <GlobalStyles />
            <ThemeToggler themeToggler={themeToggler} />
            <p>Trying out light and dark themes! 😍</p>
         </>
      </ThemeProvider>
   )
}
export default App;
首先,我们调用useDarkTheme钩子来处理切换逻辑。
然后,我们还需要一个函数selectedTheme来决定使用哪个主题。
现在,只剩下用ThemeProvider包装ThemeToggler并包含GlobalStyles。
结果☀️➡️🌙
这就是第二节 Styled Components 101 讲座的全部内容!
请继续关注本系列的未来剧集,了解有关 Styled Component 的更多信息。
非常感谢您的阅读🤗如果您对今天的讲座有任何问题或疑问,请随时与我联系。
希望您觉得这篇文章有用,我们下期再见👋
👉 您还可以在 Instagram 上查看本文的相关幻灯片👈
🎉 不要忘记在Instagram和Twitter上关注@underscorecode,获取更多每日 webdev 内容 🖥🖤
最后但同样重要的一点是...在我们离开之前有一个快速的友情提醒😊
我们都知道,编程和开发有无数种方法可以完成任务,而我们在这里是为了提供帮助和学习。所以,如果您知道其他人分享的方法(不更好,也不更差,只是不同),请随意分享,但请始终保持友善和尊重,以尊重作者和社区其他成员。谢谢您,祝您编程愉快!
文章来源:https://dev.to/underscorecode/styled-components-101-lecture-2-creating-a-theme-light-dark-theme-toggler-example-13dp 后端开发教程 - Java、Spring Boot 实战 - msg200.com


