如何使用原子设计来组织你的组件
通常,当您开始开发应用程序时,您可能会遇到如何组织组件的麻烦。
在这篇文章中,我将向你解释如何做到这一点(或者说,你可以如何做到这一点)。这是我们在MotorK中针对设计系统和单页应用程序采用的方法。它被称为:原子设计。
目录
原子设计
将整个界面分解成基本构建块,然后以此为基础进行设计。这就是原子设计的基本要点。
原子设计原则是将 UI 组件拆分成“小”且可复用的组件,以提高可复用性。
就像化学一样,你可以将组件按原子、分子和有机体进行组织。
此外,还有模板和页面,但我不会讨论它们,因为我想将重点放在小型应用程序的架构上。
那么,让我们开始讨论原子、分子和生物体。
原子
原子是应用程序中最小的组件。基本上,它们可以是文本、按钮、表单输入等等。
黄金法则是:如果无法将组件拆分成更小的组件,那么它就必须是原子。
分子
分子是由原子键合而成的组合。例如,如果你有Text和Input个原子,你可以将它们组合成一个分子InputField(或任何你想要的名称)。
生物体
生物体是分子的组合:如果你混合两个或多个分子,你就会得到一个生物体。
一个真实的例子
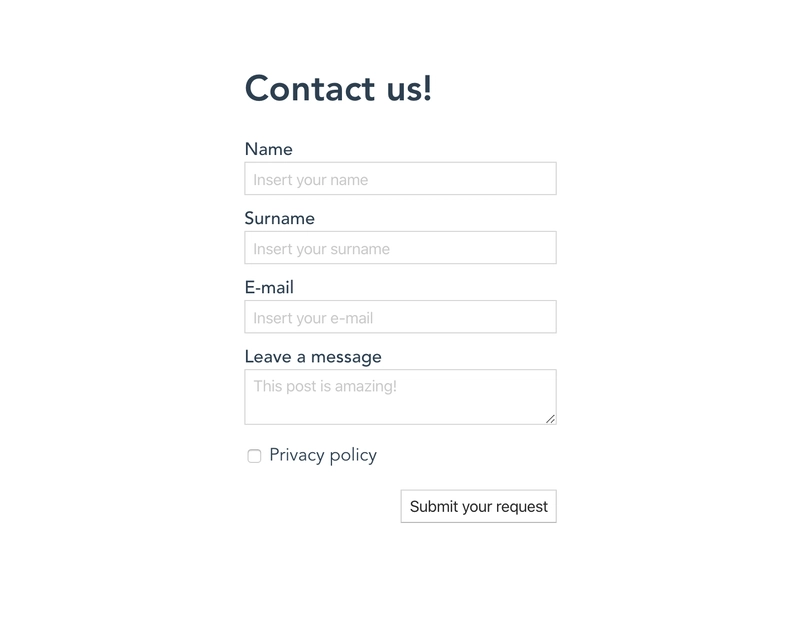
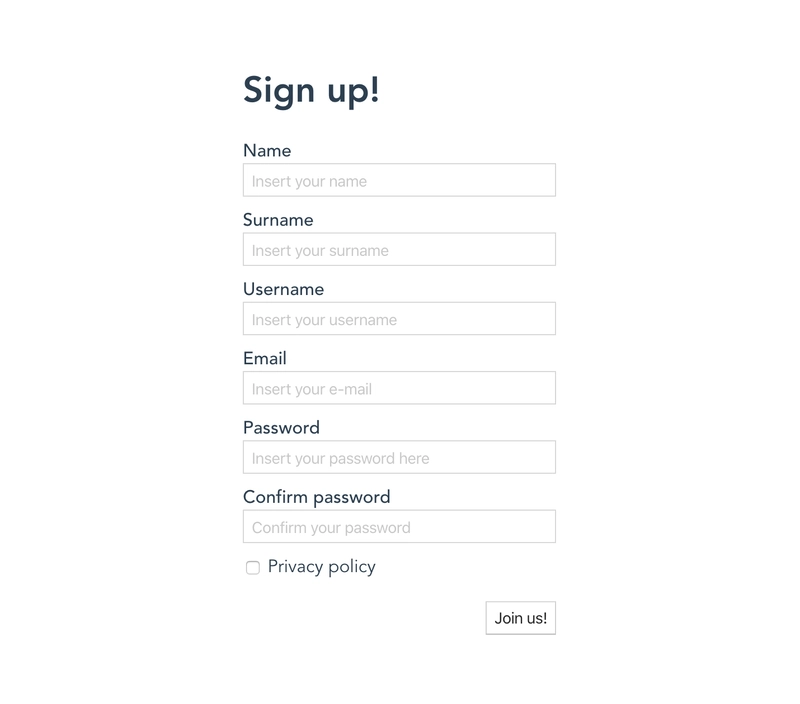
让我们尝试使用原子设计来编写一个应用程序。最终目标是创建两种不同的表单:
- 联系表格
- 注册表单
注意: 我将使用 Vue,但您可以使用任何您喜欢的语言/框架。
文件夹结构
首先,我们必须创建用于存储组件的文件夹结构
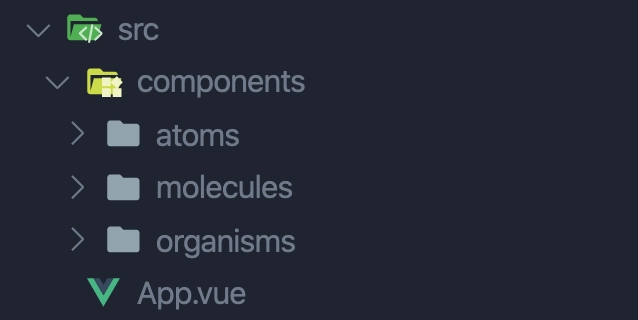
。 因此,让我们创建一个src包含所有 JS 文件的目录,并在其中创建一个components文件夹。之后,我们需要创建atoms,molecules以及organisms文件夹components。
App.vue这是我们的切入点。
由于我们有了文件夹结构,我们可以从原子开始创建组件。
我们将在每个组件中设置Ad命名空间。
我们的原子组件
让我们创建以下原子组件:
- 按钮
- 输入
- 文本
- 文本区域
按钮
<template>
  <button class="a-button" :type="type">{{label}}</button>
</template>

<script>
  const _buttonTypes = ["submit", "button"];

  export default {
    name: "AdButton",
    props: {
      type: {
        type: String,
        required: true,
        default: "button",
        validator: (value) => _buttonTypes.includes(value),
      },
      label: {
        type: String,
        required: true,
      },
    },
  };
</script>
输入
<template>
  <input
    v-model="value"
    :type="type"
    :id="id"
    :name="name"
    :placeholder="placeholder"
    class="a-input"
  />
</template>

<script>
  const _inputTypes = ["text", "email", "password", "checkbox"];

  export default {
    name: "AdInput",
    data() {
      return {
        value: "",
      };
    },
    props: {
      id: {
        type: String,
        required: true,
      },
      name: {
        type: String,
        required: true,
      },
      placeholder: {
        type: String,
        required: false,
        default: null,
      },
      type: {
        type: String,
        required: true,
        default: "text",
        validator: (value) => _inputTypes.includes(value),
      },
    },
  };
</script>
文本
<template>
  <component :is="tag" :for="getForProp" class="a-text">
    {{content}}
  </component>
</template>

<script>
  const _tagTypes = ["h1", "h2", "h3", "p", "span", "label"];

  export default {
    name: "AdText",
    props: {
      tag: {
        type: String,
        required: true,
        default: "span",
        validator: (value) => _tagTypes.includes(value),
      },
      content: {
        type: String,
        required: true,
      },
      for: {
        type: String,
        required: false,
        default: null,
      },
    },
    computed: {
      // Rendered only if the tag is a label
      getForProp() {
        return ["label"].includes(this.tag) ? this.for : null;
      },
    },
  };
</script>
文本区域
<template>
  <textarea
    v-model="value"
    :id="id"
    :name="name"
    :placeholder="placeholder"
    class="a-textarea"
  ></textarea>
</template>

<script>
  export default {
    name: "AdTextarea",
    data() {
      return {
        value: "",
      };
    },
    props: {
      id: {
        type: String,
        required: true,
      },
      name: {
        type: String,
        required: true,
      },
      placeholder: {
        type: String,
        required: false,
        default: null,
      },
    },
  };
</script>
我们的分子成分
然后是以下分子:
- 复选框字段
- 输入框
- 文本区域字段
复选框字段
<template>
  <div class="m-checkbox-field">
    <ad-input :id="id" :name="name" type="checkbox"></ad-input>
    <ad-text tag="label" :for="id" :content="label"></ad-text>
  </div>
</template>

<script>
  import AdText from "../atoms/Text";
  import AdInput from "../atoms/Input";

  export default {
    name: "CheckboxField",
    components: {
      AdText,
      AdInput,
    },
    props: {
      id: {
        type: String,
        required: true,
      },
      name: {
        type: String,
        required: true,
      },
      label: {
        type: String,
        required: true,
      },
    },
  };
</script>
输入框
<template>
  <div class="m-input-field">
    <ad-text tag="label" :for="id" :content="label"></ad-text>
    <ad-input
      :id="id"
      :name="name"
      :placeholder="placeholder"
      :type="inputType"
    ></ad-input>
  </div>
</template>

<script>
  import AdText from "../atoms/Text";
  import AdInput from "../atoms/Input";

  const _inputTypes = ["text", "email", "password"];

  export default {
    name: "InputField",
    components: {
      AdText,
      AdInput,
    },
    props: {
      id: {
        type: String,
        required: true,
      },
      name: {
        type: String,
        required: true,
      },
      label: {
        type: String,
        required: true,
      },
      placeholder: {
        type: String,
        required: false,
        default: null,
      },
      inputType: {
        type: String,
        required: false,
        default: "text",
        validator: (value) => _inputTypes.includes(value),
      },
    },
  };
</script>
文本区域字段
<template>
  <div class="m-textarea-field">
    <ad-text tag="label" :for="id" :content="label"></ad-text>
    <ad-textarea
      :id="id"
      :name="name"
      :placeholder="placeholder"
      type="text"
    ></ad-textarea>
  </div>
</template>

<script>
  import AdText from "../atoms/Text";
  import AdTextarea from "../atoms/Textarea";

  export default {
    name: "TextareaField",
    components: {
      AdText,
      AdTextarea,
    },
    props: {
      id: {
        type: String,
        required: true,
      },
      name: {
        type: String,
        required: true,
      },
      label: {
        type: String,
        required: true,
      },
      placeholder: {
        type: String,
        required: false,
        default: null,
      },
    },
  };
</script>
我们的生物体组成部分
最后,我们可以开发两个生物体:
- 联系表格
- 注册表单
联系表格
<template>
  <form method="POST" class="o-contact-form" autocomplete="off">
    <ad-text tag="h1" content="Contact us!"></ad-text>

    <ad-input-field
      id="name"
      name="name"
      label="Insert your name"
      placeholder="Name"
    ></ad-input-field>

    <ad-input-field
      id="surname"
      name="surname"
      label="Insert your surname"
      placeholder="Surname"
    ></ad-input-field>

    <ad-input-field
      id="email"
      name="email"
      label="Email"
      input-type="email"
      placeholder="Insert your e-mail"
    ></ad-input-field>

    <ad-textarea-field
      id="textarea"
      name="textarea"
      label="Leave a message"
      placeholder="This post is amazing!"
    ></ad-textarea-field>

    <ad-checkbox-field
      id="checkbox"
      name="checkbox"
      label="Privacy policy"
    ></ad-checkbox-field>

    <ad-button type="submit" label="Submit your request"></ad-button>
  </form>
</template>

<script>
  import AdText from "../atoms/Text";
  import AdButton from "../atoms/Button";
  import AdInputField from "../molecules/InputField";
  import AdCheckboxField from "../molecules/CheckboxField";
  import AdTextareaField from "../molecules/TextareaField";

  export default {
    name: "AdContactForm",
    components: {
      AdText,
      AdButton,
      AdInputField,
      AdCheckboxField,
      AdTextareaField,
    },
  };
</script>
注册表单
<template>
  <form method="POST" class="o-signup-form" autocomplete="off">
    <ad-text tag="h1" content="Sign up!"></ad-text>

    <ad-input-field
      id="name"
      name="name"
      label="Insert your name"
      placeholder="Name"
    ></ad-input-field>

    <ad-input-field
      id="surname"
      name="surname"
      label="Insert your surname"
      placeholder="Surname"
    ></ad-input-field>

    <ad-input-field
      id="username"
      name="username"
      label="Insert your username"
      placeholder="Username"
    ></ad-input-field>

    <ad-input-field
      id="email"
      name="email"
      label="Email"
      input-type="email"
      placeholder="Insert your e-mail"
    ></ad-input-field>

    <ad-input-field
      id="password"
      name="password"
      label="Password"
      input-type="password"
      placeholder="Insert your password here"
    ></ad-input-field>

    <ad-input-field
      id="confirm-password"
      name="confirm-password"
      label="Confirm password"
      input-type="password"
      placeholder="Confirm your password"
    ></ad-input-field>

    <ad-checkbox-field
      id="amazing-checkbox"
      name="amazing_checkbox"
      label="Privacy policy"
    ></ad-checkbox-field>

    <ad-button type="submit" label="Join us!"></ad-button>
  </form>
</template>

<script>
  import AdText from "../atoms/Text";
  import AdButton from "../atoms/Button";
  import AdInputField from "../molecules/InputField";
  import AdCheckboxField from "../molecules/CheckboxField";
  import AdTextareaField from "../molecules/TextareaField";

  export default {
    name: "AdSignupForm",
    components: {
      AdText,
      AdButton,
      AdInputField,
      AdCheckboxField,
      AdTextareaField,
    },
  };
</script>
让我们消耗我们的生物体
现在我们有了生物体,是时候使用它们了!
打开App.vue文件并导入表格:
<template>
  <div id="app">
    <!-- You shouldn't use them together in the same page -->
    <ad-contact-form></ad-contact-form>
    <ad-signup-form></ad-signup-form>
  </div>
</template>

<script>
  import AdSignupForm from "./components/organisms/SignupForm";
  import AdContactForm from "./components/organisms/ContactForm";

  export default {
    name: "App",
    components: {
      AdSignupForm,
      AdContactForm,
    },
  };
</script>
但为什么?
也许,此时此刻,你会问自己:“好吧,我知道它的工作原理了……但我为什么要使用原子设计呢?”
我不是真相的来源,但我可以告诉你为什么我喜欢这种方法。
主要有以下三个原因:
- 更好的组织
- 更好的设计
- 无边界
更好的组织
正如您目前所见,这种方法可以帮助您以一种易于理解和可预测的方式组织文件和组件:您知道将组件放在哪里以及如何组织它们。并且,遵循这种模式,您的开发过程将变得更快。
更好的设计
我所说的“更好的设计”不是指更好的UI设计,而是指更好的架构设计。如果你开始将组件视为原子、分子和有机体,那么在应用程序的引导过程中,你就必须遵循这种模式来设计你的软件,并将重点放在组件的复用上。
无边界
作为原子设计方法,它并不严格地局限于特定的技术:您可以将其应用于不同的语言和框架:PHP、CSS、Laravel、Symfony、React、Angular、Vue 等等。
关注我
如果你喜欢这篇文章,你可以在PayPal 上给我一个☕️。🙂
文章来源:https://dev.to/sanfra1407/how-to-organize-your-components-using-the-atomic-design-dj3
 后端开发教程 - Java、Spring Boot 实战 - msg200.com


