Keycloak 和 Spring Boot:实现单点登录的终极指南
介绍:
单点登录 (SSO)已成为现代 Web 应用程序的必备功能,它不仅提升了用户体验,还增强了安全性。本指南将指导您使用 Keycloak 和 Spring Boot 实现 SSO,为您的应用程序提供强大的身份验证和授权解决方案。
Keycloak 单点登录的重要性
单点登录 (SSO) 对于简化身份验证流程、增强安全性和提升用户体验至关重要。以下是一些主要优势:
-
集中式身份验证:SSO 允许用户只需进行一次身份验证即可访问多个应用程序。Keycloak 提供用户身份的集中管理,这在具有众多应用程序的环境中非常有用。
-
安全性提升:通过集中式身份管理,可以统一执行安全策略(例如密码强度、双因素身份验证和帐户锁定策略)。Keycloak 支持 OpenID Connect 和 OAuth 2.0 等协议,确保其符合强大的现代安全标准。
-
减少密码疲劳并增强用户体验:只需登录一次,用户即可避免密码疲劳和多重凭证,从而实现跨应用程序的更顺畅、更快速的交互。
-
可扩展性和灵活性:Keycloak 的配置可以支持大量用户和多个身份提供者,包括社交登录(Google、Facebook 等)和企业目录(LDAP、Active Directory)。
-
定制化和可扩展性:Keycloak 支持自定义主题、登录流程和扩展,能够适应各种需求。此外,它还是一个开源平台,为企业提供了根据需要修改或扩展平台的灵活性。
单点登录(SSO)的替代方案:
-
多重登录/传统身份验证:
- 用户对每个应用程序或服务都有单独的凭据
- 需要单独登录每个系统
- 每个应用程序管理自己的身份验证
-
联合身份:
- 与 SSO 类似,但允许跨不同组织进行身份验证
- 使用 SAML 或 OpenID Connect 等标准
- 用户身份已由其所在组织验证
-
多重身份验证 (MFA):
- 除了用户名和密码之外,还增加了额外的安全层
- 可与 SSO 或传统身份验证一起使用
- 通常涉及你所了解、拥有和正在
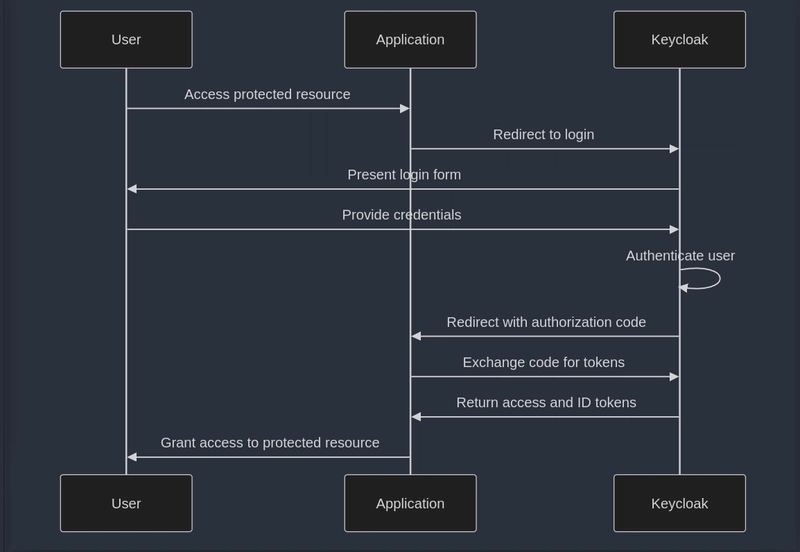
SSO 流程说明:
在深入实现之前,让我们先了解一下 SSO 流程:
先决条件:
步骤 1:项目设置
使用Spring Initializr或 intelliJ 创建具有以下结构的新 Spring Boot 项目:
keycloak-demo/
├── src/
│   ├── main/
│   │   ├── java/
│   │   │   └── com/
│   │   │       └── bansikah/
│   │   │           └── keycloakdemo/
│   │   │               ├── config/
│   │   │               │   └── SecurityConfig.java
│   │   │               ├── controller/
│   │   │               │   └── FoodOrderingController.java
│   │   │               └── KeycloakDemoApplication.java
│   │   └── resources/
│   │       ├── templates/
│   │       │   ├── home.html
│   │       │   └── menu.html
│   │       └── application.yml
├── docker-compose.yml
└── pom.xml
笔记:
bansikah是我的名字😂所以你可以放上你的名字或者举任何你想要的例子……
第2步:配置pom.xml
将以下依赖项添加到您的依赖项中pom.xml,或者您可以只替换依赖项部分以避免冲突:
<dependencies>
        <dependency>
            <groupId>org.springframework.boot</groupId>
            <artifactId>spring-boot-starter-web</artifactId>
        </dependency>
        <dependency>
            <groupId>org.springframework.boot</groupId>
            <artifactId>spring-boot-starter-security</artifactId>
        </dependency>
        <dependency>
            <groupId>org.springframework.boot</groupId>
            <artifactId>spring-boot-starter-oauth2-client</artifactId>
        </dependency>
        <dependency>
            <groupId>org.springframework.boot</groupId>
            <artifactId>spring-boot-starter-oauth2-resource-server</artifactId>
        </dependency>
        <dependency>
            <groupId>org.springframework.boot</groupId>
            <artifactId>spring-boot-starter-thymeleaf</artifactId>
        </dependency>
        <dependency>
            <groupId>org.springframework.boot</groupId>
            <artifactId>spring-boot-starter-test</artifactId>
            <scope>test</scope>
        </dependency>
        <!-- https://mvnrepository.com/artifact/org.thymeleaf.extras/thymeleaf-extras-springsecurity3 -->
        <dependency>
            <groupId>org.thymeleaf.extras</groupId>
            <artifactId>thymeleaf-extras-springsecurity3</artifactId>
            <version>3.0.5.RELEASE</version>
        </dependency>
    </dependencies>
步骤 3:使用 Docker 设置 Keycloak
docker-compose.yml在根目录中创建文件:
version: '3'

services:
  keycloak:
    image: quay.io/keycloak/keycloak:latest
    environment:
      KEYCLOAK_ADMIN: admin
      KEYCLOAK_ADMIN_PASSWORD: admin
    ports:
      - "8088:8080"
    command:
      - start-dev

  app:
    build: .
    ports:
      - "8082:8082"
    depends_on:
      - keycloak
使用以下命令运行 Keycloak 服务器:
docker-compose up -d
步骤4:配置Keycloak
-
访问 Keycloak 管理控制台:
- 转到http://localhost:8088
admin/admin使用用户名和密码登录
-
创建新领域:
- 前往左上角的“Master”
- 选择“添加领域”
- 命名
food-ordering-realm - 点击“创建”
-
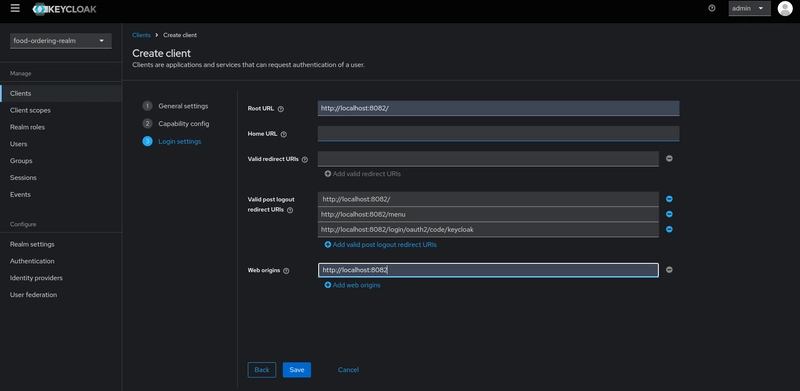
创建新客户:
在第一个屏幕上:- 将“客户端 ID”设置为“food-ordering-client”
- 客户端类型:选择“OpenID Connect”
- 点击“下一步”
在下一个屏幕(功能配置)上:
- 客户端身份验证:启用此功能(取代旧的“机密”设置)
- 授权:除非您需要细粒度的授权,否则可以将其关闭
- 点击“下一步”
- 客户端配置:
- 将根 URL 设置为http://localhost:8082/
- 将访问类型设置为机密
- 添加有效的重定向 URI(每个 URI 占一行):
 http://localhost:8082/
 http://localhost:8082/menu
 http://localhost:8082/login/oauth2/code/keycloak
- 设置 Web 来源:http://localhost:8082
- 点击“保存”
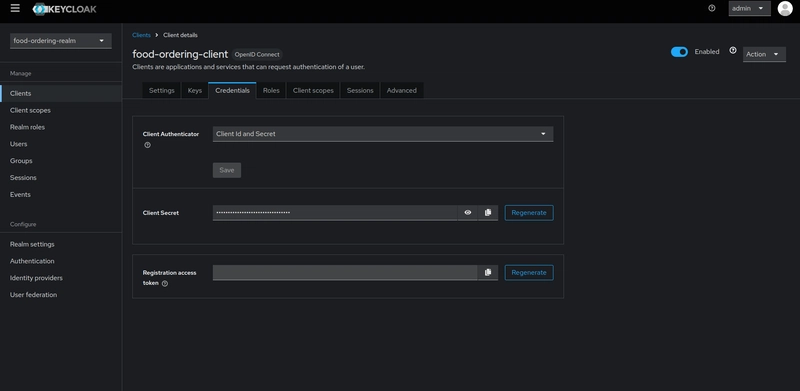
- 检索客户端机密:
- 转到
Credentials标签页 - 复制
Secret字段的值以用于应用程序配置
- 转到
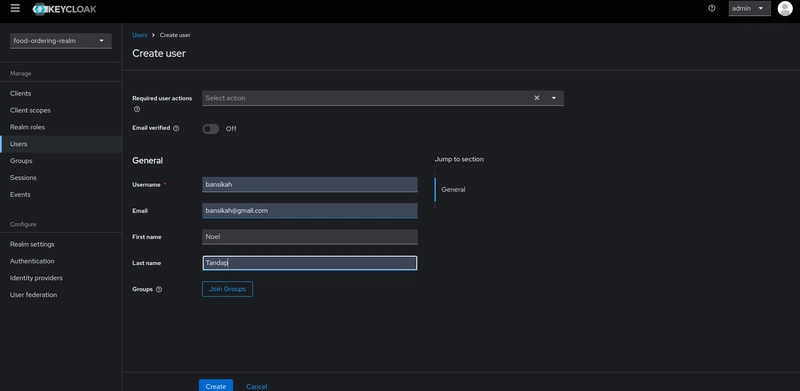
- 创建用户:
- 前往
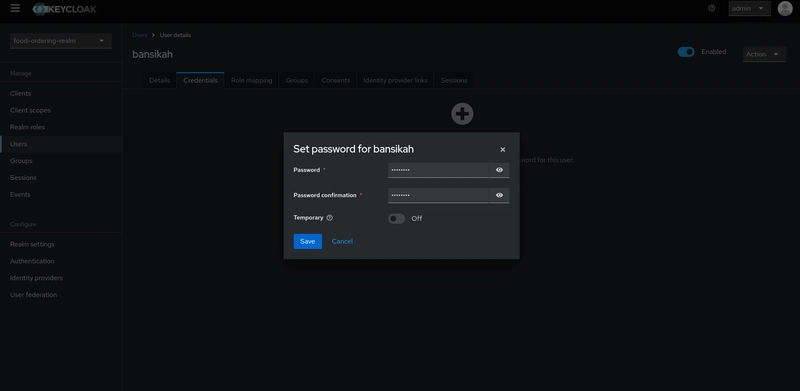
Users并点击“添加用户” - 设置用户名(例如,testuser)
- 在
Credentials标签中:- 设置密码
- 禁用“临时”
- 前往
步骤5:配置Spring Boot应用程序
创建application.yml于src/main/resources:
server:
  port: 8082

spring:
  application:
    name: keycloak-demo
  security:
    oauth2:
      client:
        registration:
          keycloak:
            client-id: food-ordering-client
            client-secret: your-client-secret
            scope: openid,profile,email
            redirect-uri: http://localhost:8082/login/oauth2/code/keycloak
        provider:
          keycloak:
            issuer-uri: http://localhost:8088/realms/food-ordering-realm

logging:
  level:
    org.springframework.security: DEBUG
    org.springframework.security.oauth2: DEBUG
<your-client-secret>用从 Keycloak 复制的密钥替换,通常是一些随机文本。
注意:
在生产中或作为一种良好的做法,最好将此类敏感信息保存在
.env项目根目录的文件中,并将其用作配置中的变量,它将类似于 ${CLIENT_SECRET},当您启动应用程序时,它会从 .env 文件中选择它,这也适用于重定向、issuer-uri 和其余部分......
步骤6:创建安全配置
创建SecurityConfig.java于src/main/java/com/bansikah/keycloakdemo/config:
package com.bansikah.keycloakdemo.config;

import org.springframework.context.annotation.Bean;
import org.springframework.context.annotation.Configuration;
import org.springframework.security.config.annotation.web.builders.HttpSecurity;
import org.springframework.security.config.annotation.web.configuration.EnableWebSecurity;
import org.springframework.security.web.SecurityFilterChain;

/**
 * SecurityConfig class configures security settings for the application,
 * enabling security filters and setting up OAuth2 login and logout behavior.
 */
@Configuration
@EnableWebSecurity
public class SecurityConfig {

    /**
     * Configures the security filter chain for handling HTTP requests, OAuth2 login, and logout.
     *
     * @param http HttpSecurity object to define web-based security at the HTTP level
     * @return SecurityFilterChain for filtering and securing HTTP requests
     * @throws Exception in case of an error during configuration
     */
    @Bean
    public SecurityFilterChain filterChain(HttpSecurity http) throws Exception {
        http
                // Configures authorization rules for different endpoints
                .authorizeHttpRequests(authorize -> authorize
                        .requestMatchers("/").permitAll() // Allows public access to the root URL
                        .requestMatchers("/menu").authenticated() // Requires authentication to access "/menu"
                        .anyRequest().authenticated() // Requires authentication for any other request
                )
                // Configures OAuth2 login settings
                .oauth2Login(oauth2 -> oauth2
                        .loginPage("/oauth2/authorization/keycloak") // Sets custom login page for OAuth2 with Keycloak
                        .defaultSuccessUrl("/menu", true) // Redirects to "/menu" after successful login
                )
                // Configures logout settings
                .logout(logout -> logout
                        .logoutSuccessUrl("/") // Redirects to the root URL on successful logout
                        .invalidateHttpSession(true) // Invalidates session to clear session data
                        .clearAuthentication(true) // Clears authentication details
                        .deleteCookies("JSESSIONID") // Deletes the session cookie
                );

        return http.build();
    }
}
步骤 7:创建控制器
创建FoodOrderingController.java于src/main/java/com/bansikah/keycloakdemo/controller:
package com.bansikah.keycloakdemo.controller;

import org.springframework.security.core.annotation.AuthenticationPrincipal;
import org.springframework.security.oauth2.core.oidc.user.OidcUser;
import org.springframework.stereotype.Controller;
import org.springframework.ui.Model;
import org.springframework.web.bind.annotation.GetMapping;

/**
 * FoodOrderingController handles web requests related to the home and menu pages of the food ordering application.
 */
@Controller
public class FoodOrderingController {

    /**
     * Maps the root URL ("/") to the home page.
     *
     * @return the name of the view to render for the home page
     */
    @GetMapping("/")
    public String home() {
        return "home";
    }

    /**
     * Maps the "/menu" URL to the menu page and sets the authenticated user's username in the model.
     *
     * @param user  the authenticated OIDC (OpenID Connect) user
     * @param model Model object for passing data to the view
     * @return the name of the view to render for the menu page, or redirects to home if user is not authenticated
     */
    @GetMapping("/menu")
    public String menu(@AuthenticationPrincipal OidcUser user, Model model) {
        if (user != null) {
            model.addAttribute("username", user.getPreferredUsername());
        } else {
            return "redirect:/";  // Redirect to home if not authenticated
        }
        return "menu";
    }
}
步骤8:创建HTML模板
创建home.html于src/main/resources/templates:
<!DOCTYPE html>
<html lang="en" xmlns:th="http://www.thymeleaf.org">
<head>
    <title>Welcome to Food Ordering</title>
</head>
<body>
<h1>Welcome to Food Ordering</h1>
<p>Click <a th:href="@{/menu}">here</a> to view the menu (requires login).</p>
</body>
</html>
创建menu.html于src/main/resources/templates:
<!DOCTYPE html>
<html lang="en" xmlns:th="http://www.thymeleaf.org">
<head>
    <title>Food Ordering Menu</title>
</head>
<body>
<h1>Welcome to the Menu, <span th:text="${username}"></span>!</h1>
<p>Here's our menu (placeholder):</p>
<ul>
    <li>Pizza - $10</li>
    <li>Burger - $8</li>
    <li>Salad - $6</li>
</ul>
<form th:action="@{/logout}" method="post">
    <input type="submit" value="Logout"/>
</form>
</body>
</html>
步骤9:运行应用程序
您应该能够通过此 URL http://localhost:8082访问该应用程序,并且您应该看到以下内容
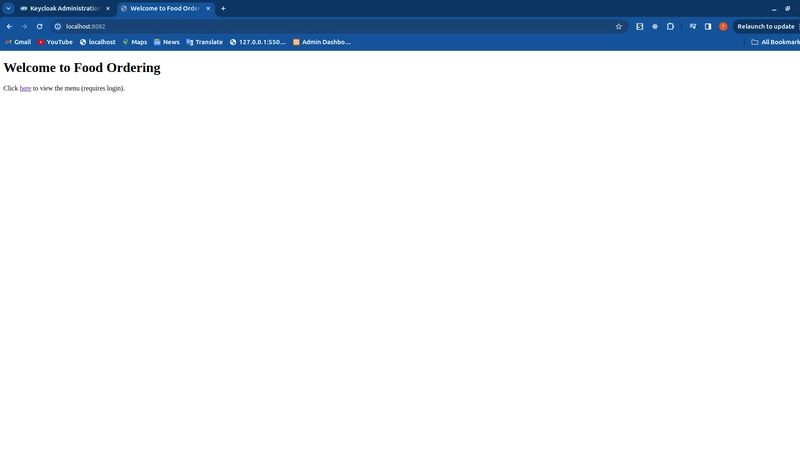
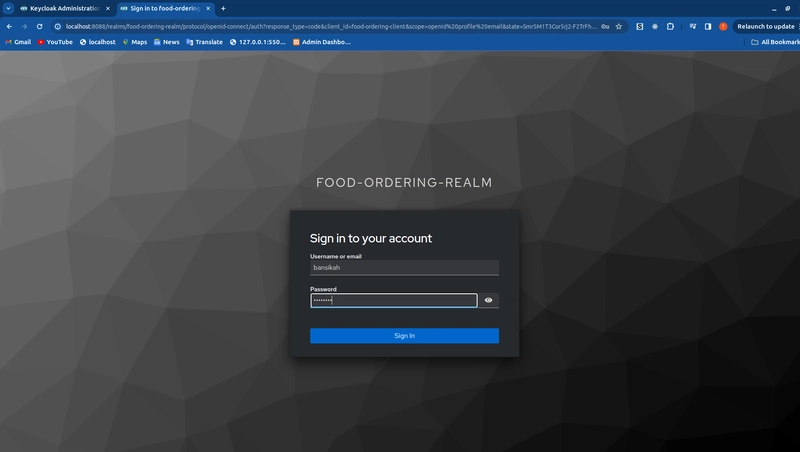
当你点击here链接时,它会带你到 keycloak 表单,用户必须使用用户名和密码进行身份验证foodorder realm
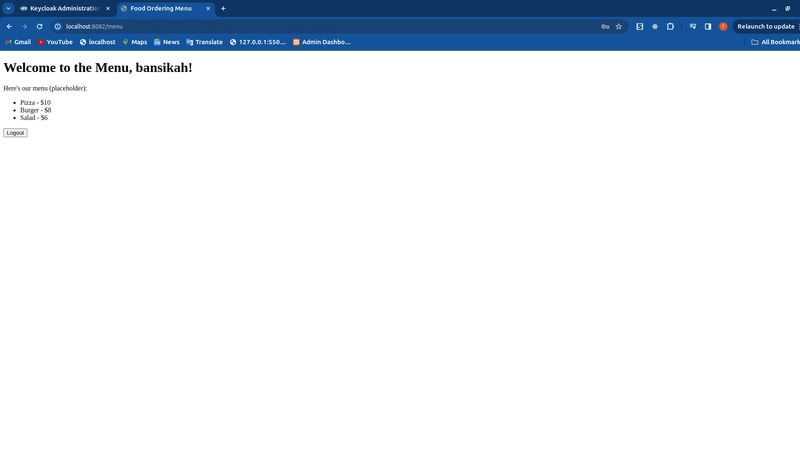
验证后,您将看到menu页面
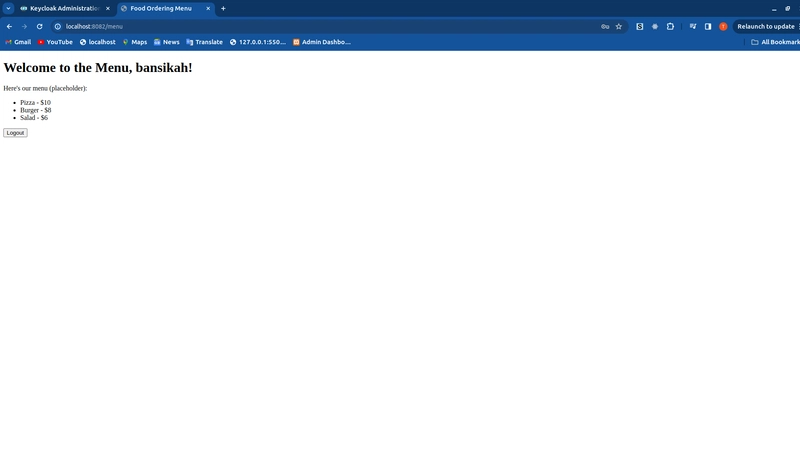
现在有了 SSO 的重要性,即使我注销,我也不必像下面这样再次登录
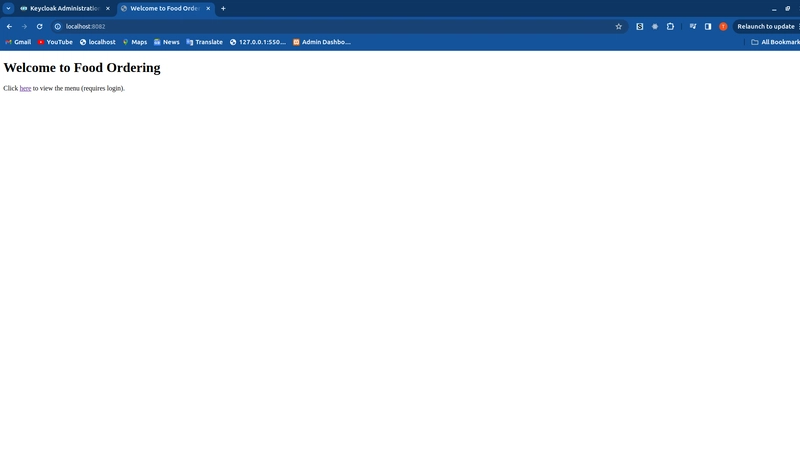
然后我可以再次点击该链接,并且不会像下面那样提示我再次输入密码和用户名
工作原理:
Keycloak 在用户登录时发放访问令牌和刷新令牌。对于单点登录 (SSO),它会在域内已授权的应用程序之间共享这些令牌,使用户无需重新身份验证即可访问多个应用程序。访问令牌过期后,刷新令牌将用于续订,从而保持会话在各个应用程序之间保持活动状态。
结论
恭喜😊,感谢您一直以来的关注。
此实现演示了使用 Keycloak 和 Spring Boot 的强大 SSO 解决方案。它在保持安全性的同时,提供了无缝的身份验证体验。该配置允许轻松定制和扩展,以满足特定的应用程序需求。
如果您遇到任何问题或对此实现有任何疑问,请随时在下方留言。请记住查看 Spring Security 和 Keycloak 文档,了解更多高级配置和功能。
代码链接:GitHub 上。
您也可以访问此代码库,使用 Keycloak SSO 进行 ping 服务器应用程序身份验证,以查看全栈 Spring Boot 和 React 应用程序中的实现。
参考:
文章来源:https://dev.to/bansikah/keycloak-and-spring-boot-the-ultimate-guide-to-implementing-single-sign-on-1af7 后端开发教程 - Java、Spring Boot 实战 - msg200.com
