WinUI 3 桌面开发简介
介绍
各位开发者,欢迎来到我的博客。在本篇博客中,我将带您探索 Fluent Windows 应用程序开发 (WinUI 3) 的世界。在本教程博客的最后,您将能够使用 Windows App SDK 创建一个简单的桌面应用程序,以呈现精彩的 Fluent UI 和更佳的性能。让我们开始吧!
先决条件
确保您满足以下要求才能开始。
- 一台装有 Windows 11 的机器(Windows 10 也可以)。
- C# 和 .NET 基础知识(可选)
- 愿意学习。
- 一致性。
入门
- 首先,从这里安装最新版本的 Visual Studio 社区版。
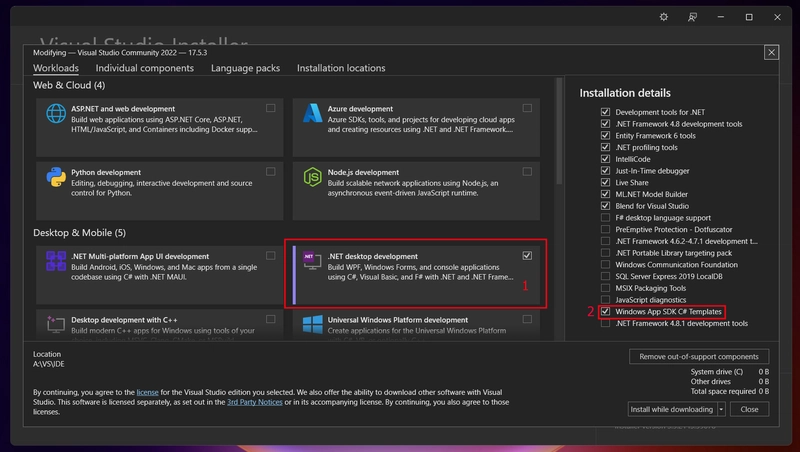
- 安装后,从列表中选择“Visual Studio Community” ,然后选择下图所示的工具链进行安装。
掌握一些基础知识
WinUI 3 是 Windows App SDK 附带的原生 UI 平台组件。它由最新的 .NET6 支持。该 SDK 的整体理念是创建功能强大的 Windows 应用程序,并充分考虑流畅的 UI。Windows App SDK 提供了一套统一的 API 和工具,可用于创建面向 Windows 10 及更高版本的生产桌面应用,并可发布到 Microsoft Store。
让我们开发我们的应用程序!
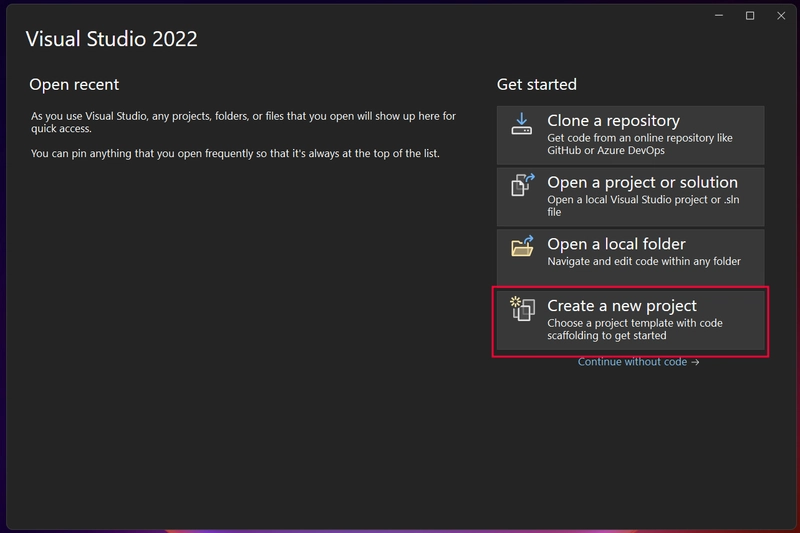
- 首先,打开Visual Studio并点击“创建新项目”,如下所示,
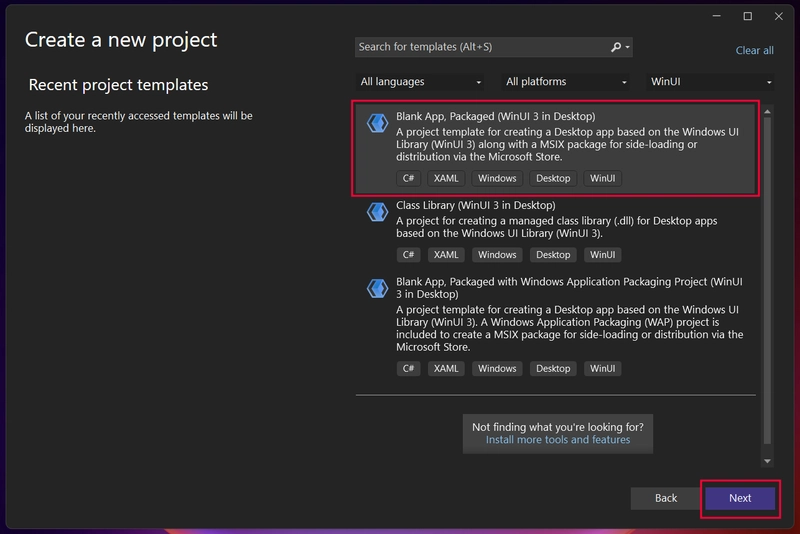
- 然后搜索“Blank App, Packaged (WinUI3 in Desktop)”,选择它并点击“Next”,如下图所示,
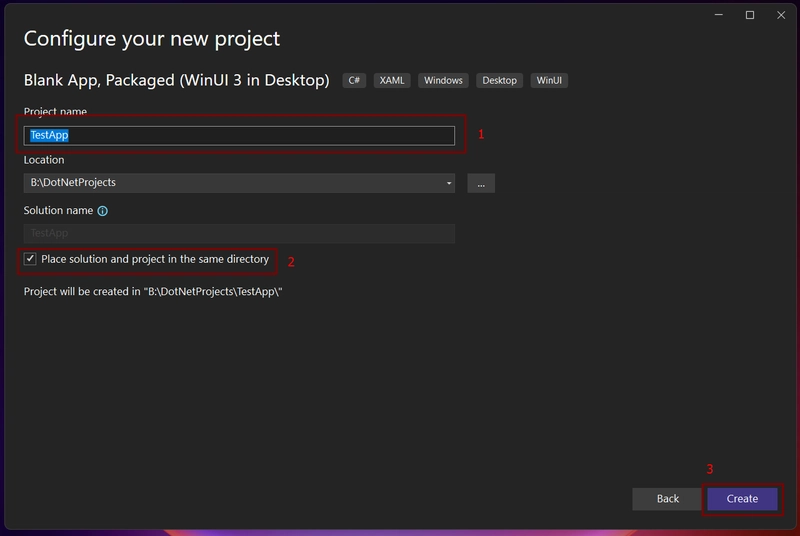
- 现在我们需要命名我们的解决方案。解决方案文件 (.sln)基本上包含项目或程序集的集合。您可以随意命名项目。我在这里使用的名称是“TestApp”。
然后点击下面的复选框并点击“创建”按钮。
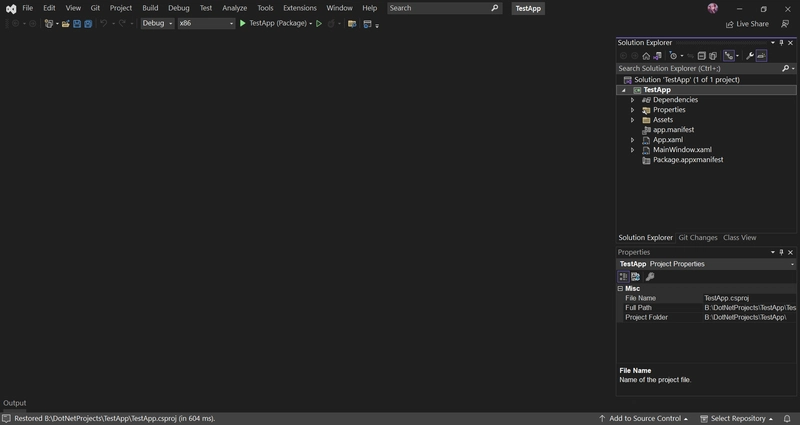
- 如果您有与下图相同的内容,那么您就可以开始了。
项目结构细分
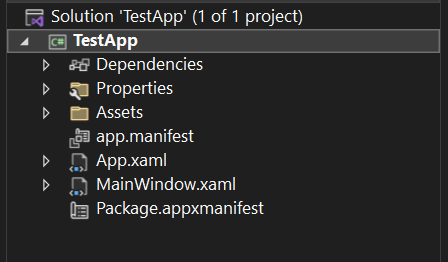
- 如果我们查看您的项目结构,将会有两个名为
MainWindow.xaml和的文件App.xaml(我将在以后的博客中解释其他文件)。 - 基本上,当应用程序启动时,“App.xaml”将首先被触发,并启动一个新实例,
MainWindow.xaml在我们的例子中,该实例就是我们的主页。 - 如果您单击文件上的箭头符号
MainWindow.xaml,将会出现另一个名为的文件MainWindow.xaml.cs。
- 嗯,那么这两个文件是什么呢?它
MainWindow.xaml是定义应用程序 UI 的文件。它使用微软设计的 XAML 标记语言,可以轻松定义漂亮的 UI。 - 该文件
MainWindow.xaml.cs被称为“Code-Behind”文件MainWindow.xaml,其中包含要在 UI 上实现的所有逻辑。
- 如果您打开该
MainWindow.xaml文件,将会看到类似于下面的代码。
<!-- Copyright (c) Microsoft Corporation and Contributors. -->
<!-- Licensed under the MIT License. -->

<Window
    x:Class="TestApp.MainWindow"
    xmlns="http://schemas.microsoft.com/winfx/2006/xaml/presentation"
    xmlns:x="http://schemas.microsoft.com/winfx/2006/xaml"
    xmlns:local="using:TestApp"
    xmlns:d="http://schemas.microsoft.com/expression/blend/2008"
    xmlns:mc="http://schemas.openxmlformats.org/markup-compatibility/2006"
    mc:Ignorable="d">

    <StackPanel Orientation="Horizontal" HorizontalAlignment="Center" VerticalAlignment="Center">
        <Button x:Name="myButton" Click="myButton_Click">Click Me</Button>
    </StackPanel>
</Window>
- 如果你打开这个
MainWindow.xaml.cs文件,它看起来会像这样,
// Copyright (c) Microsoft Corporation and Contributors.
// Licensed under the MIT License.

using Microsoft.UI.Xaml;
using Microsoft.UI.Xaml.Controls;
using Microsoft.UI.Xaml.Controls.Primitives;
using Microsoft.UI.Xaml.Data;
using Microsoft.UI.Xaml.Input;
using Microsoft.UI.Xaml.Media;
using Microsoft.UI.Xaml.Navigation;
using System;
using System.Collections.Generic;
using System.IO;
using System.Linq;
using System.Runtime.InteropServices.WindowsRuntime;
using Windows.Foundation;
using Windows.Foundation.Collections;

// To learn more about WinUI, the WinUI project structure,
// and more about our project templates, see: http://aka.ms/winui-project-info.

namespace TestApp
{
    /// <summary>
    /// An empty window that can be used on its own or navigated to within a Frame.
    /// </summary>
    public sealed partial class MainWindow : Window
    {
        public MainWindow()
        {
            this.InitializeComponent();
        }

        private void myButton_Click(object sender, RoutedEventArgs e)
        {
            myButton.Content = "Clicked";
        }
    }
}
- 根据上面的代码,a
Button是在a内部定义的StackPanel(后面会讲到Panels)。 - 具有
Button属性x:Name和myButton作为其值以及Click事件处理程序,其值为,myButton_Click并且其Content属性设置为Click Me。 - 在代码隐藏
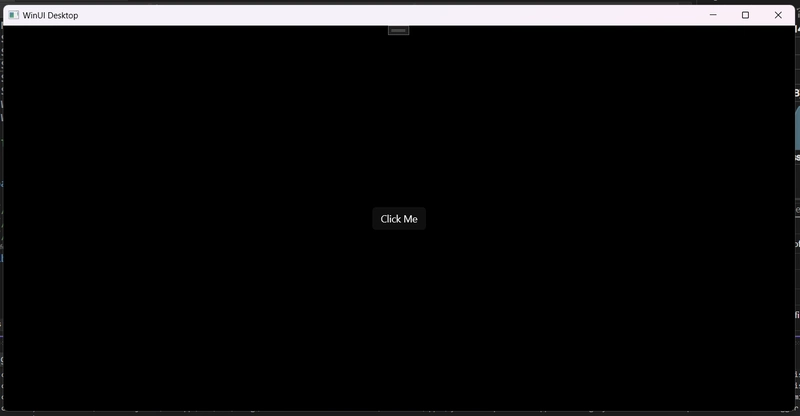
Click中,我们定义了一个事件处理程序方法,myButton_Click当事件触发时,它会将Content的属性更改Button为Clicked。是不是很简单? - 让我们运行一下应用程序,看看它的实际效果。点击“TestApp (Package)”按钮来构建并运行应用程序。
- 好了!您已经构建并运行了您的第一个 WinUI 3 应用。
- 当你点击
Click Me按钮时,你会看到按钮Content已经变成了Clicked我们在 中定义的样子MainWindow.xaml.cs。
让我们制作一个简单的计数器应用程序
- 至此,我们掌握了 WinUI 3 应用的基本工作原理。现在,我们可以制作一个简单的“计数器”应用,用于增加和减少计数。
- 为此,我们需要两个
Button。一个用于递增,另一个用于递减。 - 我们还需要一个
TextBlock来显示当前计数值。
- 让我们开始定义 UI。只需将下面的代码复制粘贴到您的
MainWindow.xaml文件中即可。
<Window
    x:Class="TestApp.MainWindow"
    xmlns="http://schemas.microsoft.com/winfx/2006/xaml/presentation"
    xmlns:x="http://schemas.microsoft.com/winfx/2006/xaml"
    xmlns:local="using:TestApp"
    xmlns:d="http://schemas.microsoft.com/expression/blend/2008"
    xmlns:mc="http://schemas.openxmlformats.org/markup-compatibility/2006"
    mc:Ignorable="d">

    <StackPanel Orientation="Horizontal" HorizontalAlignment="Center" VerticalAlignment="Center" Spacing="20">


        <Button x:Name="IncrementButton" Click="IncrementButton_Click">
            +
        </Button>

        <TextBlock x:Name="DisplayTextBlock" Width="100" Text="0" TextAlignment="Center"/>

        <Button x:Name="DecrementButton" Click="DecrementButton_Click">
            -
        </Button>

    </StackPanel>
</Window>
- 另外,将以下代码复制粘贴到您的
MainWindow.xaml.cs文件中。
// Copyright (c) Microsoft Corporation and Contributors.
// Licensed under the MIT License.

using Microsoft.UI.Xaml;
using Microsoft.UI.Xaml.Controls;
using Microsoft.UI.Xaml.Controls.Primitives;
using Microsoft.UI.Xaml.Data;
using Microsoft.UI.Xaml.Input;
using Microsoft.UI.Xaml.Media;
using Microsoft.UI.Xaml.Navigation;
using System;
using System.Collections.Generic;
using System.IO;
using System.Linq;
using System.Runtime.InteropServices.WindowsRuntime;
using Windows.Foundation;
using Windows.Foundation.Collections;

// To learn more about WinUI, the WinUI project structure,
// and more about our project templates, see: http://aka.ms/winui-project-info.

namespace TestApp
{
    /// <summary>
    /// An empty window that can be used on its own or navigated to within a Frame.
    /// </summary>
    public sealed partial class MainWindow : Window
    {

        private int count = 0;

        public MainWindow()
        {
            this.InitializeComponent();
        }

        private void IncrementButton_Click(object sender, RoutedEventArgs e)
        {
            count++;
            DisplayTextBlock.Text = count.ToString();
        }

        private void DecrementButton_Click(object sender, RoutedEventArgs e)
        {
            count--;
            DisplayTextBlock.Text = count.ToString();
        }
    }
}
Click我们基本上在“Code-Behind”文件中定义了两个按钮及其事件处理程序。- 当点击
IncrementButton_Click时, 将会触发,它会增加 的值并设置 中的计数值。 也同样适用于。IncrementButtoncountDisplayTextBlockDecrementButton
-
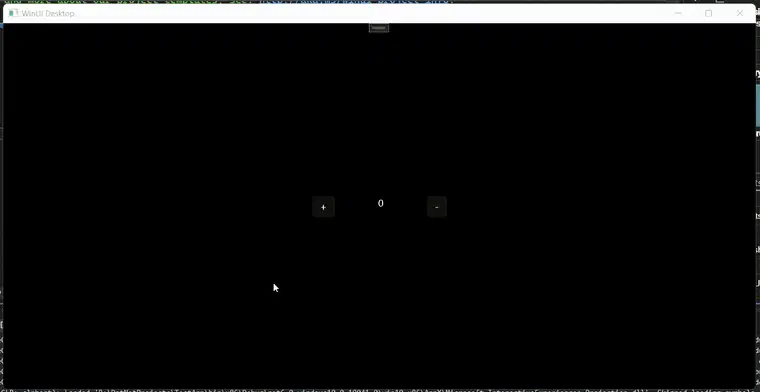
让我们通过点击顶部的“TestApp(包)”按钮来运行我们的应用程序。
-
好耶,我们构建了功能齐全的计数器应用程序。
结论
希望您对 WinUI 3 应用有了一定的了解,如果您觉得这篇博客有趣,不妨关注我并订阅我以后的博客。我们下一篇精彩的博客再见👋。
 后端开发教程 - Java、Spring Boot 实战 - msg200.com
