NGINX:高级负载均衡器、Web 服务器和反向代理
📍 并发
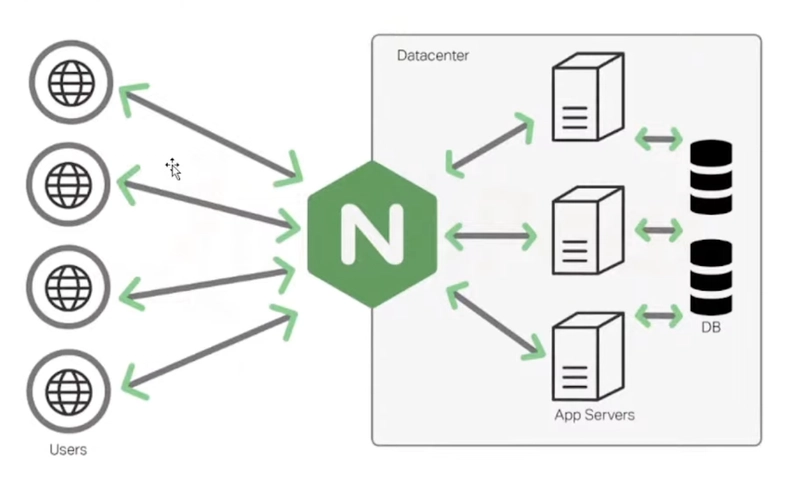
👉 当向服务器发出请求时,通常会有多个用户发出请求。服务器需要处理所有请求。这是需要考虑的重点,例如:
🎯 分配负载的方法之一是使用软件负载均衡器。这正是 Nginx 发挥作用的地方。通常,Nginx 主要用作负载均衡器。不过,Nginx 也可以用作邮件代理、反向代理、HTTP 缓存等。
🙋 但是 Nginx 到底是什么以及我们如何使用它?
📍 Nginx
Nginx 是一款 Web 服务器,每秒能够处理约 1 万个并发用户或网络负载。它已成为速度最快的 Web 服务器,仅次于 Apache。
📍 如何使用 NGINX 设置负载均衡
👉注意:-请关注更多内容,因为我们将在未来的博客中看到 NodeJS 应用程序中负载均衡器、代理等的实现。
🙂 使用 Nginx 我们可以使用简单(循环)、加权和最少连接负载平衡。
我们将遵循的步骤:-
- 将使用简单的 Node API 并在两个 EC2 实例中运行(EC2 实例只不过是可以运行我们的后端代码的虚拟服务器或机器)
- 然后,我们将在第三个 EC2 实例或第三台机器上运行 Nginx
- 然后我们将在运行 Node App 的两个 EC2 服务器之间设置负载平衡。
😌注意:- 别担心,跟着做你会得到最大的收获。
-
创建一个 AWS 账户,不用担心,您可以免费使用它,直到您不超过免费限制
-
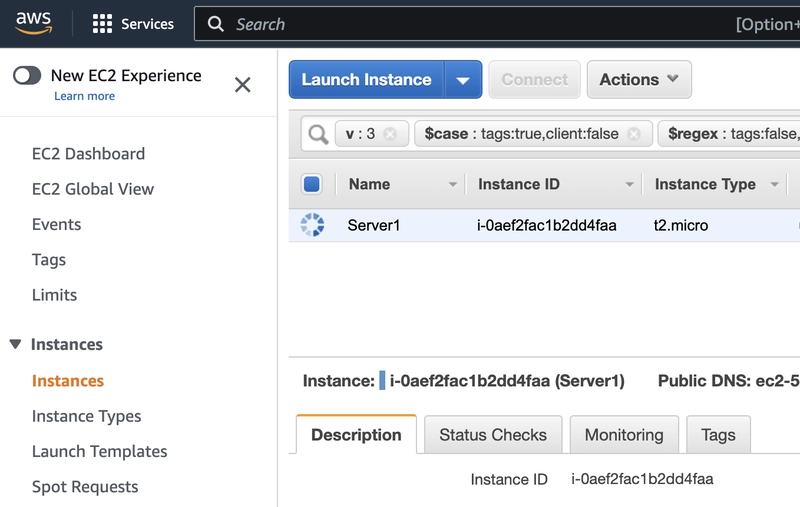
现在,从主页转到 Amazon EC2 服务并创建一个 EC2 实例(启动一个 EC2 实例)
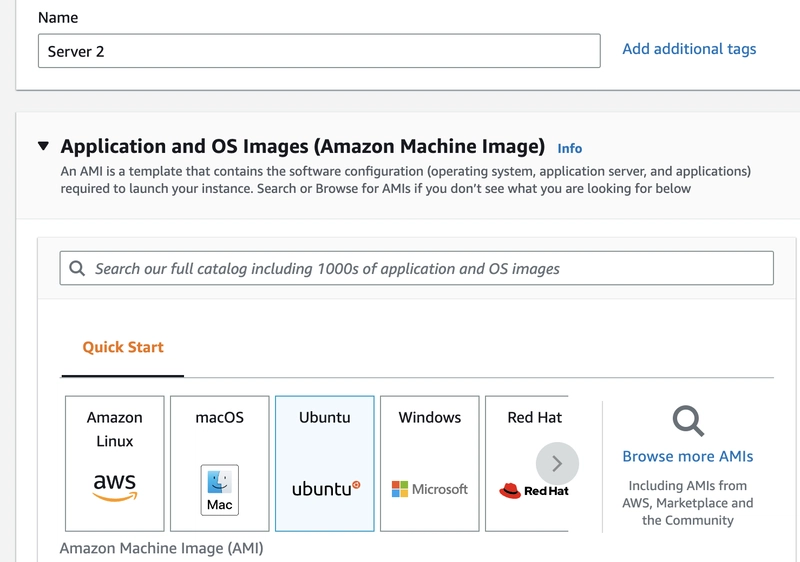
- 选择服务器的操作系统和名称
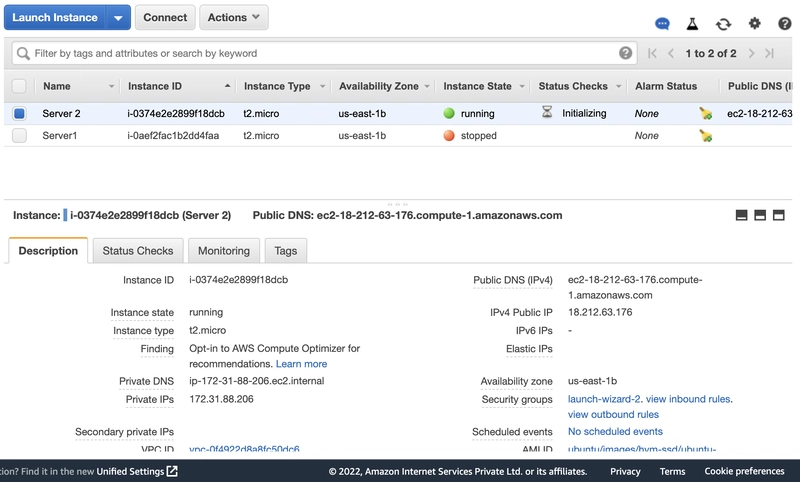
- 选择密钥对作为 .pem 文件,并将文件保存到本地计算机上。在这里,您可以看到我创建了两个 EC2 实例来运行两个服务器(我们的 NodeJS 应用程序)。
🙂注意:- 这里的公共 IP 是我们从本地机器通过 SSH 连接你的 EC2 机器所需要的 IP(基本上,用外行人的话来说,SSH 意味着你可以从本地机器的终端控制 EC2 虚拟服务器)
- 现在,转到包含 pem 文件的目录。输入以下命令,
ssh -i Server1.pem ubuntu@18.212.63.176其中 Server1.pem 是您在创建实例时保存的 pem 文件,ubuntu@public_ip 包含实例的公共 IP。
注意:在运行上述命令之前,请通过输入“chmod 400 Server1.pem”来更改 pem 文件的权限chmod
0400 Server1.pem

- **Now, Connect to your EC2 instance server and Deploy your** [NodeJS app on that server](https://www.youtube.com/watch?v=S45jZCvd2M8).

- **I have deployed NodeJS apps on Server 1 and Server 2 as**:-
NodeJS APIs code that is deployed for load balancing:-

🔥 Note:- _In case your server is listening in the EC2 instance but you are not able to connect to the server from the local machine terminal then follow these:-_
- In your SSH terminal of EC2 instance type kill -9 node
- Change the port of your server.js file to 80
- Add HTTP security Group from this [Link](https://intellipaat.com/community/3700/how-to-open-a-web-server-port-on-ec2-instance)
- **Now, here both servers are running server_1.js and server_2.js as**:-

- **Now, we'll setup Nginx Webserver (As a load balancer) on the third ec2 instance**
- **Launch New EC2 instance and** [install Nginx](https://ubuntu.com/tutorials/install-and-configure-nginx#2-installing-nginx) in your ubuntu Ec2
- Now, in this new EC2 instance, after installing Nginx go to **/etc/nginx/conf.d** directory and create a file named **lb.config**
- **Enter Content in the file as:-**

- Here, endpoint1 is the name that you can give and the same name should be present in the location block. Servers here are the Private IPs of our Ec2 instances entered.
- This is the simple load balancing (Round Robin) means the first request will route to server 1 and the second will to server 2 and so on...
-----
_Now, you can access Nginx EC2 instance public IP from browser URL and It will make requests like the first request will route to server 1 and the second will to server 2, and so on..._
🎯 **I hope you guys have enjoyed the Load balancing using Nginx.** [Follow](https://dev.to/lovepreetsingh/) for more practical tutorials
🙂 _More Quality content will be coming on the core topics._
 后端开发教程 - Java、Spring Boot 实战 - msg200.com


