强化暴露在互联网上的 Linux 服务器的 8 个措施
将虚拟机暴露到互联网上并非易事。我们通常使用 SSH 连接进行管理,因此必须尽可能地保护我们的机器免受黑客攻击。
让我们来看一下一些常见的、简单的配置,这些配置将使攻击者难以访问您的机器。
💬 本期内容
👉 我们实验室使用的信息
用户:root
密码:生成password generator
说明:我们的Root用户
用户:辅助
密码:生成password generator
说明:非Root用户进行日常访问
操作系统:Ubuntu Server 20.04 - 但它也适用于不同版本的 Linux。
创建非root用户
首先:永远不要使用 root 用户执行非特权任务。
为了实现这一点,让我们创建一个非 root 用户,并仅在必要时使用sudo命令来提升我们的权限。
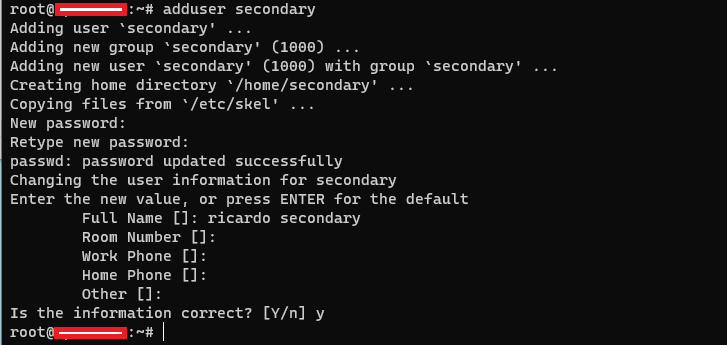
以root用户身份登录后,让我们创建一个名为secondary 的非 root用户。在我们的 中执行以下命令。bash shell
# create a regular user with name secondary
$ adduser secondary
创建次要用户
我们应该回答一些问题(从密码开始),然后我们就会有用户了。
现在我们有了一个权限较低的用户。下一步是在必要时授予其使用sudo命令的权限。
添加到 Sudo 组
运行usermod命令将辅助用户纳入sudo组。
# includes the secondary into sudo group
$ usermod -aG sudo secondary
现在我们可以在命令前使用sudo来以管理员权限运行。
启用UFW简易防火墙
UFW 是 Ubuntu Server 的默认防火墙系统(其底层是强大的 IPTables)。
使用ufw可以非常轻松地允许或阻止某个端口。
# allow port 22
$ sudo ufw allow 22
不要忘记使用sudo我们应该使用辅助用户而不是root
# Deny all incoming by default, allow outgoing, and finally enable the ufw service
$ sudo ufw default deny incoming
$ sudo ufw default allow outgoing
$ sudo ufw enable
默认拒绝所有传入,允许传出,最后启用ufw服务
# display status of ufw
$ sudo ufw status
太棒了!现在ufw已经启动并运行了。
添加无人值守升级
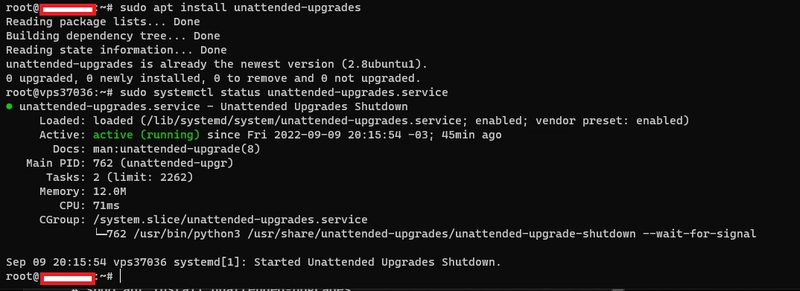
Unattended-Upgrade 是一种定期检查和更新操作系统包的服务。
无人值守升级的目的是让计算机自动保持最新的安全(和其他)更新。https
://wiki.debian.org/UnattendedUpgrades
# Install unattended upgrades and enable it

$ sudo apt install unattended-upgrades

$ sudo systemctl status unattended-upgrades.service
安装后只需启用服务就可以了。
默认配置将自动检索 Ubuntu 存储库中包含的大多数软件包的新软件包更新。
强化 SSH 配置
大多数 Linux 服务器都使用 OpenSSH 技术通过 SSH 进行远程管理。OpenSSH 是 Ubuntu 默认使用的 SSH 服务器软件。
这是互联网上暴露的针对 Linux 的黑客攻击的主要途径之一。让我们一起改进 SSH 服务器的配置吧。
使用 SSH 密钥代替密码
SSH 密钥是远程登录任何 Linux 服务器环境的推荐方式。
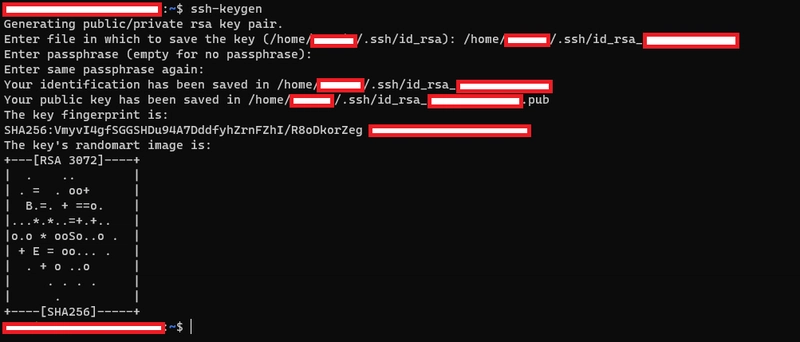
回到客户端(而不是服务器),让我们创建一对密钥——私钥和公钥。这在 Windows 10/11 上也有效。
$ ssh-keygen
如果愿意,您可以指定不同的位置来保存密钥。
下一步是将 SSH 密钥复制到 Ubuntu 服务器。
$ cat /home/{username}/.ssh/id_rsa.pub
将输出的内容复制到传输区域。
返回我们的服务器
# create .ssh if not created
$ sudo mkdir -p ~/.ssh

# copy the public key to authorized_keys file
$ sudo echo public_key_string >> ~/.ssh/authorized_keys

# remove all permissions on .ssh folder
$ sudo chmod -R go= ~/.ssh

# adding read permission to our user - our scenario is secondary - on .ssh folder
$ chown -R secondary:secondary ~/.ssh
现在,我们在服务器的属性位置中拥有由客户端机器生成的公钥,并且具有适当的权限。
就是这样。现在我们可以使用刚刚创建的 SSH 密钥登录了。我们来试试吧。
# ssh -i {key path}
$ ssh -i $HOME/.ssh/id_rsa secondary@{SERVER-IP}
使用 SSH 密钥登录服务器
更改 SSH 的默认端口
使用文本编辑器打开 SSH 配置文件sshd_config 。
$ sudo nano /etc/ssh/sshd_config
查找该条目Port 22- 它可能被注释了。将其替换为所需的值 - 端口号介于 1024 和 65536 之间
. . .
Port 2222
. . .
端口配置
保存并重新启动 OpenSSH 服务。
$ sudo systemctl restart ssh
重新启动 SSH 服务
禁用 SSH 密码验证
将属性更改为PasswordAuthentication no
. . .
PasswordAuthentication no
. . .
密码验证配置
禁用 Root 用户登录
将属性更改为PermitRootLogin no
. . .
PermitRootLogin no
. . .
密码验证配置
调整其他 sshd_config 配置
再次打开配置文件sshd_config
$ sudo nano /etc/ssh/sshd_config

. . .
MaxAuthTries 3
. . .
. . .
PermitEmptyPasswords no
. . .
测试并重新启动 SSH 服务以反映新配置
# test the configuration changes
$ sudo sshd -t

# restart the service and load the new configuration
$ sudo systemctl restart ssh
在 SSH 客户端上使用 ssh 配置文件
在 ssh 客户端的文件夹中添加一个配置文件.ssh允许我们为每个连接默认定义密钥、主机、用户和其他配置。
在我们客户的机器中
在~/.ssh/config位置创建配置文件
# THIS IS OUR CLIENT - NOT OUR UBUNTU SERVER
$ nano ~/.ssh/config
传递以下内容。
# connection name
Host ssh-server

   # host address (ip or hostname)
   Hostname 192.168.0.100

   # port of ssh server
   Port 2222

   # user
   User secondary

   # private key to use
   IdentityFile ~/.ssh/id_rsa_locaweb_secondary
配置文件
然后我们就可以仅使用连接名称进行连接
$ ssh ssh-server
最后的想法
哇,终于成功了。够了!
当然,我们可以继续加强它,甚至增加更多的保护——它永远不会停止。
在评论部分分享您将采取哪些措施来使其变得更好或有所不同。
文章来源:https://dev.to/rmauro-dev/8-actions-for-hardening-your-linux-server-exposed-on-the-internet-5168 后端开发教程 - Java、Spring Boot 实战 - msg200.com


