为初学者制作一个简单的 CSS 时间线!
一些背景故事
在设计自己的作品集时,我考虑过为它创建一个专门的时间轴。说实话,时间轴总是看起来很复杂。我在网上搜索时间轴,发现有很多方法可以创建 CSS 时间轴。
创建时间线的几种方法:
- 使用弹性框
- 使用网格
- 使用无序列表(真的吗?)
divs使用变换进行定位
我们将使用网格来创建 CSS 时间线,这可能是最适合初学者使用 CSS 时间线的方式(我希望)。
创建基本结构
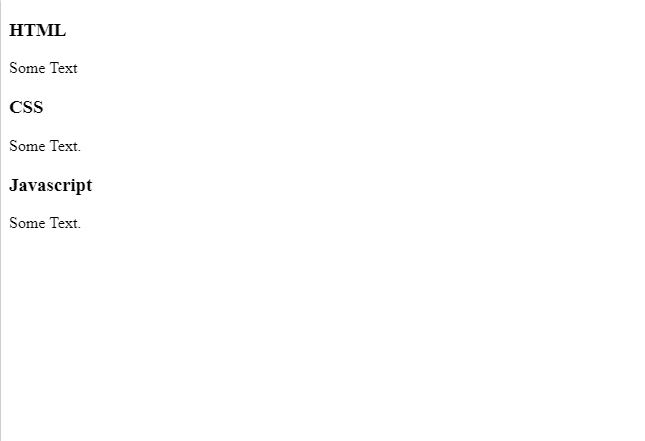
我们将从一些基本的 HTML 开始,为我们的时间线创建一个基本结构。
<section class="full-page">
<!--This is the main container that contains the whole timeline.-->

<div class="timeline">

          <!--Well, The reason for this div is to fill space.
This space is technically used for keeping dates,
but I didn't find the need for dates. However, I'll provide
you the styling for dates, so that you can use it if you
wanted to.-->
                  <div class="timeline-empty">
                  </div>

<!--This is the class where the timeline graphics are
housed in. Note that we have timeline-circle
here for that pointer in timeline.-->

               <div class="timeline-middle">
                   <div class="timeline-circle"></div>
               </div>
               <div class="timeline-component timeline-content">
                <h3>HTML</h3>
                <p>Some Text</p>
           </div>
                <div class="timeline-component timeline-content">
                         <h3>CSS</h3>
                         <p>Some Text.</p>
                </div>
                <div class="timeline-middle">
                    <div class="timeline-circle"></div>
                </div>
                <div class="timeline-empty">
                </div>

                <div class="timeline-empty">
                </div>

               <div class="timeline-middle">
                   <div class="timeline-circle"></div>
               </div>
               <div class=" timeline-component timeline-content">
                <h3>Javascript</h3>
                <p>Some Text.</p>
           </div>

       </div>
    </div>
</section>
我已经在上面代码的注释块中解释了大部分代码,如果您觉得还不够充分,请在下面的评论中告诉我。
时间轴制作的前半部分已经结束。接下来是 CSS!
设置时间线的样式。
看起来不太好看。所以,我们将使用 CSS 来让时间线看起来更酷。
我在这里使用了 Sass,您可以在这里的变量中看到它,但与常规 CSS 没有太大偏差。
.full-page{
/*I have used this to center the whole timeline on the screen.*/
  display: flex;
  align-items: center;
  justify-content: center;
}

/*The timeline container has a minimal width
than the main container to make text look more dressed up.*/
.timeline{
  width: 80%;
  height: auto;
  max-width: 800px;
  margin: 0 auto;
  display: flex;
  flex-direction: column;
}

/*This is the container for timeline content. Those are its
styling. The include statement is used in sass to copy
a certain bunch of rules. This is related to
styling and nothing to worry at your end.*/

.timeline-content{
  padding: 20px;
  @include neu-card;
  margin-bottom: 20px;
  border-radius: 6px ;
}

/*Adding some margin for all components in
the timeline. The timeline content is used
for text blocks exclusively.*/

.timeline-component{
  margin: 0px 20px 20px 20px;
}

/*This is where, I've added responsiveness. Before
this I added display: flex to show it as an
array of text blocks. But if the screen size is
 huge enough for a timeline, you can use media
queries to add styles that are apt for larger
screens, which is adding a timeline. 1fr 3px
1fr means that there will be 3 columns with 2
columns equally sized with a column of width 3px
in the middle.
*/

@media screen and (min-width: 768px) {
  .timeline{
    display: grid;
    grid-template-columns: 1fr 3px 1fr;
  }

/*Adding the styles for the timeline line and pointer.*/

  .timeline-middle{
    position: relative;
    background-image: $linear-grad;
    width: 3px;
    height: 100%;
  }

/*Adding styles for that circle pointer. using
some transforms and positioning to keep it center*/
  .timeline-circle{
    position: absolute;
    top: 0;
    left: 50%;
    width: 15px;
    height: 15px;
    border-radius: 50%;
    background-image: $linear-grad;
    transform: translateX(-50%);

  }
}
并标记此代码的结束。希望代码块中的注释能够帮助您更好地解释代码。
我的版本的代码如下所示(您可以在此嵌入中找到纯 CSS 版本,但格式非常混乱:
尝试调整结果窗口的大小,您将亲眼看到神奇的效果。
可能有很多有效的方法来做同样的事情(使用弹性框),但由于这是一个面向初学者的教程,所以我使用了网格。
相比之下,网格确实很容易理解。这就是我选择网格而不是弹性盒子的原因。
不过,如果你需要一个 flexbox 版本,网上有很多教程。谁知道呢,也许我很快就能为这篇文章创建一个 flexbox 版本!
请继续关注更多更新。
文章来源:https://dev.to/divyeshkamalanaban/making-a-simple-css-timeline-for-beginners-1ccg 后端开发教程 - Java、Spring Boot 实战 - msg200.com
