使用 refine 和 Strapi 在 15 分钟内创建反馈管理面板
在本文中,我们将创建一个面板,用于管理从 Web 应用程序收到的反馈。
我们将使用Strapi.io快速创建一个 API ,然后使用refine开发其前端。这样,让我们看看如何在极短的时间内,通过 Strapi 和 refine 的完美结合,创建一个管理面板。
我们的面板将具有以下特点:
- 使用 strapi.io 进行身份验证
- 列出反馈的页面
- 反馈突变
创建 apiStrapi
让我们使用 Strapi 的快速入门指南创建我们的后端项目。
npx create-strapi-app strapi-feedback-api --quickstart
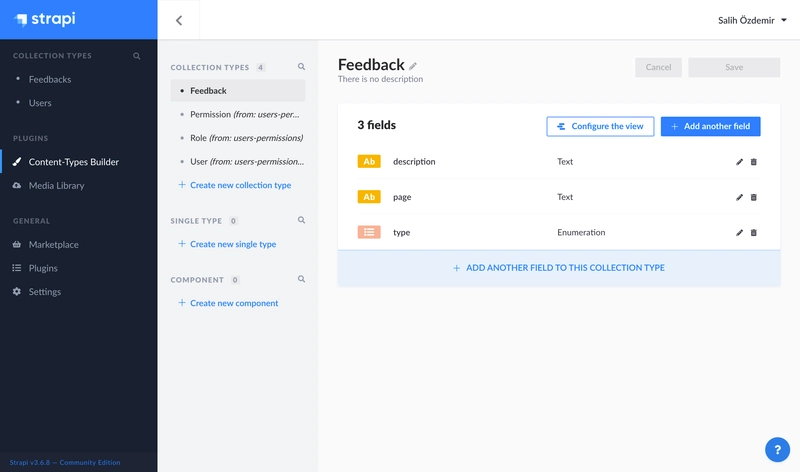
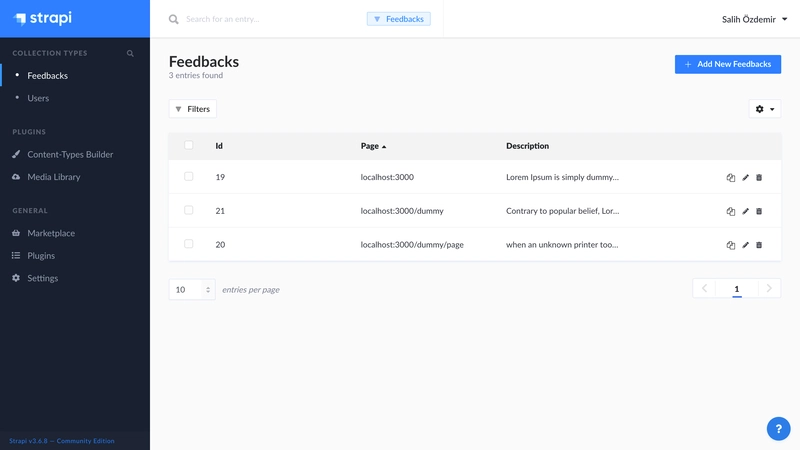
安装完成后,标签页会自动在浏览器中打开。这里,我们来feedback用 Content-Types Builder 创建一个集合。
很简单,反馈应该有一个description文本字段、一个page显示反馈发送页面的文本字段和一个type指示反馈类型(问题、想法、其他、存档)的枚举字段。
使用创建面板refine
让我们根据 refine 的设置指南来创建我们的前端项目。
有两种方法可以设置优化应用程序。我们将使用superplate快速创建我们的应用程序。
npx superplate-cli refine-feedback-client
选择以下选项以完成 CLI 向导:
? Select your project type:
❯ refine

? What will be the name of your app:
refine-strapi-web

? Package manager:
❯ Npm

? Do you want to customize the theme?:
❯ No (Ant Design default theme)

? Data Provider :
❯ Strapi

? Do you want to customize layout?
❯ Yes, I want

? i18n - Internationalization:
❯ No
安装完成后,Strapi 特定的数据提供程序、身份验证提供程序以及我们可以使用自定义布局选项更改 Refine 的默认视图的布局组件将包含在我们的项目中。
现在,使用以下命令引导应用程序:
npm run dev
现在让我们列出我们将要做出的改变:
- 更改我们的 Strapi API URL
- 删除更改细化外观时不会使用的组件
- 根据我们在 Strapi 中创建的集合名称添加资源
+ import { Refine } from "@pankod/refine";
import "@pankod/refine/dist/styles.min.css";
import { DataProvider } from "@pankod/refine-strapi";
import strapiAuthProvider from "authProvider";
import {
- Title,
  Header,
- Sider,
- Footer,
  Layout,
  OffLayoutArea,
} from "components";

function App() {
-  const API_URL = "your-strapi-api-url";
+  const API_URL = "http://localhost:1337";

  const { authProvider, axiosInstance } = strapiAuthProvider(API_URL);
  const dataProvider = DataProvider(API_URL, axiosInstance);
  return (
    <Refine
      dataProvider={dataProvider}
      authProvider={authProvider}
-     Title={Title}
      Header={Header}
-     Sider={Sider}
-     Footer={Footer}
      Layout={Layout}
      OffLayoutArea={OffLayoutArea}
      routerProvider={routerProvider}
      resources={[
        {
          name: "feedbacks",
        },
      ]}
    />
  );
}

export default App;
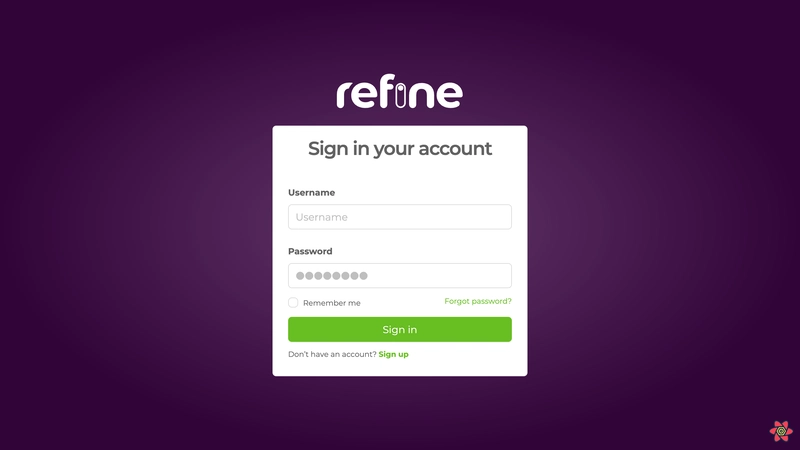
添加资源后,我们的身份验证提供程序就被激活了。
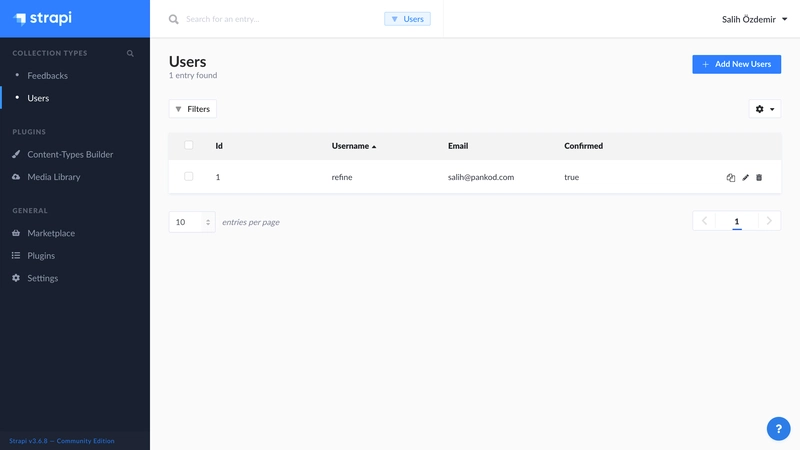
现在让我们在 Strapi 上创建一个用户以便能够登录该应用程序。
我们创建了一个用户并使用该用户登录应用程序。
让我们自定义布局组件,删除侧边栏并添加标题。
import React from "react";
import { Layout as AntLayout } from "antd";

import { LayoutProps } from "@pankod/refine";

export const Layout: React.FC<LayoutProps> = ({
  children,
  Header,
  OffLayoutArea,
}) => {
  return (
    <AntLayout style={{ minHeight: "100vh", flexDirection: "row" }}>
      <AntLayout>
        <Header />
        <AntLayout.Content>
          {children}
          <OffLayoutArea />
        </AntLayout.Content>
      </AntLayout>
    </AntLayout>
  );
};
让我们也自定义一下 header 组件
import React from "react";
import { Layout } from "antd";

export const Header: React.FC = () => {
  return (
    <Layout.Header
      style={{
        display: "flex",
        justifyContent: "center",
        alignItems: "center",
        height: "64px",
        backgroundColor: "#FFF",
        borderBottom: "1px solid #f0f0f0",
      }}
    >
      <img src="./refeedback.png" alt="refeedback" style={{ width: "250px" }} />
    </Layout.Header>
  );
};
在新视图中,不再有侧边栏,我们自定义的标题就在这里。
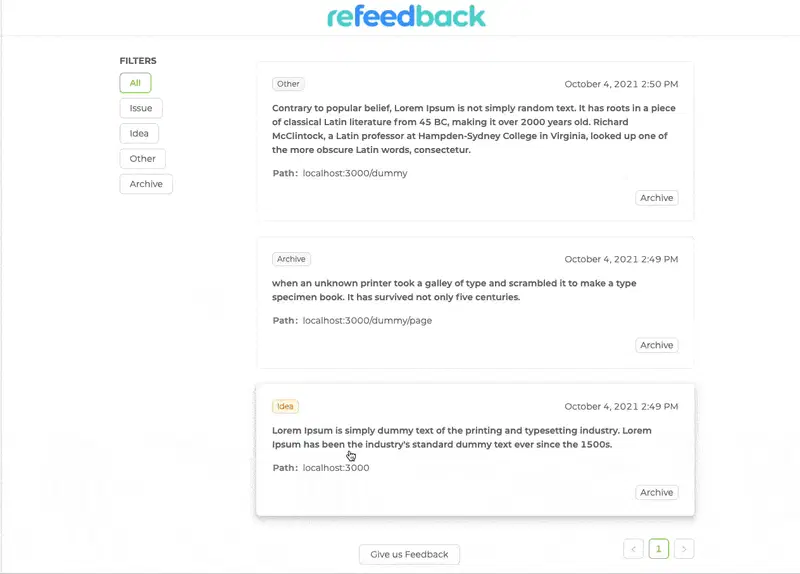
现在我们来列出我们的反馈并进行修改。在此之前,让我们在 Strapi 上创建虚拟反馈记录。
在该文件夹下创建一个FeedbackList.tsx文件pages。然后,让我们使用 refine 自带的组件和钩子创建如下组件。
import {
  List,
  Typography,
  AntdList,
  useSimpleList,
  CrudFilters,
  Form,
  HttpError,
  Row,
  Col,
  Tag,
  Radio,
  Space,
  Descriptions,
  Button,
  DateField,
  Card,
  useUpdate,
} from "@pankod/refine";

import { IFeedback, IFeedbackFilterVariables, FeedBackType } from "interfaces";

const { Paragraph } = Typography;

const addTagColor = (type: FeedBackType) => {
  switch (type) {
    case "issue":
      return "error";
    case "idea":
      return "orange";
    default:
      return "default";
  }
};

export const FeedbackList: React.FC = () => {
  const { listProps, searchFormProps } = useSimpleList<
    IFeedback,
    HttpError,
    IFeedbackFilterVariables
  >({
    initialSorter: [{ field: "created_at", order: "desc" }],
    onSearch: (params) => {
      const filters: CrudFilters = [];
      const { type } = params;

      filters.push({
        field: "type",
        operator: "eq",
        value: type || undefined,
      });

      return filters;
    },
  });

  const { mutate, isLoading } = useUpdate();

  const renderItem = (item: IFeedback) => {
    const { id, description, type, page, created_at } = item;
    return (
      <AntdList.Item>
        <Card hoverable>
          <AntdList.Item.Meta
            description={
              <div style={{ display: "flex", justifyContent: "space-between" }}>
                <Tag
                  color={addTagColor(type)}
                  style={{ textTransform: "capitalize" }}
                >
                  {type}
                </Tag>
                <DateField format="LLL" value={created_at} />
              </div>
            }
          />
          <Paragraph strong>{description}</Paragraph>
          <Descriptions labelStyle={{ color: "grey", fontWeight: 600 }}>
            <Descriptions.Item label="Path">{page}</Descriptions.Item>
          </Descriptions>
          <div style={{ display: "flex", justifyContent: "end", gap: "4px" }}>
            <Button
              size="small"
              loading={isLoading}
              onClick={() =>
                mutate({
                  id,
                  resource: "feedbacks",
                  values: {
                    type: "archive",
                  },
                })
              }
            >
              Archive
            </Button>
          </div>
        </Card>
      </AntdList.Item>
    );
  };

  return (
    <List title="" pageHeaderProps={{ style: { height: "100%" } }}>
      <Row gutter={[64, 0]} justify="center">
        <Col xs={24} sm={24} md={4} lg={4} xl={4}>
          <Form
            {...searchFormProps}
            layout="vertical"
            onValuesChange={() => searchFormProps.form?.submit()}
            initialValues={{
              type: "",
            }}
          >
            <Form.Item label="FILTERS" name="type">
              <Radio.Group>
                <Space direction="vertical">
                  <Radio.Button value="">All</Radio.Button>
                  <Radio.Button value="issue">Issue</Radio.Button>
                  <Radio.Button value="idea">Idea</Radio.Button>
                  <Radio.Button value="other">Other</Radio.Button>
                  <Radio.Button value="archive">Archive</Radio.Button>
                </Space>
              </Radio.Group>
            </Form.Item>
          </Form>
        </Col>
        <Col xs={24} sm={24} md={14} lg={14} xl={14}>
          <AntdList
            {...listProps}
            split={false}
            renderItem={renderItem}
            itemLayout="vertical"
          />
        </Col>
      </Row>
    </List>
  );
};
export type FeedBackType = "idea" | "issue" | "other" | "archive";

export interface IFeedback {
  id: string;
  description: string;
  page: string;
  user: string;
  type: FeedBackType;
  created_at: Date;
}

export interface IFeedbackFilterVariables {
  type: FeedBackType;
}
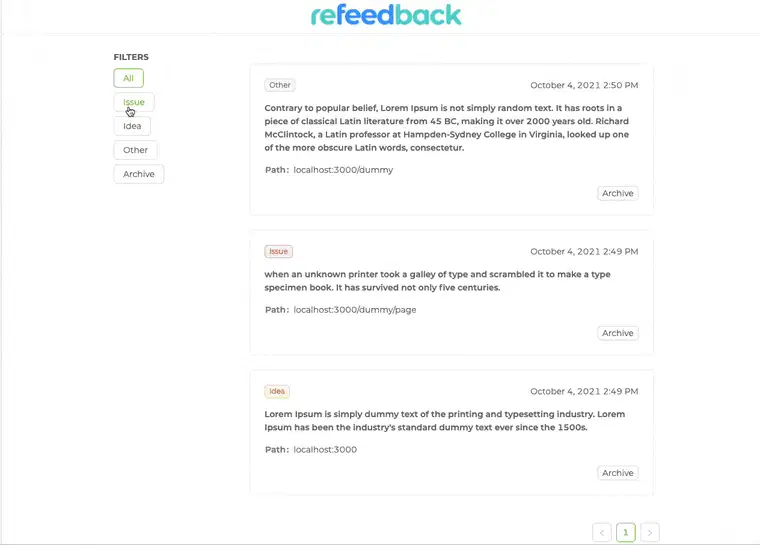
在这个组件中
useSimpleList我们使用和Ant Design 组件列出了我们的记录<List>。- 我们使用 Antd
<Form>组件来过滤我们的记录。 - 我们可以
type通过以下方式更改我们的记录useUpdate
请参阅此处了解 useSimpleList 用于添加新过滤器、添加搜索条目、动态排序操作等的详细用法。
让我们开发一个反馈小部件,用于收集反馈,从而进一步扩展应用程序。对于这个应用程序,我将使用 Refine 开发这个组件,但您也可以使用 Strapi API 以任何您想要的方式创建这个组件。
您可以在此处查看我开发的组件的代码。
现在让我们将此组件添加到OfflayouArea组件并在页面上创建反馈,看看它如何进入我们的反馈列表。
您可以在此处找到该项目的源代码:https://github.com/pankod/refine/tree/master/examples/blog/refeedback
鏂囩珷鏉ユ簮锛�https://dev.to/refine/create-a-feedback-admin-panel-in-15-minutes-with-refine-and-strapi-3i2p 后端开发教程 - Java、Spring Boot 实战 - msg200.com
