如何使用 NextJS 和 TailwindCSS 设计简洁美观的导航栏
设置和配置
创建目录
启动我们的组件

毫无疑问,NextJS 已将自己定位为目前最好的 React 框架,它提供了我们非常喜欢的库的所有优点,此外还提供了 SSR 和 SEO 配置等额外功能。
因此,本文旨在展示如何在 NextJS 中借助 TailwindCSS 轻松直观地创建导航栏。为了实现更复杂的效果,我将在下一篇文章中介绍如何为导航栏元素添加全局状态以进行更改。
设置和配置
因此,我们需要做的第一件事是使用 NextCli 安装 NextJS,就我而言,我更喜欢使用 Yarn。
yarn create next-app
创建应用程序后,我们继续安装 Tailwind 和所需的依赖项:
yarn add tailwindcss@latest postcss@latest autoprefixer@latest postcss-cli
安装依赖项后,我们需要在 App.js 中做一些修改并创建新文件。首先创建文件 postcss.config.js ,它位于项目的根目录中:
touch postcss.config.js
在文件中,我们将放置以下配置
// postcss.config.js
module.exports = {
  plugins: {
    tailwindcss: {},
    autoprefixer: {},
  },
}
此后,我们将使用以下命令创建文件 tailwind.config.js
npx tailwindcss init --full
这会生成一个 tailwind.config.js 文件,我们可以根据需要修改和自定义它。
现在,我们可以删除 Next 创建的默认生成样式,并且我们需要在 style 文件夹中创建两个文件:main.css 和 tailwind.css。
在 tailwind.css 文件中,我们需要添加以下内容
/* ./styles/tailwind.css */
@tailwind base;
@tailwind components;
@tailwind utilities;
之后我们必须修改App.js和Index.js页面,使它们不与删除的文件冲突。
/* ./pages/index.js               */
import Head from 'next/head';

export default function Home() {
  return (
    <div>
      <Head>
        <title>Create Next App</title>
        <link rel='icon' href='/favicon.ico' />
      </Head>
      <div>Hello World</div>
    </div>
  );
}
/*   ./styles/_app.js              */
import '../styles/main.css';

function MyApp({ Component, pageProps }) {
  return <Component {...pageProps} />;
}

export default MyApp;
因此,在 Next App 中使用 Tailwind 之前,我们需要生成一个脚本来编译 main.css 文件中的 Tailwind 类。因此,我们需要在 package.json 中添加一些脚本
{
  "name": "ourapp",
  "version": "0.1.0",
  "private": true,
  "scripts": {
    "dev": "next dev",
    "build": "next build",
    "start": "next start",
    "build:css": "postcss styles/tailwind.css -o styles/main.css",
    "build:watch": "postcss styles/tailwind.css -o styles/main.css --watch",
    "prod:build": "NODE_ENV=production yarn run build:css && yarn run build"
  },
  "dependencies": {
    "autoprefixer": "^10.1.0",
    "next": "10.0.4",
    "postcss": "^8.2.1",
    "postcss-cli": "^8.3.1",
    "react": "17.0.1",
    "react-dom": "17.0.1",
    "tailwindcss": "^2.0.2"
  }
}
最后,我们需要执行 build:css
yarn build:css
现在我们可以在所有应用程序中使用 Tailwind 了 :D。
创建目录
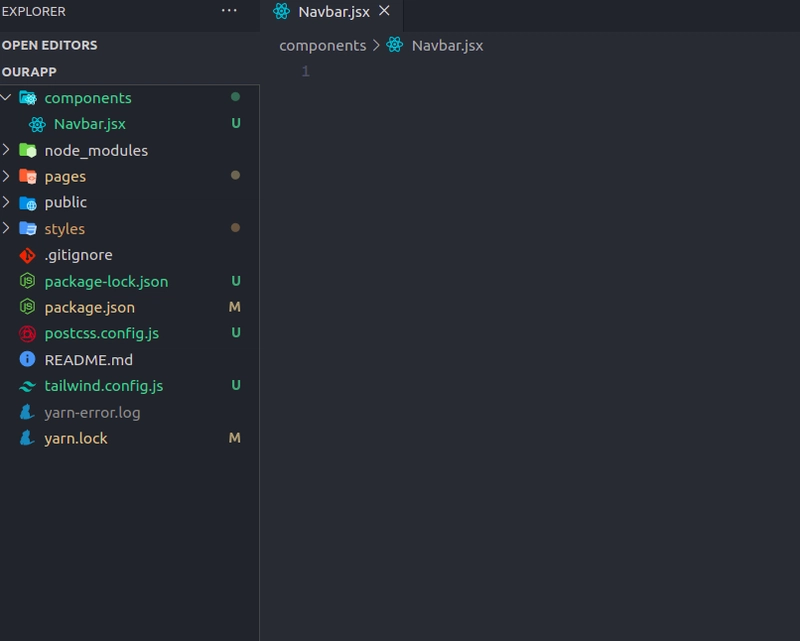
在开始之前,我想向你展示我喜欢在这种类型的应用程序中使用的架构
现在我们需要将组件插入到布局中。本例中,我们不需要创建布局容器,而是直接在 Index.js 中添加组件。
/* ./pages/index.js               */
import Head from 'next/head';
import { Navbar } from '../components/Navbar';

export default function Home() {
  return (
    <div>
      <Head>
        <title>Create Next App</title>
        <link rel='icon' href='/favicon.ico' />
      </Head>
      <Navbar />
      <div>Hello World</div>
    </div>
  );
}
启动我们的组件
/*  ./components/Navbar.jsx     */

export const Navbar = () => {
  return (
    <div>

    </div>
  )
}
从 React 17 版本开始,我们的功能组件中不再需要导入 React。
我们首先定义网格(在本例中为弹性网格)、填充和背景颜色
/*  ./components/Navbar.jsx     */

export const Navbar = () => {
  return (
    <>
      <nav className='flex items-center flex-wrap bg-green-300 p-3 '></nav>
    </>
  );
};
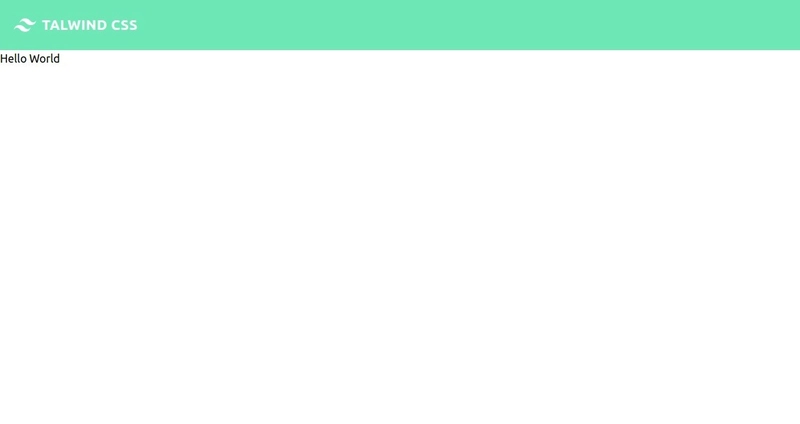
接下来为我们提供了美观且实用的工具 Link,用于在我们的 SPA 内部进行重定向,因此在这种情况下,我们将使用它作为徽标,它会将我们重定向到应用程序的“主页”或主视图。
/*  ./components/Navbar.jsx     */
import Link from 'next/link';

export const Navbar = () => {
  return (
    <>
      <nav className='flex items-center flex-wrap bg-green-300 p-3 '>
        <Link href='/'>
          <a className='inline-flex items-center p-2 mr-4 '>
            <svg
              viewBox='0 0 24 24'
              xmlns='http://www.w3.org/2000/svg'
              className='fill-current text-white h-8 w-8 mr-2'
            >
              <path d='M12.001 4.8c-3.2 0-5.2 1.6-6 4.8 1.2-1.6 2.6-2.2 4.2-1.8.913.228 1.565.89 2.288 1.624C13.666 10.618 15.027 12 18.001 12c3.2 0 5.2-1.6 6-4.8-1.2 1.6-2.6 2.2-4.2 1.8-.913-.228-1.565-.89-2.288-1.624C16.337 6.182 14.976 4.8 12.001 4.8zm-6 7.2c-3.2 0-5.2 1.6-6 4.8 1.2-1.6 2.6-2.2 4.2-1.8.913.228 1.565.89 2.288 1.624 1.177 1.194 2.538 2.576 5.512 2.576 3.2 0 5.2-1.6 6-4.8-1.2 1.6-2.6 2.2-4.2 1.8-.913-.228-1.565-.89-2.288-1.624C10.337 13.382 8.976 12 6.001 12z' />
            </svg>
            <span className='text-xl text-white font-bold uppercase tracking-wide'>
              TalwindCSS
            </span>
          </a>
        </Link>
      </nav>
    </>
  );
};
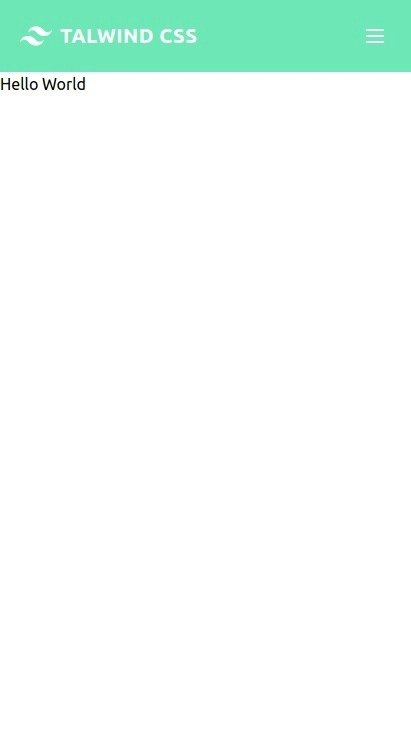
目前我们有一个简单的视图。接下来我们将继续添加可在智能手机和平板电脑上显示的汉堡菜单:
/*  ./components/Navbar.jsx     */
import Link from 'next/link';

export const Navbar = () => {
  return (
    <>
      <nav className='flex items-center flex-wrap bg-green-300 p-3 '>
        <Link href='/'>
          <a className='inline-flex items-center p-2 mr-4 '>
            <svg
              viewBox='0 0 24 24'
              xmlns='http://www.w3.org/2000/svg'
              className='fill-current text-white h-8 w-8 mr-2'
            >
              <path d='M12.001 4.8c-3.2 0-5.2 1.6-6 4.8 1.2-1.6 2.6-2.2 4.2-1.8.913.228 1.565.89 2.288 1.624C13.666 10.618 15.027 12 18.001 12c3.2 0 5.2-1.6 6-4.8-1.2 1.6-2.6 2.2-4.2 1.8-.913-.228-1.565-.89-2.288-1.624C16.337 6.182 14.976 4.8 12.001 4.8zm-6 7.2c-3.2 0-5.2 1.6-6 4.8 1.2-1.6 2.6-2.2 4.2-1.8.913.228 1.565.89 2.288 1.624 1.177 1.194 2.538 2.576 5.512 2.576 3.2 0 5.2-1.6 6-4.8-1.2 1.6-2.6 2.2-4.2 1.8-.913-.228-1.565-.89-2.288-1.624C10.337 13.382 8.976 12 6.001 12z' />
            </svg>
            <span className='text-xl text-white font-bold uppercase tracking-wide'>
              Talwind CSS
            </span>
          </a>
        </Link>
        <button className=' inline-flex p-3 hover:bg-green-600 rounded lg:hidden text-white ml-auto hover:text-white outline-none'>
          <svg
            className='w-6 h-6'
            fill='none'
            stroke='currentColor'
            viewBox='0 0 24 24'
            xmlns='http://www.w3.org/2000/svg'
          >
            <path
              strokeLinecap='round'
              strokeLinejoin='round'
              strokeWidth={2}
              d='M4 6h16M4 12h16M4 18h16'
            />
          </svg>
        </button>
      </nav>
    </>
  );
};
好的,现在我们将继续添加计算机上可用的视图:
/*  ./components/Navbar.jsx     */
import Link from 'next/link';

export const Navbar = () => {
  return (
    <>
      <nav className='flex items-center flex-wrap bg-green-400 p-3 '>
        <Link href='/'>
          <a className='inline-flex items-center p-2 mr-4 '>
            <svg
              viewBox='0 0 24 24'
              xmlns='http://www.w3.org/2000/svg'
              className='fill-current text-white h-8 w-8 mr-2'
            >
              <path d='M12.001 4.8c-3.2 0-5.2 1.6-6 4.8 1.2-1.6 2.6-2.2 4.2-1.8.913.228 1.565.89 2.288 1.624C13.666 10.618 15.027 12 18.001 12c3.2 0 5.2-1.6 6-4.8-1.2 1.6-2.6 2.2-4.2 1.8-.913-.228-1.565-.89-2.288-1.624C16.337 6.182 14.976 4.8 12.001 4.8zm-6 7.2c-3.2 0-5.2 1.6-6 4.8 1.2-1.6 2.6-2.2 4.2-1.8.913.228 1.565.89 2.288 1.624 1.177 1.194 2.538 2.576 5.512 2.576 3.2 0 5.2-1.6 6-4.8-1.2 1.6-2.6 2.2-4.2 1.8-.913-.228-1.565-.89-2.288-1.624C10.337 13.382 8.976 12 6.001 12z' />
            </svg>
            <span className='text-xl text-white font-bold uppercase tracking-wide'>
              Talwind CSS
            </span>
          </a>
        </Link>
        <button className=' inline-flex p-3 hover:bg-green-600 rounded lg:hidden text-white ml-auto hover:text-white outline-none'>
          <svg
            className='w-6 h-6'
            fill='none'
            stroke='currentColor'
            viewBox='0 0 24 24'
            xmlns='http://www.w3.org/2000/svg'
          >
            <path
              strokeLinecap='round'
              strokeLinejoin='round'
              strokeWidth={2}
              d='M4 6h16M4 12h16M4 18h16'
            />
          </svg>
        </button>
        <div className='hidden w-full lg:inline-flex lg:flex-grow lg:w-auto'>
          <div className='lg:inline-flex lg:flex-row lg:ml-auto lg:w-auto w-full lg:items-center items-start  flex flex-col lg:h-auto'>
            <Link href='/'>
              <a className='lg:inline-flex lg:w-auto w-full px-3 py-2 rounded text-white font-bold items-center justify-center hover:bg-green-600 hover:text-white '>
                Home
              </a>
            </Link>
            <Link href='/'>
              <a className='lg:inline-flex lg:w-auto w-full px-3 py-2 rounded text-white font-bold items-center justify-center hover:bg-green-600 hover:text-white'>
                Services
              </a>
            </Link>
            <Link href='/'>
              <a className='lg:inline-flex lg:w-auto w-full px-3 py-2 rounded text-white font-bold items-center justify-center hover:bg-green-600 hover:text-white'>
                About us
              </a>
            </Link>
            <Link href='/'>
              <a className='lg:inline-flex lg:w-auto w-full px-3 py-2 rounded text-white font-bold items-center justify-center hover:bg-green-600 hover:text-white'>
                Contact us
              </a>
            </Link>
          </div>
        </div>
      </nav>
    </>
  );
};
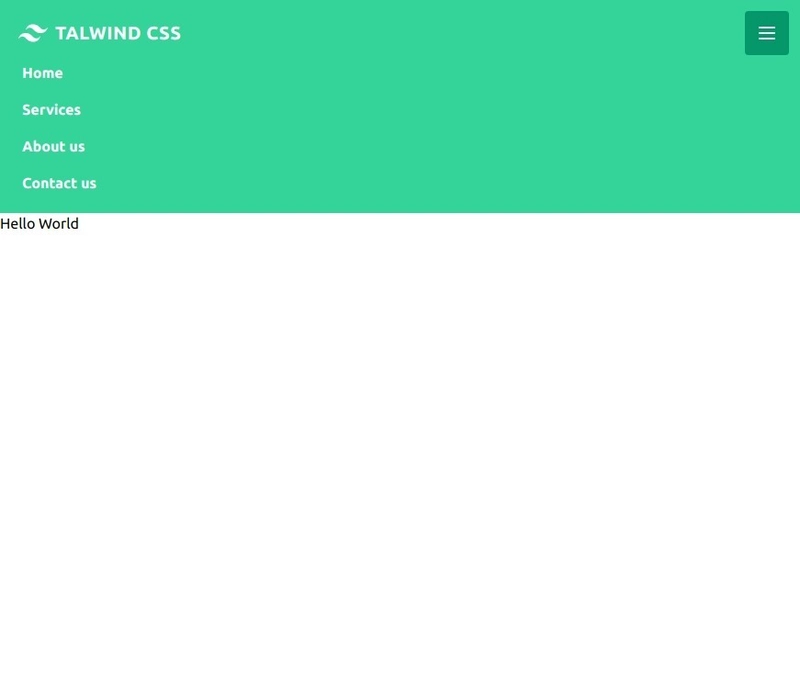
之后,我们需要一个函数,用于在点击汉堡菜单时显示或隐藏菜单。为此,我们使用 useState 钩子创建一个状态,并为点击按钮创建一个函数:
/*  ./components/Navbar.jsx     */
import Link from 'next/link';
import { useState } from 'react';

export const Navbar = () => {
  const [active, setActive] = useState(false);

  const handleClick = () => {
    setActive(!active);
  };

  return (
    <>
      <nav className='flex items-center flex-wrap bg-green-400 p-3 '>
        <Link href='/'>
          <a className='inline-flex items-center p-2 mr-4 '>
            <svg
              viewBox='0 0 24 24'
              xmlns='http://www.w3.org/2000/svg'
              className='fill-current text-white h-8 w-8 mr-2'
            >
              <path d='M12.001 4.8c-3.2 0-5.2 1.6-6 4.8 1.2-1.6 2.6-2.2 4.2-1.8.913.228 1.565.89 2.288 1.624C13.666 10.618 15.027 12 18.001 12c3.2 0 5.2-1.6 6-4.8-1.2 1.6-2.6 2.2-4.2 1.8-.913-.228-1.565-.89-2.288-1.624C16.337 6.182 14.976 4.8 12.001 4.8zm-6 7.2c-3.2 0-5.2 1.6-6 4.8 1.2-1.6 2.6-2.2 4.2-1.8.913.228 1.565.89 2.288 1.624 1.177 1.194 2.538 2.576 5.512 2.576 3.2 0 5.2-1.6 6-4.8-1.2 1.6-2.6 2.2-4.2 1.8-.913-.228-1.565-.89-2.288-1.624C10.337 13.382 8.976 12 6.001 12z' />
            </svg>
            <span className='text-xl text-white font-bold uppercase tracking-wide'>
              Talwind CSS
            </span>
          </a>
        </Link>
        <button
          className=' inline-flex p-3 hover:bg-green-600 rounded lg:hidden text-white ml-auto hover:text-white outline-none'
          onClick={handleClick}
        >
          <svg
            className='w-6 h-6'
            fill='none'
            stroke='currentColor'
            viewBox='0 0 24 24'
            xmlns='http://www.w3.org/2000/svg'
          >
            <path
              strokeLinecap='round'
              strokeLinejoin='round'
              strokeWidth={2}
              d='M4 6h16M4 12h16M4 18h16'
            />
          </svg>
        </button>
        {/*Note that in this div we will use a ternary operator to decide whether or not to display the content of the div  */}
        <div
          className={`${
            active ? '' : 'hidden'
          }   w-full lg:inline-flex lg:flex-grow lg:w-auto`}
        >
          <div className='lg:inline-flex lg:flex-row lg:ml-auto lg:w-auto w-full lg:items-center items-start  flex flex-col lg:h-auto'>
            <Link href='/'>
              <a className='lg:inline-flex lg:w-auto w-full px-3 py-2 rounded text-white font-bold items-center justify-center hover:bg-green-600 hover:text-white '>
                Home
              </a>
            </Link>
            <Link href='/'>
              <a className='lg:inline-flex lg:w-auto w-full px-3 py-2 rounded text-white font-bold items-center justify-center hover:bg-green-600 hover:text-white'>
                Services
              </a>
            </Link>
            <Link href='/'>
              <a className='lg:inline-flex lg:w-auto w-full px-3 py-2 rounded text-white font-bold items-center justify-center hover:bg-green-600 hover:text-white'>
                About us
              </a>
            </Link>
            <Link href='/'>
              <a className='lg:inline-flex lg:w-auto w-full px-3 py-2 rounded text-white font-bold items-center justify-center hover:bg-green-600 hover:text-white'>
                Contact us
              </a>
            </Link>
          </div>
        </div>
      </nav>
    </>
  );
};
就这样。现在,我们使用 NextJS 和 TailwindCSS 创建了美观简洁的导航栏。
我强烈建议您访问Tailwind和Next的文档。
这两个框架功能强大,文档也很完善,能够帮助我们脱颖而出,每天学习,提升开发水平。
我希望很快能写出本文的第二部分,在 useContext 的帮助下,我们将添加一个用户部分,并根据用户是否登录来更改导航栏视图。
另外:如果你热爱 React,并且正在寻找简洁美观的图标,你一定会喜欢 HeroIcons。这里我放出了他们的官方页面 :D
圣诞快乐,与家人共享欢乐。
文章来源:https://dev.to/andrewespejo/how-to-design-a-simple-and-beautiful-navbar-using-nextjs-and-tailwindcss-26p1 后端开发教程 - Java、Spring Boot 实战 - msg200.com


