带有 Next.js、AWS Fargate 和 AWS Amplify 的无服务器容器
AWS Amplify最近宣布支持使用 AWS Fargate 的容器。使用这项新功能,您可以直接从 Amplify CLI 部署 API(REST 和 GraphQL)以及托管到 AWS Fargate。
在本文中,我将引导您了解如何使用 Amplify CLI 将 Next.js 应用程序部署到具有自定义域的 AWS Fargate。
入门
要遵循本教程,您首先需要安装并配置Amplify CLI。
首先,创建一个新的 Next.js 应用:
npx create-next-app nextonfargate
接下来,初始化一个新的 Amplify 项目:
amplify init

? Enter a name for the project: nextonfargate
? Enter a name for the environment: dev
? Choose your default editor: <your-default-text-editor>
? Choose the type of app that youre building: javascript
? What javascript framework are you using: react
? Source Directory Path: .
? Distribution Directory Path: .next
? Build Command:  npm run-script build
? Start Command: npm run-script start

> When prompted, choose the AWS profile you'd like to use for this project.
接下来,重新配置项目以启用容器部署:
amplify configure project

? Enter a name for the project nextonfargate
? Choose your default editor: <your-default-text-editor>
? Choose the type of app that youre building javascript
? What javascript framework are you using react
? Source Directory Path:  .
? Distribution Directory Path: .next
? Build Command:  npm run-script build
? Start Command: npm run-script start
? Do you want to enable container-based deployments? Yes
? Do you want to update or remove the project level AWS profile? No
将域添加到 Route53
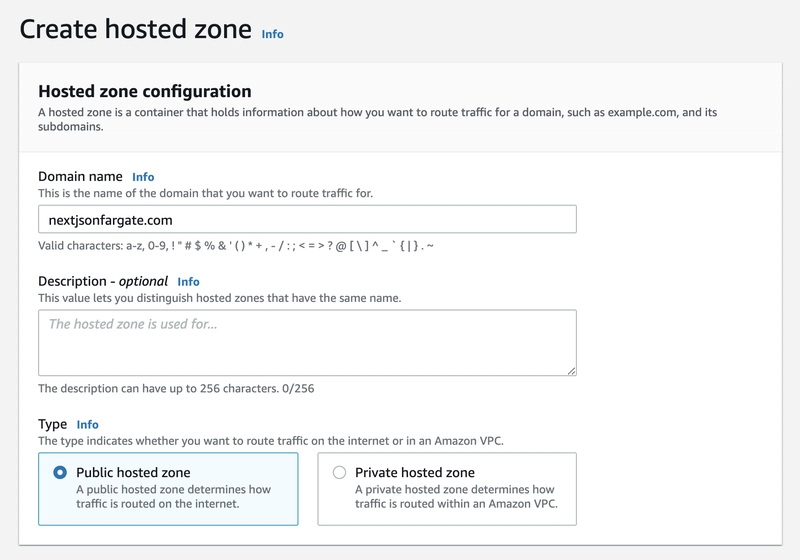
接下来,打开Route53 仪表板并单击左侧菜单中的“托管区域” 。
单击创建托管区域并输入您将使用的域名,然后单击创建托管区域。
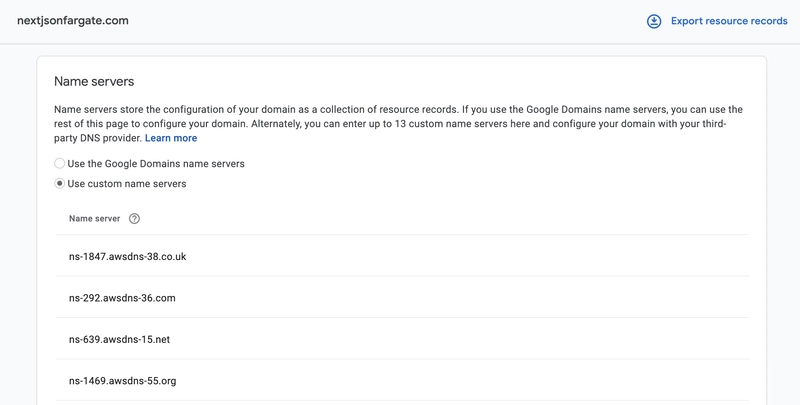
Route53 现在应该为您提供 4 个名称服务器,您可以使用它们来配置域名的 DNS。
接下来,访问您的域名注册服务并使用这些名称服务器配置您的域名。
添加 Fargate 托管
接下来,通过运行以下命令添加 Fargate Hosting:
amplify add hosting

? Select the plugin module to execute: Container-based hosting with AWS Fargate
? Provide your web app endpoint: www.yourdomain.com
? Do you want to automatically protect your web app using Amazon Cognito Hosted UI: No
这应该在本地配置您的项目,现在您应该看到在项目根目录下创建的Dockerfile 。
使用以下内容更新 Dockerfile 并保存文件:
This file contains hidden or bidirectional Unicode text that may be interpreted or compiled differently than what appears below. To review, open the file in an editor that reveals hidden Unicode characters. Learn more about bidirectional Unicode characters
| # Build locally | |
| # docker build . -t nextapp | |
| # Run locally | |
| # docker run -it -p 8080:3000 nextapp | |
| FROM public.ecr.aws/bitnami/node:14.15.1-debian-10-r8 | |
| WORKDIR /app | |
| COPY package.json yarn.lock ./ | |
| RUN yarn | |
| COPY . . | |
| RUN yarn build | |
| EXPOSE 3000 | |
| CMD ["yarn", "start"] |
部署
现在您应该可以开始部署了。为此,您可以运行以下命令:
amplify publish
部署成功后,您应该能够在实时域上查看该应用程序。
调试
您应该能够在CodeBuild仪表板中查看部署和构建情况以及任何错误日志。
部署更新
一旦您做出更改并准备部署,您应该能够amplify publish随时运行以部署更新。
视频
观看此视频以了解此过程的完整演练。
 后端开发教程 - Java、Spring Boot 实战 - msg200.com


