如何在 2022 年创建电子商务网站 [附源代码]
视频教程
代码
主页
您可能觉得有用的文章
大家好,今天我们将学习如何使用 HTML、CSS 和 JS 创建一个电商网站。这是全栈电商网站的一部分。在本部分中,我们将只创建前端页面的 UI。本教程将创建 1 个页面 - 主页,其余 3 个页面,即产品页面、搜索页面和 404 页面,您可以查看 YouTube 教程。
如果您想观看演示或完整的编码教程视频以更好地理解,您可以观看下面的教程。
视频教程
如果您能订阅我的 YouTube 频道来支持我,我将不胜感激。
代码
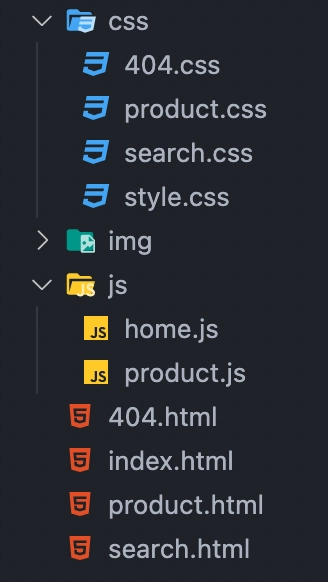
您可以在下面看到我们项目的文件夹结构。
那么,开始吧。
主页
要创建主页,请打开index.html文件并从基本的 HTML 5 模板开始。完成后,将style.css文件链接到该模板。同时,还要链接Cinzel, LatoGoogle 字体。
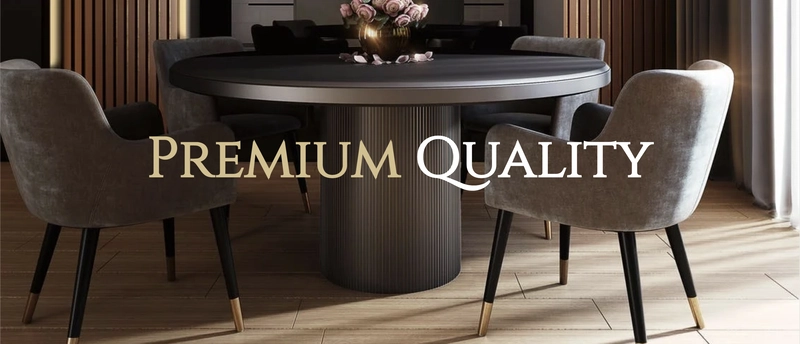
现在让我们来制作header部分。
<!-- header -->
<header class="header-section">
    <h1 class="header-heading"><span>premium</span> quality</h1>
</header>
让我们给它添加一些风格。
*{
    margin: 0;
    padding: 0;
    box-sizing: border-box;
}

body{
    font-family: 'cinzel', serif;
}

.header-section{
    width: 100%;
    height: 100vh;
    background: url(../img/header.png);
    background-size: cover;
    display: flex;
    justify-content: center;
    align-items: center;
}

.header-heading{
    font-size: 100px;
    text-transform: capitalize;
    color: #fff;
}

.header-heading span{
    color: #d5be8b;
}
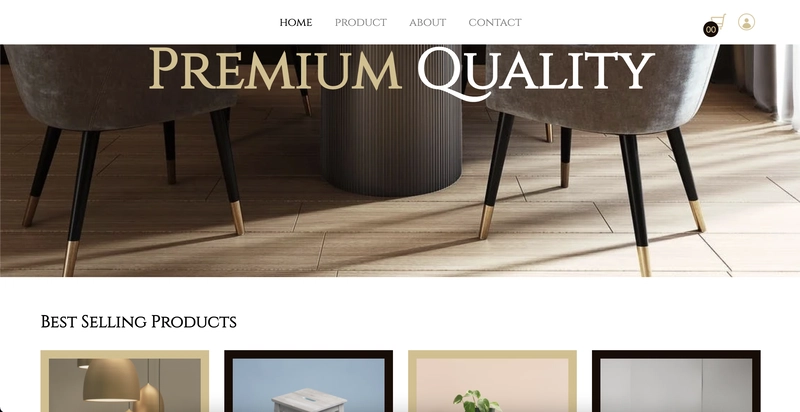
让我们看看输出
输出
现在,让我们制作导航栏。
导航栏
<!-- navbar -->
<nav class="navbar">
    <ul class="links-container">
        <li class="link-item"><a href="#" class="link active">home</a></li>
        <li class="link-item"><a href="#" class="link">product</a></li>
        <li class="link-item"><a href="#" class="link">about</a></li>
        <li class="link-item"><a href="#" class="link">contact</a></li>
    </ul>
    <div class="user-interactions">
        <div class="cart">
            <img src="img/cart.png" class="cart-icon" alt="">
            <span class="cart-item-count">00</span>
        </div>
        <div class="user">
            <img src="img/user.png" class="user-icon" alt="">
        </div>
    </div>
</nav>
并进行造型。
.navbar{
    width: 100%;
    height: 80px;
    position: fixed;
    top: 0;
    left: 0;
    display: flex;
    justify-content: center;
    z-index: 9;
    transition: .5s;
}

.navbar.bg{
    background: #fff;
}

.links-container{
    display: flex;
    align-items: center;
    list-style: none;
}

.link-item{
    margin: 10px;
}

.link{
    font-size: 20px;
    color: #fff;
    text-decoration: none;
    padding: 10px;
    opacity: 0.7;
    transition: .5s;
}

.navbar.bg .link{
    color: #000;
    opacity: 0.5;
}

.link.active, .link:hover, .navbar.bg .link:hover, .navbar.bg .link.active{
    opacity: 1;
}

.user-interactions{
    display: flex;
    position: absolute;
    right: 5vw;
    top: 50%;
    transform: translateY(-50%);
}

.cart, .user{
    width: 30px;
    height: 30px;
    position: relative;
    margin: 10px;
    cursor: pointer;
}

.cart-icon, .user-icon{
    width: 100%;
    height: 100%;
    object-fit: cover;
}

.cart-item-count{
    font-family: 'lato', sans-serif;
    color: #d5be8b;
    padding: 5px;
    font-size: 15px;
    border-radius: 50%;
    background: #190c05;
    position: absolute;
    bottom: -12px;
    left: -12px;
}
你可能注意到,上面的 CSS 代码中也包含我创建的.navbar.bg代码。我创建这个样式是为了方便我们在向下滚动时将导航栏背景颜色设置为白色。
看起来很棒。现在,制作产品卡片或畅销产品部分。
最畅销产品部分
<!-- best selling products -->
<section class="best-selling-product-section">
    <h1 class="section-title">best selling products</h1>
    <div class="product-container">
        <div class="product-card">
            <img src="img/product-1.png" class="product-img" alt="">
            <p class="product-name">lights →</p>
        </div>
        // +3 more product cards
    </div>
</section>
并且还设计了风格。
/* best selling product */

.best-selling-product-section{
    position: relative;
    padding: 60px 5vw;
}

.section-title{
    text-transform: capitalize;
    font-size: 30px;
    margin-bottom: 30px;
}

.product-container{
    display: flex;
    justify-content: space-between;
}

.product-card{
    border: 15px solid #d5be8b;
    width: 300px;
    height: 300px;
    overflow: hidden;
    position: relative;
    background: #d5be8b;
}

.product-card:nth-child(even){
    border-color: #190c05;
    background: #190c05;
}

.product-img{
    width: 100%;
    height: 100%;
    object-fit: cover;
    transition: .5s;
}

.product-name{
    position: absolute;
    color: #fff;
    text-transform: capitalize;
    font-family: 'lato', sans-serif;
    font-size: 25px;
    bottom: 20px;
    left: 50%;
    transform: translateX(-50%);
    opacity: 0;
    transition: .5s;
}

.product-card:hover .product-name{
    opacity: 1;
}

.product-card:hover .product-img{
    opacity: 0.5;
}
输出
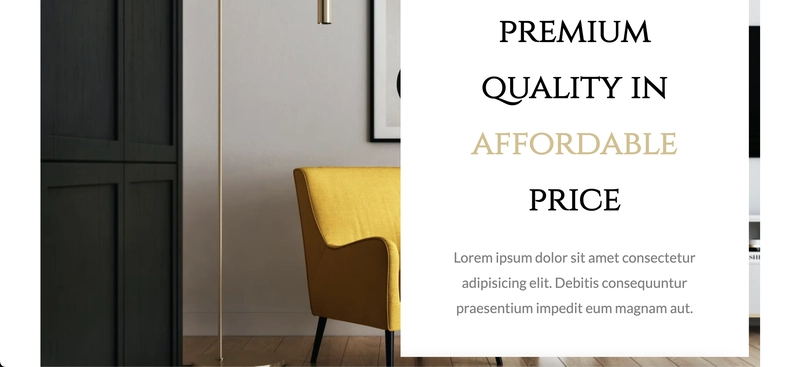
畅销产品部分之后,我们有一个中间部分,主要介绍公司的一些关键点。现在就开始吧。
中间部分
<!-- mid section -->
    <section class="mid-section">
        <div class="section-item-container">
            <img src="img/bg-2.png" class="section-bg" alt="">
            <div class="section-info">
                <h1 class="title">premium quality in <span>affordable</span> price</h1>
                <p class="info">lorem 15</p>
            </div>
        </div>
    </section>
/* mid section */

.mid-section{
    width: 100%;
    height: 800px;
    padding: 40px 5vw;
}

.section-item-container{
    width: 100%;
    height: 100%;
    position: relative;
    padding: 20px;
}

.section-bg{
    width: 100%;
    height: 100%;
    position: absolute;
    z-index: -1;
    top: 0;
    left: 0;
}

.section-info{
    width: 50%;
    height: 100%;
    background: #fff;
    display: block;
    margin-left: auto;
    padding: 50px;
    text-align: center;
}

.title{
    font-size: 60px;
    line-height: 100px;
}

.title span{
    color: #d5be8b;
}

.info{
    font-family: 'lato', sans-serif;
    font-size: 25px;
    line-height: 45px;
    margin-top: 30px;
    opacity: 0.5;
}
输出
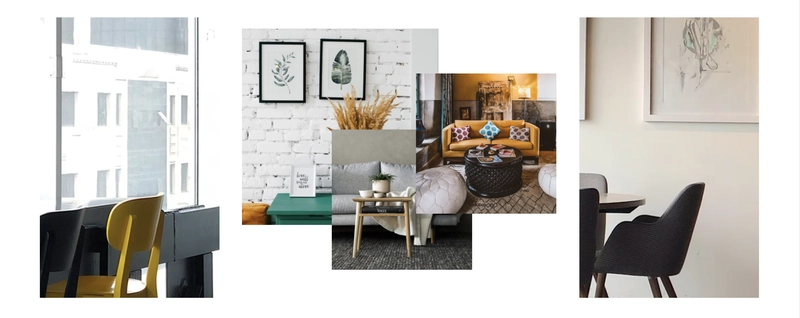
看起来是不是很棒?好的,我们还有一个部分,基本上是图片拼贴部分,将来用户点击这些图片后,我们会重定向到产品页面。
图像拼贴
<!-- image collage section -->
<section class="image-mid-section">
    <div class="image-collage">
        <div class="image-collection">
            <img src="img/poster-1.png" class="collage-img" alt="">
            <img src="img/poster-2.png" class="collage-img" alt="">
            <img src="img/poster-3.png" class="collage-img" alt="">
        </div>
    </div>
</section>
/* image collage */

.image-mid-section{
    width: 100%;
    height: 600px;
    padding: 50px 5vw;
}

.image-collage{
    width: 100%;
    height: 100%;
    background: url(../img/bg-1.png);
    background-size: cover;
}

.image-collection{
    position: relative;
    display: block;
    width: 50%;
    height: 100%;
    background: #fff;
    margin: auto;
}

.collage-img{
    position: absolute;
    object-fit: cover;
    transition: .5s;
}

.collage-img:nth-child(1){
    width: 350px;
    height: 350px;
    top: 20px;
    left: 40px;
}

.collage-img:nth-child(2){
    width: 250px;
    height: 250px;
    top: 200px;
    left: 200px;
}

.collage-img:nth-child(3){
    width: 250px;
    height: 250px;
    top: 100px;
    left: 350px;
}

.collage-img:hover{
    transform: translateY(-10px);
}
上面我们给 添加了悬停效果.collage-img。但是我们还没有添加模糊效果,我们将通过 JS 来实现。
因此打开home.js文件并使用标签将其链接到主页script。
然后写一些JS。
// image collage

const collageImages = [...document.querySelectorAll('.collage-img')]

collageImages.map((item, i) => {
    item.addEventListener('mouseover', () => {
        collageImages.map((image, index) => {
            if(index != i){
                image.style.filter = `blur(10px)`;
                item.style.zIndex = 2;
            }
        })
    })

    item.addEventListener('mouseleave', () => {
        collageImages.map((image, index) => {
            image.style = null;
        })
    })
})
上面的代码很容易理解,我只需选中所有图片,然后使用map方法循环遍历每张图片即可。之后,我为图片添加了事件。如果您不明白,请在评论中告诉我mouseover。mouseleave
输出
完成所有这些之后,让我们进行评论部分。
评论部分
<!-- review section -->
<section class="review-section">
    <h1 class="section-title">what our <span>customers</span> says about us</h1>
    <div class="review-container">
        <div class="review-card">
            <div class="user-dp" data-rating="4.9"><img src="img/user 1.png" alt=""></div>
            <h2 class="review-title">best quality more than my expectation</h2>
            <p class="review">Lorem15</p>
        </div>
        +3 more reviews
    </div>
</section>
/* review section */

.review-section{
    padding: 50px 5vw;
}

.section-title span{
    color: #d5be8b;
}

.review-container{
    margin: 50px;
    margin-bottom: 0;
    display: flex;
    justify-content: space-between;
}

.review-card{
    width: 250px;
    height: auto;
    font-family: 'lato', sans-serif;
}

.user-dp{
    width: 100px;
    height: 100px;
    border-radius: 50%;
    position: relative;
}

.user-dp img{
    width: 100%;
    height: 100%;
    object-fit: cover;
}

.user-dp::before{
    content: '';
    position: absolute;
    top: 10px;
    left: 10px;
    right: 10px;
    bottom: 10px;
    border: 4px solid #fff;
    border-radius: 50%;
}

.user-dp::after{
    content: attr(data-rating);
    position: absolute;
    bottom: 0;
    right: -20px;
    padding: 5px 20px;
    border-radius: 20px;
    background: #d5be8b;
}

.review-title{
    font-size: 20px;
    line-height: 25px;
    margin: 30px 0;
    text-transform: capitalize;
}

.review{
    opacity: 0.7;
}
输出
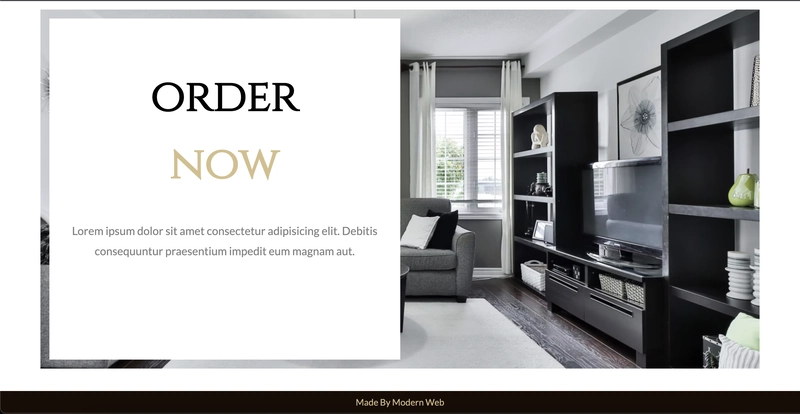
所以,我们的最后一部分基本上是中间部分的复制。所以你可以在复习部分之后复制粘贴。然后只需稍微修改一下classnames。
结束部分
<!-- end section -->
<section class="end-section">
    <div class="section-item-container">
        <img src="img/bg-3.png" class="section-bg" alt="">
        <div class="section-info">
            <h1 class="title">order <span>now</span></h1>
            <p class="info">Lorem15.</p>
        </div>
    </div>
</section>

<footer>made by modern web</footer>
还制作页脚部分。
.end-section .section-info{
    margin: 0;
}

.end-section .title{
    font-size: 100px;
    line-height: 150px;
    margin: 50px;
}

footer{
    font-family: 'lato', sans-serif;
    color: #d5be8b;
    background: #190c05;
    width: 100%;
    height: 50px;
    line-height: 50px;
    text-align: center;
    text-transform: capitalize;
    font-size: 20px;
}
输出
最后一件事是让“导航栏”在滚动时将其背景更改为白色。
home.js
// navbar

const navbar = document.querySelector('.navbar');

window.addEventListener('scroll', () => {
    if(scrollY >= 180){
        navbar.classList.add('bg');
    } else{
        navbar.classList.remove('bg');
    }
})
上面的代码很简单,如果你还是不明白,可以在描述中问我。
输出
主页终于完成了。不用担心响应速度,我们最终会把网站设计成响应式的。
我们现在可以制作搜索页面、产品页面和 404 页面了,但我觉得文章有点长。所以你可以参考视频来制作这些页面。
今天就到这里。干得好!我知道内容有点多。但电商网站没那么简单。如果你不想错过本系列的下一篇,别忘了在 YouTube 和 dev.to 上关注我。
希望你理解了所有内容。如果你有疑问或者我遗漏了什么,请在评论区告诉我。
您可能觉得有用的文章
如果您能订阅我的YouTube频道,我将不胜感激。我创作了非常棒的网络内容。
源代码
,给我买杯咖啡
您的捐赠确实激励我做更多令人惊奇的事情
感谢您的观看。
 后端开发教程 - Java、Spring Boot 实战 - msg200.com
