JWT 授权和身份验证、Node、Express 和 Vue
后端
架构
控制器
index.js
前端
报名
登录
登出
MySQL
PostreSQL
发送确认代码
在本教程中,我们将为博客应用添加之前教程中用到的身份验证和授权功能。我们将使用 Passport 和 JWT 两种身份验证方式。今天我们将介绍 JWT 的使用方法。
有趣的是,我也会阅读其他人的文章,那些有趣的内容总是会添加到我的阅读列表中。这篇文章解释了 JWT 的可扩展性。我不需要再添加更多内容了。
https://dev.to/kmistele/demystifying-jwt-how-to-secure-your-next-web-app-9h0。
在我学习的过程中,我总是好奇地想知道如何将我所读到的内容实际应用到应用程序中。
到目前为止,我们已经了解到:
-
MongoDB、Express、Vue 和 Node 的方法仍然属于无服务器,因为我们目前运行应用程序时无需管理基础设施。Atlas 为我们管理一切。
-
AWS PostgreSQL、Express、Vue 和 Node 的方法属于服务器方法,因为我们目前在 EC2 中运行应用程序。我们必须管理基础设施。
-
AWS MySQL、Express、Vue 和 Node 的方法属于服务器方法,因为我们目前在 EC2 上运行应用程序。我们必须管理基础设施。
对于初创公司来说,维护服务器的成本相当高,因此在容器和无服务器之间进行权衡是理想的。
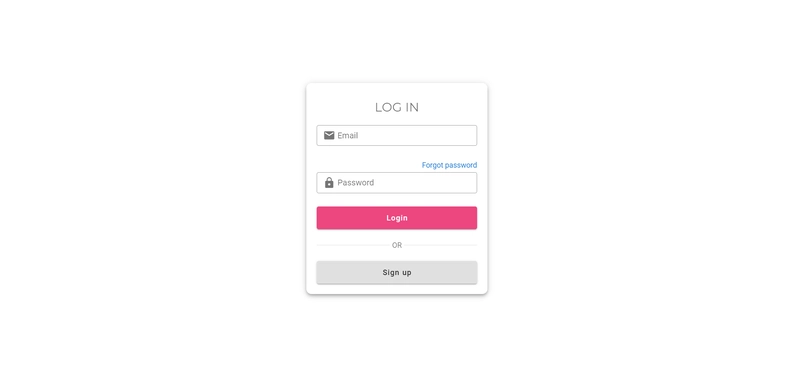
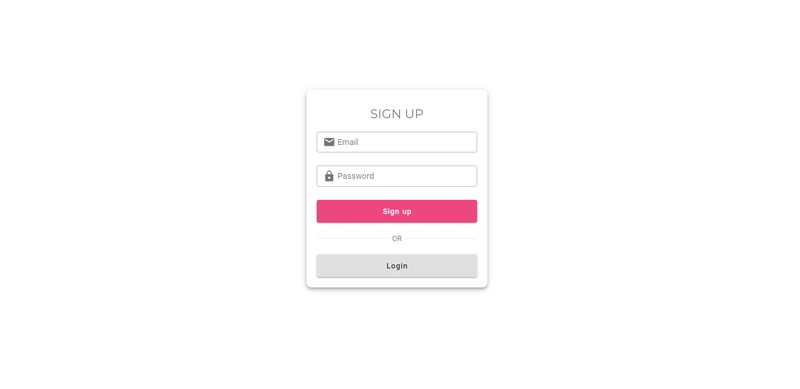
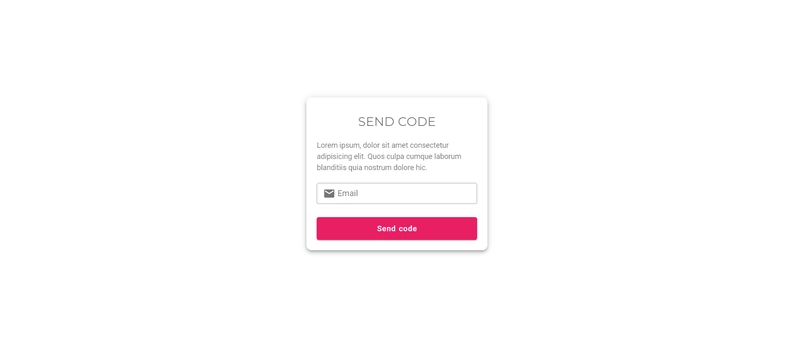
让我们将以下组件添加到前端的身份验证目录。
登录.vue
注册.vue
确认.vue
最终,我们只允许使用 GET 文章 API 来公开查看文章。其余的 CRUD 操作需要经过身份验证后才能执行。
让我们开始吧。
后端
如果您关注过我们之前的教程,那么您现在知道我们有两个应用程序后端在 Node、Express、Mongo DB 或 PostgreSQL 或 MySQL 上运行,具体取决于您选择的数据库。
我们希望为该应用程序添加身份验证和授权。我们假设如下。
- 我们只想允许公众通过 GET 方式访问以下路线。
- 我们希望允许管理员角色执行 DELETE 操作,其他所有操作均可由管理员或用户进行评估。
以下是 routes 文件夹中的 blog.js 内容
const express = require("express")
const router = express.Router()
const blog = require("../controller/blog.controller");
const { auth_jwt_token } = require("../authentication");

// /api/blog: GET, POST, DELETE
// /api/blog/:id: GET, PUT, DELETE
// /api/blog/published: GET

// Create a new blog
router.post("/", [auth_jwt_token.verifyToken], blog.create);

// Retrieve all blog
router.get("/", blog.findAll);

// Retrieve all published blog
router.get("/published", blog.findAllPublished);

// Retrieve a single blog with id
router.get("/:id", blog.findOne);

// Update a blog with id
router.put("/:id", [auth_jwt_token.verifyToken], blog.update);

// Delete a blog with id
router.delete("/:id", [auth_jwt_token.verifyToken, auth_jwt_token.isAdmin], blog.delete);

// Create a new blog
router.delete("/", [auth_jwt_token.verifyToken, auth_jwt_token.isAdmin], blog.deleteAll);

module.exports = router
我们的博客需要两个角色:用户和管理员。
对于令牌,您可以使用 jsonwebtoken 或 express.jwt。让我们安装 bcryptjs 来哈希密码,并使用 jsonwebtoken 来获取令牌。
yarn add jsonwebtoken bcryptjs
index.js
在 index.js 文件中,当我们的后端应用程序加载时,我们需要检查数据库是否已正确设置角色。如果为空,则需要创建角色。让我们创建一个初始化函数来处理角色的检查。
const Role = db.role // reference the Role DB
function initialize() {
    Role.estimatedDocumentCount((err, count) => {
      if (!err && count === 0) {
        new Role({
          name: "user"
        }).save(err => {
          if (err) {
            console.log("error", err);
          }
          console.log("added 'user' to roles collection");
        });

        new Role({
          name: "admin"
        }).save(err => {
          if (err) {
            console.log("error", err);
          }
          console.log("added 'admin' to roles collection");
        });
      }
    });
  }
以下是首次运行后端时的结果。我们之前没有角色,它初始化了角色表并添加了新角色。
路线
我们将在 routes 文件夹中添加一个名为 auth.js 的新路由并更新博客路由。
auth.js
此路由将处理 signup 和 signin 两个函数。verify_user_email 函数用于检查邮箱是否已注册,以避免重复。
const { verify_user_email } = require("../authentication");
const express = require("express")
const router = express.Router()
const auth = require("../controller/auth.controller");

router.post("/signin", auth.signin);

router.post("/signup",
  [
      verify_user_email.checkDuplicateUsernameOrEmail,
      verify_user_email.checkRolesExisted
  ],
  auth.signup
)

module.exports = router
blog.js
我已经在上面分享了我们的 blog.js 路由文件夹应该是什么样子。
这就是我们在 routes 文件夹中需要做的全部工作。接下来,我们需要更新 index.js 文件并导入我们的路由。使用 express.js,您可以使用可选的挂载路径加载应用程序级和路由器级中间件。您还可以将一系列中间件函数一起加载,从而在挂载点创建中间件系统的子堆栈。
index.js
// routes
const blog = require('./app/routes/blog') // blog routes
const auth = require('./app/routes/auth') // user authentication

app.use('/api/blog',blog, function(req, res, next){
  res.header(
    "Access-Control-Allow-Headers",
    "x-access-token, Origin, Content-Type, Accept"
  );
  next();
}) // user authorization
app.use('/api/auth', auth, function(req, res, next){
  res.header(
    "Access-Control-Allow-Headers",
    "x-access-token, Origin, Content-Type, Accept"
  );
  next();
}) // auth authentication
我希望我们目前能达成共识。保持密切联系
架构
让我们定义用户和角色的架构。这将在模型文件夹中完成,我们也在其中保存了博客架构。
role.model.js
我们的角色将有一个名称和一个 ID。
module.exports = mongoose => {
    const Role = mongoose.model(
      "Role",
      mongoose.Schema(
        {
          name: String,
        },
        { timestamps: true }
      )
    );
    return Role;
  };
user.model.js
在用户模型中,我们需要为用户添加用户名、邮箱、密码和角色。默认情况下,用户将拥有一个用户角色,之后会升级为管理员。
注意,我们引用了角色,以便获取角色的正确 ID。
module.exports = mongoose => {
    const User = mongoose.model(
      "User",
      mongoose.Schema(
        {
          username: String,
          email: String,
          password: String,
          roles: [
            {
              type: mongoose.Schema.Types.ObjectId,
              ref: "Role"
            }
          ]
        },
        { timestamps: true }
      )
    );
    return User;
  };
控制器
在控制器文件夹中,让我们添加一个处理身份验证的控制器
auth.controller.js 中的
注册函数会创建一个新用户,而签名函数则会确认用户是否存在。之后,用户的有效负载将使用私钥进行签名,并生成一个令牌。为了验证令牌,我们可以验证签名后使用 JWT 进行解码,或者直接解码 JWT 令牌。我们将处理这两种情况。
const crypto = require('crypto');
const db = require("../models");
const User = db.user;
const Role = db.role;

var jwt = require("jsonwebtoken");
var bcrypt = require("bcryptjs");

exports.signup = (req, res) => {
  const user = new User({
    username: req.body.username,
    email: req.body.email,
    password: bcrypt.hashSync(req.body.password, 8)
  });

  user.save((err, user) => {
    if (err) {
      res.status(500).send({ message: err });
      return;
    }

    if (req.body.roles) {
      Role.find(
        {
          name: { $in: req.body.roles }
        },
        (err, roles) => {
          if (err) {
            res.status(500).send({ message: err });
            return;
          }

          user.roles = roles.map(role => role._id);
          user.save(err => {
            if (err) {
              res.status(500).send({ message: err });
              return;
            }

            res.send({ message: "User was registered successfully!" });
          });
        }
      );
    } else {
      Role.findOne({ name: "user" }, (err, role) => {
        if (err) {
          res.status(500).send({ message: err });
          return;
        }

        user.roles = [role._id];
        user.save(err => {
          if (err) {
            res.status(500).send({ message: err });
            return;
          }

          res.send({ message: "User was registered successfully!" });
        });
      });
    }
  });
};

exports.signin = (req, res) => {
  User.findOne({
    username: req.body.username
  })
    .populate("roles", "-__v")
    .exec((err, user) => {

      if (err) {
        res.status(500).send({ message: err });
        return;
      }

      if (!user) {
        return res.status(404).send({ message: "User Not found." });
      }

      var passwordIsValid = bcrypt.compareSync(
        req.body.password,
        user.password
      );

      if (!passwordIsValid) {
        return res.status(401).send({
          accessToken: null,
          message: "Invalid Password!"
        });
      }

      const { privateKey, publicKey } = crypto.generateKeyPairSync('ec', {
        namedCurve: 'sect239k1'
      });

      // generate a signature of the payload
      const sign = crypto.createSign('SHA256');
      sign.write(`${user}`);
      sign.end();
      var signature = sign.sign(privateKey, 'hex');
      console.log(signature)


      // sign username
      var token = jwt.sign({ id: user.id }, signature, {
        expiresIn: 86400 // 24 hours
      });

      var authorities = [];

      for (let i = 0; i < user.roles.length; i++) {
        authorities.push("ROLE_" + user.roles[i].name.toUpperCase());
      }
      res.status(200).send({
        id: user._id,
        username: user.username,
        email: user.email,
        roles: authorities,
        accessToken: token, // access token
        signature: signature // signature
      });
    });
};
最后,让我们在应用程序文件夹中创建一个身份验证文件夹。
touch /app/authentication
然后创建三个文件 index.js、auth.js 和 verify.js。verify.js 将处理用户电子邮件的验证,而 auth.js 将处理用户令牌的验证以及用户是否为管理员。
授权.js
const jwt = require("jsonwebtoken");
const db = require("../models");
const User = db.user;
const Role = db.role;

verifyToken = (req, res, next) => {
  let token = req.headers["x-access-token"];
  let secret = req.headers["x-access-signature"];

  if (!token) {
    return res.status(403).send({ message: "No token provided!" });
  }


  // Prints: true
  jwt.verify(token, secret, (err, decoded) => {
    if (err) {
      return res.status(401).send({ message: "Unauthorized!" });
    }
    req.userId = decoded.id;
    next();
  });
};

isAdmin = (req, res, next) => {
  User.findById(req.userId).exec((err, user) => {
    if (err) {
      res.status(500).send({ message: err });
      return;
    }

    Role.find(
      {
        _id: { $in: user.roles }
      },
      (err, roles) => {
        if (err) {
          res.status(500).send({ message: err });
          return;
        }

        for (let i = 0; i < roles.length; i++) {
          if (roles[i].name === "admin") {
            next();
            return;
          }
        }

        res.status(403).send({ message: "Require Admin Role!" });
        return;
      }
    );
  });
};

const authJwt = {
  verifyToken,
  isAdmin,
};
module.exports = authJwt;
验证.js
const db = require("../models");
const ROLES = db.ROLES;
const User = db.user;

checkDuplicateUsernameOrEmail = (req, res, next) => {
  // Username
  User.findOne({
    username: req.body.username
  }).exec((err, user) => {
    if (err) {
      res.status(500).send({ message: err });
      return;
    }

    if (user) {
      res.status(400).send({ message: "Failed! Username is already in use!" });
      return;
    }

    // Email
    User.findOne({
      email: req.body.email
    }).exec((err, user) => {
      if (err) {
        res.status(500).send({ message: err });
        return;
      }

      if (user) {
        res.status(400).send({ message: "Failed! Email is already in use!" });
        return;
      }

      next();
    });
  });
};

checkRolesExisted = (req, res, next) => {
  if (req.body.roles) {
    for (let i = 0; i < req.body.roles.length; i++) {
      if (!ROLES.includes(req.body.roles[i])) {
        res.status(400).send({
          message: `Failed! Role ${req.body.roles[i]} does not exist!`
        });
        return;
      }
    }
  }

  next();
};

const verifySignUp = {
  checkDuplicateUsernameOrEmail,
  checkRolesExisted
};

module.exports = verifySignUp;
通过文件夹中的index.js导出认证文件中的所有内容。
index.js
const auth_jwt_token = require("./auth");
const verify_user_email = require("./verify");

module.exports = {
  auth_jwt_token,
  verify_user_email
};
让我们测试一下后端,确保所有配置都正确。我将使用 Postman 进行以下测试:
- 注册一个没有管理员权限的用户。
- 登录用户。
- 创建博客(需要令牌)
- 删除博客(需要令牌和管理员访问权限)
前端
让我们配置前端并链接两者之间的通信。让我们在 components 目录中创建一个名为 auth.script.js 的文件。
import axios from "axios";

export const signup = async item => {
  let data = {
    username: item.username,
    email: item.email,
    password: item.password,
    roles: ["user"]
  };
  let request = {
    url: "http://localhost:3000/api/auth/signup", // should be replaced after going to production with domain url
    method: "post",
    headers: {
      "Content-type": "application/json"
    },
    data: JSON.stringify(data)
  };

  const response = await axios(request);
  return response;
};

export const login = async item => {
  let data = {
    username: item.username,
    password: item.password
  };
  let request = {
    url: "http://localhost:3000/api/auth/signin", // should be replaced after going to production with domain url
    method: "post",
    headers: {
      "Content-type": "application/json"
    },
    data: JSON.stringify(data)
  };

  const response = await axios(request);
  return response;
};
登录成功后,我们需要确保安全地保存用户信息。这里有一篇关于如何安全地保存有效载荷的文章。https ://dev.to/gkoniaris/how-to-securely-store-jwt-tokens-51cf 。
注销功能应该清除存储并将用户重定向回登录页面或主页。
报名
在注册组件的方法部分添加以下函数,并在用户提交时调用它。
// import the signup function from auth.script.js

// sibmit signup
    async submit() {
      this.loading = true;
      const response = await signup(this.item);
      if (response === "User was registered successfully!") {
        // DO NOT USE LOCAL STORAGE
        localStorage.setItem("user", JSON.stringify(response.data));
        this.item = {
          username: "",
          email: "",
          password: "",
          roles: ["user"]
        };
        this.loading = false;
        this.$router.push("/dashboard");
      } else {
        // error
        console.log("Error", response);
        setTimeout(() => {
          this.loading = false;
        }, 1000);
      }
    }
登录
在登录组件中,在方法部分添加以下函数,并在用户提交时调用它。
// import the login function from auth.script.js

// sibmit login
    async submit() {
      this.loading = true;
      const response = await login(this.item);
      if (response.data.accessToken) {
         // DO NOT USE LOCAL STORAGE
        localStorage.setItem("user", JSON.stringify(response.data));
        this.item = {
          username: "",
          password: ""
        };
        this.loading = false;
        this.$router.push("/dashboard");
      } else {
        // error
        console.log("Error", response);
      }
    }
登出
在仪表板中更新注销功能,添加清除已保存的用户信息的方法。
// DO NOT USE LOCAL STORAGE
localStorage.removeItem("user")
笔记
对于博客路由中需要身份验证的每个请求,请确保您的标头包含以下内容:
headers: {
      "Content-type": "application/json",
      'x-access-token': item.accessToken,
      'x-access-signature': item.signature
    },
最后,在路由器中保护 Vue 应用程序中的所有路由。在路由器文件夹中,确保按如下方式更新 index.js 文件。
const router = new VueRouter({
  routes: [
    {
      path: '/dashboard',
      component: Dashboard,
      // save you have a means of updating isAuthenticated
      beforeEach((to, from, next) => {
         if (to.name !== 'Login' && !isAuthenticated) next({ name:
           'Login' })
          else next()
      })
    }
  ]
})
阅读有关在 Vue 应用程序中保护路由的更多信息https://router.vuejs.org/guide/advanced/navigation-guards.html#global-before-guards
MySQL
对于 MySQL,我将提供需要更改的文件。以下是 MySQL 的文章:https://dev.to/kevin_odongo35/aws-rds-mysql-express-vue-and-node-jfj
index.js
const Role = db.role // reference the Role DB
function initialize() {
  Role.create({
    id: 1,
    name: "user"
  });

  Role.create({
    id: 3,
    name: "admin"
  });
}
角色.模型.js
module.exports = (sequelize, Sequelize) => {
    const Role = sequelize.define("roles", {
    id: {
      type: Sequelize.INTEGER,
      primaryKey: true
    },
    name: {
      type: Sequelize.STRING
    }
  });
  };
用户.模型.js
const User = sequelize.define("users", {
    username: {
      type: Sequelize.STRING
    },
    email: {
      type: Sequelize.STRING
    },
    password: {
      type: Sequelize.STRING
    }
  });

  return User;
/模型/index.js
db.user = require("../models/user.model.js")(sequelize, Sequelize);
db.role = require("../models/role.model.js")(sequelize, Sequelize);

db.role.belongsToMany(db.user, {
  through: "user_roles",
  foreignKey: "roleId",
  otherKey: "userId"
});
db.user.belongsToMany(db.role, {
  through: "user_roles",
  foreignKey: "userId",
  otherKey: "roleId"
});

db.ROLES = ["user", "admin"];
其余内容与我上面详述的一致。只需编辑以下文件即可。
PostreSQL
对于 PostgreSQL,我将提供需要更改的文件。以下是 PostgreSQL 的文章:https://dev.to/kevin_odongo35/aws-rds-postgresql-express-vue-and-node-1k99
index.js
const Role = db.role // reference the Role DB
function initialize() {
  Role.create({
    id: 1,
    name: "user"
  });

  Role.create({
    id: 3,
    name: "admin"
  });
}
角色.模型.js
module.exports = (sequelize, Sequelize) => {
    const Role = sequelize.define("roles", {
    id: {
      type: Sequelize.INTEGER,
      primaryKey: true
    },
    name: {
      type: Sequelize.STRING
    }
  });
  };
用户.模型.js
const User = sequelize.define("users", {
    username: {
      type: Sequelize.STRING
    },
    email: {
      type: Sequelize.STRING
    },
    password: {
      type: Sequelize.STRING
    }
  });

  return User;
/模型/index.js
db.user = require("../models/user.model.js")(sequelize, Sequelize);
db.role = require("../models/role.model.js")(sequelize, Sequelize);

db.role.belongsToMany(db.user, {
  through: "user_roles",
  foreignKey: "roleId",
  otherKey: "userId"
});
db.user.belongsToMany(db.role, {
  through: "user_roles",
  foreignKey: "userId",
  otherKey: "roleId"
});

db.ROLES = ["user", "admin"];
其余内容与我上面详述的一致。只需编辑以下文件即可。
发送确认代码
您可以使用不同的产品来实现这一点,但我推荐 AWS SES。我曾经讨论过如何配置 AWS SES https://dev.to/kevin_odongo35/build-a-bulk-email-and-sms-app-with-vue-and-aws-ses-aws-sns-or-twilio-part-1-33jp。我将在一个课程中详细介绍整个逻辑。从头到尾。请密切关注
我希望本教程对如何实现 JWT 有所帮助。我提供了一些文章来帮助您更好地理解 JWT。如何安全地使用它们。
谢谢
鏂囩珷鏉ユ簮锛�https://dev.to/kevin_odongo35/jwt-authorization-and-authentication-node-express-and-vue-2p8c 后端开发教程 - Java、Spring Boot 实战 - msg200.com


