使用 NextJS 构建竞价系统
TL;DR
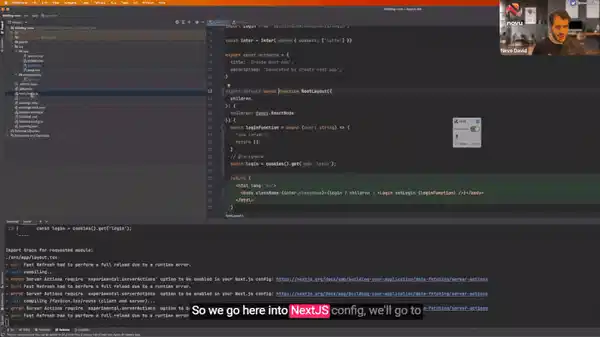
NextJS 引入了新的服务器操作组件,我必须对它们进行测试才能知道它到底有什么用处🥳
我已经构建了一个简单的应用程序,您可以在其中注册系统、添加新产品并对其进行竞标。
一旦出价,它将通知其他投标人他们的出价已被超越。
它还会通知卖家系统中有新的出价。
Novu——开源通知基础设施
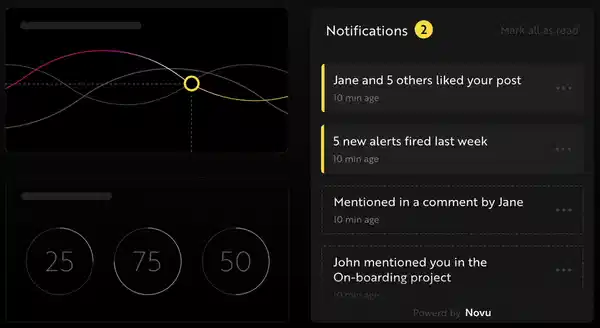
简单介绍一下我们。Novu 是第一个开源通知基础设施。我们主要负责管理所有产品通知。通知可以是应用内通知(类似于开发者社区Websockets中的铃铛图标)、电子邮件、短信等。
如果你能给我们一颗星,我会非常高兴!这会帮助我每周写更多文章🚀
https://github.com/novuhq/novu
安装项目
我们将通过启动一个新的 NextJS 项目来启动该项目:
npx create-next-app@latest
并标记以下细节
✔ What is your project named? … new-proj
✔ Would you like to use TypeScript with this project? … No / Yes
✔ Would you like to use ESLint with this project? … No / Yes
✔ Would you like to use Tailwind CSS with this project? … No / Yes
✔ Would you like to use `src/` directory with this project? … No / Yes
✔ Use App Router (recommended)? … No / Yes
✔ Would you like to customize the default import alias? … No / Yes
让我们进入文件夹
cd new-proj
并修改我们的next.config.js使其看起来像这样
/** @type {import('next').NextConfig} */
const nextConfig = {
    experimental: {
        serverActions: true
    }
}

module.exports = nextConfig;
我们正在添加使用服务器操作的功能,因为它目前仍处于测试阶段。这将允许我们直接从客户端调用服务器 💥
创建数据库
在我们的项目中,我们将使用 Postgres。您也可以自行托管(使用 docker)、neon.tech、supabase或类似平台。在本例中,我们将使用 Vercel Postgres。
您可以先前往Vercel 存储区域并创建一个新的数据库。
我们首先添加出价表。该表包含产品名称、产品类型、产品所有者以及当前出价数量。
单击查询选项卡并运行以下查询
create table bids
(
    id         SERIAL PRIMARY KEY,
    name       varchar(255),
    owner      varchar(255),
    total_bids int default 0 not null
);
单击“.env.local”选项卡,然后复制所有内容。
在我们的项目中打开一个名为的新文件.env并将所有内容粘贴到里面。
然后通过运行安装 Vercel Postgres。
npm install @vercel/postgres
构建登录页面
我们不希望人们在没有登录的情况下(通过任何路径)访问任何页面。
为此,让我们研究一下主布局并将我们的登录逻辑放在那里。
编辑layout.tsx并将其替换为以下代码:
import './globals.css'
import {cookies} from "next/headers";
import Login from "@biddingnew/components/login";

export default async function RootLayout({
  children,
}: {
  children: React.ReactNode
}) {
  const login = cookies().get('login');

  return (
    <html lang="en">
      <body>{login ? children : <Login />}</body>
    </html>
  )
}
非常简单的反应组件。
我们正在从用户那里获取登录 cookie。
如果 cookie 存在 - 让 Next.JS 呈现任何路由。
如果没有,则显示登录页面。
让我们看这里的一些事情。
- 我们的组件是
"async"使用新的 App 路由器目录时所必需的。 - 我们正在获取没有任何的 cookie
"useState",因为这不是一个"client only"组件,并且状态不存在。
如果您不确定 App 路由器的新功能,请观看底部的视频,我会解释一切。
让我们构建登录组件
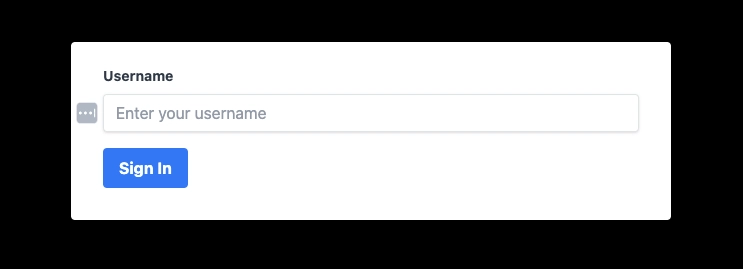
这是一个非常简单的登录组件,只有用户名,没有密码或电子邮件。
"use client";

import {FC, useCallback, useState} from "react";

const Login: FC<{setLogin: (value: string) => void}> = (props) => {
    const {setLogin} = props;
    const [username, setUsername] = useState('');
    const submitForm = useCallback(async (e) => {
        setLogin(username);
        e.preventDefault();
        return false;
    }, [username]);

    return (
        <div className="w-full flex justify-center items-center h-screen">
            <form className="bg-white w-[80%] shadow-md rounded px-8 pt-6 pb-8 mb-4" onSubmit={submitForm}>
                <div className="mb-4">
                    <label className="block text-gray-700 text-sm font-bold mb-2" htmlFor="username">
                        Username
                    </label>
                    <input
                        onChange={(event) => setUsername(event.target.value)}
                        className="shadow appearance-none border rounded w-full py-2 px-3 text-gray-700 leading-tight focus:outline-none focus:shadow-outline"
                        id="username"
                        type="text"
                        placeholder="Enter your username"
                    />
                </div>
                <div className="flex items-center justify-between">
                    <button
                        className="bg-blue-500 hover:bg-blue-700 text-white font-bold py-2 px-4 rounded focus:outline-none focus:shadow-outline"
                        type="submit"
                    >
                        Sign In
                    </button>
                </div>
            </form>
        </div>
    )
}

export default Login;
- 我们正在使用
"use client",这意味着该组件将在客户端上运行。因此,您可以看到我们可以使用"useState"。需要说明的是,您可以在服务器组件中使用客户端组件,但反之则不行。 - 我们添加了一个名为的参数要求,
setLogin这意味着一旦有人点击提交功能,它就会触发登录功能。
setLogin让我们在主布局页面上构建。
这就是奇迹发生的地方🪄✨
我们将使用新的 Next.JS 服务器操作方法创建一个函数。
该方法将在客户端编写。但是,它将在服务器上运行。
在后台,Next.JS 实际上会发送一个 HTTP 请求。
import './globals.css'
import {cookies} from "next/headers";
import Login from "@biddingnew/components/login";

export default async function RootLayout({
  children,
}: {
  children: React.ReactNode
}) {
  const loginFunction = async (user: string) => {
    "use server";

    cookies().set('login', user);
    return true;
  }

  const login = cookies().get('login');

  return (
    <html lang="en">
      <body className={inter.className}>{login ? children : <Login setLogin={loginFunction} />}</body>
    </html>
  )
}
如您所见,有一个名为 的新函数loginFunction,并且在开头有一个“use server”语句,这告诉该函数在服务器上运行。它将从 中获取用户名,setLogin并设置一个名为“login”的新 cookie。
一旦完成后,该函数将重新渲染,我们将看到其余的路线。
构建竞价页面
让我们首先编辑page.tsx文件
我们将首先添加一个简单的代码来从我们的数据库中获取所有出价:
const { rows } = await sql`SELECT * FROM bids ORDER BY id DESC`;
我们还添加我们的登录 cookie 信息
const login = cookies().get("login");
页面全部内容:
import Image from "next/image";
import { sql } from "@vercel/postgres";
import { cookies } from "next/headers";

export default async function Home() {
  const { rows } = await sql`SELECT * FROM bids ORDER BY id DESC`;

  const login = cookies().get("login");

  return (
    <div className="text-black container mx-auto p-4 border-l border-white border-r min-h-[100vh]">
      <div className="flex">
        <h1 className="flex-1 text-3xl font-bold mb-4 text-white">
          Product Listing ({login?.value!})
        </h1>
      </div>
      <div className="grid grid-cols-3 gap-4">
        {rows.map((product) => (
          <div key={product.id} className="bg-white border border-gray-300 p-4">
            <div className="text-lg mb-2">
              <strong>Product Name</strong>: {product.name}
            </div>
            <div className="text-lg mb-2">
              <strong>Owner</strong>: {product.owner}
            </div>
            <div className="text-lg">
              <strong>Current Bid</strong>: {product.total_bids}
            </div>
          </div>
        ))}
      </div>
    </div>
  );
}
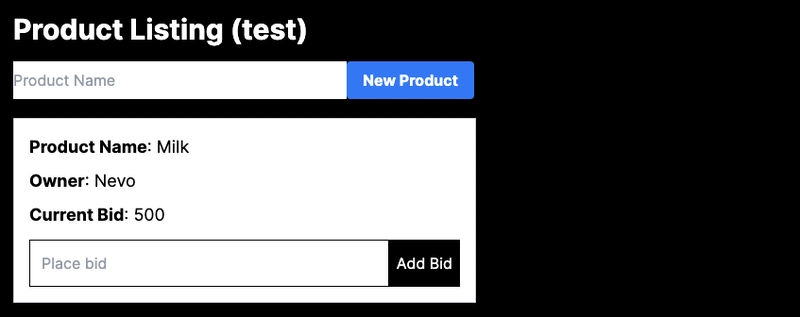
我们从数据库中获取所有出价,迭代并显示它们。
现在让我们创建一个简单的组件来添加新产品。
创建一个名为的新组件new.product.tsx
"use client";

import { FC, useCallback, useState } from "react";

export const NewProduct: FC<{ addProduct: (name: string) => void }> = (
  props
) => {
  const { addProduct } = props;
  const [name, setName] = useState("");
  const addProductFunc = useCallback(() => {
    setName("");
    addProduct(name);
  }, [name]);
  return (
    <div className="flex mb-5">
      <input
        value={name}
        placeholder="Product Name"
        name="name"
        className="w-[23.5%]"
        onChange={(e) => setName(e.target.value)}
      />
      <button
        type="button"
        onClick={addProductFunc}
        className="w-[9%] bg-blue-500 hover:bg-blue-700 text-white font-bold py-2 px-4 rounded"
      >
        New Product
      </button>
    </div>
  );
};
该组件看起来几乎与我们的登录组件完全一样。
当用户添加新产品时,我们不会触发一个为我们完成此操作的功能。
  const addProduct = async (product: string) => {
    "use server";

    const login = cookies().get("login");
    const { rows } =
      await sql`INSERT INTO bids (name, owner, total_bids) VALUES(${product}, ${login?.value!}, 0) RETURNING id`;
    revalidatePath("/");
  };
- 我们在这里直接从客户端使用 SQL 🤯 您还可以看到 SQL 函数处理任何 XSS 或 SQL 注入(我没有使用任何绑定)。
- 我们向数据库中插入一个新产品。您可以看到,我们使用了 Cookie 中保存的名称作为“所有者”。我们还将出价设置为 0。
- 最后,我们必须告诉应用程序重新验证路径。否则,我们将看不到新产品。
最终页面将如下所示:
import { sql } from "@vercel/postgres";
import { cookies } from "next/headers";
import { NewProduct } from "@biddingnew/components/new.product";
import { revalidatePath } from "next/cache";

export default async function Home() {
  const addProduct = async (product: string) => {
    "use server";

    const login = cookies().get("login");
    const { rows } = await sql`INSERT INTO bids (name, owner, total_bids) VALUES(${product}, ${login?.value!}, 0) RETURNING id`;
    revalidatePath("/");
  };

  const { rows } = await sql`SELECT * FROM bids ORDER BY id DESC`;
  const login = cookies().get("login");

  return (
    <div className="text-black container mx-auto p-4 border-l border-white border-r min-h-[100vh]">
      <div className="flex">
        <h1 className="flex-1 text-3xl font-bold mb-4 text-white">
          Product Listing ({login?.value!})
        </h1>
      </div>
      <NewProduct addProduct={addProduct} />
      <div className="grid grid-cols-3 gap-4">
        {rows.map((product) => (
          <div key={product.id} className="bg-white border border-gray-300 p-4">
            <div className="text-lg mb-2">
              <strong>Product Name</strong>: {product.name}
            </div>
            <div className="text-lg mb-2">
              <strong>Owner</strong>: {product.owner}
            </div>
            <div className="text-lg">
              <strong>Current Bid</strong>: {product.total_bids}
            </div>
          </div>
        ))}
      </div>
    </div>
  );
}
现在让我们创建一个新的组件来为产品添加出价。
创建一个名为的新文件bid.input.tsx并添加以下代码:
"use client";

import { FC, useCallback, useState } from "react";

export const BidInput: FC<{
  id: number;
  addBid: (id: number, num: number) => void;
}> = (props) => {
  const { id, addBid } = props;
  const [input, setInput] = useState("");

  const updateBid = useCallback(() => {
    addBid(id, +input);
    setInput("");
  }, [input]);

  return (
    <div className="flex pt-3">
      <input
        placeholder="Place bid"
        className="flex-1 border border-black p-3"
        value={input}
        onChange={(e) => setInput(e.target.value)}
      />
      <button type="button" className="bg-black text-white p-2" onClick={updateBid}>
        Add Bid
      </button>
    </div>
  );
};
该组件与产品组件几乎相同。
唯一的区别是它还获取当前产品的ID参数,以告诉服务器要更新哪个出价。
现在让我们添加出价逻辑:
  const addBid = async (id: number, bid: number) => {
    "use server";

    const login = cookies().get("login");
    await sql`UPDATE bids SET total_bids = total_bids + ${bid} WHERE id = ${id}`;

    revalidatePath("/");
  };
一个非常简单的功能,获取出价 ID 并增加总价。
整页代码看起来应该是这样的:
import { sql } from "@vercel/postgres";
import { cookies } from "next/headers";
import { NewProduct } from "@biddingnew/components/new.product";
import { revalidatePath } from "next/cache";
import { BidInput } from "@biddingnew/components/bid.input";

export default async function Home() {
  const addBid = async (id: number, bid: number) => {
    "use server";

    const login = cookies().get("login");
    await sql`UPDATE bids SET total_bids = total_bids + ${bid} WHERE id = ${id}`;
    revalidatePath("/");
  };

  const addProduct = async (product: string) => {
    "use server";

    const login = cookies().get("login");
    const { rows } =
      await sql`INSERT INTO bids (name, owner, total_bids) VALUES(${product}, ${login?.value!}, 0) RETURNING id`;

    revalidatePath("/");
  };

  const { rows } = await sql`SELECT * FROM bids ORDER BY id DESC`;

  const login = cookies().get("login");

  return (
    <div className="text-black container mx-auto p-4 border-l border-white border-r min-h-[100vh]">
      <div className="flex">
        <h1 className="flex-1 text-3xl font-bold mb-4 text-white">
          Product Listing ({login?.value!})
        </h1>
      </div>
      <NewProduct addProduct={addProduct} />
      <div className="grid grid-cols-3 gap-4">
        {rows.map((product) => (
          <div key={product.id} className="bg-white border border-gray-300 p-4">
            <div className="text-lg mb-2">
              <strong>Product Name</strong>: {product.name}
            </div>
            <div className="text-lg mb-2">
              <strong>Owner</strong>: {product.owner}
            </div>
            <div className="text-lg">
              <strong>Current Bid</strong>: {product.total_bids}
            </div>
            <div>
              <BidInput addBid={addBid} id={product.id} />
            </div>
          </div>
        ))}
      </div>
    </div>
  );
}
剩下的唯一事情就是在有新出价时向用户发送通知。
开始吧🚀
添加通知
我们将在右侧显示一个漂亮的铃铛图标,以便在新出价时在用户之间发送通知。
继续注册Novu。
完成后,进入“设置”页面,转到“API 密钥”选项卡,然后复制应用程序标识符。
让我们在项目中安装 Novu
npm install @novu/notification-center
现在让我们创建一个名为的新组件novu.tsx并添加通知中心代码。
"use client";

import {
    NotificationBell,
    NovuProvider,
    PopoverNotificationCenter,
} from "@novu/notification-center";
import { FC } from "react";

export const NovuComponent: FC<{ user: string }> = (props) => {
    const { user } = props;
    return (
        <>
            <NovuProvider subscriberId={user} applicationIdentifier="APPLICATION_IDENTIFIER">
                <PopoverNotificationCenter onNotificationClick={() => window.location.reload()}>
                    {({ unseenCount }) => <NotificationBell unseenCount={unseenCount!} />}
                </PopoverNotificationCenter>
            </NovuProvider>
        </>
    );
};
该组件非常简单。只需确保将应用程序标识符更新为 Novu 仪表板上的标识符即可。您可以在Novu 文档中找到通知组件的完整参考。
至于subscriberId,你可以选择任何名称。在我们的例子中,我们使用 Cookie 中的名称,因此每次发送通知时,我们都会将其发送到 Cookie 中的名称。
这种方法不太安全,以后你应该发送加密的ID。不过就这个例子来说,没问题 :)
现在让我们将其添加到我们的代码中。
整页代码看起来应该是这样的:
import Image from "next/image";
import { sql } from "@vercel/postgres";
import { cookies } from "next/headers";
import { NovuComponent } from "@biddingnew/components/novu.component";
import { NewProduct } from "@biddingnew/components/new.product";
import { revalidatePath } from "next/cache";
import { BidInput } from "@biddingnew/components/bid.input";

export default async function Home() {
  const addBid = async (id: number, bid: number) => {
    "use server";

    const login = cookies().get("login");
    await sql`UPDATE bids SET total_bids = total_bids + ${bid} WHERE id = ${id}`;
    const { rows } = await sql`SELECT * FROM bids WHERE id = ${id}`;

    revalidatePath("/");
  };

  const addProduct = async (product: string) => {
    "use server";

    const login = cookies().get("login");
    const { rows } =
      await sql`INSERT INTO bids (name, owner, total_bids) VALUES(${product}, ${login?.value!}, 0) RETURNING id`;

    revalidatePath("/");
  };

  const { rows } = await sql`SELECT * FROM bids ORDER BY id DESC`;

  const login = cookies().get("login");

  return (
    <div className="text-black container mx-auto p-4 border-l border-white border-r min-h-[100vh]">
      <div className="flex">
        <h1 className="flex-1 text-3xl font-bold mb-4 text-white">
          Product Listing ({login?.value!})
        </h1>
        <div>
          <NovuComponent user={login?.value!} />
        </div>
      </div>
      <NewProduct addProduct={addProduct} />
      <div className="grid grid-cols-3 gap-4">
        {rows.map((product) => (
          <div key={product.id} className="bg-white border border-gray-300 p-4">
            <div className="text-lg mb-2">
              <strong>Product Name</strong>: {product.name}
            </div>
            <div className="text-lg mb-2">
              <strong>Owner</strong>: {product.owner}
            </div>
            <div className="text-lg">
              <strong>Current Bid</strong>: {product.total_bids}
            </div>
            <div>
              <BidInput addBid={addBid} id={product.id} />
            </div>
          </div>
        ))}
      </div>
    </div>
  );
}
 我们可以看到 Novu 通知铃图标,但是我们尚未发送任何通知。
所以,我们开始吧!
每当有人创建新产品时,我们都会为其创建一个新主题。
然后,在对同一产品发出每个通知时,我们都会为其注册订阅者。
让我们举个例子:
- 主持人创建新产品 - 创建主题。
- 用户 1 添加了一个新的出价,将自己注册到该主题,并向所有注册到该主题的人发送有新出价的消息(目前还没有人注册)。
- 用户 2 添加了一个新的出价,将自己注册到该主题,并向所有注册到该主题的人发送有新出价的消息(用户 1 收到通知)。
- 用户 3 添加了新的出价,将自己注册到该主题,并向所有注册到该主题的人发送有新出价的消息(用户 1 收到通知,用户 2 也收到通知)。
- 用户 1 添加新的出价(针对同一主题)并向注册该主题的所有人发送有新出价的消息(用户 2 收到通知,用户 3 也收到通知)。
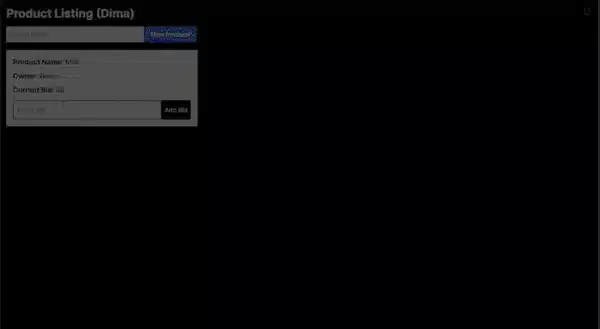 现在让我们转到 Novu 仪表板并添加一个新模板
我们来创建一个新的模板,命名为“系统新出价”,我们拖入一个新的“应用内”渠道,并添加如下内容:
{{name}} just added a bid of {{bid}}
 完成后,进入设置页面,转到 API 密钥选项卡,然后复制 API 密钥。
让我们将 Novu 添加到我们的项目中:
npm install @novu/node
让我们将其添加到文件顶部,并使用 Novu 仪表板中的 API KEY 更改 API_KEY:
import { Novu } from "@novu/node";
const novu = new Novu("API_KEY");
现在,当主机创建新产品时,让我们创建一个新主题,因此让我们修改我们的addProduct函数使其如下所示:
  const addProduct = async (product: string) => {
    "use server";

    const login = cookies().get("login");
    const { rows } =
      await sql`INSERT INTO bids (name, owner, total_bids) VALUES(${product}, ${login?.value!}, 0) RETURNING id`;
    await novu.topics.create({
      key: `bid-${rows[0].id}`,
      name: "People inside of a bid",
    });
    revalidatePath("/");
  };
我们添加了一个新novu.topics.create功能,可以创建新主题。
主题键必须是唯一的。
我们使用了出价的创建ID来创建主题。
名字就是任何你想在未来了解它是什么的东西。
至此,我们创建了一个新主题。对于新的出价,剩下的就是将用户注册到该主题并通知所有人。让我们修改addBid并添加新的逻辑:
const addBid = async (id: number, bid: number) => {
    "use server";

    const login = cookies().get("login");
    await sql`UPDATE bids SET total_bids = total_bids + ${bid} WHERE id = ${id}`;

    await novu.topics.addSubscribers(`bid-${id}`, {
      subscribers: [login?.value!],
    });

    await novu.trigger("new-bid-in-the-system", {
      to: [{ type: "Topic", topicKey: `bid-${id}` }],
      payload: {
        name: login?.value!,
        bid: bid,
      },
      actor: { subscriberId: login?.value! },
    } as ITriggerPayloadOptions);
    revalidatePath("/");
  };
如您所见,我们使用novu.topics.addSubscribers它将新用户添加到主题中。
然后,我们触发主题通知,以novu.trigger通知每个人有关新出价的信息。
我们也有一个actor参数,因为我们已经注册了主题,所以我们不想给自己发送通知。我们可以将我们的标识符传递给actor参数来避免这种情况。
只缺少一件事。
主持人不知道发生了什么事。
主机未注册该主题并且未收到任何通知。
我们应该向主办方发送任何出价的通知。
因此让我们为此创建一个新模板。
现在让我们转到 Novu 仪表板并添加一个新模板
让我们创建一个新的模板并将其命名为“主机出价”让我们拖出一个新的“应用内”频道并添加以下内容:
Congratulation!! {{name}} just added a bid of {{bid}}
现在唯一剩下的就是每次都调用触发器,以确保主机收到通知。以下是新的代码addBid
const addBid = async (id: number, bid: number) => {
    "use server";
    // @ts-ignore
    const login = cookies().get("login");
    await sql`UPDATE bids SET total_bids = total_bids + ${bid} WHERE id = ${id}`;
    const { rows } = await sql`SELECT * FROM bids WHERE id = ${id}`;

    await novu.trigger("host-bid", {
      to: [
        {
          subscriberId: rows[0].owner,
        },
      ],
      payload: {
        name: login?.value!,
        bid: bid,
      },
    });

    await novu.topics.addSubscribers(`bid-${id}`, {
      subscribers: [login?.value!],
    });

    await novu.trigger("new-bid-in-the-system", {
      to: [{ type: "Topic", topicKey: `bid-${id}` }],
      payload: {
        name: login?.value!,
        bid: bid,
      },
      actor: { subscriberId: login?.value! },
    } as ITriggerPayloadOptions);
    revalidatePath("/");
  };
以下是该页面的完整代码:
import Image from "next/image";
import { sql } from "@vercel/postgres";
import { cookies } from "next/headers";
import { NovuComponent } from "@biddingnew/components/novu.component";
import { NewProduct } from "@biddingnew/components/new.product";
import { revalidatePath } from "next/cache";
import { BidInput } from "@biddingnew/components/bid.input";
import { ITriggerPayloadOptions } from "@novu/node/build/main/lib/events/events.interface";
import { Novu } from "@novu/node";
const novu = new Novu("API_KEY");

export default async function Home() {
  const addBid = async (id: number, bid: number) => {
    "use server";
    // @ts-ignore
    const login = cookies().get("login");
    await sql`UPDATE bids SET total_bids = total_bids + ${bid} WHERE id = ${id}`;
    const { rows } = await sql`SELECT * FROM bids WHERE id = ${id}`;

    await novu.trigger("host-inform-bid", {
      to: [
        {
          subscriberId: rows[0].owner,
        },
      ],
      payload: {
        name: login?.value!,
        bid: bid,
      },
    });

    await novu.topics.addSubscribers(`bid-${id}`, {
      subscribers: [login?.value!],
    });

    await novu.trigger("new-bid-in-the-system", {
      to: [{ type: "Topic", topicKey: `bid-${id}` }],
      payload: {
        name: login?.value!,
        bid: bid,
      },
      actor: { subscriberId: login?.value! },
    } as ITriggerPayloadOptions);
    revalidatePath("/");
  };

  const addProduct = async (product: string) => {
    "use server";
    // @ts-ignore
    const login = cookies().get("login");
    const { rows } =
      await sql`INSERT INTO bids (name, owner, total_bids) VALUES(${product}, ${login?.value!}, 0) RETURNING id`;
    await novu.topics.create({
      key: `bid-${rows[0].id}`,
      name: "People inside of a bid",
    });
    revalidatePath("/");
  };

  const { rows } = await sql`SELECT * FROM bids ORDER BY id DESC`;

  // @ts-ignore
  const login = cookies().get("login");

  return (
    <div className="text-black container mx-auto p-4 border-l border-white border-r min-h-[100vh]">
      <div className="flex">
        <h1 className="flex-1 text-3xl font-bold mb-4 text-white">
          Product Listing ({login?.value!})
        </h1>
        <div>
          <NovuComponent user={login?.value!} />
        </div>
      </div>
      <NewProduct addProduct={addProduct} />
      <div className="grid grid-cols-3 gap-4">
        {rows.map((product) => (
          <div key={product.id} className="bg-white border border-gray-300 p-4">
            <div className="text-lg mb-2">
              <strong>Product Name</strong>: {product.name}
            </div>
            <div className="text-lg mb-2">
              <strong>Owner</strong>: {product.owner}
            </div>
            <div className="text-lg">
              <strong>Current Bid</strong>: {product.total_bids}
            </div>
            <div>
              <BidInput addBid={addBid} id={product.id} />
            </div>
          </div>
        ))}
      </div>
    </div>
  );
}
你已经完成了🎉
您可以在这里找到该项目的完整源代码:
https://github.com/novuhq/blog/tree/main/bidding-new
您可以在此处观看同一教程的完整视频:
Novu Hackathon 现已上线!
ConnectNovu Hackathon现已上线🤩
这是您展示技能、结识新团队成员和赢取精美奖品的机会。
如果您喜欢通知功能,那么这场黑客马拉松就是为您量身打造的。
您可以使用 Novu 创建任何需要通知的系统。
短信、电子邮件、应用内通知、推送,任何您喜欢的方式。
我们还准备了 100 个主题列表供您选择,以防您不知所措。
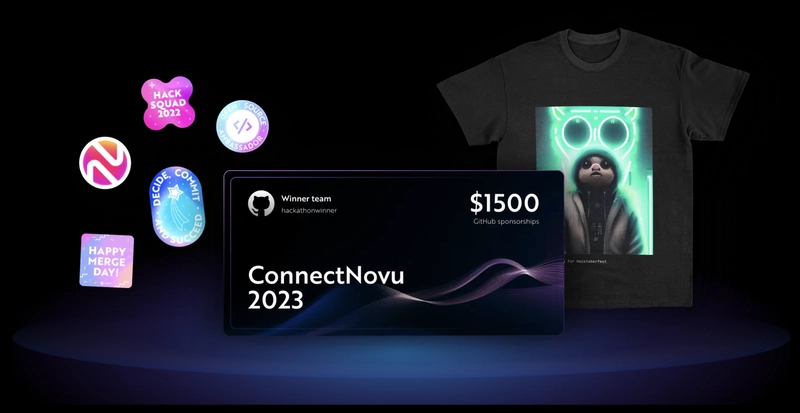 一些精彩的奖品正在等着您:
例如 1500 美元的 GitHub 赞助、Novu 的 Swag、Pluralsight 订阅和优秀的 Novu 福利。
 后端开发教程 - Java、Spring Boot 实战 - msg200.com

