使用 LlamaIndex、Composio 和 ExaAI 从零开始构建开源深度研究代理 🔎🔥
🔎 GPT研究员
这可能是 OpenAI 一段时间以来推出的最佳 AI 产品,其深度研究功能让每个人都惊叹不已,甚至包括那些已经停止使用 Chatgpt 的用户。

它可以仅用几十分钟就完成复杂的任务研究,而人类则需要花费数小时甚至数天的时间。
然而,这项功能目前仅对 Chatgpt Pro 用户开放,而 Pro 的月费高达 200 美元,价格实在太贵。虽然 Plus 用户也能使用,但使用频率会受到严格限制。
因此,我决定使用以下方法构建一个开源版本。
- LlamaIndex 用于代理构建和编排,
- Composio 将 Google Docs 和 ExaAI 与代理集成,进行网络搜索并生成文档。
这是该项目的演示视频。
什么是 OpenAI 深度研究?
来自 OpenAI

是不是很神奇?用过一次就知道它有多好用了。因此,我做了一个开源版本,虽然它不如原版,因为它使用的是未发布的 o3 版本。不过,我们会用 Deepseek r1 来尽可能地接近原版的性能。
挑战
最大的挑战在于集成。我们需要一种方法将 Google Docs 和 ExaAI 与 LlamaIndex 代理集成。Google Docs 采用基于 OAuth 的身份验证流程,而 ExaAI 使用 API 密钥身份验证。构建这些集成需要数天时间。
Composio 来了;只需几行代码,即可集成几乎任何 SaaS 应用,包括 G Suite 应用、Slack、GitHub 等。
在这里,我们将仅使用 Google Docs 来编写最终报告,并使用 ExaAI 来支持代理的互联网搜索。
什么是Composio?
Composio 允许开发者将 AI 代理连接到任何第三方服务。它提供超过 250 种集成方案,可用于与 AI 代理通信,从而实现现实世界任务的自动化。
您无需再担心用户身份验证;Composio 会自动完成所有操作,让您轻松无忧。
需求和依赖关系
为此,你需要
- Groq API 密钥 - 访问Groq官方网站并创建 API 密钥,或从TogetherAI获取。
- Deepseek API 密钥 - 访问官方网站获取 API 密钥。
- Composio 帐户 - 访问此 URL → 使用任意方法注册
该项目分为两部分。
- 前端设计简洁精简。(你可以做得更好,但目前这样也能用。)
- 后端 - 使用 LlamaIndex 构建和编排代理,并使用 Composio 添加集成。
我们先从构建代理和添加集成开始。
后端
开始之前,这里是您可以参考的Replit 代码库。
后端代码是用 Python 编写的。因此,请创建一个虚拟环境并安装依赖项。
python -m venv deep-research
cd deep-research
source bin/activate
安装这些依赖项
composio-llamaindex,
email-validator,
flask,
flask-sqlalchemy,
gunicorn,
llama-index-core,
llama-index-llms-groq,
llama-index-llms-openai,
openai,
psycopg2-binary,
python-dotenv,
设置组合
首先,您需要登录您的 Composio 帐户或将 Composio API 密钥添加到环境变量中。
您可以从控制面板设置中获取 API_KEY。
composio login
现在添加对 Exa 和 Google Docs 的集成。
composio add googledocs
composio add exa
按照屏幕上的指示完成身份验证流程。完成后,您可以在控制面板中查看结果。

像这样。(我有很多这样的插件;你只会看到你集成的那些)

现在,您可以开始编写代理程序的代码了。请确保已将 API 密钥添加到.env文件中。
DEEPSEEK_API_KEY=""
GROQ_API_KEY= ""
导入库文件,加载环境变量,并启用日志记录。
from composio_llamaindex import ComposioToolSet, App, Action
from llama_index.core.agent import FunctionCallingAgentWorker
from llama_index.core.llms import ChatMessage
from llama_index.llms.groq import Groq
from llama_index.llms.openai import OpenAI
from dotenv import load_dotenv

# Load environment variables
load_dotenv()
现在,定义工具集并将其添加到代理中。
def create_research_agent():
    # Initialize toolset and LLM
    toolset = ComposioToolSet()
    tools = toolset.get_tools(actions=[
        Action.EXA_SEARCH, Action.EXA_SIMILARLINK,
        Action.GOOGLEDOCS_CREATE_DOCUMENT
    ])

    #function_calling_llm = OpenAI(model="o1")
    function_calling_llm = Groq(model="deepseek-r1-distill-llama-70b")
    # Setup chatbot-style prefix messages
    prefix_messages = [
        ChatMessage(
            role="system",
            content=("""
                You are a sophisticated research assistant. Perform comprehensive research on the given query and provide detailed analysis. Focus on:
                - Key concepts and main ideas
                - Current developments and trends
                - Important stakeholders and their roles
                - Relevant data and statistics
                - Critical analysis and implications

                Create a detailed report on the research and write it in google docs. Return the google doc url as well.

                Ensure all information is accurate, up-to-date, and properly sourced. Present findings in a clear, structured format suitable for professional analysis.
                """),
        )
    ]

    return FunctionCallingAgentWorker(
        tools=tools,  # type: ignore
        llm=function_calling_llm,
        prefix_messages=prefix_messages,
        max_function_calls=10,
        allow_parallel_tool_calls=False,
        verbose=True,
    ).as_agent()
好的,我们一步一步来。首先,我们定义包含所需操作的工具集。
- EXA_SEARCH = 搜索操作针对 Exa 搜索服务执行查询,根据提供的搜索条件返回精选结果列表。
- EXA_SIMILARLINK = 使用 Exa 执行搜索以查找相似链接并检索相关结果列表。搜索可以选择性地返回内容。
- GOOGLEDOCS_CREATE_DOCUMENT = 创建新文档。
然后,我们定义了要使用的模型。根据你的预算,你可以选择任何模型。我选择的是精简版的 Deepssek Llama 70b,但这个模型对于工具调用来说已经足够好了。
function_calling_llm = Groq(model="deepseek-r1-distill-llama-70b")
现在,我们已经定义了代理的前缀,这让代理知道我们希望它执行什么操作。
prefix_messages = [
        ChatMessage(
            role="system",
            content=("""
                You are a sophisticated research assistant. Perform comprehensive research on the given query and provide detailed analysis. Focus on:
                - Key concepts and main ideas
                - Current developments and trends
                - Important stakeholders and their roles
                - Relevant data and statistics
                - Critical analysis and implications

                Create a detailed report on the research and write it in google docs. Return the google doc url as well.

                Ensure all information is accurate, up-to-date, and properly sourced. Present findings in a clear, structured format suitable for professional analysis.
                """),
        )
    ]
最后,定义代理的前缀和工具集。
return FunctionCallingAgentWorker(
        tools=tools,  # type: ignore
        llm=function_calling_llm,
        prefix_messages=prefix_messages,
        max_function_calls=10,
        allow_parallel_tool_calls=False,
        verbose=True,
    ).as_agent()
接下来,定义一个根据查询生成问题的函数。这是深度研究代理的一个基本特征。
def generate_questions(topic: str, domain: str) -> list[str]:
    """Generate questions about the research topic."""
    function_calling_llm = OpenAI(model='deepseek-reasoner', base_url="https://api.deepseek.com", api_key=os.environ["DEEPSEEK_API_KEY"] )

    questions_prompt = f"""
    Generate 5-6 specific questions about the topic to help guide the research agent to research about the topic: {topic} and this is the domain: {domain}, so don't ask too complex probing questions, keep them relatively simple. Focus on:
    Mostly make these yes or no questions.
    Do not ask the user for information, you are supposed to help him/her with the research, you can't ask questions about the topic itself,
    you can ask the user about what he wants to know about the topic and the domain.
    Format your response as a numbered list, with exactly one question per line.
    Example format:
    1. [First question]
    2. [Second question]
    """

    questions_response = function_calling_llm.complete(questions_prompt)
    # Clean up the response to ensure proper formatting
    cleaned_questions = [
        q.strip() for q in questions_response.text.strip().split('\n')
        if q.strip() and any(q.startswith(str(i)) for i in range(1, 7))
    ]

    return cleaned_questions
我们在此函数中使用了 Deepseek r1 作为 LLM,因为它能够更好地推理问题。
添加以下代码,即可在不使用前端的情况下,在命令行界面 (CLI) 中运行脚本。
def chatbot():
    print("🤖: Hi! I can help you research any topics. Let's start!")

    # Get the main research topic
    topic = input("What topic would you like to research: ")
    domain = input('What domain is this topic in: ')
    # Generate and ask probing questions
    cleaned_questions = generate_questions(topic, domain)

    # Show all questions at once and collect one response
    print("\n🤖: Please consider these questions about your research needs:")
    print("\n".join(cleaned_questions))

    answer = input(
        "\nPlease provide your response addressing these questions: ")

    # Combine all information for research
    research_prompt = f"""
    Topic: {topic}
    Domain: {domain}

    User's Response to Questions:
    {answer}

    Please research this topic thoroughly and create a comprehensive report in Google Docs.
    """

    print(
        "\n🤖: Thank you! I'll now conduct the research and create a detailed report..."
    )
    agent = create_research_agent()
    res = agent.chat(research_prompt)
    print("\n🤖: Here's your research report:")
    print(res.response)

if __name__ == "__main__":
    chatbot()
前端
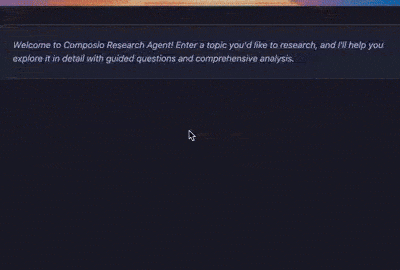
前端界面非常简洁明了。您可以在这里使用您的聊天机器人并将其连接到后端。
只有三个文件:index.html,,main.js和style.css。
让我们来看看main.js
document.addEventListener('DOMContentLoaded', function() {
    const chatForm = document.getElementById('chatForm');
    const batchInput = document.getElementById('batchInput');
    const chatMessages = document.getElementById('chatMessages');
    let currentMessageDiv = null;
我们将整个文件包裹起来,addEventListener以确保代码只有在所有 DOM 元素准备就绪后才会运行。
然后,抓住关键要素
chatForm:用于发送消息的表单。batchInput文本输入框。chatMessages用于存放聊天信息的容器。- c
urrentMessageDiv:跟踪最新更新的助手消息。
marked.setOptions({
    breaks: true,
    gfm: true
});
设置标记库,将任何 Markdown 文本转换为 HTML
function addMessage(content, type) {
    const messageDiv = document.createElement('div');
    messageDiv.classList.add('message', `${type}-message`);

    if (type === 'assistant') {
        messageDiv.innerHTML = marked.parse(content);
    } else {
        messageDiv.textContent = content;
    }

    chatMessages.appendChild(messageDiv);
    messageDiv.scrollIntoView({ behavior: 'smooth' });
    return messageDiv;
}
创建一个新的消息元素,根据发件人设置样式,并将其添加到聊天中。助手消息会从 Markdown 转换为 HTML,而用户消息则显示为纯文本。
function addLoadingIndicator() {
    const loadingDiv = document.createElement('div');
    loadingDiv.classList.add('message', 'assistant-message', 'loading');
    loadingDiv.innerHTML = `
        Generating ideas
        <div class="loading-dots">
            <span></span>
            <span></span>
            <span></span>
        </div>
    `;
    chatMessages.appendChild(loadingDiv);
    loadingDiv.scrollIntoView({ behavior: 'smooth' });
    return loadingDiv;
}
显示“正在加载”消息,并带有动画圆点,表示助手正在生成响应。
chatForm.addEventListener('submit', async function(e) {
    e.preventDefault();

    const batch = batchInput.value.trim();
    if (!batch) return;

    addMessage(batch, 'user');
    batchInput.value = '';

    const loadingDiv = addLoadingIndicator();

    const eventSource = new EventSource(`/stream?batch=${encodeURIComponent(batch)}`);
    let accumulatedContent = '';

    eventSource.onmessage = function(event) {
        const data = JSON.parse(event.data);

        if (loadingDiv) loadingDiv.remove();

        if (data.error) {
            addMessage(data.error, 'error');
            eventSource.close();
            return;
        }

        if (data.content) {
            if (!currentMessageDiv) {
                currentMessageDiv = addMessage('', 'assistant');
            }
            accumulatedContent += data.content;
            currentMessageDiv.innerHTML = marked.parse(accumulatedContent);
            currentMessageDiv.scrollIntoView({ behavior: 'smooth' });
        }

        if (data.done) {
            currentMessageDiv = null;
            accumulatedContent = '';
            eventSource.close();
        }
    };

    eventSource.onerror = function() {
        if (loadingDiv) loadingDiv.remove();
        addMessage('Error connecting to server', 'error');
        eventSource.close();
    };
});
- 阻止表单刷新页面。
- 获取用户输入的文本,显示文本,然后清除输入内容。
- 显示加载指示器。
- 打开服务器发送事件(SSE) 连接,以实时获取助手的响应。
- 当文本块到达时(
on message),系统会移除加载指示器,更新助手的消息,并使用 Markdown 格式。 - 如果出现错误,它会显示错误信息并关闭连接。
- 当服务器发出完成信号(
data.done)时,它会重置所有内容并关闭连接。
好了,我们的聊天机器人用户界面就介绍到这里。
请检查 HTML 和 CSS 文件,并根据需要进行添加。
运行该应用程序
最后,运行应用程序。
import logging
from flask import Flask, render_template, Response, request, jsonify
import json
from agent import create_research_agent, generate_questions
import time
import os

# Configure logging
logging.basicConfig(level=logging.DEBUG)
logger = logging.getLogger(__name__)

app = Flask(__name__)

@app.route('/')
def index():
    return render_template('index.html')

@app.route('/generate_questions', methods=['POST'])
def get_questions():
    data = request.get_json()
    if not data or 'topic' not in data or 'domain' not in data:
        return jsonify({'error': 'Topic and domain are required'}), 400

    # Check for required environment variables
    if not os.environ.get("DEEPSEEK_API_KEY"):
        return jsonify({'error': 'Deepseek API key is not configured. Please set up your API keys.'}), 500

    try:
        questions = generate_questions(data['topic'], data['domain'])
        return jsonify({'questions': questions})
    except Exception as e:
        logger.error(f"Error generating questions: {str(e)}")
        return jsonify({'error': 'An error occurred while generating questions. Please try again later.'}), 500

@app.route('/research', methods=['POST'])
def research():
    data = request.get_json()
    if not data or 'topic' not in data or 'domain' not in data or 'answers' not in data:
        return jsonify({'error': 'Topic, domain and answers are required'}), 400

    # Check for required environment variables
    if not os.environ.get("GROQ_API_KEY"):
        return jsonify({'error': 'Groq API key is not configured. Please set up your API keys.'}), 500

    if not os.environ.get("COMPOSIO_API_KEY"):
        return jsonify({'error': 'Composio API key is not configured. Please set up your API keys.'}), 500

    try:
        agent = create_research_agent()
        research_prompt = f"""
        Topic: {data['topic']}
        Domain: {data['domain']}

        User's Response to Questions:
        {data['answers']}

        Please research this topic thoroughly and create a comprehensive report in Google Docs.
        """

        response = agent.chat(research_prompt)
        return jsonify({'content': str(response.response)})
    except Exception as e:
        logger.error(f"Error in research: {str(e)}")
        return jsonify({'error': 'An error occurred while conducting research. Please try again later.'}), 500

if __name__ == '__main__':
    app.run(host='0.0.0.0', port=5000, debug=True)
现在,你已经准备好了。现在运行它main.py,你就万事俱备了。然后,祈祷它能顺利运行,不出错。

以上就是全部内容。完整的代码在这个Replit 代码库中。
感谢您的阅读。请分享您使用Composio进行开发的经验。我们一直在努力改进产品。
文章来源:https://dev.to/composiodev/building-an-open-source-deep-research-agent-from-scratch-using-llamaindex-composio-exaai-4j9b