使用 Next.js 和 OpenAI 构建 AI 助手来与您的文档进行聊天
您将在本文中发现什么?
人工智能正在融入我们生活的方方面面,尤其是在工作中。人工智能可以帮助我们更好地理解文档、更快地找到正确的信息以及更有效地开展协作。
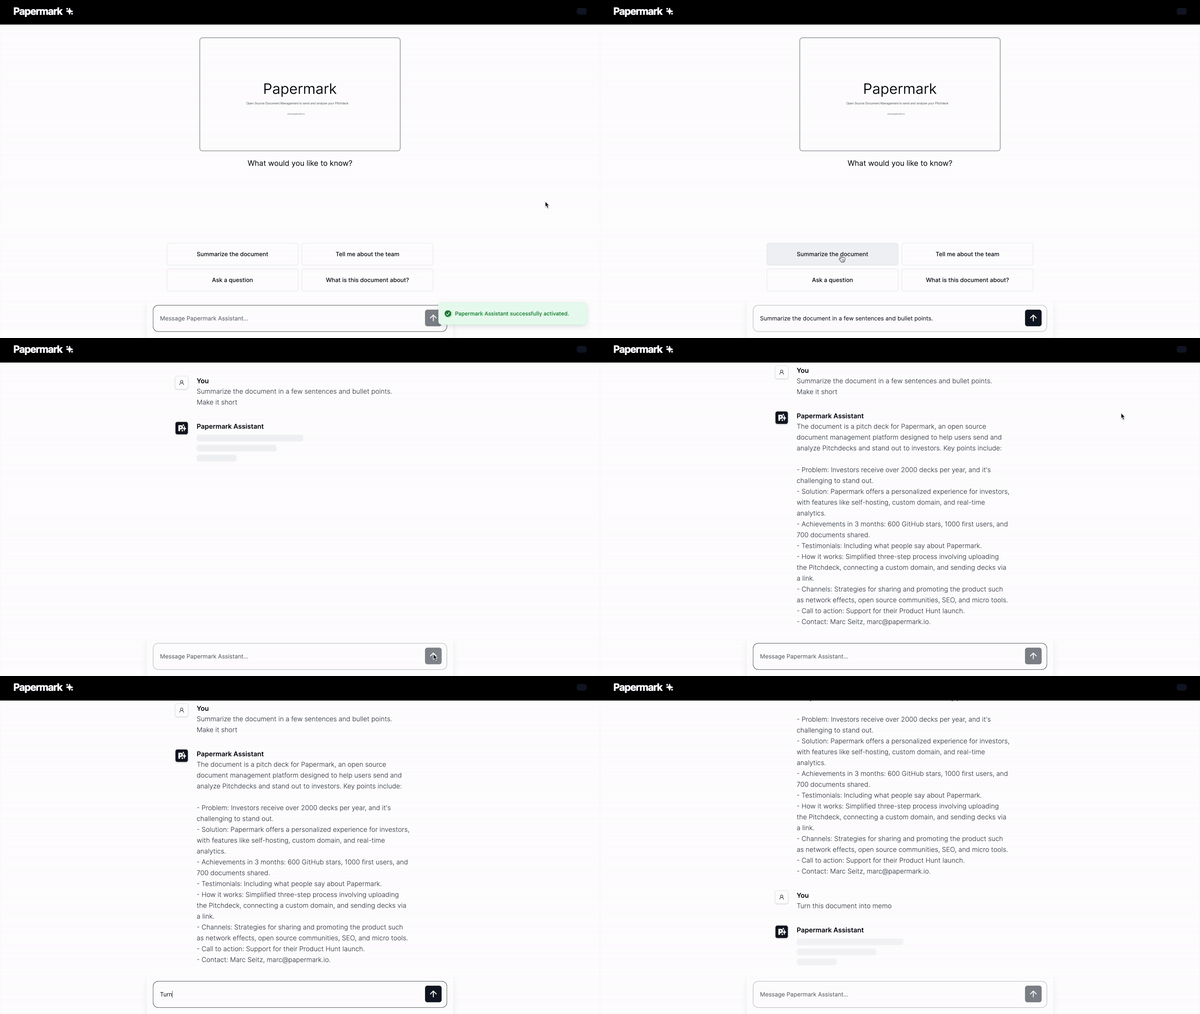
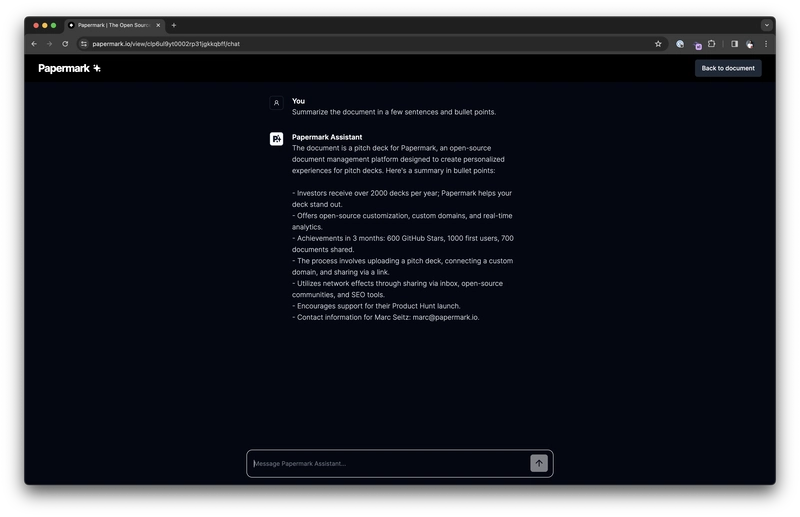
在本文中,我们将构建一个强大的 AI 助手,它能让你聊天、提问,并从文档中获取答案。我们将使用 Next.jsvercel/ai和 OpenAI 来构建此应用程序。
Papermark - 开源的 DocSend 替代品。
在开始之前,我想先跟大家分享一下 Papermark。它是 DocSend 的开源替代品,可以帮助你安全地共享文档,并实时获取浏览者的逐页分析数据。当然,它还内置了 AI 文档助手。而且它完全开源!
如果您能给我们一颗星,我将不胜感激!别忘了在评论区分享你的想法❤️
https://github.com/mfts/papermark

设置项目
让我们设置项目环境。我们将设置一个 Next.js 应用程序,安装 Vercel 的 AI 包并配置 OpenAI。
使用 TypeScript 和 Tailwindcss 设置 Next.js
我们将使用 create-next-app 生成一个新的 Next.js 项目。我们还将使用 TypeScript 和 Tailwind CSS,因此请确保在出现提示时选择这些选项。
npx create-next-app

# ---
# you'll be asked the following prompts
What is your project named?  my-app
Would you like to add TypeScript with this project?  Y/N
# select `Y` for typescript
Would you like to use ESLint with this project?  Y/N
# select `Y` for ESLint
Would you like to use Tailwind CSS with this project? Y/N
# select `Y` for Tailwind CSS
Would you like to use the `src/ directory` with this project? Y/N
# select `N` for `src/` directory
What import alias would you like configured? `@/*`
# enter `@/*` for import alias
安装 Vercel 的 AI 包
接下来,我们将安装 Vercel 的 AI 包。该包提供了便捷的类型安全抽象来访问 OpenAI(以及其他 LLM)API。它还提供了在无服务器环境中使用 API 的便捷方式,包括流式聊天响应。
npm install ai
我不得不承认,ai这是一个非常棒的包名!🎉
设置 OpenAI
如果您还没有创建 OpenAI 帐户,请先创建一个。创建帐户后,您需要在 platform.openai.com 上创建一个 API 密钥。您可以在仪表盘上找到您的 API 密钥。我们稍后会用到它。
构建应用程序
现在我们已经完成了设置,可以开始构建应用程序了。我们将介绍的主要功能包括:
- 配置 OpenAI Assistant API
- 创建聊天界面
#1 配置 OpenAI Assistant API
让我们首先在 OpenAI 平台上配置 OpenAI Assistant API。
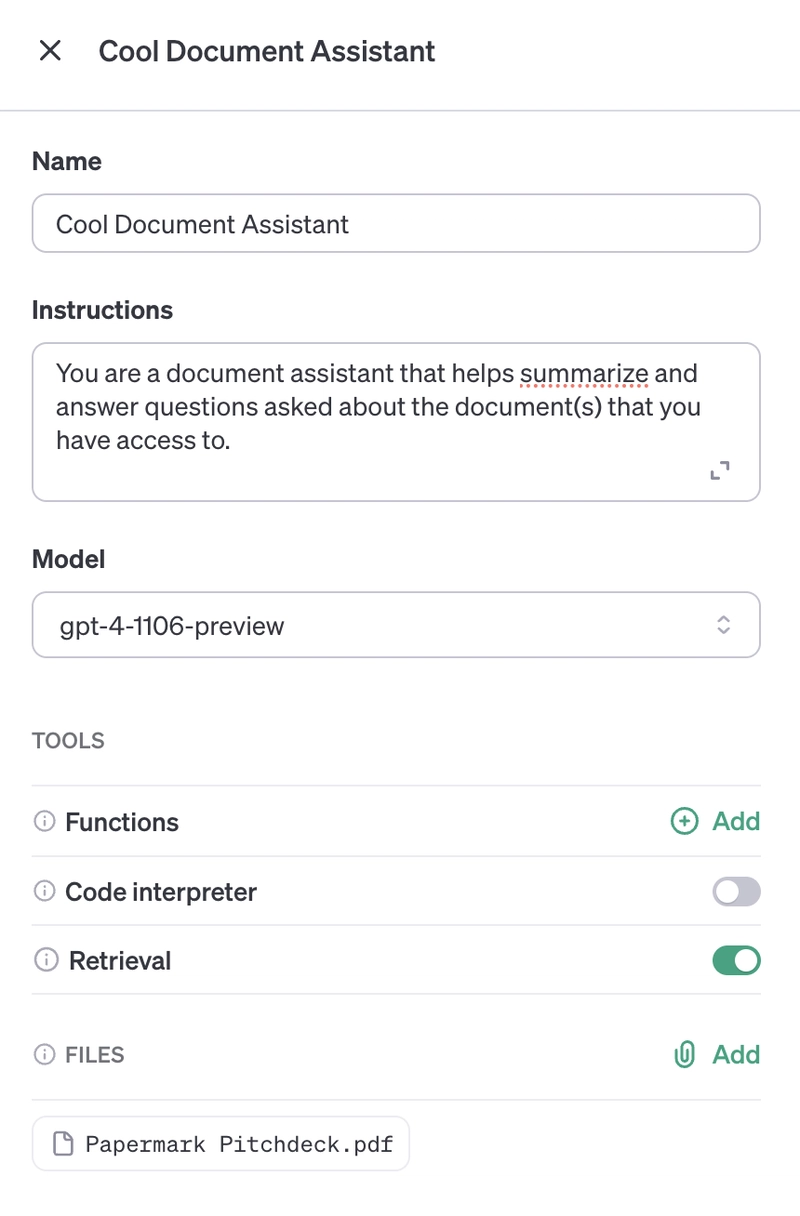
从仪表板创建新助手
给它一个名字、一个指令提示、一个模型(目前必须是gpt-4-1106-preview),并确保启用检索。
最后,向助手添加一个文件。该文件将作为聊天的初始文档。我们先上传一个 PDF 文件。
获取助手 ID
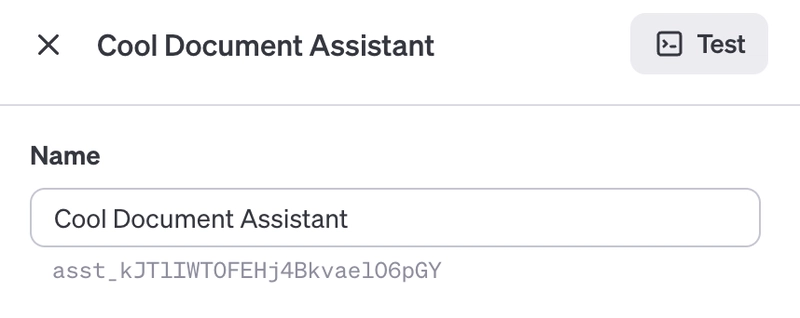
保存助手时,您会在仪表板或助手名称下方找到助手 ID。我们需要此 ID 来配置 API。
#2 为您的文档创建聊天界面
现在我们已经配置好了助手,接下来创建一个聊天界面来与助手交互。我们将使用软件包中的useAssistanthoo(目前为 beta 版本)ai与 API 进行交互。
让我们创建聊天界面app/page.tsx:
// app/page.tsx
"use client";

import { Message, experimental_useAssistant as useAssistant } from "ai/react";
import { useEffect, useRef } from "react";

const roleToColorMap: Record<Message["role"], string> = {
  system: "red",
  user: "black",
  assistant: "green",
};

export default function Chat() {
  const { status, messages, input, submitMessage, handleInputChange, error } =
    useAssistant({
      api: "/api/assistant",
    });

  // When status changes to accepting messages, focus the input:
  const inputRef = useRef<HTMLInputElement>(null);
  useEffect(() => {
    if (status === "awaiting_message") {
      inputRef.current?.focus();
    }
  }, [status]);

  return (
    <div className="flex flex-col w-full max-w-md py-24 mx-auto stretch">
      {error != null && (
        <div className="relative bg-red-500 text-white px-6 py-4 rounded-md">
          <span className="block sm:inline">
            Error: {(error as any).toString()}
          </span>
        </div>
      )}

      {messages.map((m: Message) => (
        <div
          key={m.id}
          className="whitespace-pre-wrap"
          style={{ color: roleToColorMap[m.role] }}>
          <strong>{`${m.role}: `}</strong>
          {m.role !== "data" && m.content}
          {m.role === "data" && (
            <>
              {(m.data as any).description}
              <br />
              <pre className={"bg-gray-200"}>
                {JSON.stringify(m.data, null, 2)}
              </pre>
            </>
          )}
          <br />
          <br />
        </div>
      ))}

      {status === "in_progress" && (
        <div className="h-8 w-full max-w-md p-2 mb-8 bg-gray-300 dark:bg-gray-600 rounded-lg animate-pulse" />
      )}

      <form onSubmit={submitMessage}>
        <input
          ref={inputRef}
          disabled={status !== "awaiting_message"}
          className="fixed bottom-0 w-full max-w-md p-2 mb-8 border border-gray-300 rounded shadow-xl"
          value={input}
          placeholder="What is the temperature in the living room?"
          onChange={handleInputChange}
        />
      </form>
    </div>
  );
}
以及相应的 API 路由app/api/assistant/route.ts:
// app/api/assistant/route.ts
import { experimental_AssistantResponse } from "ai";
import OpenAI from "openai";
import { MessageContentText } from "openai/resources/beta/threads/messages/messages";

// Create an OpenAI API client (that's edge friendly!)
const openai = new OpenAI({
  apiKey: process.env.OPENAI_API_KEY || "",
});

// IMPORTANT! Set the runtime to edge
export const runtime = "edge";

export async function POST(req: Request) {
  // Parse the request body
  const input: {
    threadId: string | null;
    message: string;
  } = await req.json();

  // Create a thread if needed
  const threadId = input.threadId ?? (await openai.beta.threads.create({})).id;

  // Add a message to the thread
  const createdMessage = await openai.beta.threads.messages.create(threadId, {
    role: "user",
    content: input.message,
  });

  return experimental_AssistantResponse(
    { threadId, messageId: createdMessage.id },
    async ({ threadId, sendMessage }) => {
      // Run the assistant on the thread
      const run = await openai.beta.threads.runs.create(threadId, {
        assistant_id:
          process.env.ASSISTANT_ID ??
          (() => {
            throw new Error("ASSISTANT_ID is not set");
          })(),
      });

      async function waitForRun(run: Run) {
        // Poll for status change
        while (run.status === "queued" || run.status === "in_progress") {
          // delay for 500ms:
          await new Promise((resolve) => setTimeout(resolve, 500));

          run = await openai.beta.threads.runs.retrieve(threadId!, run.id);
        }

        // Check the run status
        if (
          run.status === "cancelled" ||
          run.status === "cancelling" ||
          run.status === "failed" ||
          run.status === "expired"
        ) {
          throw new Error(run.status);
        }
      }

      await waitForRun(run);

      // Get new thread messages (after our message)
      const responseMessages = (
        await openai.beta.threads.messages.list(threadId, {
          after: createdMessage.id,
          order: "asc",
        })
      ).data;

      // Send the messages
      for (const message of responseMessages) {
        sendMessage({
          id: message.id,
          role: "assistant",
          content: message.content.filter(
            (content) => content.type === "text"
          ) as Array<MessageContentText>,
        });
      }
    }
  );
}
最后,将之前的OPENAI_API_KEY和添加ASSISTANT_ID到您的环境变量中:
# .env
OPENAI_API_KEY=<your-openai-api-key>
ASSISTANT_ID=<your-assistant-id>
奖励:向助手添加新文档
如果您想向助手添加新文档,则需要将它们上传到filesOpenAI API 的端点。
重要的是您要声明purpose文件的内容以便assistants助手可以使用它。
在您有权访问上传文件的地方添加以下后端代码:
// ...
// Upload the file to OpenAI
const fileId = (
  await openai.files.create({
    file: await fetch(url_to_file), // the `file` variable accepts a File, Buffer or ReadableStream
    purpose: "assistants",
  })
).id;
// ...
然后,你需要授权你的助手访问你上传的文件。你可以将文件添加到助手中:
// ...
// Add the file to the assistant
await openai.beta.assistants.files.create(assistantId, {
  file: fileId,
});
// ...
就这样!现在您可以将新文档上传到您的助手了。
结论
恭喜!您已经构建了一个强大的 AI 助手,可以与文档进行聊天。
感谢您的阅读。我是 Marc,一位开源倡导者。我正在构建papermark.com ——DocSend 的开源替代方案。
祝您搭建愉快!
帮帮我!
如果您觉得这篇文章对您有帮助,并且了解了 OpenAI 的 Assistant API、vercel/ai软件包和 Next.js,请给我们一个 Star!也别忘了在评论区分享您的想法哦 ❤️
https://github.com/mfts/papermark

 后端开发教程 - Java、Spring Boot 实战 - msg200.com


